In my previous post Step by Step: Build your first Fabric App using Rayfin CLI, we built a Todo app where Rayfin created the SQL database for us.
In real projects, the data often already lives in Fabric. Lets build a small Fabric App that reads an existing Lakehouse table and shows it in a grid.
Why a Lakehouse Connector?
- A Lakehouse stores tables in Fabric. Each Lakehouse comes with a read-only SQL analytics endpoint.
- Rayfin reads that endpoint through a connector of type
fabric-sqlanalytics. - The app reads the table as it is. Lakehouse connectors are read-only, which suits a reporting style app.
Prerequisites
- Everything from the previous post: Fabric capacity, Fabric App Items (preview) enabled, and a workspace.
- Node.js v20+, npm and VS Code.
Create a Lakehouse
- Connect to your Farbic
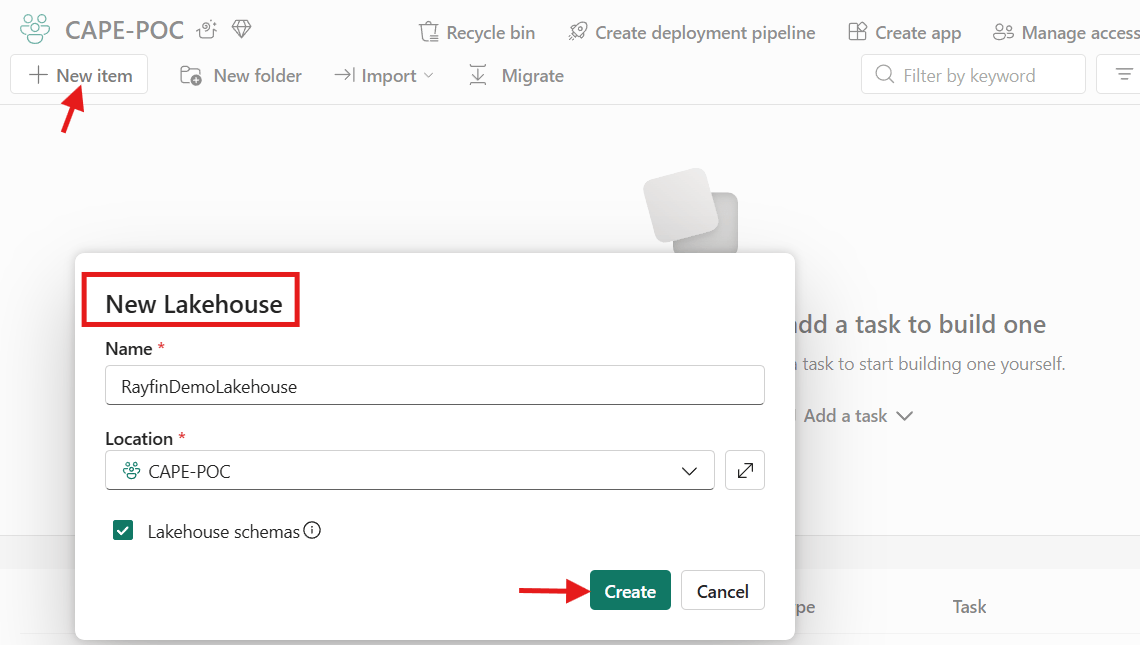
- Open your workspace and click + New item, then pick Lakehouse.
- Name it RayfinDemoLakehouse, keep Lakehouse schemas checked, and click Create.
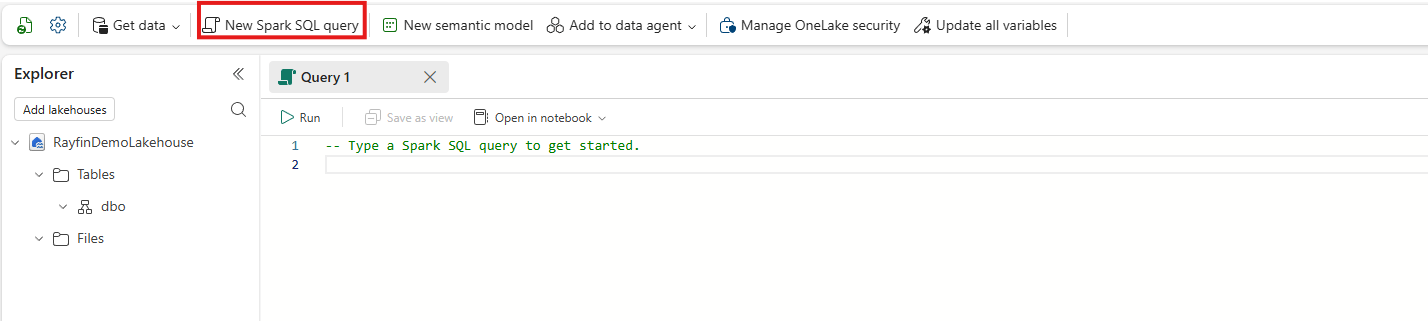
- Post creation, the Lakehouse opens with an empty
dboschema under Tables.

Now we have an empty Lakehouse. Lets add a table with a few sample rows.
Create the Products Table Using Spark SQL
- Click New Spark SQL query from the ribbon.
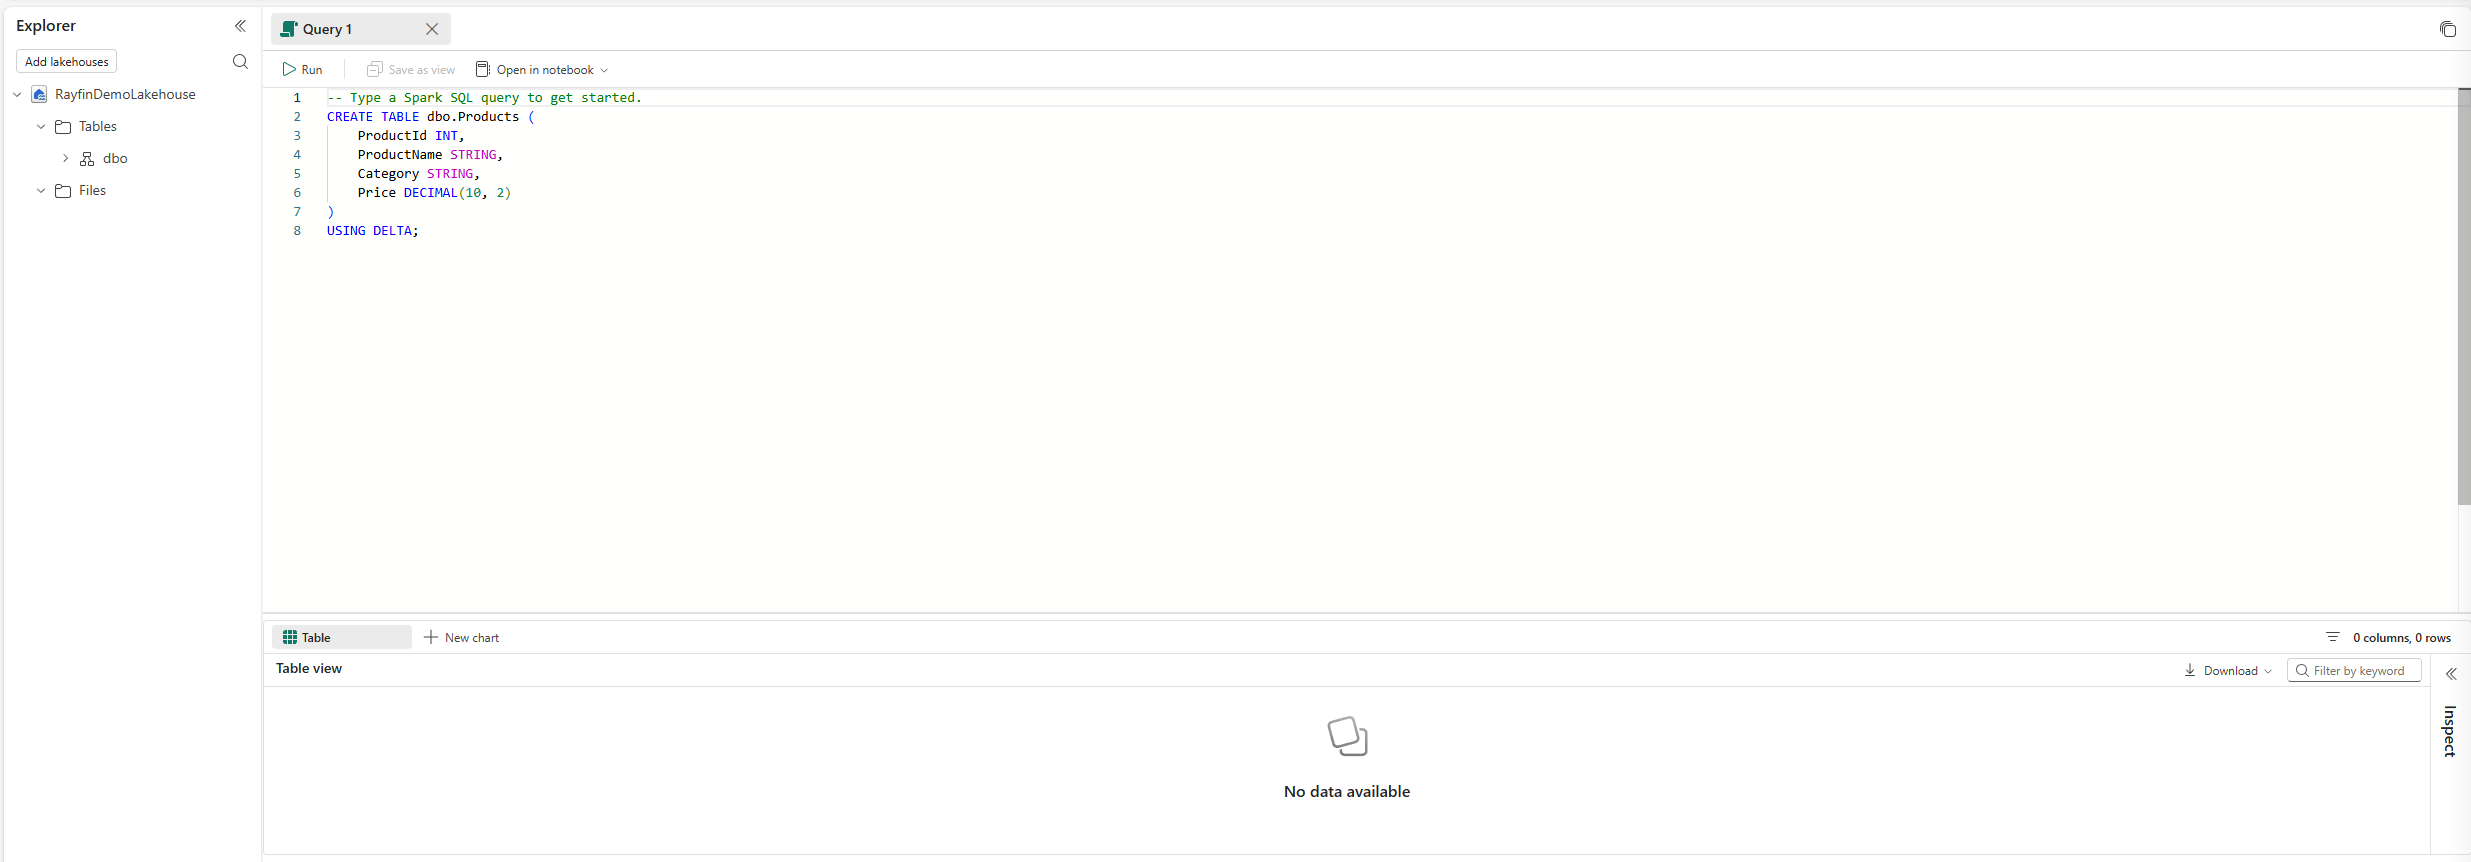
- Paste the following script and click Run to create the table.
CREATE TABLE dbo.Products ( ProductId INT, ProductName STRING, Category STRING, Price DECIMAL(10, 2))USING DELTA;
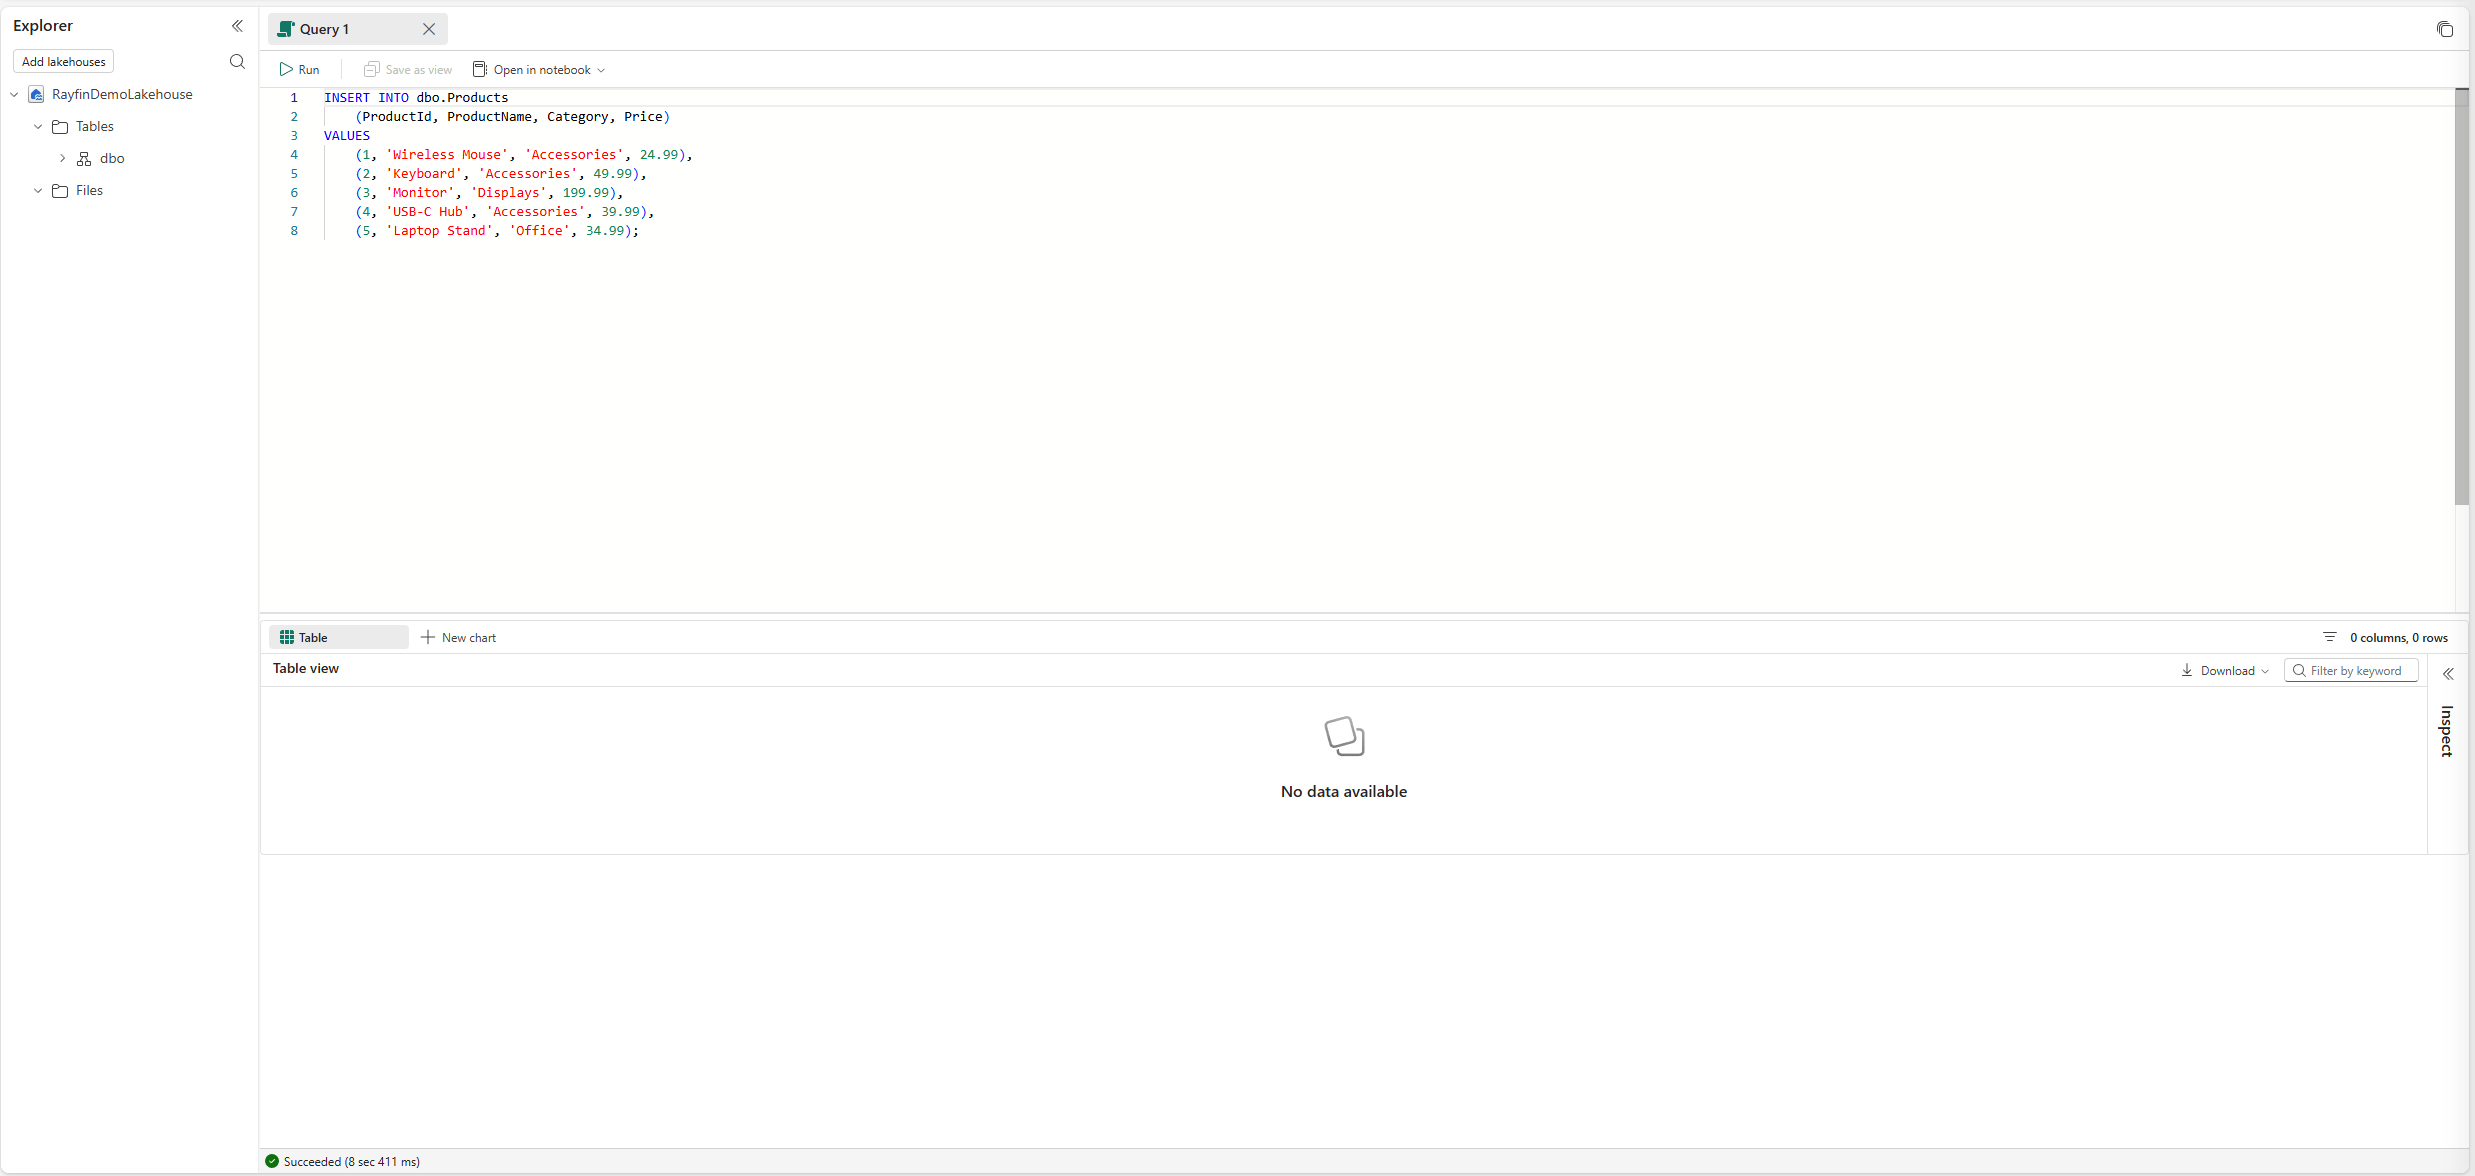
- Once the table is created, lets insert sample data.
- Use the insert statement below and click Run again.
INSERT INTO dbo.Products (ProductId, ProductName, Category, Price)VALUES (1, 'Wireless Mouse', 'Accessories', 24.99), (2, 'Keyboard', 'Accessories', 49.99), (3, 'Monitor', 'Displays', 199.99), (4, 'USB-C Hub', 'Accessories', 39.99), (5, 'Laptop Stand', 'Office', 34.99);
- Post insert command run, Run a quick select to confirm the five rows.
SELECT ProductId, ProductName, Category, Price FROM dbo.Products ORDER BY ProductId;
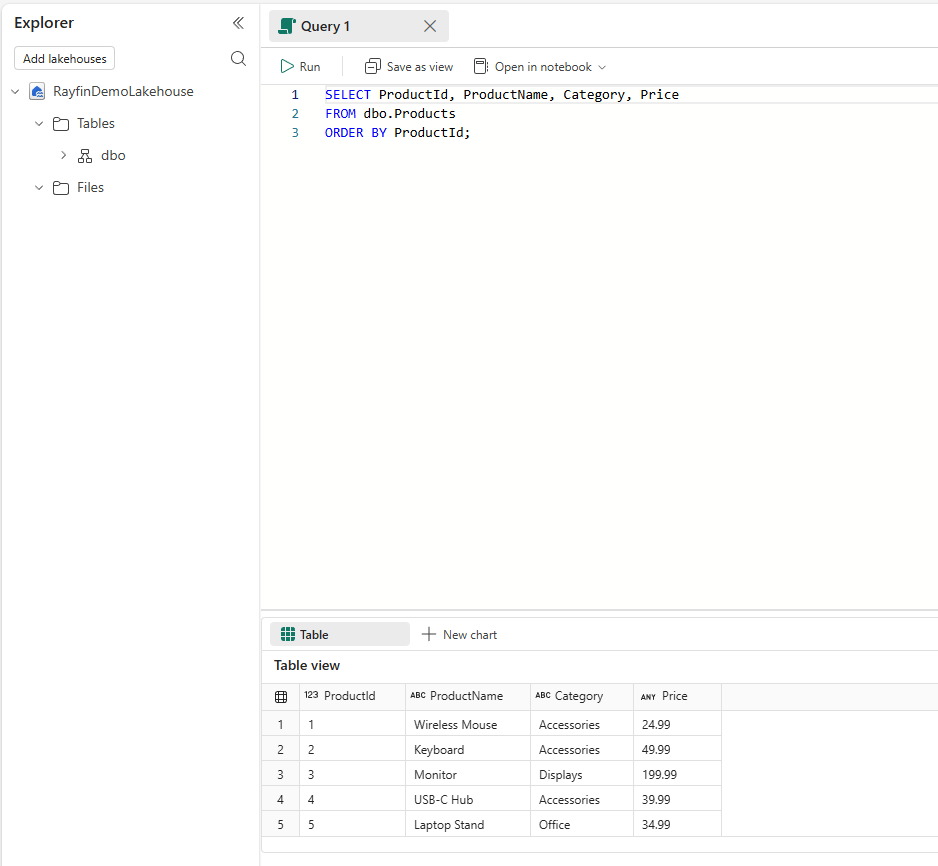
- Open the SQL analytics endpoint of the Lakehouse. The table shows up under Schemas > dbo > Tables as
products.

Note: The SQL analytics endpoint is what the Rayfin connector reads. If the table is visible here, the app can read it.
The data is ready. Lets create the Rayfin app.
Scaffold the Rayfin Project
- Create an empty folder and open it in VS Code.
- In the VS Code terminal, run the following command.
npm create @microsoft/rayfin@latest
- Answer the prompts:
- How would you like to start? → Use a template (built-in).
- Select a template → Data App. This template is built for apps that read data already in Fabric.
- Project name → rayfin-fabric-table-demo.

- The scaffolder copies the files, installs packages and prints Project created successfully!

- Move into the project folder.
cd rayfin-fabric-table-demo
Now we have the project ready. Next we will connect it to the Lakehouse.
Add the Lakehouse Connector
- Sign in to Fabric from the terminal, if you are not already signed in.
npx rayfin login
- Search for the Lakehouse in your workspace. Replace the workspace ID with yours.
npx rayfin connector search "RayfinDemoLakehouse" --workspace-id "<workspace-id>" --type fabric-sqlanalytics --json
- The result has the Lakehouse
itemId. It also shows"operations":["read"], which confirms the connector is read-only.

- Add the connector using the
itemIdfrom the search result.
npx rayfin connector add --type fabric-sqlanalytics --workspace-id "<workspace-id>" --item-id "<lakehouse-item-id>" --name productsLakehouse --operations read
- The command does the following:
- Adds a connector named
productslakehousetorayfin\rayfin.yml. The CLI changes the name to lowercase. - Creates
rayfin\connectors\productslakehouse\schema.tsandmetadata.json. - Prints the npm packages the connector needs.
- Adds a connector named

- Install the packages exactly as printed by previous command. Your version numbers may be different.
npm install @microsoft/rayfin-connector-fabric-graphql@1.36.2 @microsoft/rayfin-connectors@1.36.2

- Next, Inspect the connector. The first command lists the tables. The second one returns five sample rows from
dbo.products.
npx rayfin connector inspect --name productslakehouse --json npx rayfin connector inspect --name productslakehouse --entity dbo.products --rows 5 --json

The connector can now see the table. Lets add the app code.
Add the App Code
The full source code is available in the GitHub repo: rayfin-fabric-table-demo. Below are the key files and code blocks.
rayfin\connectors\productslakehouse\Products.tsmaps the Lakehouse table to an entity.
@role("authenticated", ["read"])
@entity()
export class Products extends Source({
    schema: "dbo",
    table: "products",
    primaryKey: [],
}) {
    @int({ optional: true, column: "ProductId" })
    productId?: number;

    @text({ optional: true, column: "ProductName", max: 8000 })
    productName?: string;

    @text({ optional: true, column: "Category", max: 8000 })
    category?: string;

    @decimal({ optional: true, column: "Price", precision: 10, scale: 2 })
    price?: number;
}rayfin\connectors\productslakehouse\schema.tsregisters the entity with the connector.
export const connectorConfig = { connector: "fabric-sqlanalytics", operations: ["read"], entities: { Products },} as const satisfies ConnectorConfig;
src\App.tsxreads the rows and shows them in a Fluent UI DataGrid.
const page = await getRayfinClient().connectors.productslakehouse.Products .select(["productId", "productName", "category", "price"]) .orderBy({ productId: "asc" }) .first(100) .executePaginated();
- To display the data in the app, I am using Fluent UI grid, so install Fluent UI and build the app.
npm install @fluentui/react-componentsnpm run build
Note: Connectors do not run under
npx rayfin dev. To see the Lakehouse data, deploy the app to Fabric.
The app builds fine. Lets deploy it to Fabric.
Deploy to Fabric
- Run the deploy command. Replace the workspace ID with yours.
npx rayfin up --workspace-id "<workspace-id>"
- When asked Who should be able to open your deployed app?, pick the first option. Only users with access to the Fabric item can open the app, and they must sign in.
- The CLI builds the app, applies the connector and prints Project “rayfin-fabric-table-demo” is now deployed to Fabric!

- Open the workspace. The app item
rayfin-fabric-table-demoappears. - Open the app. The grid shows the five products from
dbo.products.

Tip: Add or update rows in the Lakehouse, then click Refresh in the app. The grid reads the latest data from the table.
Summary
Here is what we did:
- Created a Lakehouse and a
dbo.productstable using Spark SQL. - Scaffolded a Rayfin project with the Data App template.
- Added a read-only
fabric-sqlanalyticsconnector to the Lakehouse. - Added a
Productsentity for the table. - Showed the rows in a Fluent UI DataGrid and deployed the app with
npx rayfin up.
If you are new to Rayfin, start with Step by Step: Build your first Fabric App using Rayfin CLI, then use this post to bring in your Lakehouse data.
Source code: rayfin-fabric-table-demo
Official docs: Fabric Apps overview • What is a lakehouse in Microsoft Fabric? • Rayfin on GitHub
🙂

Leave a Reply