The Power Automate skills plugin brings cloud flow authoring into Claude Code and GitHub Copilot CLI. It ships a self-contained FlowAgent MCP server that talks to your Power Platform environments.
What is the Power Automate Skills Plugin?
- A marketplace plugin for Claude Code and GitHub Copilot CLI.
- Bundles the FlowAgent MCP server with 50+ tools for flows, runs, connections, and desktop flows.
- Ships nine skills covering setup, browsing, guided creation, autonomous build, debug, diagnose, and lifecycle management.
- Uses Azure CLI (
az login) for auth. No npm install or remote host is required.
Why This Plugin?
- Cloud flow authoring usually means clicking through the Power Automate Designer portal.
- With this plugin we author, edit, publish, and debug flows using natural language from the terminal.
- The same commands work across Claude Code and Copilot CLI.
Before we install the plugin, lets make sure the machine has everything it needs.
Prerequisites
- Node.js 18 or higher.
- Azure CLI installed and signed in with
az login. - Access to a Power Platform environment where you can create flows.
- Claude Code or GitHub Copilot CLI installed on your machine.
- A preferred solution set in the target environment. This helps route new flows into the right solution.
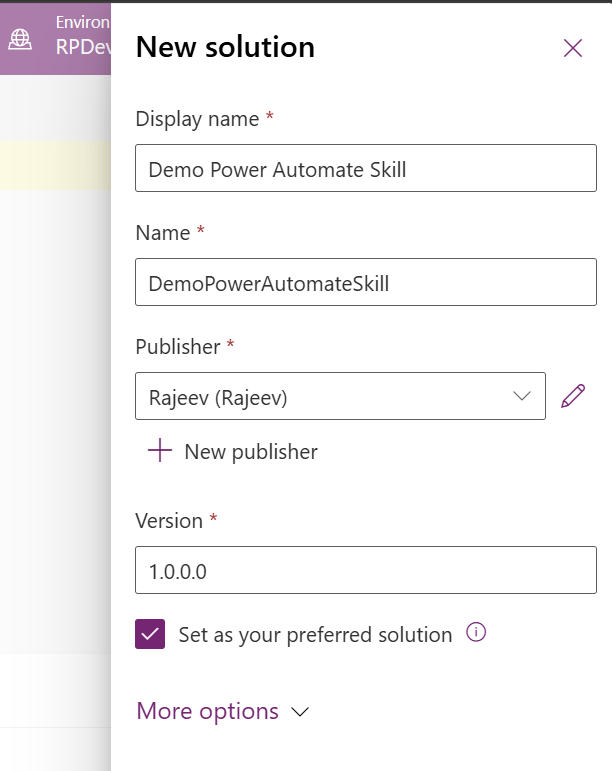
Sign in with Azure CLI
The FlowAgent MCP server uses your Azure CLI session for authentication. If you have not signed in yet, run:
az login
Tip: I covered the same
az loginstep in my earlier post Step by Step | Dataverse Skills Plugin. Refer to it if you want a fuller walkthrough of the sign-in flow.
Lets install the plugin next.
Lets install the plugin next.
Install the Power Automate Skills Plugin
From a Claude Code or GitHub Copilot CLI session, add the marketplace and install the plugin.
- Execute adding marketplace command:
/plugin marketplace add microsoft/power-platform-skills
- Install the plugin:
/plugin install power-automate@power-platform-skills

- The plugin registers itself with the client. You should see it listed as installed.

- Start a new session so that the newly installed skills can be used.
Now that the plugin is installed, lets run the one-time setup to wire the MCP server.
Run First-Time Setup
- The
setupskill installs prerequisites and registers the FlowAgent MCP server with the client. Invoke it from the session:
/setup

- The skill checks Node.js, Azure CLI, and other prerequisites. It reports progress as each step runs.
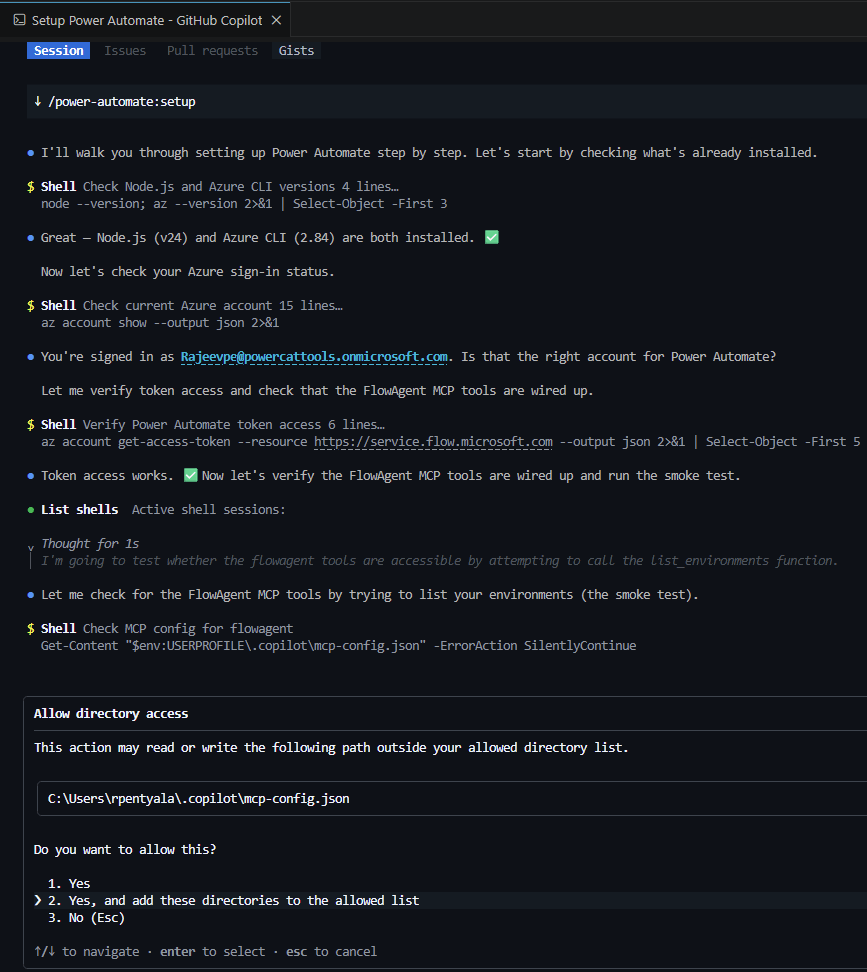
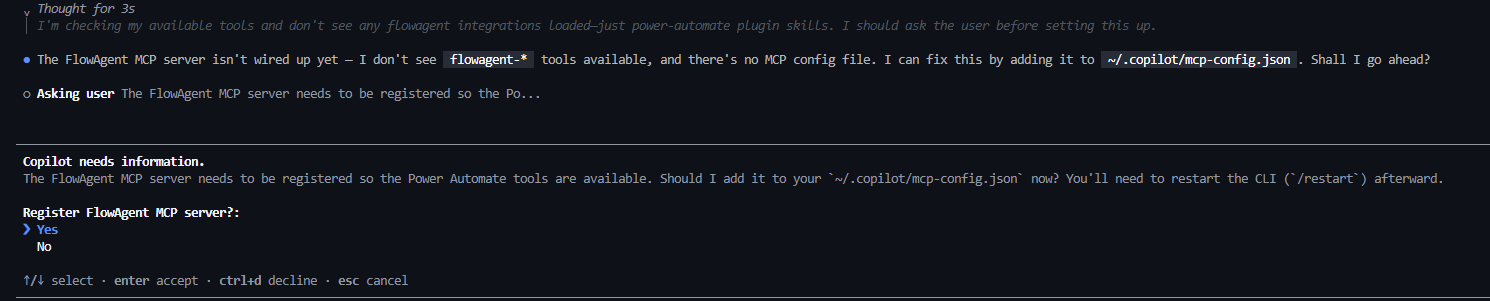
- Choose allow in above screen and procced.
- Click Yes and the FlowAgent MCP server is then registered with the client.
- Setup finishes with a green summary.
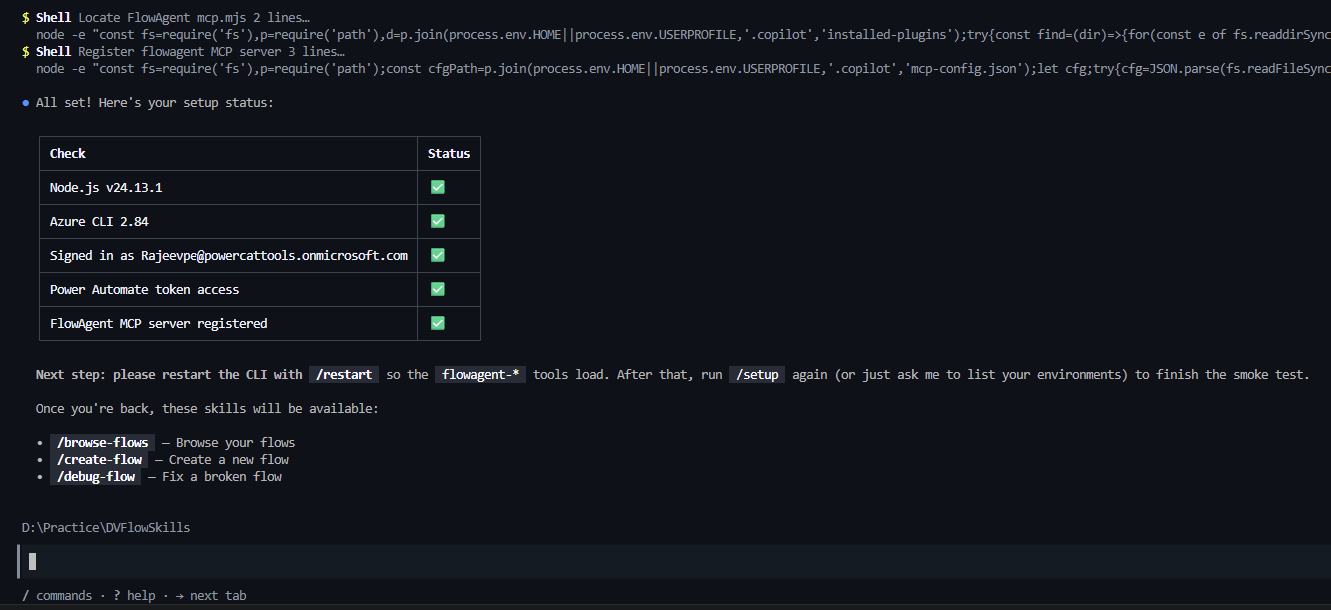
Note: A client restart is required for the MCP server to load. Restart Claude Code or Copilot CLI before moving on.
With the MCP server loaded, we can now connect to power platform tenant and browse environments and flows.
Browse Environments and Flows
- The
browse-flowsskill lists environments and the flows inside a selected environment. Invoke it:
/browse-flows

- The skill fetches all environments you have access to. If the tenant has many environments, it asks how you want to pick one.

- Paste the target environment ID when prompted. You can copy the ID from the Power Platform admin center or Maker Portal Session Details.

- The skill returns a table of flows with name, state, trigger, action count, and last modified time.

Now we have a view of existing flows. Lets create a new Instant flow using natural language.
Create an Instant Flow using /create-flow skill:
The create-flow skill walks through requirement gathering, connector discovery, validation, and creation.
- I prompted following with flow description in natural language:
/create-flow Create an Instant flow that lists top 10 recently modified Account records. Loop through the records and add a Compose action to read and set the Account name.

- The skill confirms the flow name, target environment, and whether to publish after creation.

- It then asks if the flow should be turned on immediately or left in a stopped state for review

- Next, since the flow needs Dataverse connection, it prompts options:

- It shows the flow definition includes the trigger, the Dataverse list rows action, the Apply to each loop, and a Compose action.

- Once you confirm, the skill calls
create_flowand returns the new flow ID.
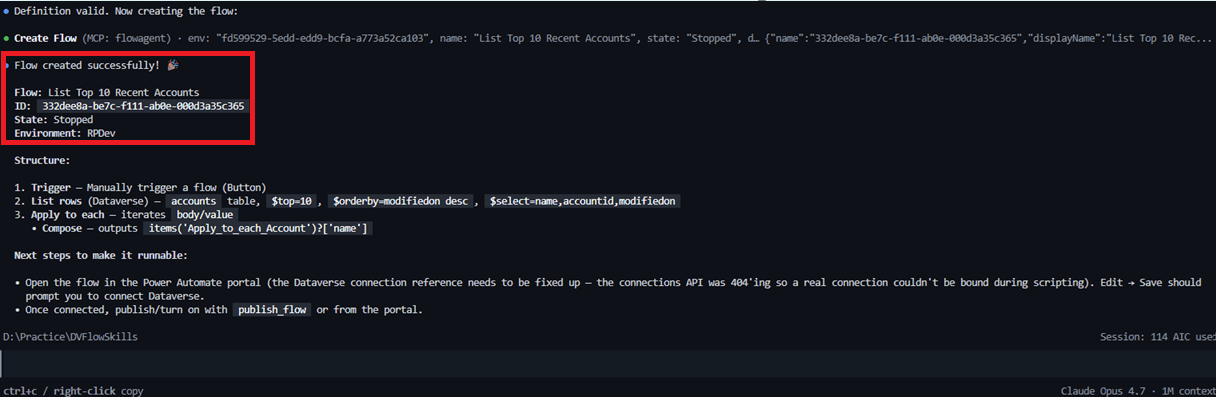
Lets verify the result in the maker portal.
Verify the Flow in the Maker Portal
- Connect to Power Platform Maker Portal.
- Open the preferred solution which we configured at the start.
- The new flow appears in the solution

- Open the flow in the designer. You should see the manual trigger, the Dataverse list rows action, the Apply to each loop, and the Compose action.

Tip: If the flow was created in a stopped state, click Turn on in the designer. Fix any connection prompt if the Dataverse connection was not fully bound during creation.
That completes the end-to-end walk. Lets recap what we did.
Summary
We installed the Power Automate skills plugin, ran the setup skill to register the FlowAgent MCP server, browsed environments with browse-flows, and created an Instant flow with create-flow that lists the top 10 recently modified Accounts and composes the account name in a loop.
For more details, refer to the plugin repo on GitHub: microsoft/power-platform-skills. 🙂

Leave a Reply