If you have been building canvas screens by dragging controls, there is a faster option. Power Apps Studio can show you the YAML behind any control, and it accepts YAML back.
So you can author a screen in a text editor and paste it into Studio.
- Right click any control or screen in the Tree view and select View code.
- The dialog shows that control and its children as YAML. It is read only, so you cannot type in it.
- Copy that YAML, edit it outside Studio, then paste it back with Ctrl+V or the Paste menu.
- The format is a subset of the source code files for canvas apps format used by Git integration.
Lets walk through two examples. First we add controls to an existing screen. Then we create a brand new screen.
Example 1: Add controls to an existing screen
- Here the YAML is just a list of controls. You can copy and paste this YAML to existing screen.
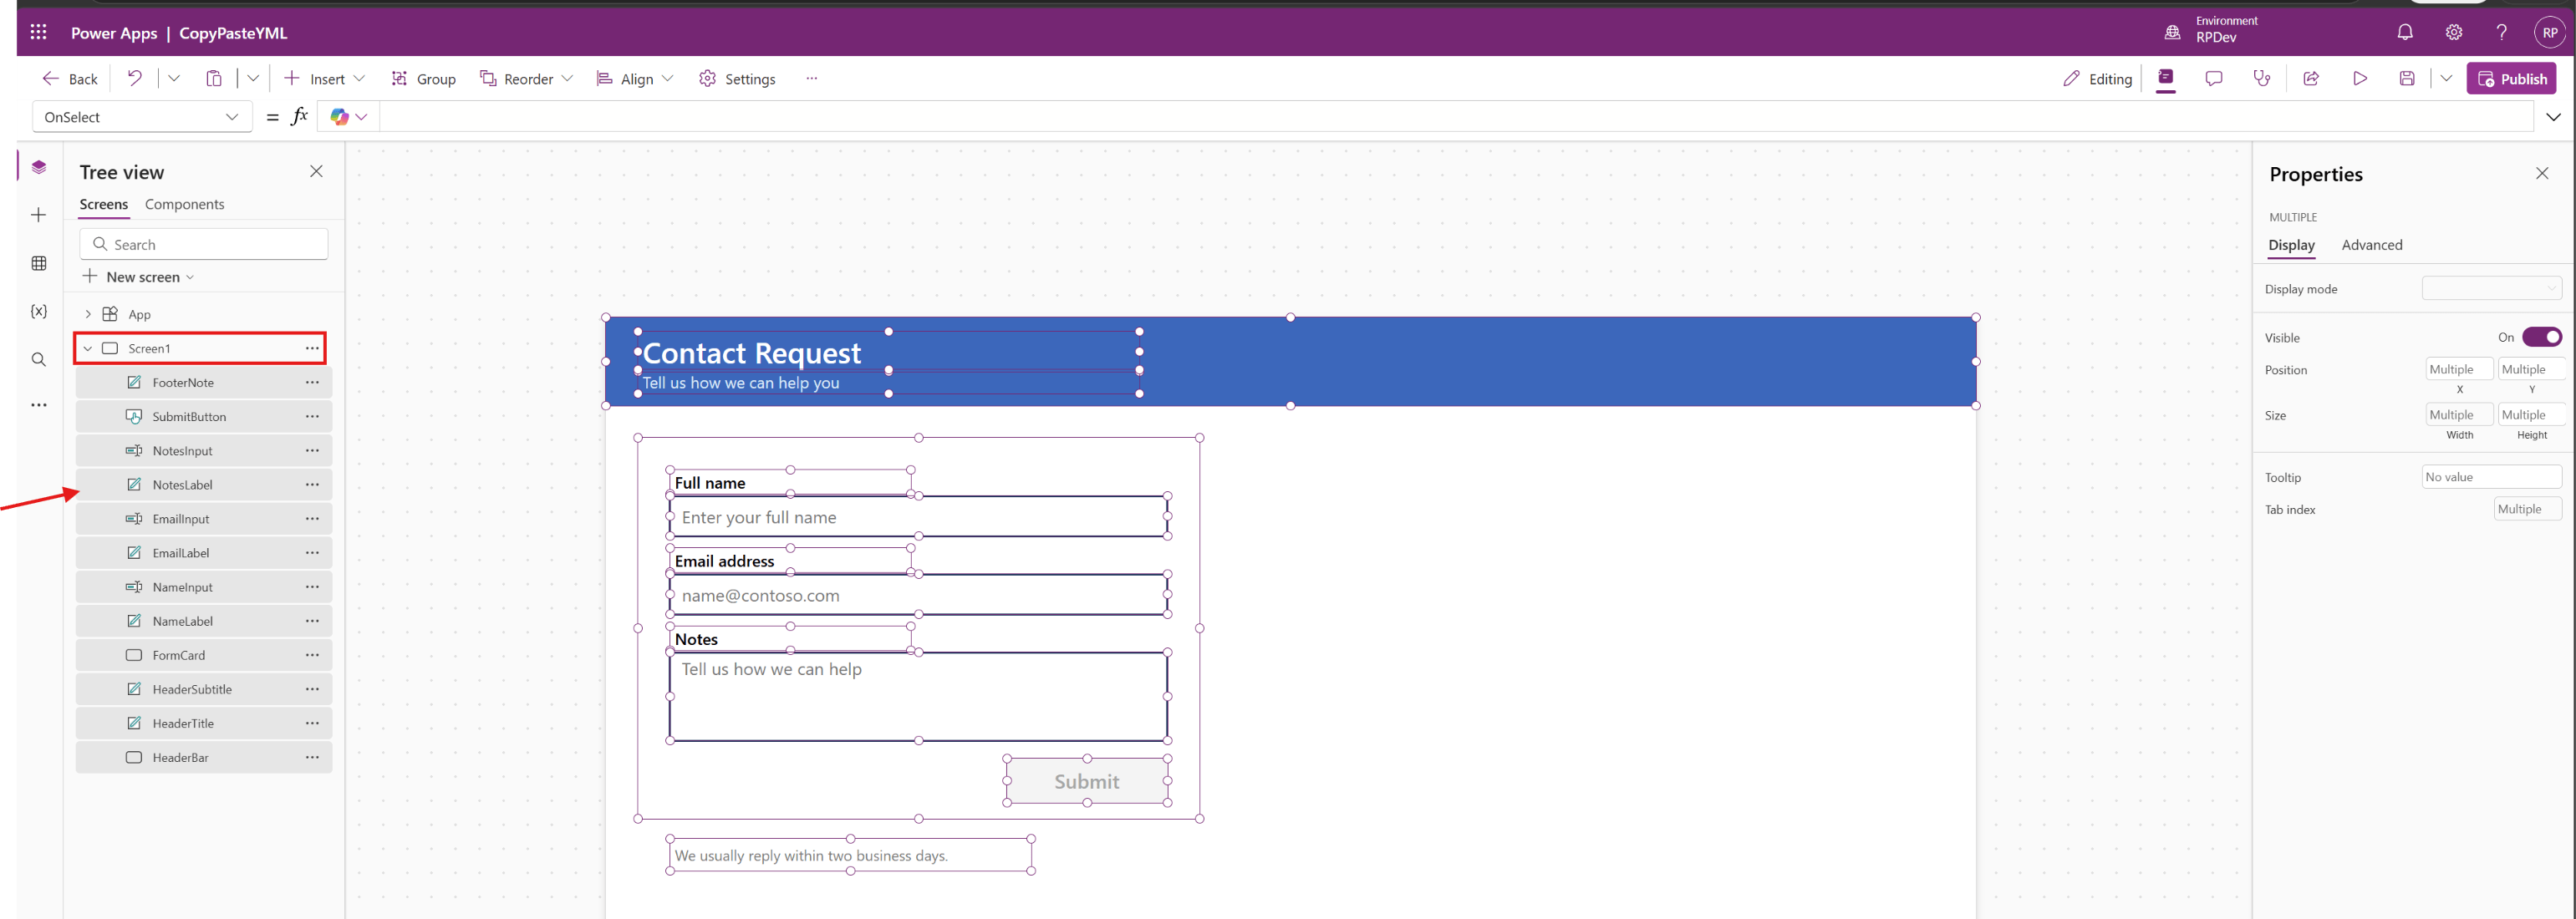
- HeaderBar: Control: Rectangle Properties: Fill: =RGBA(16, 110, 190, 1) Height: =88 Width: =Parent.Width X: =0 Y: =0- HeaderTitle: Control: Label Properties: Text: ="Contact Request" Color: =RGBA(255, 255, 255, 1) FontWeight: =FontWeight.Semibold Size: =22 VerticalAlign: =VerticalAlign.Middle Height: =40 Width: =500 X: =32 Y: =14- HeaderSubtitle: Control: Label Properties: Text: ="Tell us how we can help you" Color: =RGBA(220, 235, 250, 1) Size: =12 Height: =24 Width: =500 X: =32 Y: =52- FormCard: Control: Rectangle Properties: Fill: =RGBA(255, 255, 255, 1) Height: =380 Width: =560 X: =32 Y: =120- NameLabel: Control: Label Properties: Text: ="Full name" FontWeight: =FontWeight.Semibold Size: =12 Height: =24 Width: =240 X: =64 Y: =152- NameInput: Control: Classic/TextInput Properties: Default: ="" HintText: ="Enter your full name" Height: =40 Width: =496 X: =64 Y: =178- EmailLabel: Control: Label Properties: Text: ="Email address" FontWeight: =FontWeight.Semibold Size: =12 Height: =24 Width: =240 X: =64 Y: =230- EmailInput: Control: Classic/TextInput Properties: Default: ="" HintText: ="name@contoso.com" Height: =40 Width: =496 X: =64 Y: =256- NotesLabel: Control: Label Properties: Text: ="Notes" FontWeight: =FontWeight.Semibold Size: =12 Height: =24 Width: =240 X: =64 Y: =308- NotesInput: Control: Classic/TextInput Properties: Default: ="" HintText: ="Tell us how we can help" Mode: =TextMode.MultiLine Height: =88 Width: =496 X: =64 Y: =334- SubmitButton: Control: Classic/Button Properties: Text: ="Submit" Fill: =RGBA(16, 110, 190, 1) Color: =RGBA(255, 255, 255, 1) DisplayMode: =If(IsBlank(NameInput.Text) || IsBlank(EmailInput.Text), DisplayMode.Disabled, DisplayMode.Edit) OnSelect: |- =Notify("Thanks " & NameInput.Text & ", we received your request.", NotificationType.Success) Height: =44 Width: =160 X: =400 Y: =440- FooterNote: Control: Label Properties: Text: ="We usually reply within two business days." Color: =RGBA(120, 120, 120, 1) Size: =11 Height: =32 Width: =360 X: =64 Y: =520
- For example, copy above YAML, Select Screen1 in the Tree view, click the three dots and select Paste.
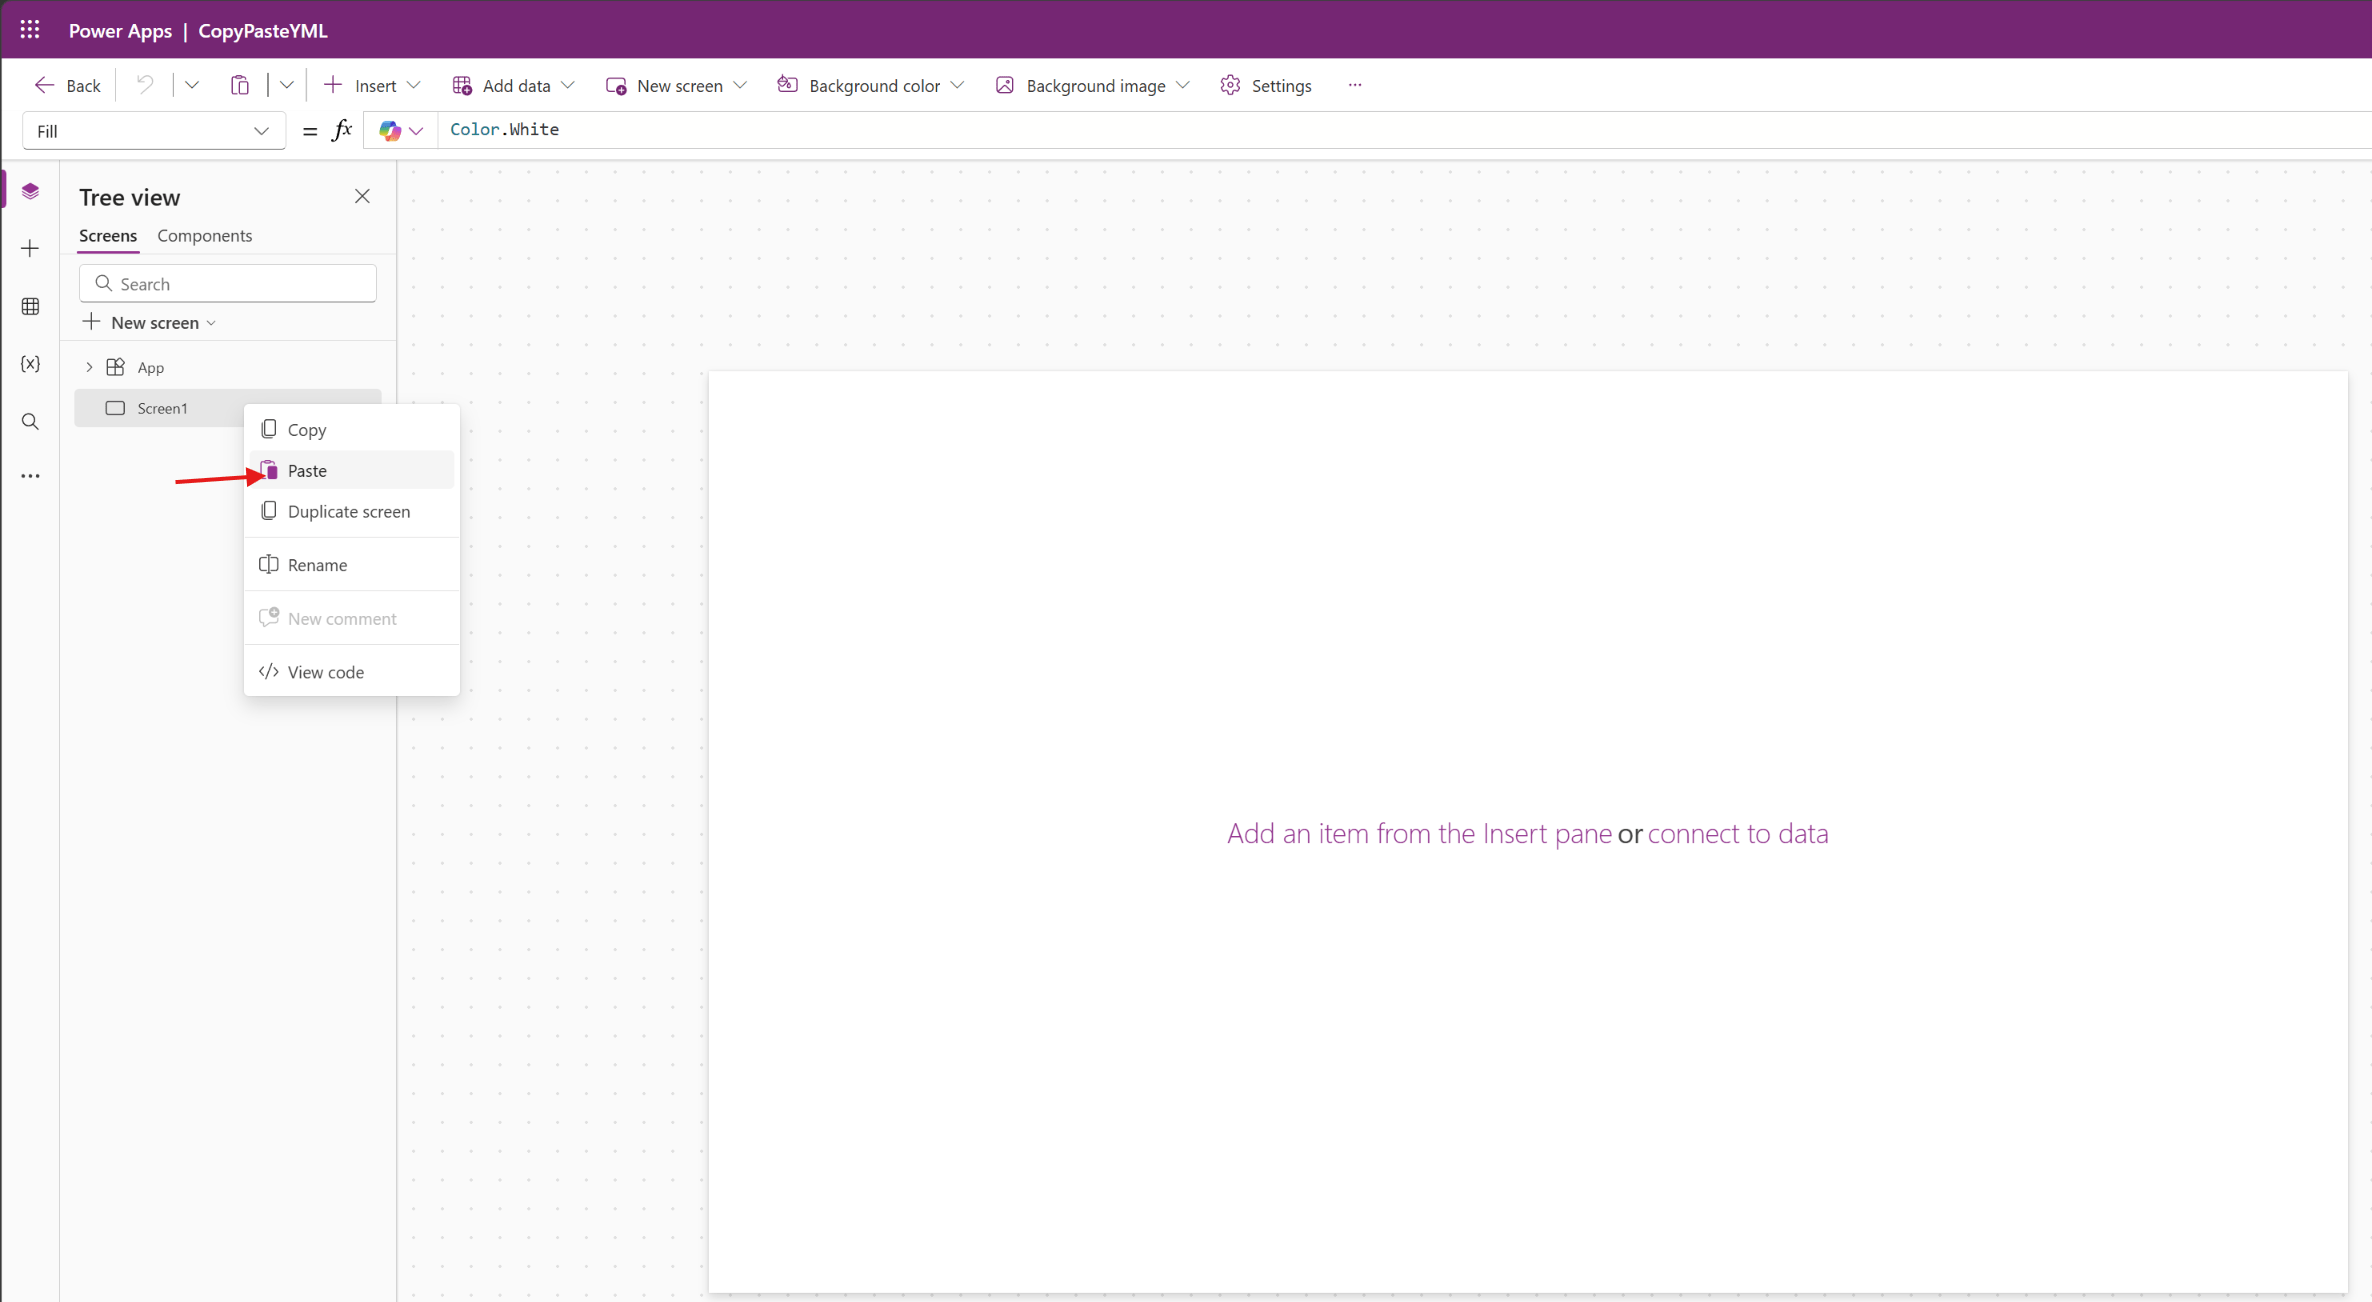
- The controls land inside Screen1.
Example 2: Create a new screen
- This time the YAML starts with
Screens:and gives the screen a name. That one keyword is the whole difference.
Screens: ContactScreen: Properties: Fill: =RGBA(245, 246, 248, 1) Children: - HeaderBar: Control: Rectangle Properties: Fill: =RGBA(16, 110, 190, 1) Height: =88 Width: =Parent.Width X: =0 Y: =0 - HeaderTitle: Control: Label Properties: Text: ="Contact Request" Color: =RGBA(255, 255, 255, 1) FontWeight: =FontWeight.Semibold Size: =22 VerticalAlign: =VerticalAlign.Middle Height: =40 Width: =500 X: =32 Y: =14 - HeaderSubtitle: Control: Label Properties: Text: ="Tell us how we can help you" Color: =RGBA(220, 235, 250, 1) Size: =12 Height: =24 Width: =500 X: =32 Y: =52 - FormCard: Control: Rectangle Properties: Fill: =RGBA(255, 255, 255, 1) Height: =380 Width: =560 X: =32 Y: =120 - NameLabel: Control: Label Properties: Text: ="Full name" FontWeight: =FontWeight.Semibold Size: =12 Height: =24 Width: =240 X: =64 Y: =152 - NameInput: Control: Classic/TextInput Properties: Default: ="" HintText: ="Enter your full name" Height: =40 Width: =496 X: =64 Y: =178 - EmailLabel: Control: Label Properties: Text: ="Email address" FontWeight: =FontWeight.Semibold Size: =12 Height: =24 Width: =240 X: =64 Y: =230 - EmailInput: Control: Classic/TextInput Properties: Default: ="" HintText: ="name@contoso.com" Height: =40 Width: =496 X: =64 Y: =256 - NotesLabel: Control: Label Properties: Text: ="Notes" FontWeight: =FontWeight.Semibold Size: =12 Height: =24 Width: =240 X: =64 Y: =308 - NotesInput: Control: Classic/TextInput Properties: Default: ="" HintText: ="Tell us how we can help" Mode: =TextMode.MultiLine Height: =88 Width: =496 X: =64 Y: =334 - SubmitButton: Control: Classic/Button Properties: Text: ="Submit" Fill: =RGBA(16, 110, 190, 1) Color: =RGBA(255, 255, 255, 1) DisplayMode: =If(IsBlank(NameInput.Text) || IsBlank(EmailInput.Text), DisplayMode.Disabled, DisplayMode.Edit) OnSelect: |- =Notify("Thanks " & NameInput.Text & ", we received your request.", NotificationType.Success) Height: =44 Width: =160 X: =400 Y: =440 - FooterNote: Control: Label Properties: Text: ="We usually reply within two business days." Color: =RGBA(120, 120, 120, 1) Size: =11 Height: =32 Width: =360 X: =64 Y: =520
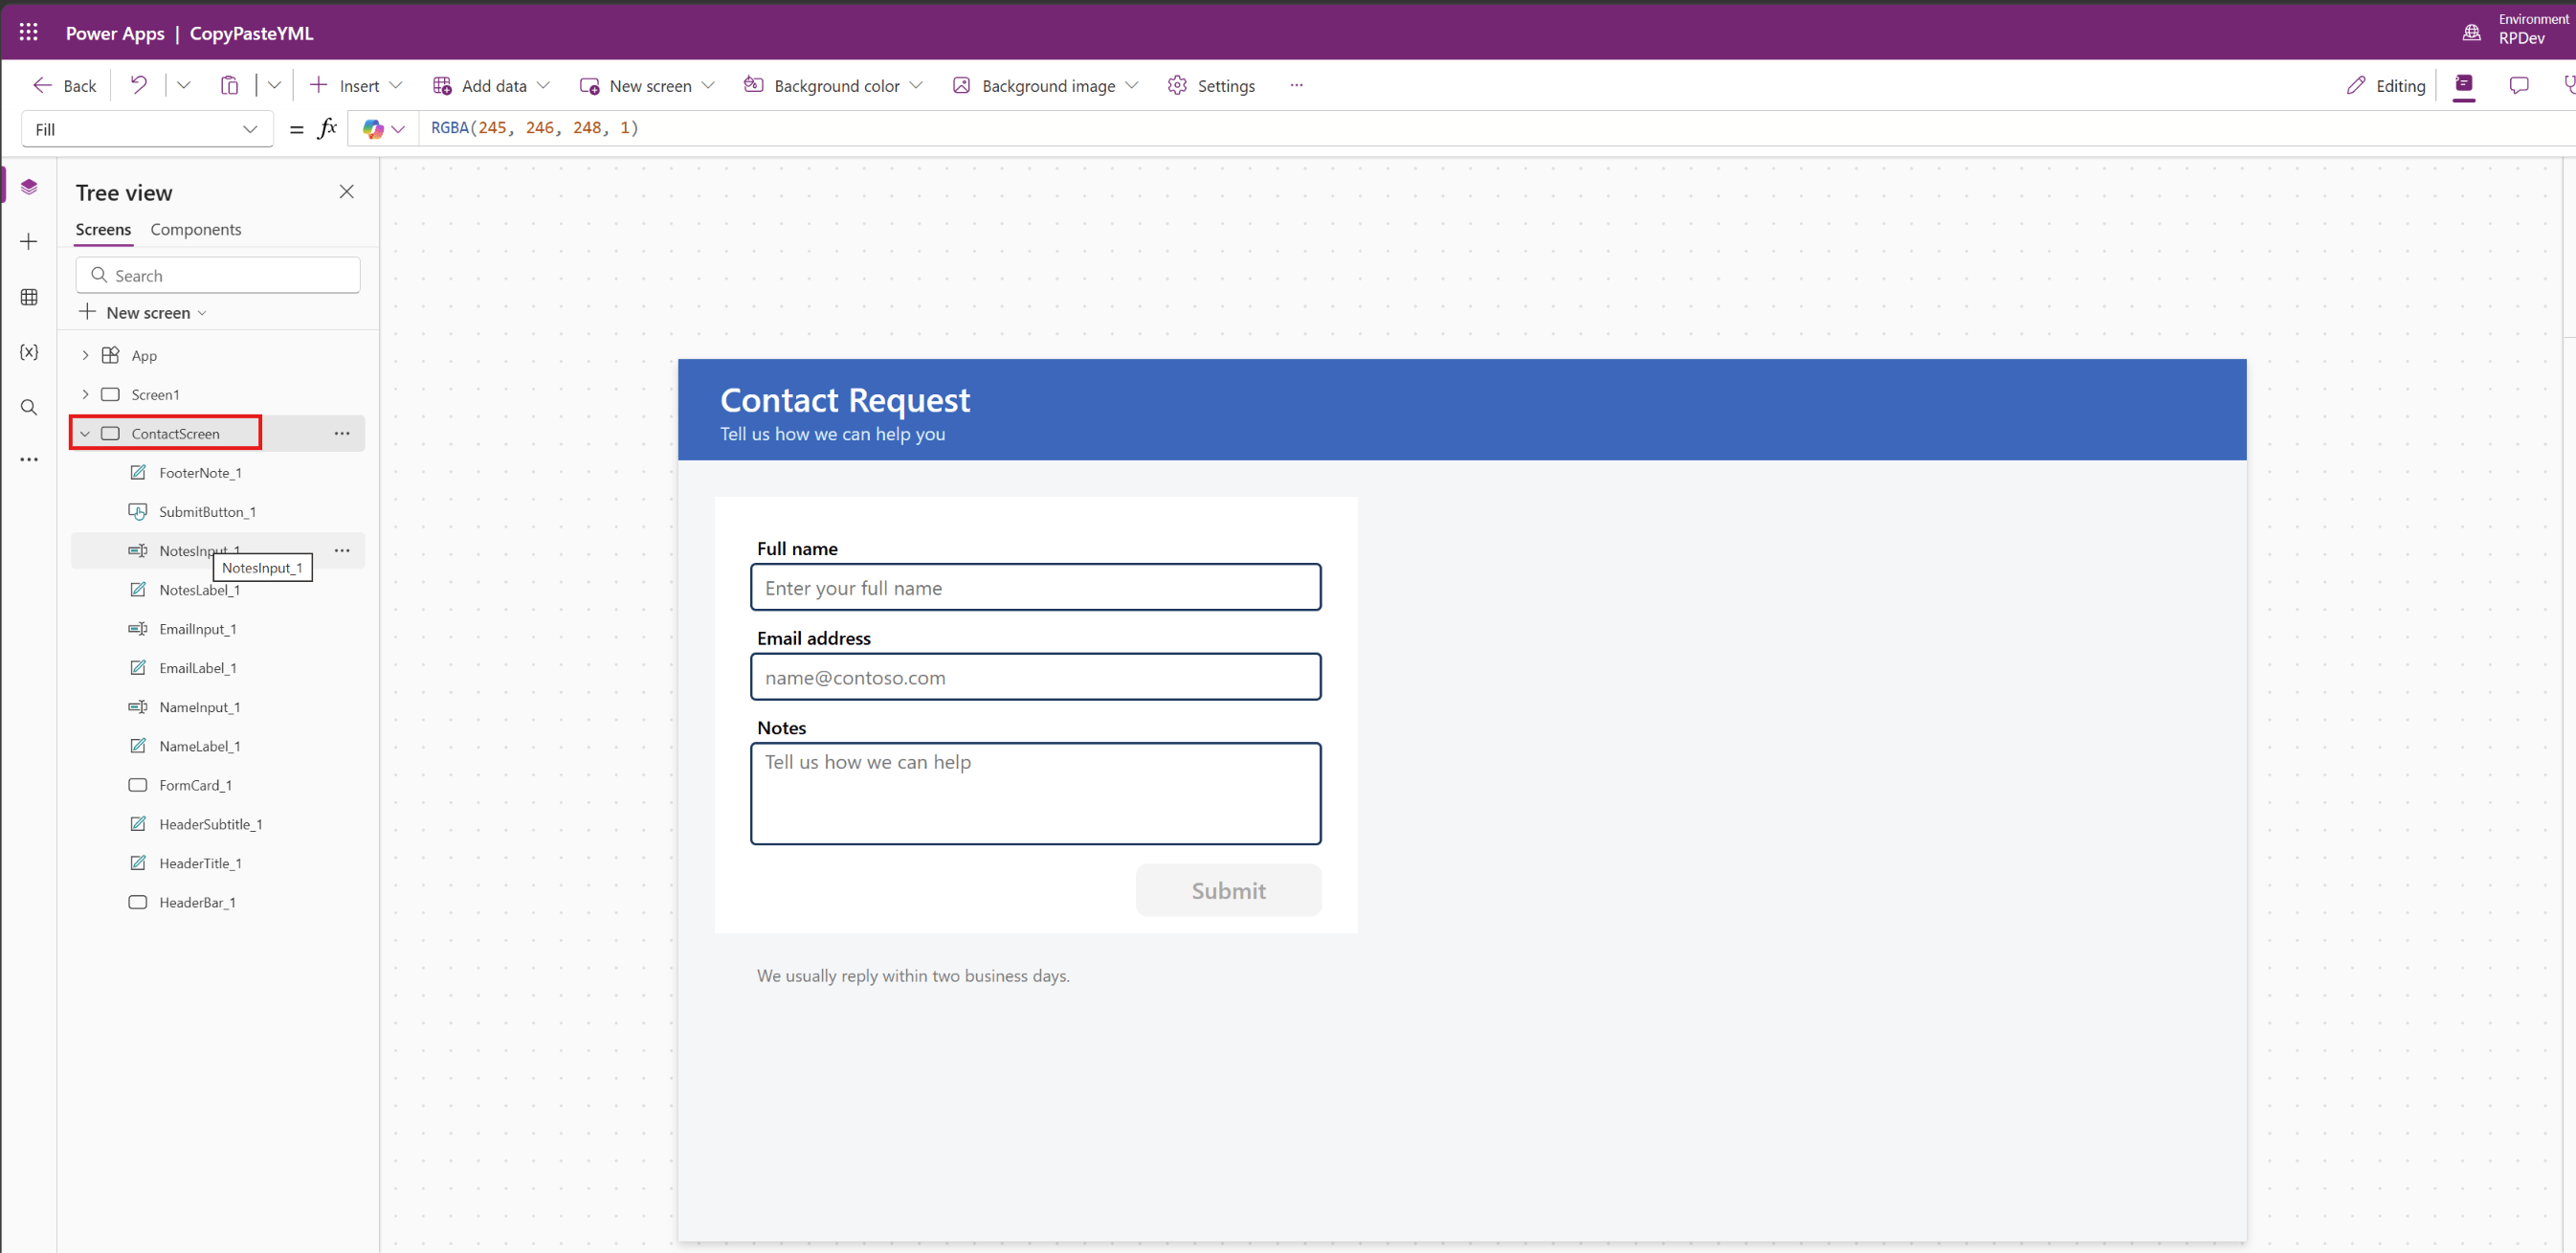
- Repeat the same steps, copy above YAML, Select Screen1 in the Tree view, click the three dots and select Paste.
- You get a screen named
ContactScreen, with the controls.
Lets note a few things before you try this.
Things worth knowing
- Every property value starts with
=. A text value needs the=and the quotes, likeText: ="Submit". - Paste creates controls. It never replaces what is already on the screen.
- Plain names like
TextInputandButtonpoint to the modern Fluent controls. For the classic ones useClassic/TextInputandClassic/Button. - Screen properties like
Fillonly travel with Example 2. In Example 1 you set them in the Properties pane. - Duplicate names get a number appended. That is why the second screenshot shows
HeaderBar_1. - You cannot view or paste code for the App object.
Summary
Code View turns a canvas screen into text you can keep and reuse. A plain list of controls fills a screen you already have. Add Screens: at the top and you get a new screen instead.
Official documentation: Use code view for canvas app controls
🙂


Leave a Reply