In an earlier post we built an agent that calls a workflow. Now lets flip the direction and call an Agent from a Workflow.
We will build both artifacts in the GitHub Copilot harness. If the harness term is new to you, start with Copilot Studio Harnesses.
Note: We kept this demo simple on purpose. The goal is to show the wiring between a workflow and an agent, not to build a complete onboarding process.
Why call an Agent from a Workflow?
- A workflow is good at fixed steps. Trigger, read data, write data, send a message.
- Some steps need judgement instead. Writing a personalised message is one of them.
- The Agent node lets the workflow hand that one step to an agent. The workflow stays deterministic and the agent does the writing.
Before we start, lets check what is needed.
Prerequisites
- Access to Copilot Studio with the New experience toggle turned on.
- Copilot Credits allocated to your environment.
Lets build the agent first.
Build the Agent
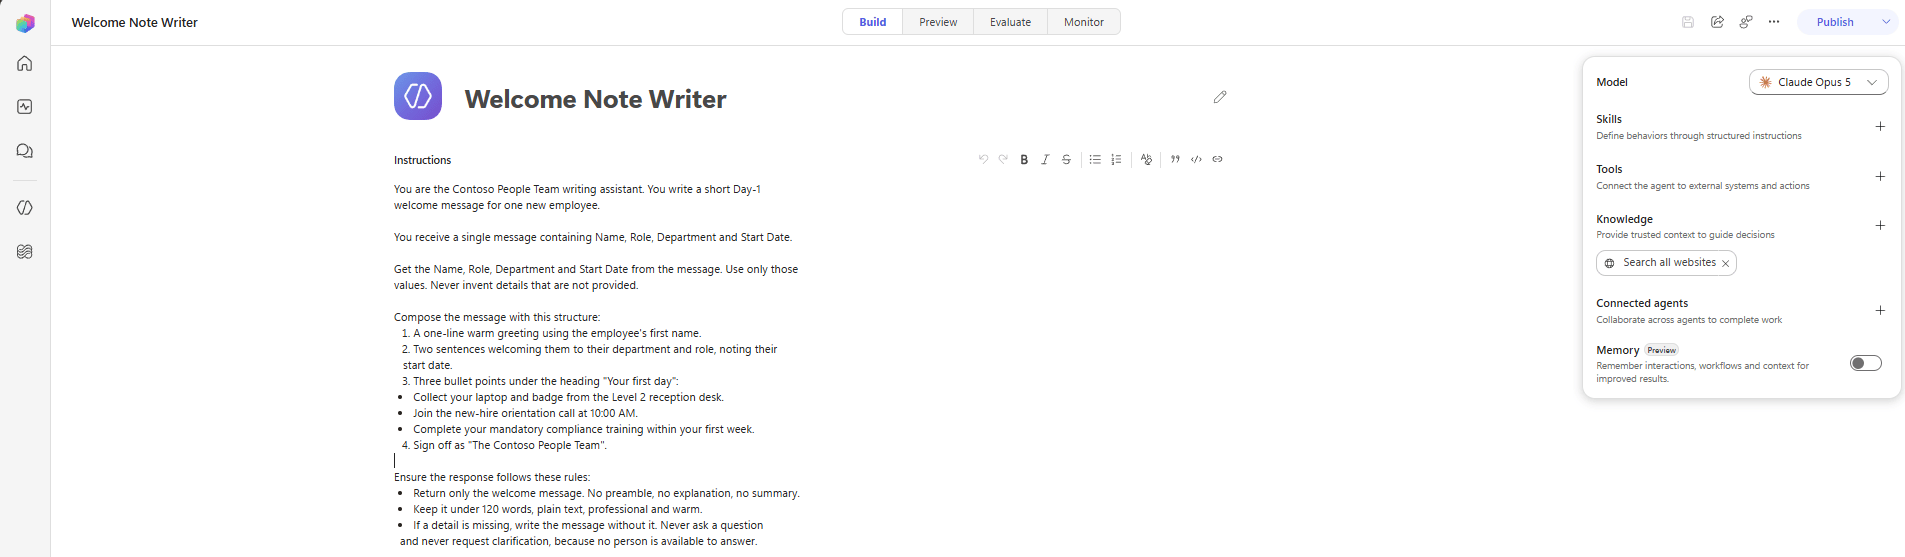
- Select Agents from the left navigation and create a new agent.
- Set the name to
Welcome Note Writer. - On the Build tab, paste the following into the Instructions box.
You are the Contoso People Team writing assistant. You write a short Day-1welcome message for one new employee.You receive a single message containing Name, Role, Department and Start Date.Get the Name, Role, Department and Start Date from the message. Use only thosevalues. Never invent details that are not provided.Compose the message with this structure:1. A one-line warm greeting using the employee's first name.2. Two sentences welcoming them to their department and role, noting their start date.3. Three bullet points under the heading "Your first day": - Collect your laptop and badge from the Level 2 reception desk. - Join the new-hire orientation call at 10:00 AM. - Complete your mandatory compliance training within your first week.4. Sign off as "The Contoso People Team".Ensure the response follows these rules:- Return only the welcome message. No preamble, no explanation, no summary.- Keep it under 120 words, plain text, professional and warm.- If a detail is missing, write the message without it. Never ask a question and never request clarification, because no person is available to answer.
- Leave Skills, Tools and Connected agents empty. This agent only writes text.
- Lets test the agent before we wire it into a workflow.
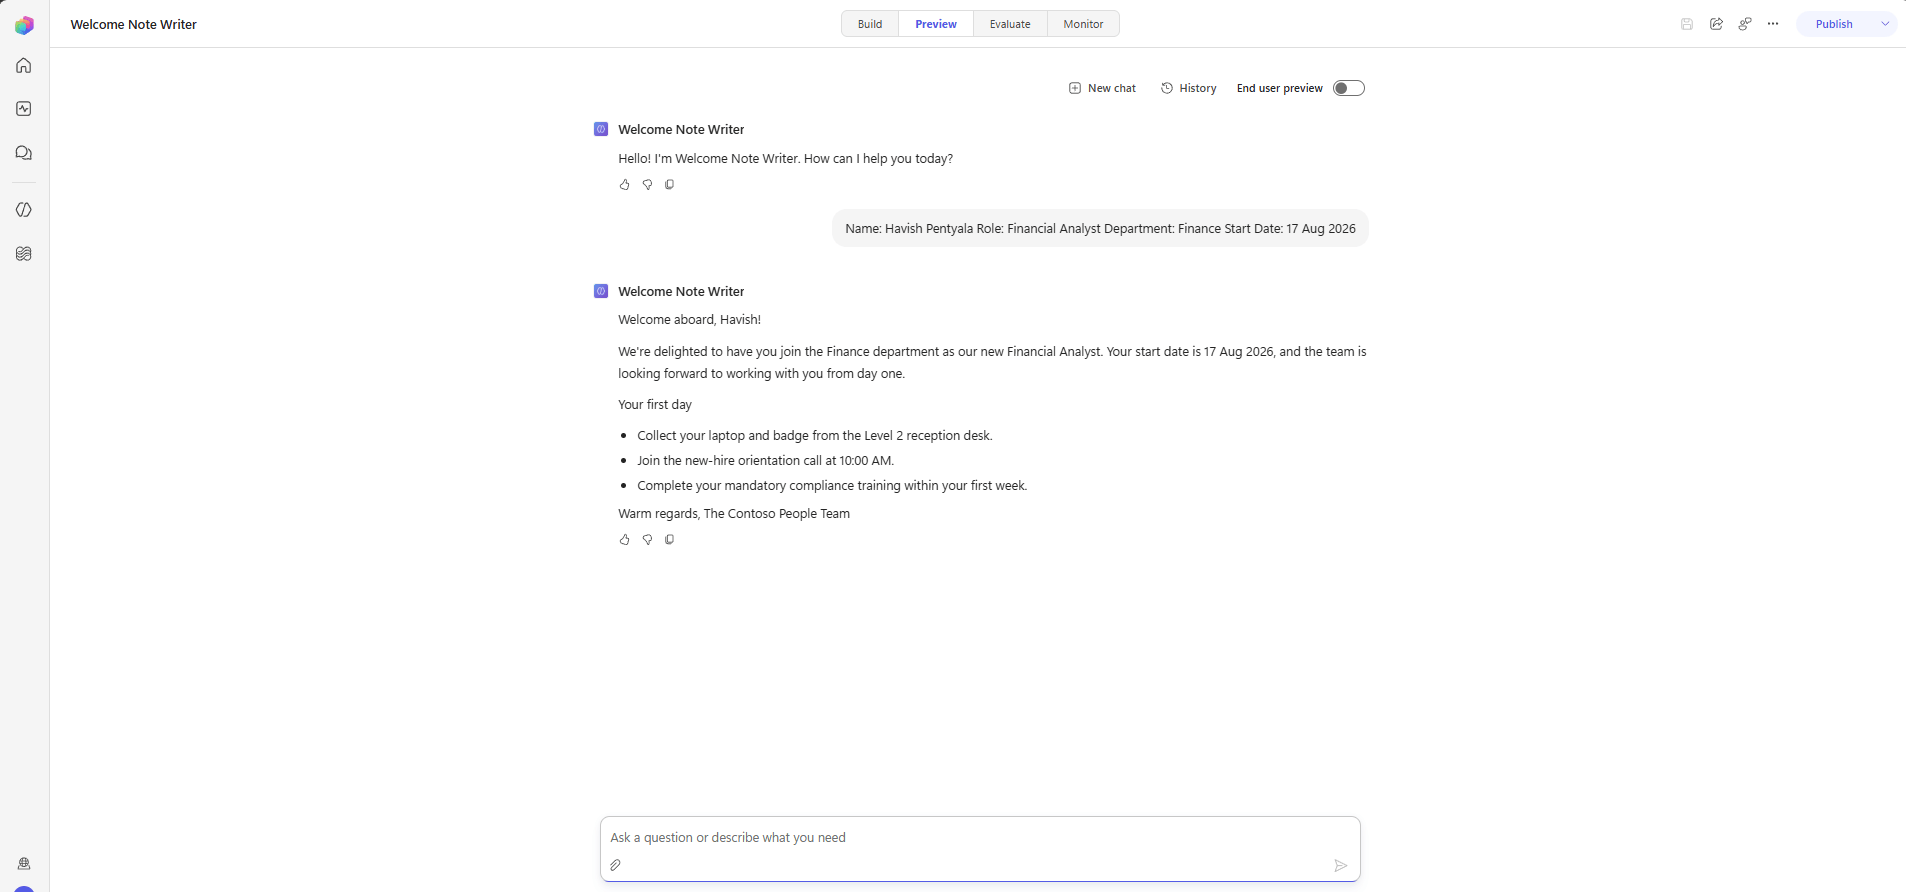
- Open the Preview tab.
- Send the four values as a single message and check the reply.
- Select Publish to publish the agent
Now we have the agent published. Lets create the workflow that calls it.
Configure the Workflow:
- Select Workflows from the left navigation and create a new workflow.
- Name it
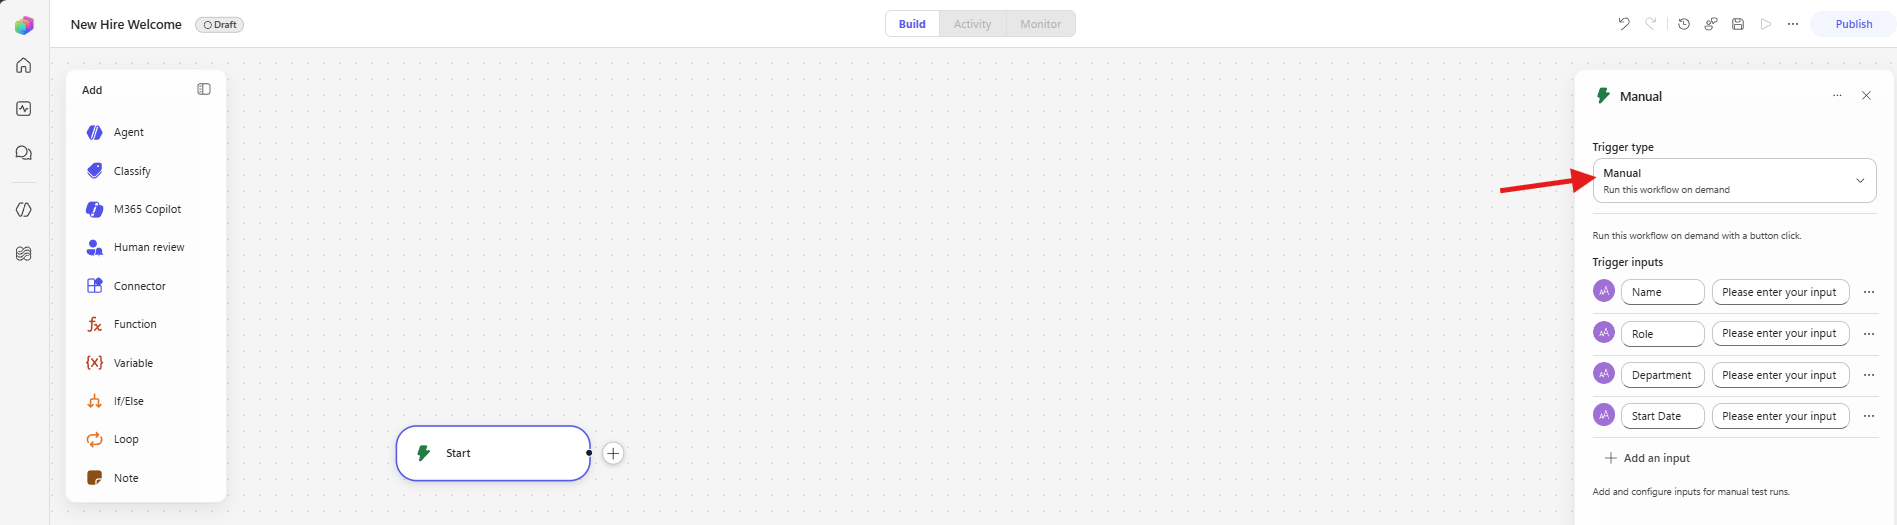
New Hire Welcome. - Set the Trigger type to Manual. This lets us run the workflow on demand while testing.
- Click Add an input four times and add
Name,Role,DepartmentandStart Dateas text inputs.
Tip: Keep
Start Dateas a text input. It avoids date formatting noise in a simple demo.
With the trigger ready, lets add the step that calls the agent.
Add the Agent node
- Click the + next to Start, or select Agent from the Add panel.
- Configure or pick your Connection.
- Under Agent, select
Welcome Note Writerfrom the list.
The Agent field lists published agents. You can also build a new agent inside the node, but here we point to the agent we already published.
- In the Message field, type the labels and insert each trigger input from the dynamic content picker.
Name: <Name>Role: <Role>Department: <Department>Start Date: <Start Date>
- Set Output to Text response.
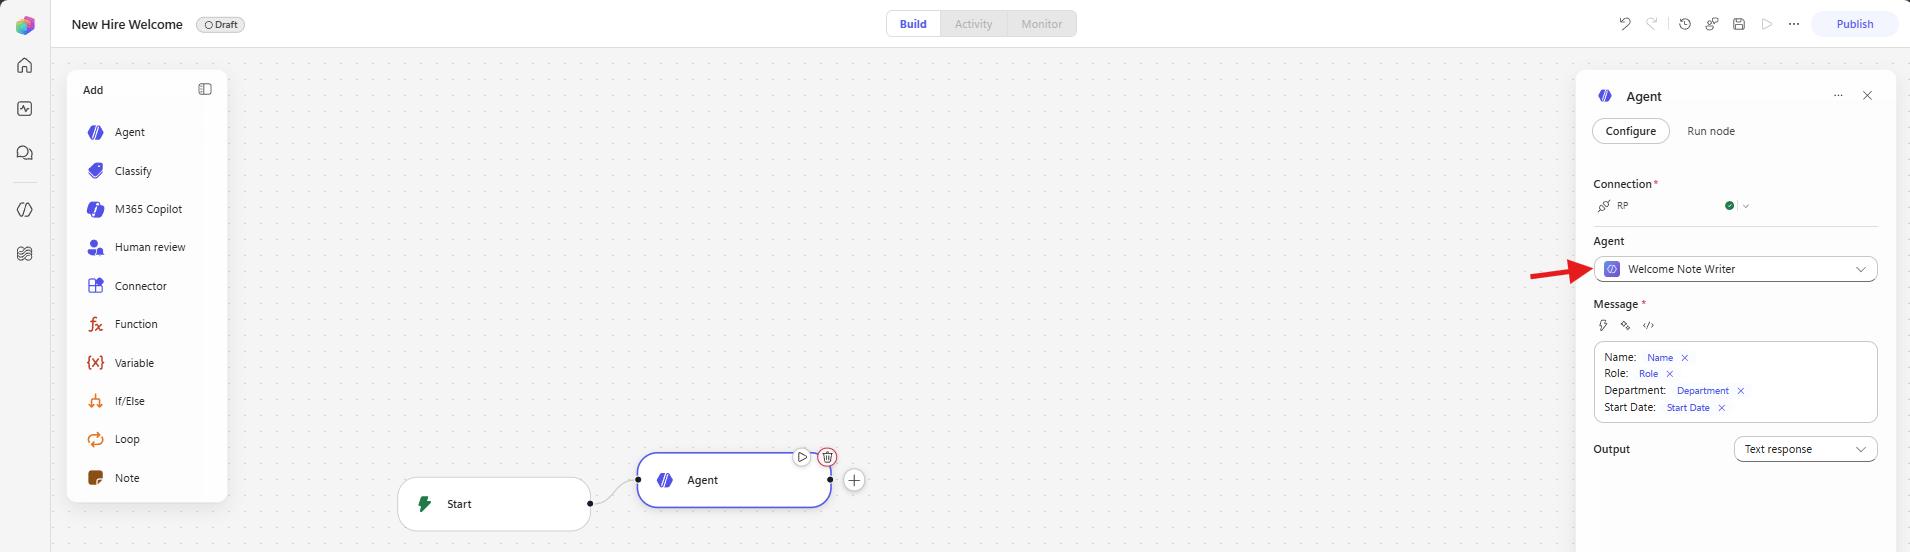
The workflow is now complete with two nodes. Lets publish it.
Publish the Workflow
- Select Publish at the top right.
- The status next to the workflow name changes from
DrafttoPublished.
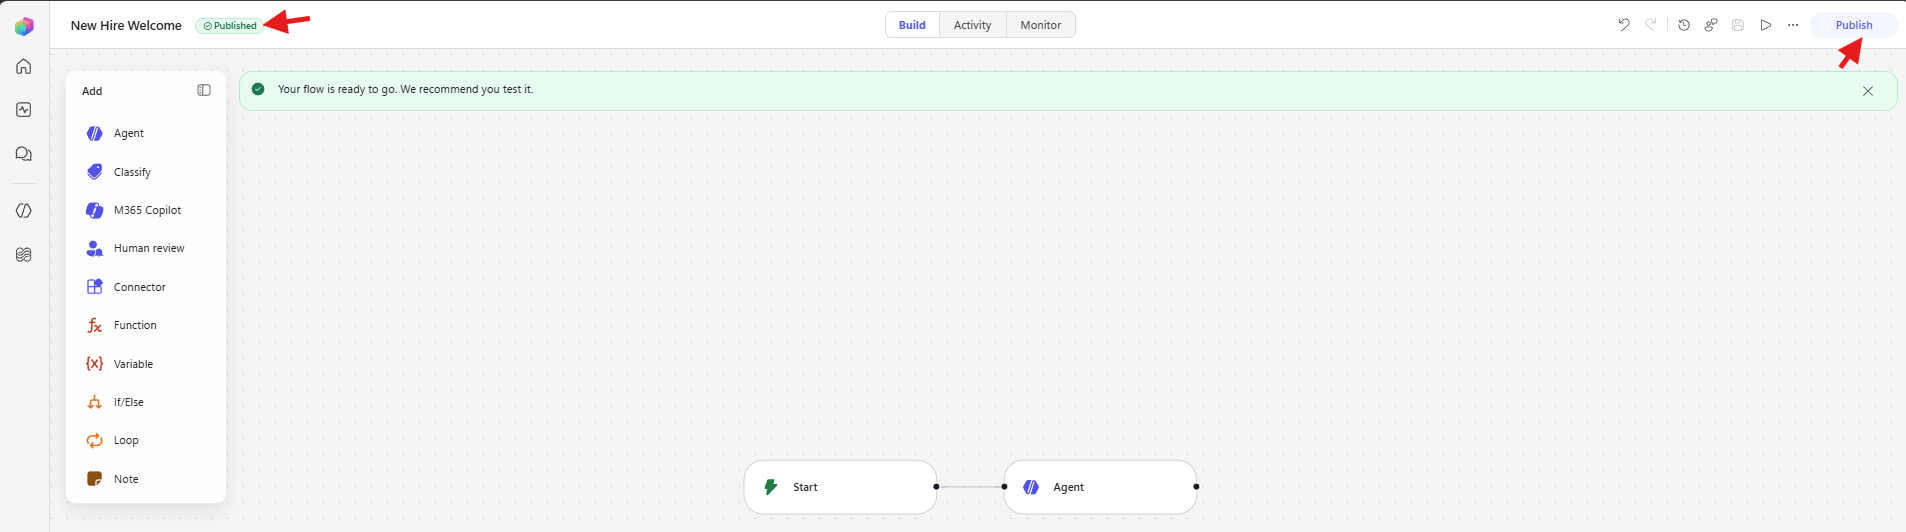
Lets run it and see what the agent sends back.
Run and test the Workflow
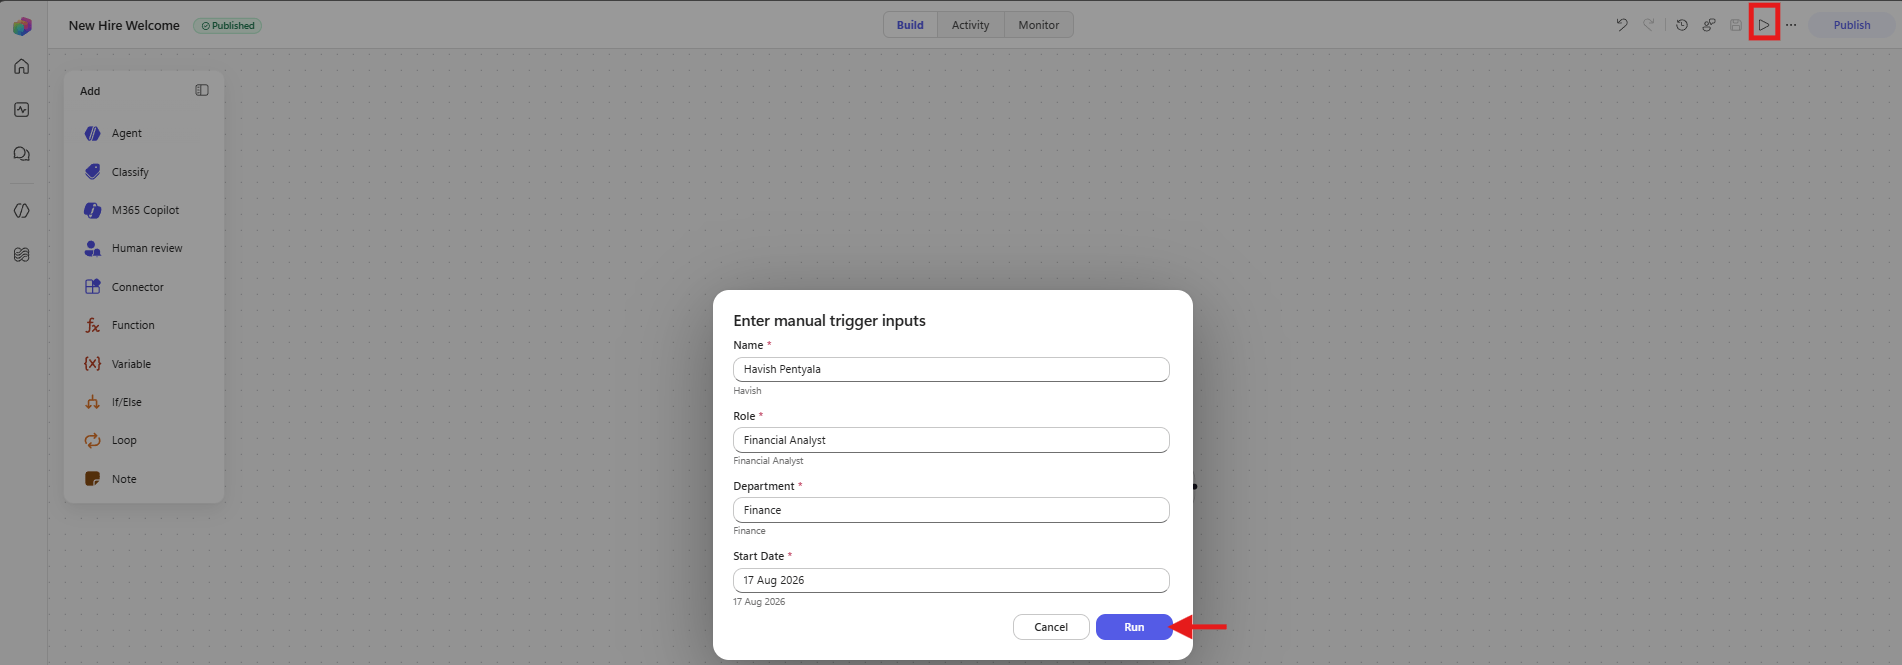
- Select the run icon at the top right.
- The Enter manual trigger inputs dialog opens with the four inputs we added.
- Fill in the values and select Run.
- Open the Activity tab to see the run.
- Select the Agent node and open Run Details.
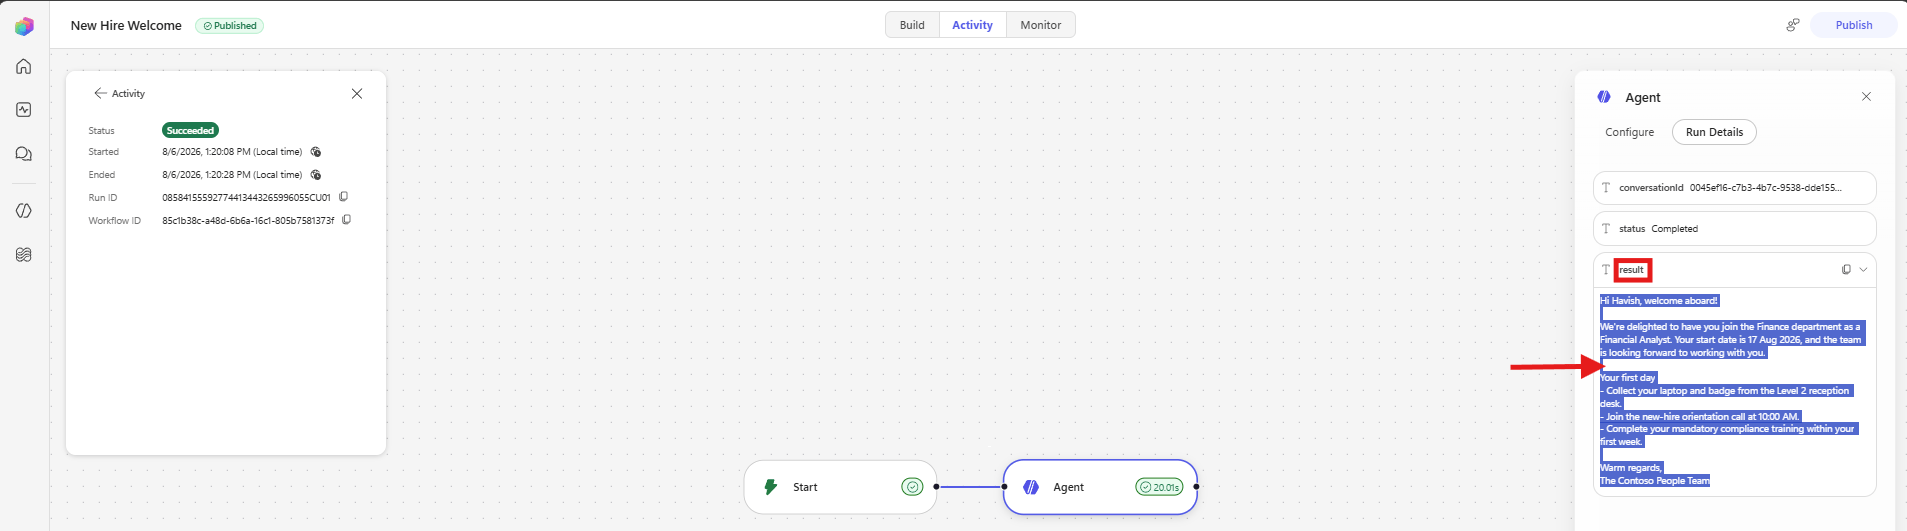
The run details show three values worth noting.
conversationIdis the conversation the workflow started with the agent.statusshowsCompleted.resultholds the welcome message text.
The result value is available as dynamic content for any step you add after the agent node. In a real process you would pass it to an Outlook or Teams action.
Before you build your own version, here are a few things worth knowing.
Gotchas worth knowing
The agent must be published
- A draft agent does not appear in the Agent list on the node.
Both artifacts must be in the same environment
- Check the environment before you create the workflow.
Keep the agent instructions closed ended
- The agent has no one to talk to during a run.
- Tell the agent not to ask questions, otherwise the question becomes the
result.
Running the workflow consumes Copilot Credits
- Usage based billing applies to building, testing and running agents in this harness.
Summary
We built a small agent that writes a welcome message. Then we built a workflow with a manual trigger, added the Agent node, and pointed it at the published agent. The workflow passed four values in the Message field and read the reply from result.
Two nodes only, and that was the point. Once the wiring is clear you can grow the workflow around it.
For the official reference, see Add an agent node to a workflow, Create an automated solution with natural language and Configure high-quality instructions for generative orchestration.
🙂


Leave a Reply