Until now, we managed Copilot Studio credits in the Power Platform admin center (PPAC). We allocated credits to each environment and picked what happens when they run out.
You can now manage the same credits from the Microsoft 365 admin center (MAC), using a spending policy. In this article, lets learn how to move one environment from PPAC to MAC and see how the experience changes.
What changes when you move to MAC?
The biggest change is how credits reach the environment.
In PPAC, you reserve a fixed number of credits for each environment.
- You allocate a fixed number of prepaid credits to an environment.
- When those run out, the environment can draw from the unallocated tenant credits.
- It can also bill a pay-as-you-go billing plan instead.
In MAC, the environment uses credits from a shared tenant pool, up to a monthly limit.
- Nothing is allocated to the environment.
- A spending policy sets a monthly limit, an optional per-agent limit, and email alerts.
- Credits come from the billing method. Prepaid capacity packs are used first, then a pre-purchase plan (P3), then pay-as-you-go.
Why move to MAC?
- MAC brings Copilot Studio costs into the same place as other Copilot costs. You get one place to set limits, choose how to pay, and see usage.
- The move is opt-in and environments you don’t add to a MAC policy stay on PPAC.
Prerequisites
- The Global Administrator or Billing Administrator role in the Microsoft 365 admin center. These roles can create spending policies and choose the billing method.
- A test environment that doesn’t use AI Builder prompts. MAC spending policies don’t cover AI Builder credits.
Note: The AI Administrator role can edit spending policies, but it can’t create them.
Lets first note how PPAC manages our test environment today, so we can compare it later.
Check the environment in PPAC
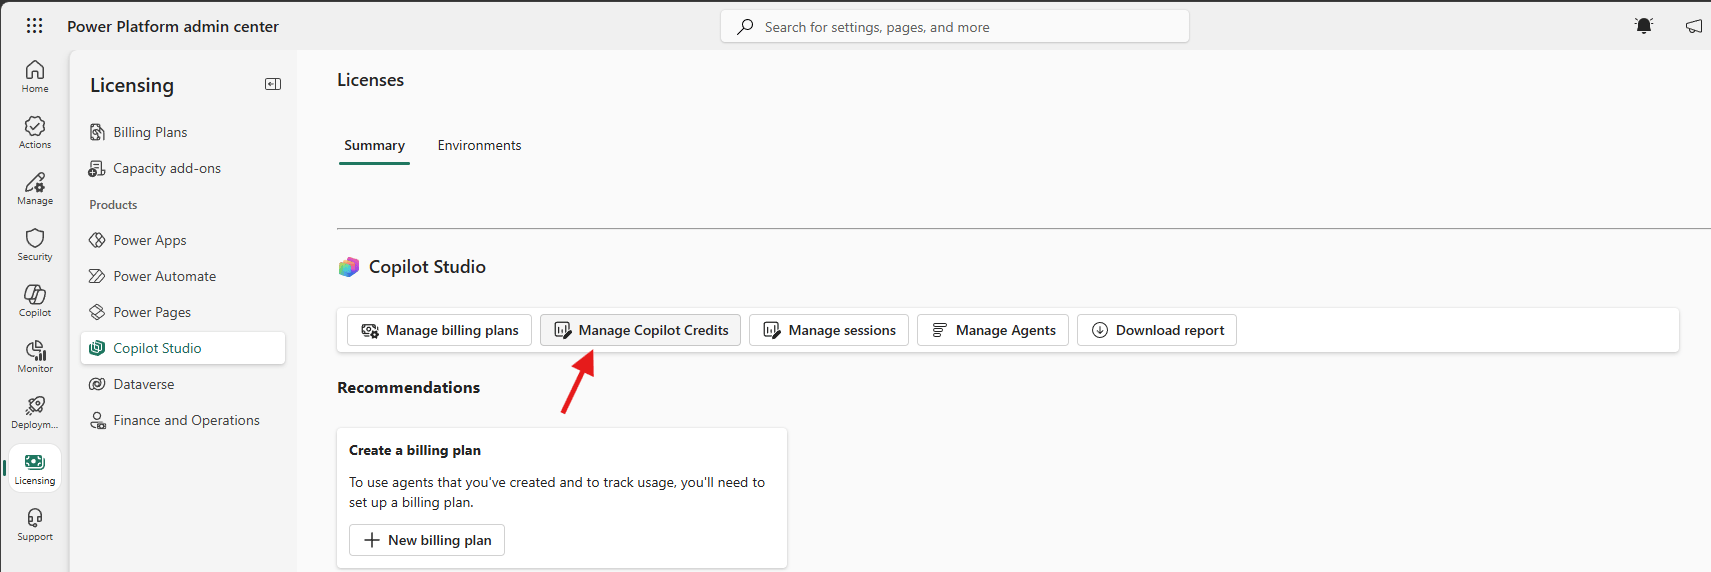
- Open the Power Platform admin center and go to ‘Licensing’ > ‘Copilot Studio’.
- Click ‘Manage Copilot Credits’ and select the environment. We use ‘Pedda Dev’.
- Note the ‘Copilot Credits’ allocated and the ‘Capacity overages’ options.
- In our case, 0 credits are allocated and both overage options are off. All the controls can be edited.

Now we have a “before” picture of the environment from PPAC. Lets head over to MAC.
Open Cost management in MAC
- Open the Microsoft 365 admin center and go to ‘Copilot’ > ‘Cost management’.
- Select the ‘Configuration’ tab. It lists the existing spending policies.
- Click ‘Add spending policy’.

Pick the environment
- Give the policy a name. We use ‘DemoSpendingPolicy’.
- Under ‘Policy scope’, select ‘Resources’ > ‘Resource collection’ > ‘Specific environments’.
- Search for the environment and select it.

Important: Don’t select ‘All environments’ for a first try. It moves every environment in the tenant to MAC, including new ones.
- Click ‘Next’. MAC lists the agents and services in the environment.
- Note the message at the top. Agents you add to the environment later are added to this policy too.

The policy now knows which environment it covers. Next lets set how much it can spend.
Set limits and alerts
This is where MAC feels most different from PPAC. There is no “allocate credits” box. You set a monthly limit instead.
- Under ‘Set the monthly spending limit for this policy’, select ‘Limit monthly spending’ and enter a value.
- When the limit is reached, the agents stop until the credits reset on the 1st of next month.
- We leave ‘Select monthly budget limits for agents’ as ‘No limit’. You can set a limit per agent here if needed.

Key Concept: The limit is a cap, not a charge. Credits are used only when agents do billable work.
- Turn on ‘Define alerts’ and add the people who should get emails.
- Set the threshold. We use 80% of the limit, which is about 4,000 credits.

Choose the billing method
- MAC shows the default billing method, which is an Azure subscription.
- It also shows how many prepaid credits are available. Prepaid credits are used first, then pay-as-you-go.
- We keep the default. Click ‘Change’ if you want a different subscription for this policy.

Everything is set. Lets review and create the policy.
Review and create the policy
- Review the settings and click ‘Create spending policy’.

- The new policy appears on the ‘Configuration’ tab as ‘Enabled’.

Note: A new policy can take up to 12 minutes to apply.
Now we have the policy created. Lets go back to PPAC and see what changed.
Verify the change in PPAC
- In PPAC, go to ‘Licensing’ > ‘Copilot Studio’ > ‘Manage Copilot Credits’ and select the same environment.
- A message now says the environment’s credits are managed by a spending policy in the Microsoft 365 admin center.
- It also says capacity allocations and linked billing plans in PPAC don’t apply.
- The allocation and overage controls are greyed out.

How do you move the environment back to PPAC?
- Edit the Billing Policy and remove the environment, or delete the Billing Policy.
- PPAC takes over again on its own.
Summary
- Moving Copilot Studio credits to MAC is opt-in.
- PPAC sets aside credits for each environment. MAC uses a shared pool with a monthly limit and alerts.
- Once a policy covers an environment, MAC wins over PPAC. PPAC shows a message and greys out its controls.
- Removing the environment from the policy returns it to PPAC.
Useful links:
- Manage Copilot Studio costs in the Microsoft 365 admin center
- Set up usage-based billing for Copilot Credits
- Manage Copilot Credits and capacity in PPAC
🙂

Leave a Reply