In this post we build a small MCP App on a Power Apps model-driven app (MDA). The app exposes one custom tool that generates a 5-color palette, with an HTML widget that shows the colors as swatches inside Microsoft 365 Copilot chat.
Why App MCP?
Say we want to interact with our Power Platform data from inside Microsoft 365 Copilot chat. Without App MCP, a standard tool response is limited to text and structured data, so Copilot just prints it as a table or paragraph. With App MCP, the same tool can include an HTML widget that renders the data as a real UI (grid, form, chart, swatches, anything) inside the chat.
Scenario:
- I pick a color palette generator to keep the scenario small and to focus on the tool + widget contract.
Prerequisites
- A Power Platform environment in the same tenant as our Microsoft 365 Copilot. Cross tenant calls fail with auth errors.
- A Microsoft 365 Copilot license.
- Permission to upload custom apps in Microsoft Teams.
Build the App
Now that the prerequisites are in place, lets walk through the build. We will create an empty MDA, enable App MCP, add the custom tool, paste the widget, and download the package.
Create the model-driven app
Lets start by creating an empty model-driven app in Power Apps.
- Go to Power Apps, select the environment you want, and then open the desired model-driven app.
- Add at least one item to the sitemap. Any Dataverse table works. Accounts is fine.
- Note: Power Apps does not let us publish an MDA with an empty sitemap, even though the MCP App tool we are about to build never touches Dataverse.
- Select the App MCP icon on the left navigation bar, and then select Set up MCP.

- This generates the MCP server for our app and registers the built-in tools (
create_record,view_record,edit_record,view_data). The agent card with the Download app package button should appear.

Create the custom tool:
- Under Tools in the App MCP pane, click Create custom tool. Fill in the fields below.
| Field | Value |
|---|---|
| Tool name | color_palette_generator |
| Tool description | Generates a 5-color design palette for a given theme, mood, brand, scene, season, room, or product. Returns named colors with hex codes and roles (background, primary, accent, text, highlight) for visual rendering as swatches. Use whenever the user asks for a color palette, color scheme, color ideas, color inspiration, or colors for any theme or vibe. |
| Model | GPT-4.1 mini |
Key Concept: The Microsoft 365 Copilot orchestrator picks tools based on the name + description. Copilot uses these to decide when to call the tool. Vague descriptions cause Copilot to answer from its own knowledge without invoking the tool.

- In the Instructions editor, type
/to add an input. Name itThemeDescription, typeText, with a short description. Then paste the prompt body. It references the input and constrains the output to a strict JSON shape.
You are a color palette designer. Generate a cohesive 5-color palette inspired by the following theme:Theme: /ThemeDescriptionRules:- Return EXACTLY 5 colors.- Each color must have these three fields and nothing else: "name", "hex", "role".- "name" is a short evocative color name (1-2 words).- "hex" is a valid 6-digit hex code starting with '#'.- "role" MUST be one of EXACTLY these values: "background", "primary", "accent", "text", "highlight".- Use each role exactly once across the 5 colors.Respond ONLY with a JSON object in this exact shape, no prose, no markdown fences:{ "theme": "<echo the user's theme description here>", "colors": [ { "name": "...", "hex": "#XXXXXX", "role": "background" }, { "name": "...", "hex": "#XXXXXX", "role": "primary" }, { "name": "...", "hex": "#XXXXXX", "role": "accent" }, { "name": "...", "hex": "#XXXXXX", "role": "text" }, { "name": "...", "hex": "#XXXXXX", "role": "highlight" } ]}

- Click Test and confirm the model returns clean JSON with exactly 5 colors and all 5 roles.
Add the HTML widget
- Click Next to advance to Step 2 of 2: Add your own UI code (optional). This is where the widget HTML goes.
- Paste the widget below. It is a single self-contained file that loads the MCP Apps SDK and Fluent UI from CDN.
<html lang="en"> <head> <meta charset="UTF-8" /> <meta name="viewport" content="width=device-width, initial-scale=1.0" /> <title>Color Palette</title> <script src="https://unpkg.com/@fluentui/web-components@beta/dist/web-components.min.js"></script> <style> :root { color-scheme: light dark; --bg: var(--colorNeutralBackground1, #ffffff); --bg2: var(--colorNeutralBackground2, #f5f5f5); --fg: var(--colorNeutralForeground1, #1f1f1f); --fg2: var(--colorNeutralForeground2, #555555); --stroke: var(--colorNeutralStroke1, #d1d1d1); } body { margin: 0; padding: 12px; font-family: "Segoe UI", system-ui, sans-serif; background: var(--bg); color: var(--fg); } .card { border: 1px solid var(--stroke); border-radius: 8px; padding: 12px; background: var(--bg2); } h2 { margin: 0 0 4px 0; font-size: 14px; font-weight: 600; } .theme-label { color: var(--fg2); font-size: 12px; margin-bottom: 12px; } .swatches { display: grid; grid-template-columns: repeat(5, 1fr); gap: 8px; margin-bottom: 12px; } .swatch { border: 1px solid var(--stroke); border-radius: 6px; overflow: hidden; font-size: 11px; } .swatch .chip { height: 56px; } .swatch .meta { padding: 6px 8px; background: var(--bg); color: var(--fg); } .swatch .name { font-weight: 600; display: block; } .swatch .role { color: var(--fg2); text-transform: uppercase; font-size: 10px; } .swatch .hex { font-family: ui-monospace, Consolas, monospace; color: var(--fg2); } .controls { display: flex; gap: 8px; align-items: center; } .controls fluent-text-input { flex: 1; } .status { margin-top: 8px; font-size: 11px; color: var(--fg2); min-height: 14px; } .error { color: var(--colorStatusDangerForeground1, #c4314b); } </style> </head> <body> <div class="card"> <h2>Color palette</h2> <div class="theme-label" id="themeLabel">Waiting for Copilot to invoke the tool…</div> <div class="swatches" id="swatches"></div> <div class="controls"> <fluent-text-input id="themeInput" placeholder="Try another theme (e.g., cozy winter cabin)"></fluent-text-input> <fluent-button id="regenBtn" appearance="accent">Regenerate</fluent-button> </div> <div class="status" id="status"></div> </div> <script type="module"> import { App } from "https://cdn.jsdelivr.net/npm/@modelcontextprotocol/ext-apps/+esm"; const $themeLabel = document.getElementById("themeLabel"); const $swatches = document.getElementById("swatches"); const $input = document.getElementById("themeInput"); const $regen = document.getElementById("regenBtn"); const $status = document.getElementById("status"); function render(data) { if (!data || !Array.isArray(data.colors)) { $themeLabel.textContent = "No palette data received."; $swatches.innerHTML = ""; return; } $themeLabel.textContent = `Theme: ${data.theme ?? "(unspecified)"}`; $swatches.innerHTML = data.colors.map((c) => ` <div class="swatch" title="${c.name} (${c.role})"> <div class="chip" style="background:${c.hex}"></div> <div class="meta"> <span class="name">${c.name}</span> <span class="role">${c.role}</span><br/> <span class="hex">${c.hex}</span> </div> </div>`).join(""); } function setStatus(msg, isError = false) { $status.textContent = msg ?? ""; $status.classList.toggle("error", !!isError); } // Gotcha #1: appInfo (name + version) is REQUIRED. const app = new App({ name: "Color Palette Widget", version: "1.0.0" }); // Flow 1: Copilot orchestrator invoked the tool; host delivers JSON here. // Gotcha #2: tool data lives at result.structuredContent (NOT result.data). app.ontoolresult = (result) => { if (result?.isError) return setStatus("Tool returned an error.", true); render(result?.structuredContent); setStatus("Rendered from Copilot invocation."); }; app.onhostcontextchanged = (ctx) => { if (ctx?.theme) document.documentElement.dataset.theme = ctx.theme; }; // Gotcha #3: register every on* handler BEFORE calling connect(). await app.connect(); const ctx = app.getHostContext(); if (ctx?.theme) document.documentElement.dataset.theme = ctx.theme; // Flow 2: Widget calls the tool itself with a parameter. $regen.addEventListener("click", async () => { const ThemeDescription = ($input.value || "").trim(); if (!ThemeDescription) return setStatus("Type a theme first.", true); setStatus(`Calling tool with ThemeDescription="${ThemeDescription}"…`); try { const result = await app.callServerTool({ name: "color_palette_generator", arguments: { ThemeDescription }, }); if (result?.isError) return setStatus("Tool returned an error.", true); render(result?.structuredContent); setStatus(`Rendered from widget call. ThemeDescription="${ThemeDescription}"`); } catch (err) { setStatus(`callServerTool failed: ${err?.message ?? err}`, true); } }); </script> </body></html>

- Click Save. The tool now appears under Custom tools with its description.

Publish and download the app package
- Save and Publish the MDA.
- The Download app package button stays disabled until publish completes. Then in the App MCP pane, click Download app package.
- This is a standard Microsoft 365 declarative agent package. It contains the manifest, the agent definition, and a reference to the MCP server hosted automatically by Power Platform.

Deploy and Test
Now we have the app package zip. Lets sideload it to Teams and test the agent in M365 Copilot.
- Open Microsoft Teams, click Apps in the left rail, then Manage your apps at the bottom.

- Click Upload an app, then Upload a custom app, and select the downloaded zip.

- After upload, Teams shows the agent in our list. Click Add to install it for ourselves.


- Open Microsoft 365 Copilot and pick the agent from the Agents list. The agent name should appear in the chat header.

- Click to open the App
- Enable debug mode so the tool invocations become visible in each response.
-developer on
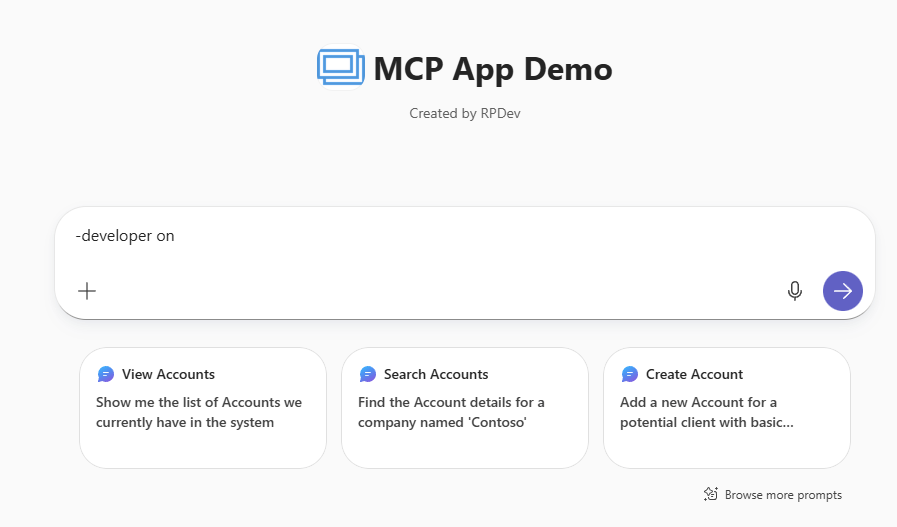
- Hit enter
- Now send the actual prompt:
Generate a color palette for a calm beach at sunset.

- The widget renders inline with 5 swatches, a text input, and a Regenerate button. The status line at the bottom of the card reads “Rendered from Copilot invocation.” This confirms the first flow worked. Copilot called our tool and the widget rendered the result.

- Open the Agent debug info panel on the same response to verify the orchestrator picked the right tool and extracted the right arguments. Look for the
MatchedandSelectedbadges under the action card.

Summary
We created an empty MDA, enabled App MCP, added one custom tool with a JSON output schema, pasted an HTML widget, downloaded the declarative agent package, sideloaded it to Teams, and saw the widget render inside M365 Copilot. The widget pattern is intentionally small so the data flow is visible. One tool, one widget, two ways the same ThemeDescription parameter reaches the tool.
For more details:
- Enable your app and custom tools in Microsoft 365 Copilot
- Generate MCP App widgets with AI code generation tools
🙂


Leave a Reply