Copilot Managed Runtime is a Microsoft-hosted service for building business apps that comply with your organization’s governance.
Consider a scenario : You have an idea for an app that reads business data and presents it in a UI. Building App is easy with the advent of AI assisted coding. The concern is governance, like, who can open the app, which data it can access, and how to prevent data loss.
Copilot Managed Runtime addresses this concern:
- You build the app, and Microsoft hosts it.
- The app inherits your organization’s IT policies automatically.
- These policies include Microsoft Entra authentication, Data loss prevention (DLP) and sharing limits.
- Each app also appears in the Microsoft 365 admin center, where admins track usage, monitor health, and manage its lifecycle.
There are three ways to create a Managed App.
- Copilot Cowork, for business users who describe an app in chat.
- Microsoft Copilot Studio, for makers who want more control over the build.
- Develop with the Copilot Managed Runtime SDK and CLI, for a code-first workflow.
In this post we use the SDK and the CLI option. We will build a React app using Dataverse connector.
Prerequisites
Make sure you have the following ready.
- Node.js, Git, and npm installed.
- Visual Studio Code or any code editor
- Access to a Power Platform environment with Dataverse and some account records.
Lets start by installing the command line tool.
Install the CLI and sign in
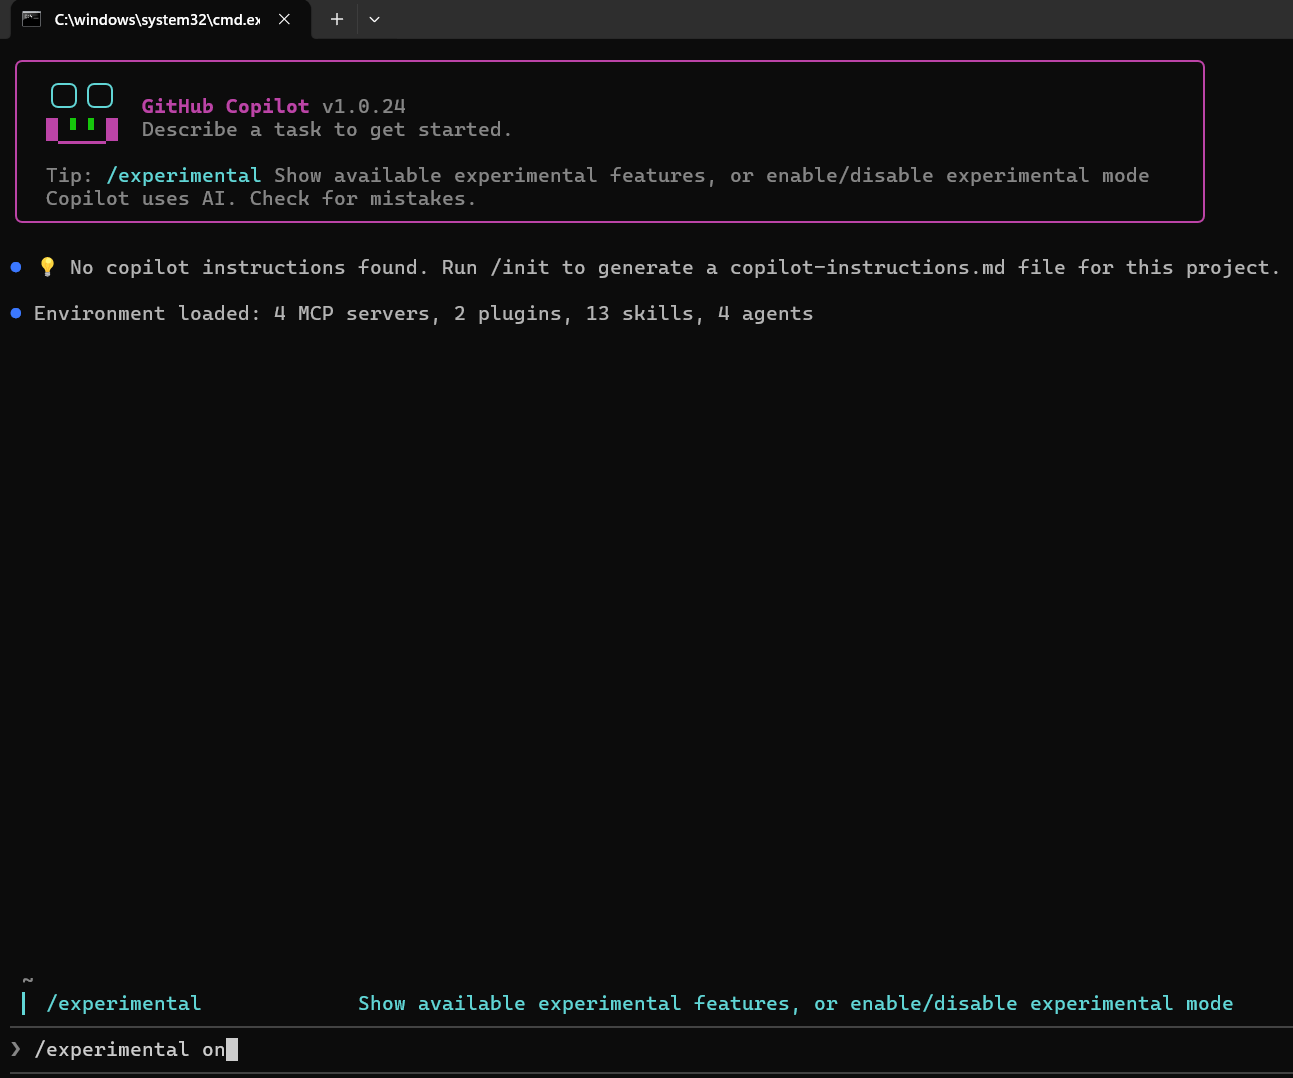
- The SDK ships a command line tool through the npm package
@microsoft/managed-apps-cli. - It installs a command named
ms. - Run following commands:
npm install -g @microsoft/managed-apps-clims --version

- Next authentication. This opens a browser for Entra authentication.
ms auth login

We are signed in. Next lets create the app.
Create and run the app locally
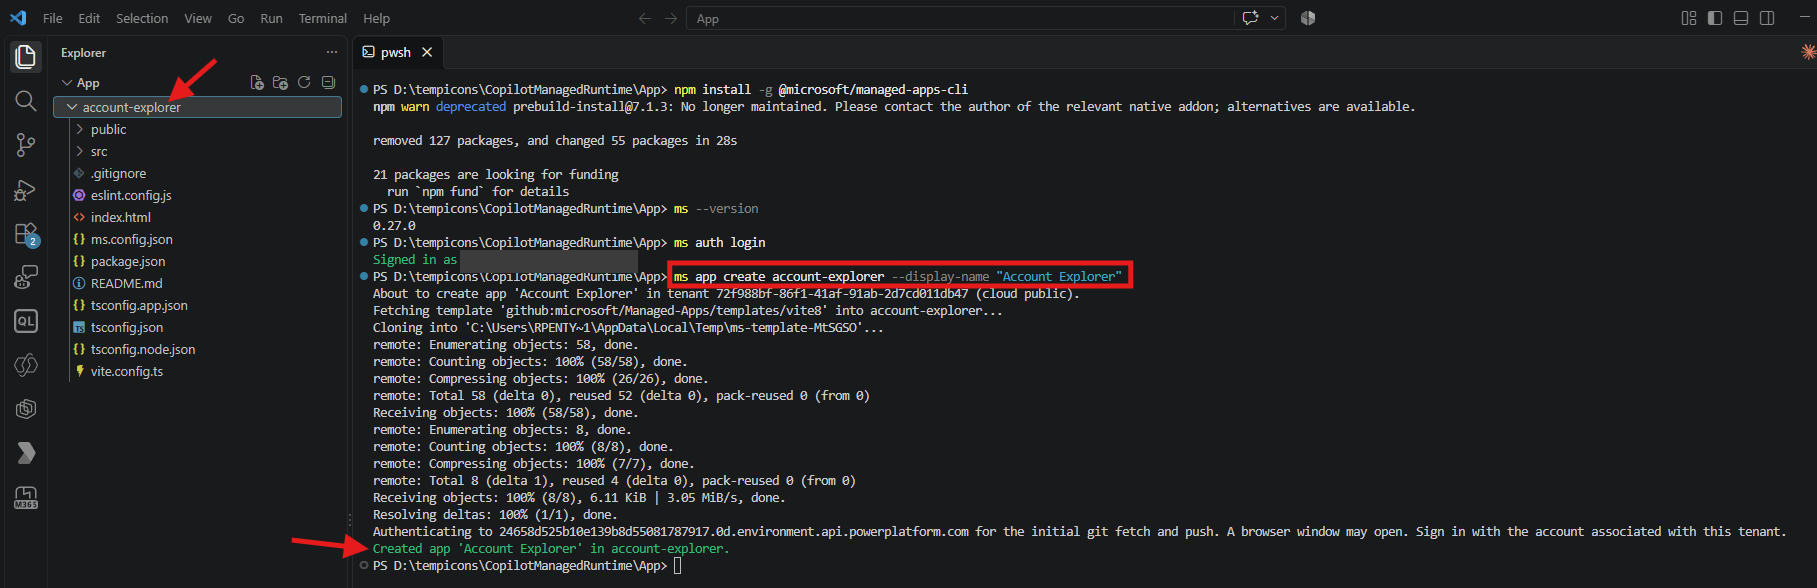
- Create the app with a display name by running following command:
ms app create account-explorer --display-name "Account Explorer"
- The CLI scaffolds a Vite template with React and TypeScript, plus a platform-managed Git repo.
- Next install dependencies:
cd account-explorernpm install

- You can run the app locally using following command:
ms app dev
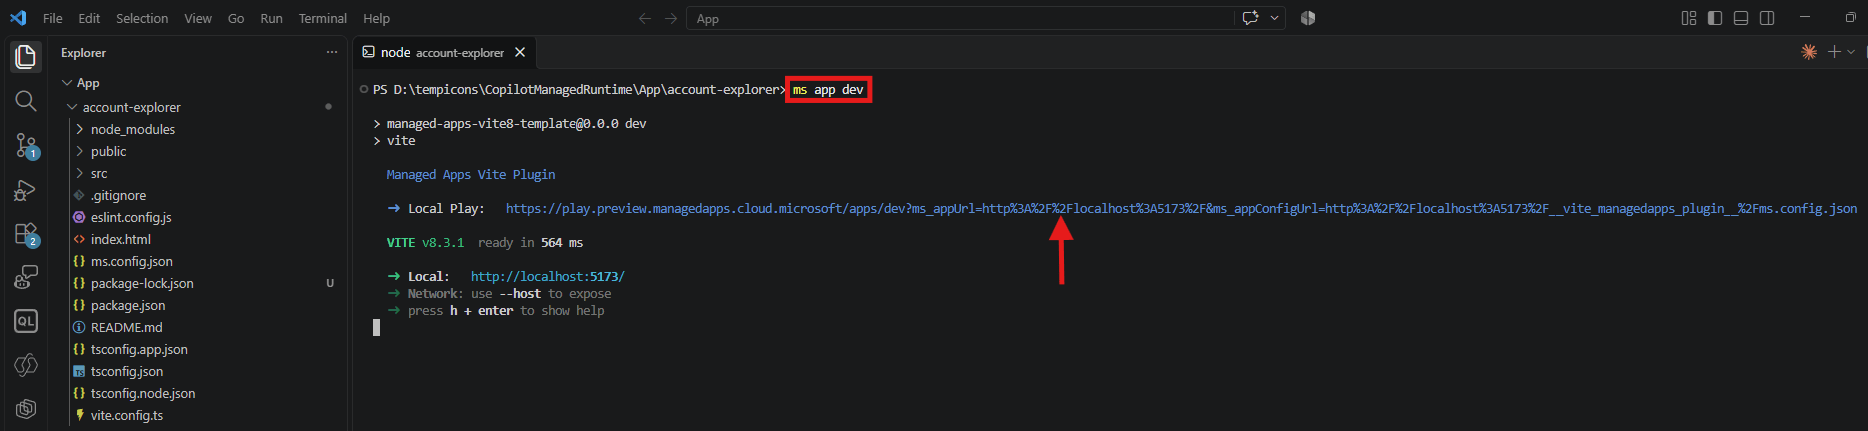
- Open the Local Play URL in a browser to see the starter page.

- I went ahead added a grid with mock data. Use any AI coding agents to make changed.

- Open the
ms.config.jsonfile. It contains the app identity and build settings.

Next, we will replace the mock grid data with real Dataverse data.
Add the Dataverse data source
- Add a data source using the Dataverse connector.
ms app add data-source --connector commondataserviceforapps
- The CLI asks you to pick or create a connection.
- When it asks “Connect this to a specific Dataverse table?”, choose Yes. For the table logical name, enter
account(singular).

- The CLI reports “Dataverse table binding added successfully” and writes a
generated/folder.
Note: The CLI skips some write actions if your org policy blocks

- Open the
ms.config.jsonfile. You will see connection reference for Dataverse and the account table binding.

- Now update the UI logic to replace the mock data with Dataverse Account table data.
- Open
src/App.tsxand replace the mock array with a call to the generatedAccountsService. AccountsServiceis a default export. Import it asimport AccountsService from '../generated/services/AccountsService'.- The row type is
AccountsModel.Accountswith fieldsnameandaccountid. ListRecordsreturns a result where rows live inresult.data.value.
- Open
- Once you done with code changes you can test the App.
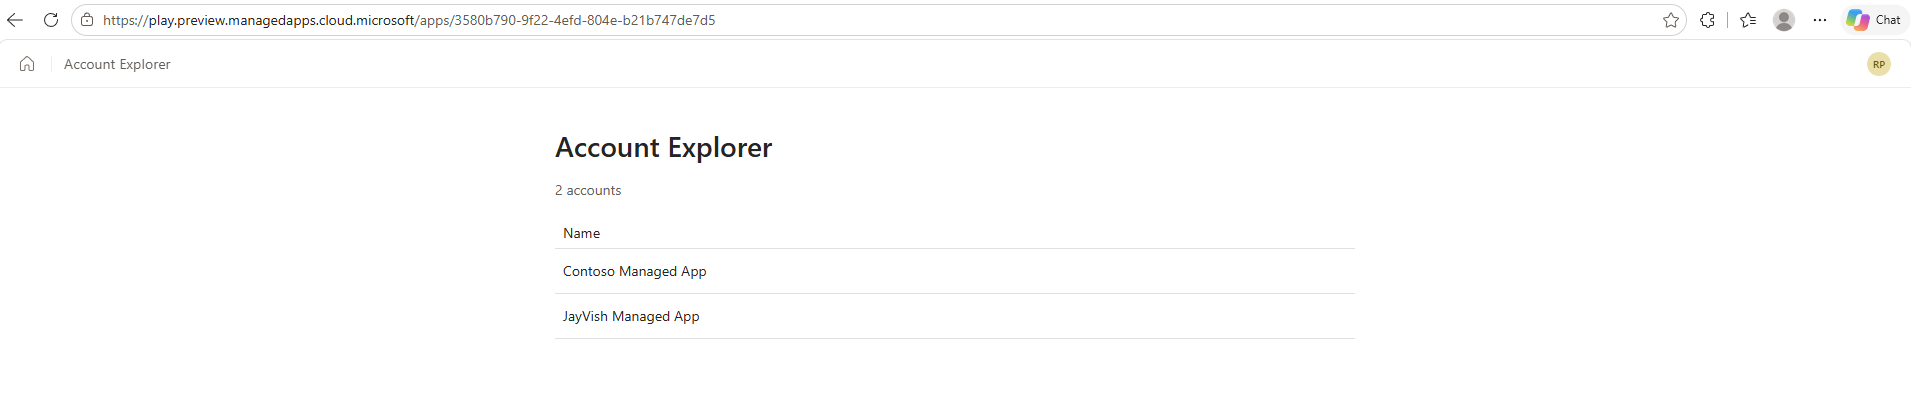
- In my Dataverse environment, I’ve 2 records

- Run the App locally and the table now shows the real accounts fetched from Dataverse.

The app works locally against live data. Now lets build and commit it.
Build and commit the code
- Run the build to confirm there are no type errors.
npm run build
- Next commit and push the code.
git add .git commit -m "Account Explorer with Dataverse accounts"git push
Important:
ms app deploybuilds from your committed code, not your local files. Commit and push before you deploy, or the live app shows old code.
The code is committed. Lets deploy it to the managed runtime.
Deploy and open the live app
- Deploy the app using ms app deploy command.
- The platform-managed Git repo builds from the committed
maincommit, promotes the build to live, and prints a Play URL.
ms app deploy
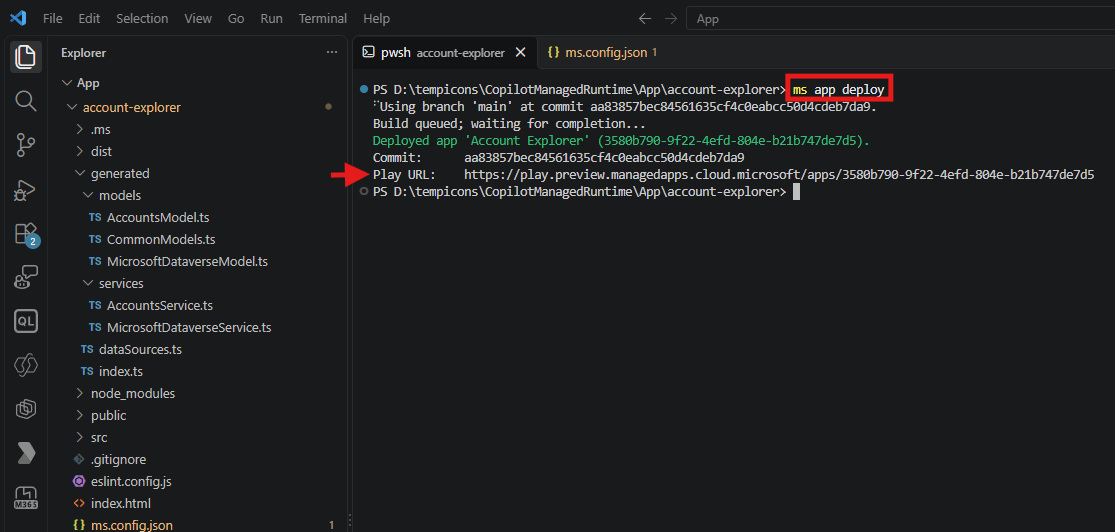
- Open the Play URL. The first open shows a one-time connection consent dialog. Approve it and sign in.

- After consent, the Account Explorer table renders real accounts from Dataverse.
Summary
We built a React app on the Copilot Managed Runtime using the code-first SDK. We created the app with the ms CLI and built a Fluent UI table. Then we added a Dataverse data source and deployed it as a governed, hosted app. The key idea is that the platform handles hosting, identity, and secure data access, so we only write the UI.
For more details, see the official docs.
🙂
Leave a Reply