In this article lets install the Dataverse CLI and execute few commands.
What is the Dataverse CLI?
Dataverse CLI is a command-line tool for Microsoft Dataverse with these capabilities:
- Manage authentication profiles (compatible with PAC CLI profiles).
- Run environment, data, and API operations against Dataverse and Finance & Operations.
- Start an MCP server so tools like Claude Desktop, Cursor, and VS Code Copilot can talk to your environment.
Why Dataverse CLI (and how is it different from PAC CLI)?
Until now, PAC CLI was the only CLI for scripting Dataverse tasks. Dataverse CLI is not a replacement. It focuses on Dataverse and Finance & Operations, adds record-level data commands, and ships an MCP server for AI clients.
Dataverse CLI powers the Microsoft Dataverse Skills for GitHub Copilot, Claude Code, Cursor, and Codex. The
dv-connectskill installs@microsoft/dataverseand uses it as the MCP proxy and for scripted data actions.
Lets get started with the prerequisites. I am on a Windows machine, so terminal steps may look different on macOS or Linux.
Prerequisites
We need the following before we begin.
Tooling and permissions
- Node.js 18 or later, and npm.
- A Power Platform environment where you are a System Administrator.
- Tenant admin permissions to grant consent for the CLI app.
- Azure CLI (
az)
Before we install the CLI, lets provision a Service Principal (SP) that the CLI needs later during sign in.
Provision the Microsoft Dynamics ERP service principal
The Dataverse CLI requests permissions for both Dataverse and Microsoft Dynamics ERP. On a fresh developer tenant, the Dynamics ERP service principal (SP) does not exist yet. Create the SP using below steps:
- Ensure you have az installed. If not install from here.
- Open PowerShell terminal
- Login to Azure using:
az login --tenant <tenantId> --allow-no-subscriptions

- Execute following create SP command:
az ad sp create --id 00000015-0000-0000-c000-000000000000

Now the prerequisites are in place. Lets install the CLI.
Install the CLI
- Open Command Prompt
- Execute following command:
npm install -g @microsoft/dataverse
- To ensure the CLI installed, execute:
dataverse

The CLI is installed. Before we authenticate, lets check what options dataverse auth create supports.
Authenticate using CLI:
- We use the device code flow
dataverse auth create --environment https://<yourorg>.crm.dynamics.com --tenant <tenantId> --name dev --deviceCode

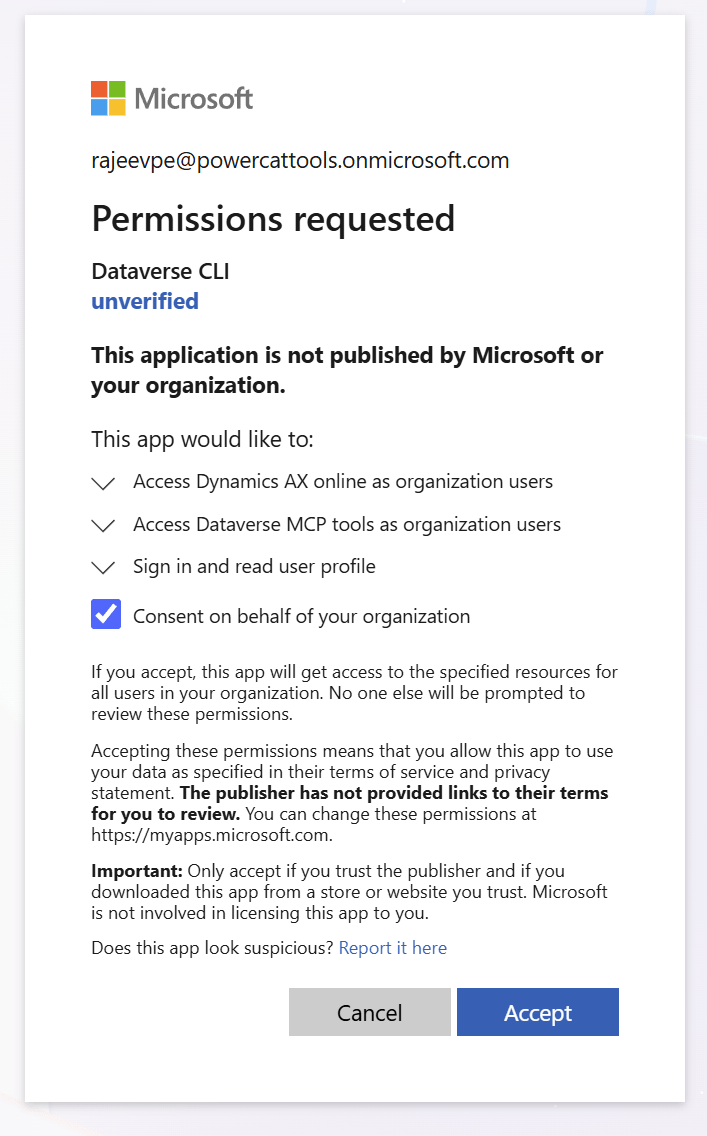
- Open the URL in an InPrivate browser, enter the code, and sign in with your tenant admin account. The consent screen shows the requested permissions.
- Keep the Consent on behalf of your organization checkbox ticked and click Accept. This grants tenant-wide admin consent in one step.
- Back in the terminal, the CLI validates the connection and prints the profile details.

The authentication profile is ready. Next we enable the MCP feature on the target environment and add the CLI to the allowed clients list.
Enable Dataverse MCP on the environment
- Go to Power Platform admin center. Select Manage > Environments.
- Select the Environment Name where you want to turn on the Dataverse MCP server, and then select Settings.

- Under Settings, select Product > Features. Scroll down to locate Dataverse Model Context Protocol and make sure Allow MCP clients to interact with Dataverse MCP server is turned on.
- Select Advanced Settings.

- Add a new or open existing Allowed MCP Client record. Set Name to
Dataverse MCP CLI tool, Application Id to0c412cc3-0dd6-449b-987f-05b053db9457, and Is Enabled toYes. Save.

The environment is now ready for the CLI. Lets verify the connection.
Verify the connection
- Run the command in the terminal:
dataverse auth who

- The profile info matches what we set up. Time to run some queries.
Query data using OData select and filter
The CLI supports OData style queries with --table, --select, and --filter.
dataverse data query --help

- Lets fetch users whose
fullnamecontains “rajeev”:--tableuses the plural EntitySet name (systemusers,accounts). ODatacontains()is case-insensitive.
dataverse data query --table systemusers --select "fullname,internalemailaddress,systemuserid" --filter "contains(fullname,'rajeev')" --top 10

Query data using FetchXML
- Lets try a FetchXML example for the same scenario, users whose
fullnamecontains “rajeev”- FetchXML uses the singular logical name (
systemuser)
- FetchXML uses the singular logical name (
dataverse data query --fetchxml "<fetch top='10'><entity name='systemuser'><attribute name='fullname'/><attribute name='internalemailaddress'/><filter><condition attribute='fullname' operator='like' value='%rajeev%'/></filter></entity></fetch>"

Common errors and fixes:
I have encountered following errors
WAM broker error on dataverse auth create
- If you run
dataverse auth createwithout--deviceCodeon Windows, MSAL tries to use the Web Account Manager broker. I gotWAM_provider_error_3399614468withIncorrectConfiguration.

AADSTS650052: Microsoft Dynamics ERP service principal missing
- If you skipped the prerequisite
az ad sp createstep, the device code sign in fails withAADSTS650052. - The message says the app is trying to access Microsoft Dynamics ERP (
00000015-0000-0000-c000-000000000000) and your tenant lacks a service principal for it.
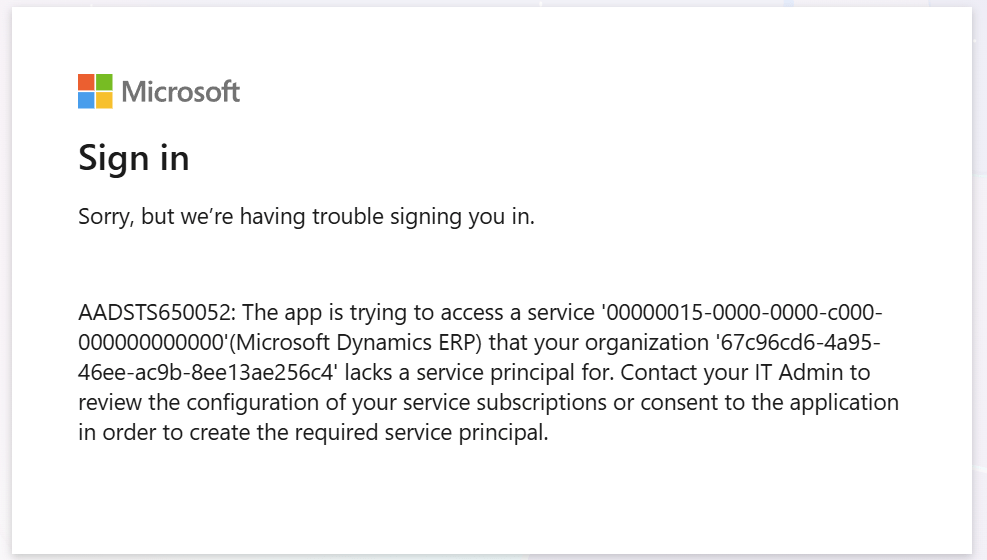
- Fix : run the two
azcommands from the Prerequisites section, then retrydataverse auth create.
Summary
We installed the @microsoft/dataverse npm package and used the device code flow to grant tenant consent in one step. We enabled Dataverse MCP on the environment and added the CLI to the allowed clients list. Finally we ran OData and FetchXML queries against the connected environment.
Reference:
- npm package: https://www.npmjs.com/package/@microsoft/dataverse
- Microsoft Learn: https://learn.microsoft.com/power-apps/maker/data-platform/data-platform-mcp-other-clients
🙂


Leave a Reply