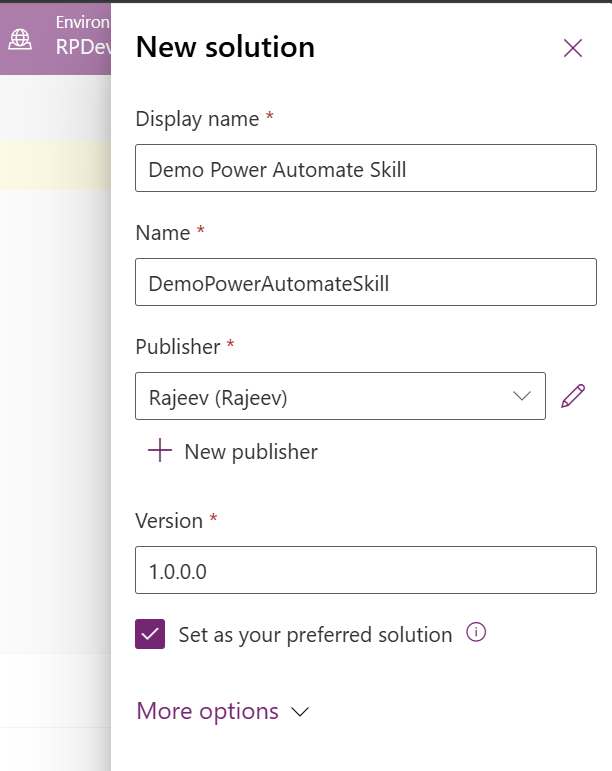
In this article, let’s learn how to set up and use Power Shield — a governance feature in the Copilot Studio Kit that enables organizations to manage Power Platform connector access through a structured, approval-based workflow for Data Loss Prevention (DLP) policies.
What is Power Shield?
- Power Shield is part of the Copilot Studio Kit by Microsoft CAT team.
- It allows Makers to request connector access through a self-service wizard.
- Admins review, approve, and manage those requests.
- Once approved, Power Shield automatically creates a scoped DLP policy — ensuring governance compliance and auditability.
Why Power Shield?
Let me explain with a simple use case.
Without Power Shield:
- David is a Maker in a large organization. He needs the Work IQ Copilot MCP connector for a POC. But he doesn’t know who the Power Platform administrator is. He spends time searching for the right contact, sending emails, and waiting for a response — just to get one connector enabled.
- Mary is an Admin. She receives David’s request over email. To grant access, she has to manually sign in to the Power Platform Admin Center, create a new DLP Policy, select the environments, add the connector to the Business data group, and save. For every request, she repeats this manual process.
With Power Shield:
- David simply opens the Copilot Studio Kit for Makers app, clicks + New Request, selects his environment and the connector he needs, provides a justification, and submits. Done in minutes.
- Mary receives a notification, opens the Copilot Studio Kit for Admins app, reviews David’s request, clicks Approve, and Power Shield automatically creates the scoped DLP policy. No manual steps in the Admin Center.
In short — Power Shield brings a self-service, auditable, and automated experience to connector governance.

The following are the high-level steps to configure and use Power Shield:
- Configure the Environment Variable (Tenant ID)
- Create Connections (HTTP with Microsoft Entra ID)
- Map Connections to Connection References in the Solution
- Enable and Run Cloud Flows (Sync Connectors)
- Configure Notification Settings (optional)
- Submit a Connector Access Request (Maker Workflow)
- Review and Approve the Request (Admin Workflow)
- Verify the DLP Policy in Power Platform Admin Center
Prerequisites:
Make sure the following are in place:
- Enable code apps on the Power Platform environment
- Copilot Studio Kit managed solution installed (version 20260430.1 or later).
- Security Roles: Users need either:
- CSK – Maker — for the Maker experience
- CSK – Administrator — for the Admin experience
- Power Platform Administrator role (for Admins) — assigned in the Microsoft 365 admin center. This is required to create DLP policies.
Good to know: By default, Power Shield follows a default-blocked model — only connectors published by Microsoft are enabled. All other (non-Microsoft) connectors are blocked. Admins can selectively unblock connectors via the Settings > Connector Configurations screen in the Admin app.
Configure the Environment Variable
Power Shield needs your Tenant ID to make API calls to the Power Platform governance endpoint.
- Open Power Apps and select your environment.
- Navigate to Solutions > Default Solution > Environment variables.
- Locate PowerShield Tenant ID (
cat_PowerShieldTenantID). - Enter your Tenant GUID in the Current Value field.
- Click Save.

Create Connections:
Power Shield cloud flows use two HTTP with Microsoft Entra ID (preauthorized) connections. You need to create them before the flows can be turned on.
Connection 1: PowerShield APIFlow
- In Power Apps, go to Connections > + New connection.
- Search for HTTP with Microsoft Entra ID and select the (preauthorized) variant.
- Enter the following values:
| Setting | Value |
|---|---|
| Base Resource URL | https://api.flow.microsoft.com |
| Microsoft Entra ID Resource URI | https://service.powerapps.com/ |
- Click Create and complete the sign-in prompt.

Connection 2: PowerShield BAPAPI
- Repeat the above steps with the following values:
| Setting | Value |
|---|---|
| Base Resource URL | https://api.bap.microsoft.com |
| Microsoft Entra ID Resource URI | https://api.bap.microsoft.com |
- Click Create and complete the sign-in prompt.

- Note: You must sign in with an account that has the Power Platform Administrator role for the BAPAPI connection.
- Once both connections are created, you should see them listed with Connected status:
Map Connections to Connection References
Now, associate the connections with the solution’s connection references.
- In Power Apps, go to Solutions > Default Solution.
- Filter by Type = Connection Reference.
- Select PowerShield APIFlow and set the Connection to the one with
https://api.flow.microsoft.com. - Click Save.

- Similarly, Select PowerShield BAPAPI and set the Connection to the one with
https://api.bap.microsoft.com. - Click Save.

- Also set the connections for Power Apps for Makers and Microsoft Dataverse, connection references.
Enable Cloud Flows
After connection references are configured, turn on the Power Shield cloud flows.
- In Power Apps, go to Solutions > Copilot Studio Kit > Cloud flows.
- Search for “Power” to filter the flows.
- Turn on the following three flows:
- PowerShield | Sync Connectors
- PowerShield | Sync Connector Actions
- PowerShield | DLP Request – Patch Custom Connector and Actions

Run the Sync Connectors Flow (First Time)
After enabling the flows, you need to run the Sync Connectors flow at least once to populate the connector catalog.
- Open the PowerShield | Sync Connectors flow.
- Click Run from the command bar.
- Wait for the flow to complete successfully.

- Verify: Open the PowerShield Connectors table — you should see hundreds of connector records.

- Repeat the same for PowerShield | Sync Connector Actions flow.
Launch Power Shield
Power Shield is accessible from Copilot Studio Kit MDA App, Copilot Studio Kit for Makers and Copilot Studio Kit for Admins code apps. For this example, I will be using code apps.
Maker App
- Open Copilot Studio Kit for Makers.
- Allow the app to access your data when prompted.

- In the left sidebar, under Governance, click Power Shield.

Create a Connector Access Request (Maker Workflow)
Now let’s walk through the Maker experience of creating a connector access request.
- On the Power Shield home screen, click + New Request.
The wizard has 4 steps: Team & Environments → Connectors → Justification → Review & Submit.
Step 1: Team & Environments
In this step, you create a Service Tree (your team/project group) and an Environment Container (the environments you need access to).

Create a Service Tree:
- Click + New Service Tree.
- Enter the Name, Organization, and Description.
- Add at least one Team Members by entering their alias and clicking + Add.

- You will see yourself as the Owner and the added members listed.
- Click Save & Continue.
Create an Environment Container
After saving the Service Tree, you will be prompted to create an Environment Container.
- Enter the Container name and Description.
- Select the environment(s) from the list using checkboxes.

- I selected the MSFT (default) environment.
- Click Save.

Select and Proceed
- You should now see your Service Tree and Environment Container selected.
- The environments in the container are displayed in the table below.
- Click Next →.

Step 2: Select Connectors
In this step, you select the connectors you want access to.

- Use the search bar and filters to find connectors.
- Non-Microsoft connectors marked as “Blocked by Admin” cannot be selected.
- Switch to the Available tab to see only connectors you can request.
Select Connectors
- I searched for “mcp” and selected Work IQ Copilot MCP and Work IQ Mail MCP.
- I also selected Asana from the list.

Configure Connector Actions (Optional)
- Click View Connector Actions on any connector to allow or block specific actions.
- For example, on Asana I allowed only Get project by ID, Get task by ID, and Get user by ID — and blocked everything else.

Add Custom Connector Patterns (Optional)
- Click + Add Custom Connectors to define URL patterns for custom connectors.
- I added
http://api.mydomain.comand clicked Save.

Confirm Selections
- Click Next → to see the confirmation dialog.
- It summarizes your Selected Connectors, Blocked Actions, and Custom Connector Patterns.
- Click Confirm & Continue.

Step 3: Business Justification
- Enter a Business justification (minimum 20 characters).
- Optionally upload a Supporting Document (PDF, DOCX, XLSX, PNG, or JPG — max 25 MB).
- Click Next →.

Step 4: Review & Submit
Review your request across three tabs — Scope, Details, and Collaboration.
- Scope shows environments, connectors (with action rules), and custom patterns.

- Click Submit Request ✓ and confirm.
- You will see a success notification: “Request REQ-00001000 submitted successfully.”

Admin Workflow: Review and Approve
Now let’s switch to the Admin App to review and approve the request.
- Open Copilot Studio Kit for Admins.
- Allow the app to access your data when prompted.

View the Request
- In the Admin app, under Power Shield, you will see the submitted request.

Assign to Me
- Click on the request to open the Policy Request Summary.
- Click Assign to Me to take ownership. The status changes to In Review.

- A confirmation dialog reminds you that the Power Platform Administrator role is required to approve and create DLP policies.
- Click Confirm.

Approve the Request
- After assignment, you will see the Approve and Reject buttons.

- Click Approve. The first step shows the DLP Policy Impact check.
- It confirms: “No existing DLP policies will be affected.” along with the environment and connector counts.
- Click Next →.

- In Step 2, enter a required Admin comment.
- Click Confirm Approve.

Request Approved
- The request status changes to In Progress with a success message: “Request approved. DLP policy created.”

Fulfillment Tab
- Once the process completes, the status changes to Completed.
- The Fulfillment tab shows the DLP Policy Name, Policy ID, and per-environment fulfillment status as Succeeded.

Verify the DLP Policy
Let’s verify that the DLP policy was actually created in the Power Platform Admin Center.
- From the Fulfillment tab click on the Request link.
- You will be redirected to the new DLP policy named with the request ID.
Prebuilt Connectors
- The 3 connectors (Work IQ Copilot MCP, Work IQ Mail MCP, Asana) are placed in the Business data group.

Connector Actions
- Click on the Asana connector > Configure connector > Connector actions.
- You can see that only the 3 actions I allowed (Get project by ID, Get task by ID, Get user by ID) are set to Yes. The rest are blocked.

Custom Connector Patterns
- Under Custom connectors, the URL pattern
http://api.mydomain.comis listed in the Business data group.

Environments
- Under Environments > Added to policy, the MSFT (default) environment is scoped to this policy.

Configure Notification Settings (Optional)
If you want email notifications for request submissions and approvals, configure the mailbox first.
Approve and Enable Mailbox
- Open the sender’s mailbox record in Dynamics 365.
- Click Approve Email and confirm.

- Click Test & Enable Mailbox and confirm.

Configure Notification Settings in Power Shield
- In the Admin App, go to Settings > Notification Settings.
- Enter the Sender Email Address (the mailbox you just enabled).
- Optionally add an Admin Distribution List and the PowerShield App URL.
- Check Enable email notifications.
- Click Save.

Summary
That’s it! You now know how to set up and use Power Shield to govern connector access in your Power Platform tenant.
Here’s a quick recap:
- Makers submit connector access requests through a guided wizard.
- Admins review, approve (or reject), and the DLP policy is created automatically.
- Every DLP policy change is traceable to a Power Shield request — ensuring governance and auditability.
- The feature supports granular control at the connector action level and custom connector URL patterns.
For more details, refer to the official Power Shield documentation.


Leave a Reply