In this blog post, I will explain how you can get started with Claude Code and build your first simple application.
Let’s start with the basics and prerequisites.
What is Claude Code:
- Claude Code is different from a normal AI chat application. In a chat app, you ask questions and get answers.
- But Claude Code works like an AI developer assistant inside your coding environment.

- Instead of only suggesting code, Claude Code can help you plan, create, and update multiple files to build complete features.
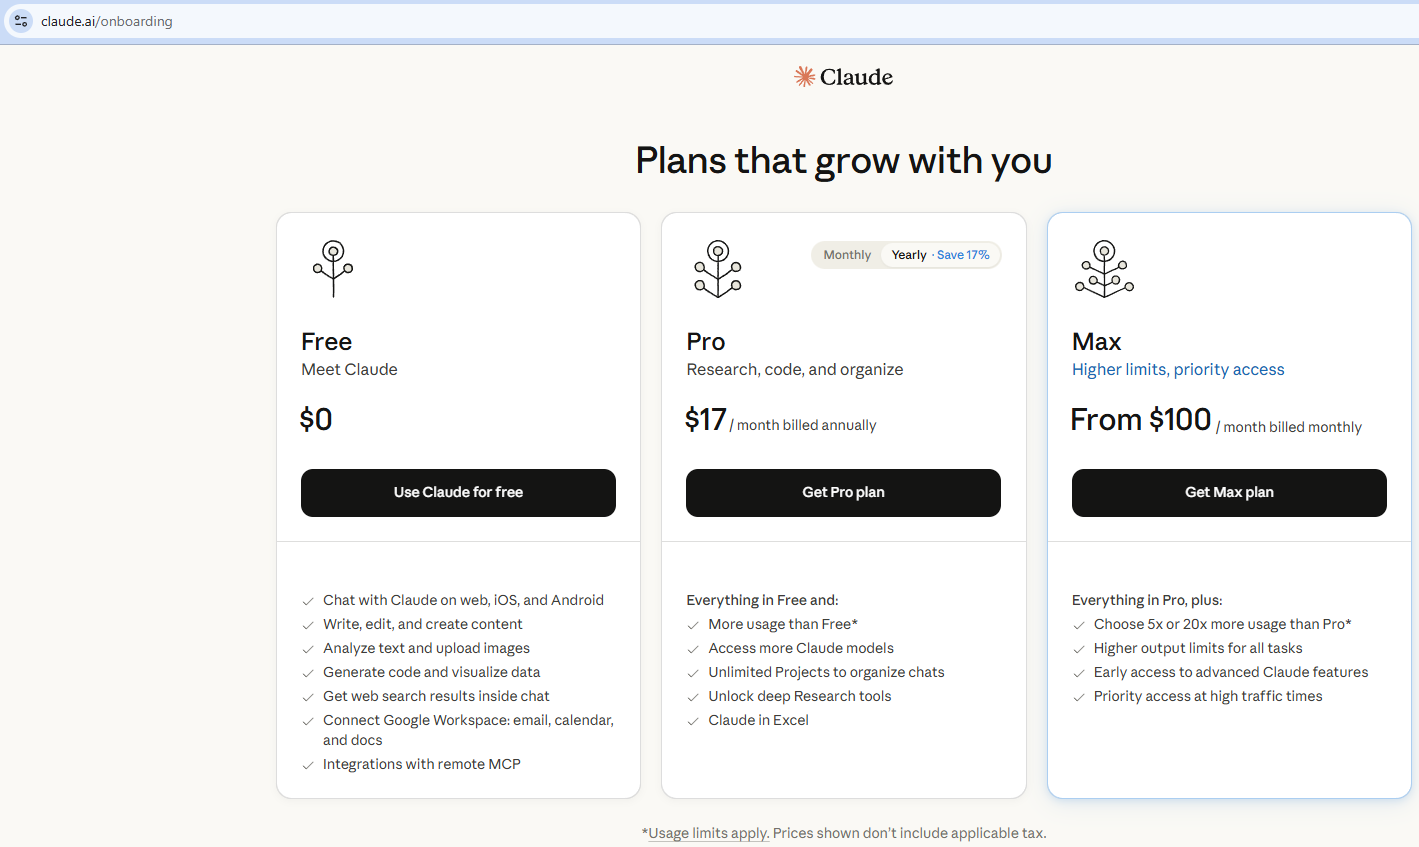
Create a Claude account:
- To get started, you first need a Claude account. Go to: https://claude.ai/onboarding
- Choose a plan, create your account.
Install Claude Code:
To install Claude Code on all platforms, refer to the official Installation Guide.
Since I am using Windows 11, I installed Claude Code using the following winget command:
winget install Anthropic.ClaudeCode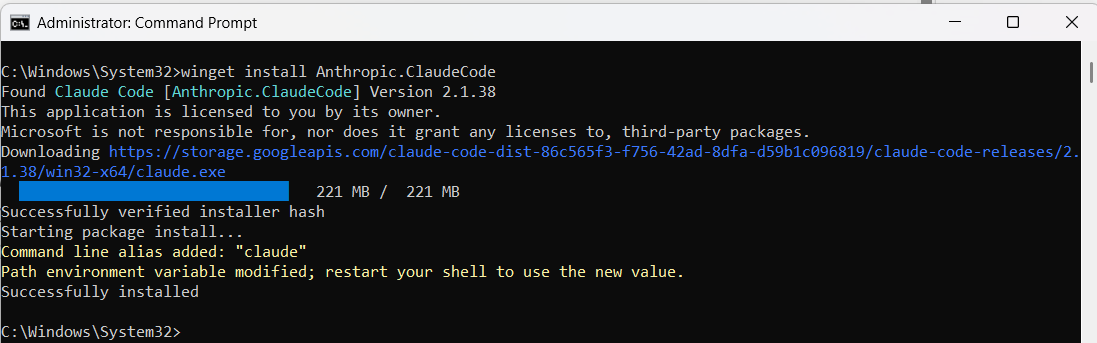
Once the installation is completed, Claude Code is installed on your machine.
Login to your Claude Account from ‘Claude Code’:
- Open Command Prompt and run:
Claude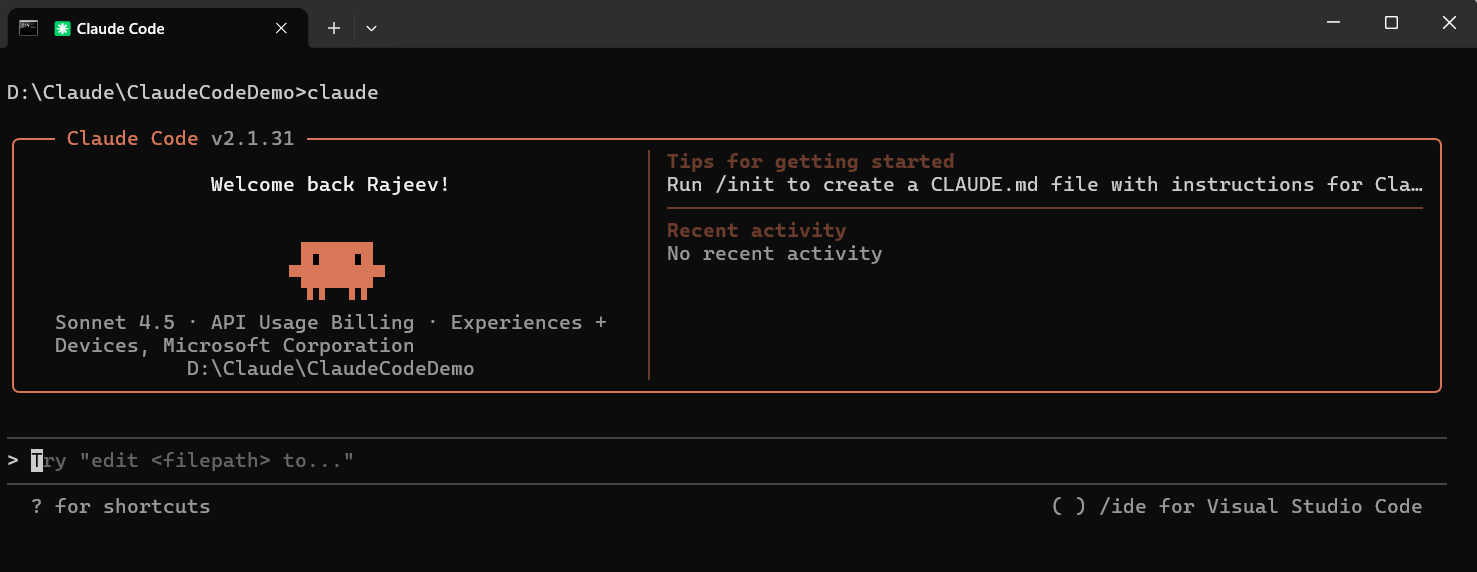
- If you have not logged in already, run the following command and complete the login process:
/login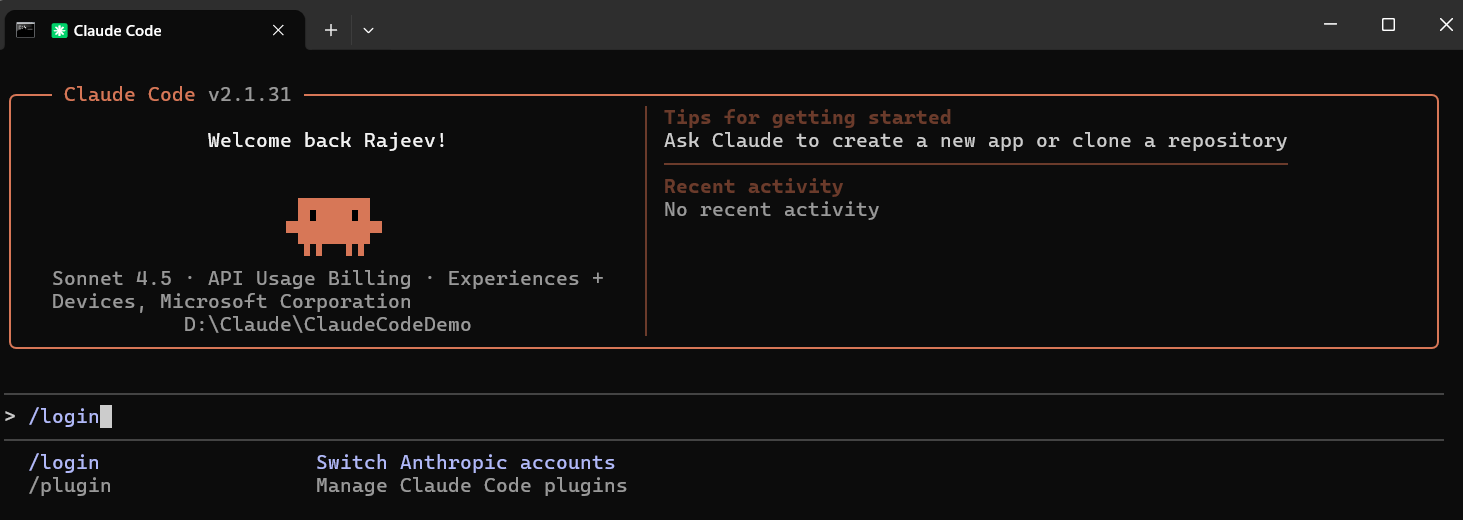
Next, we will install the Claude Code for VS Code extension. This extension provides a native graphical interface for Claude Code and integrates directly into the IDE. This is the recommended way to use Claude Code in VS Code.
Install Claude Code VS Code Extension:
- In VS Code, open the Extensions view, search for “Claude Code”, and click Install.

Now we are all set. Let’s proceed with creating our first application.
Design and build ‘To Do list’ application:
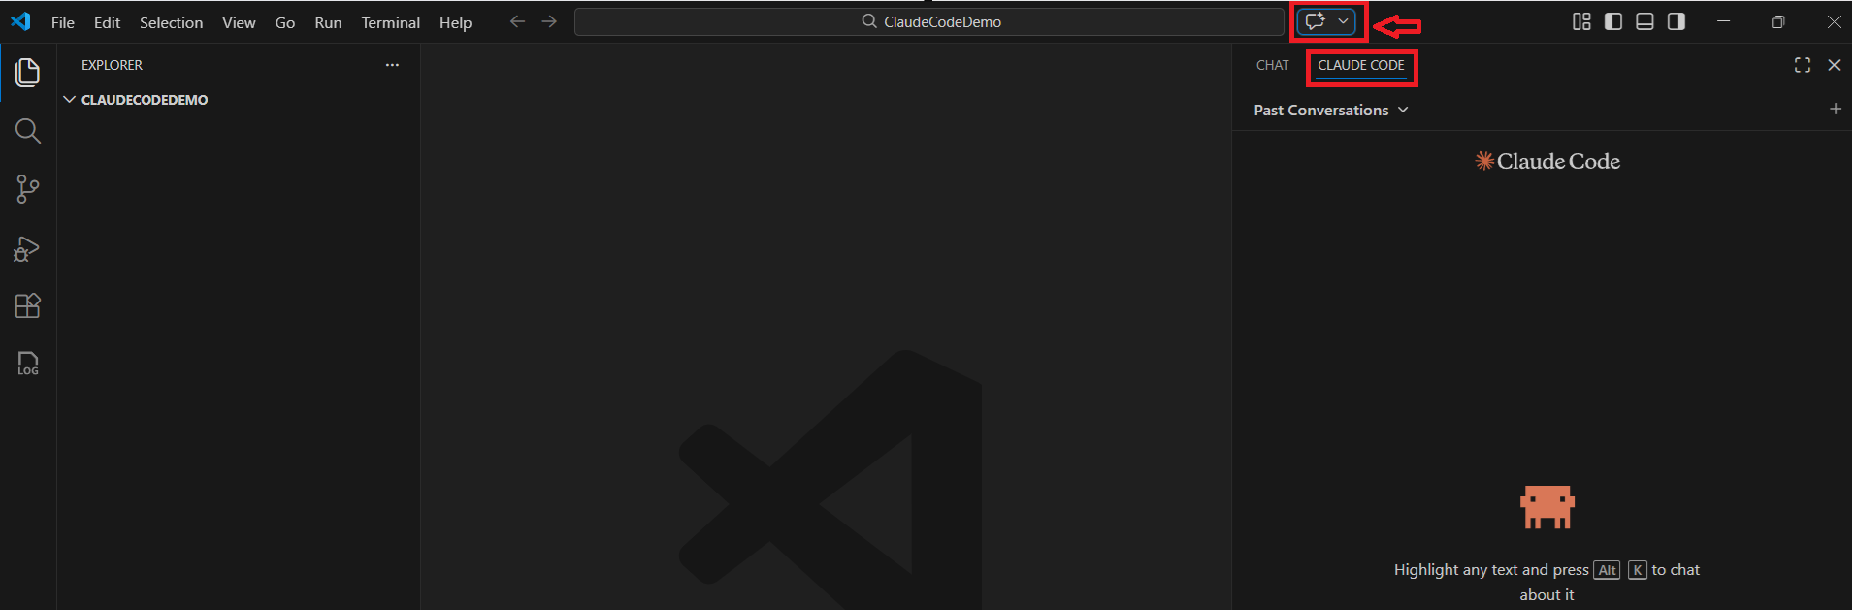
- In the VS Code, click on Chat icon and select CLAUDE CODE as shown below.
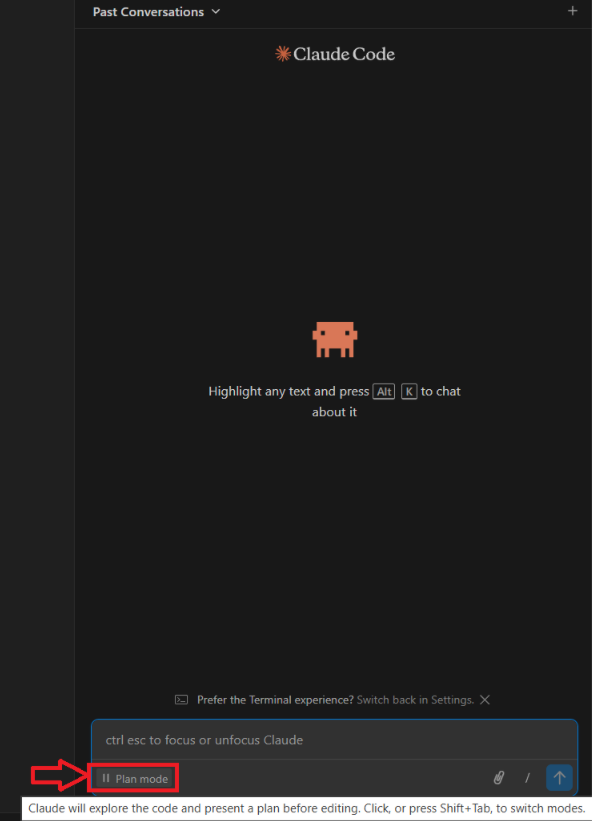
- To build the application, we will use Plan mode. Plan mode helps Claude understand your requirement, ask clarifying questions, and create a requirement specification document. This is one of the key features that makes Claude Code stand out.
- Select the Plan mode as shown below.
- Now provide the following prompt:
Help me design a 'To Do' list app. Create a requirement document (requirement.md).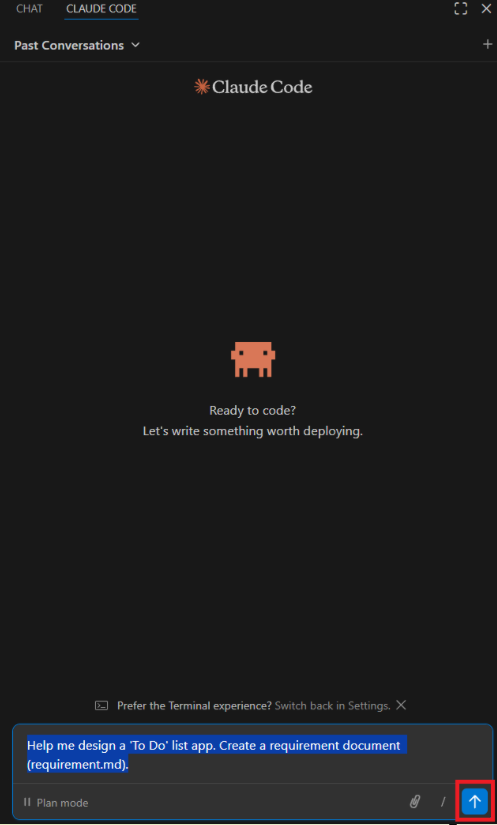
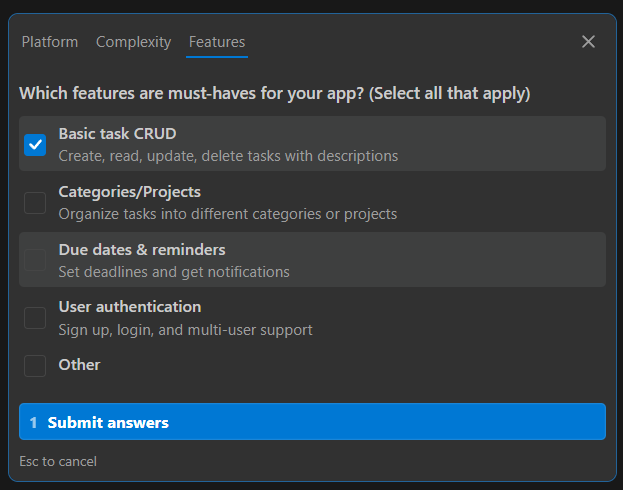
- Claude Code will ask a few questions such as platform, complexity, and required features.
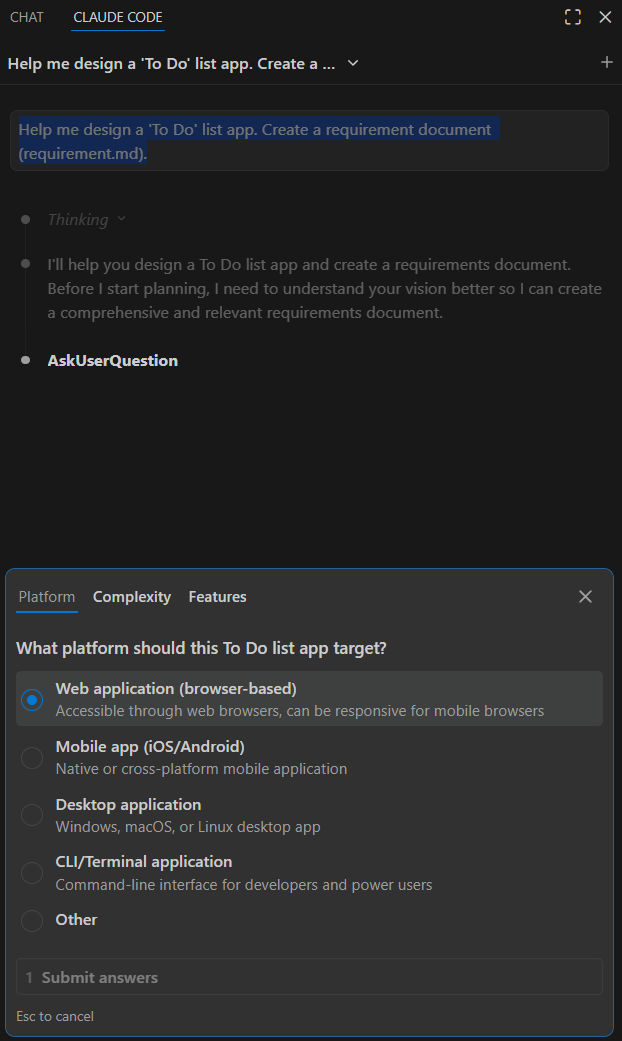
- Provide your answers and click Submit answers.
- Accept the plan.
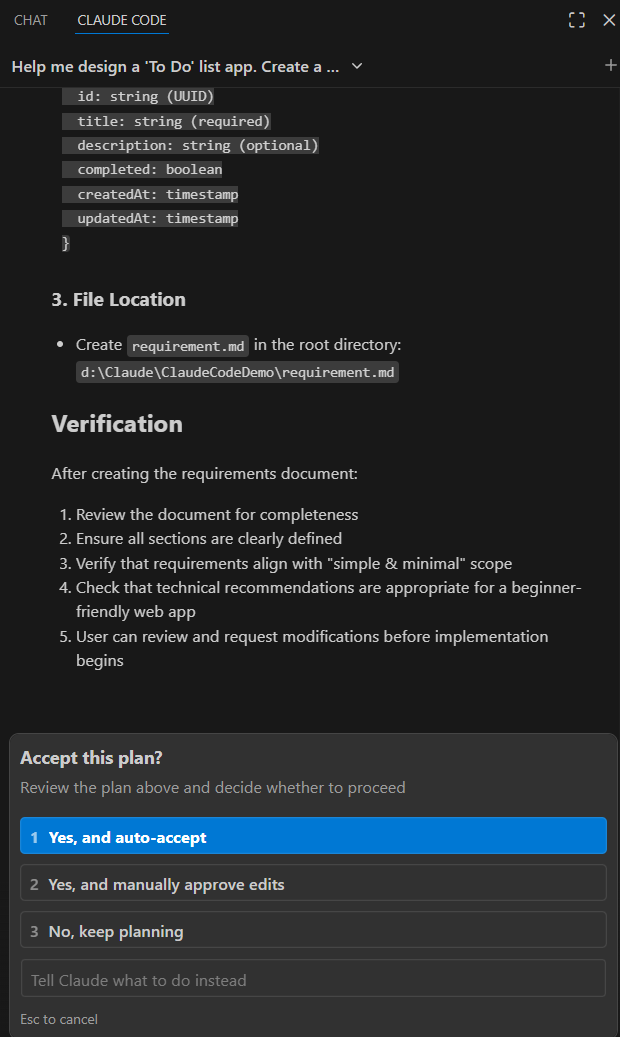
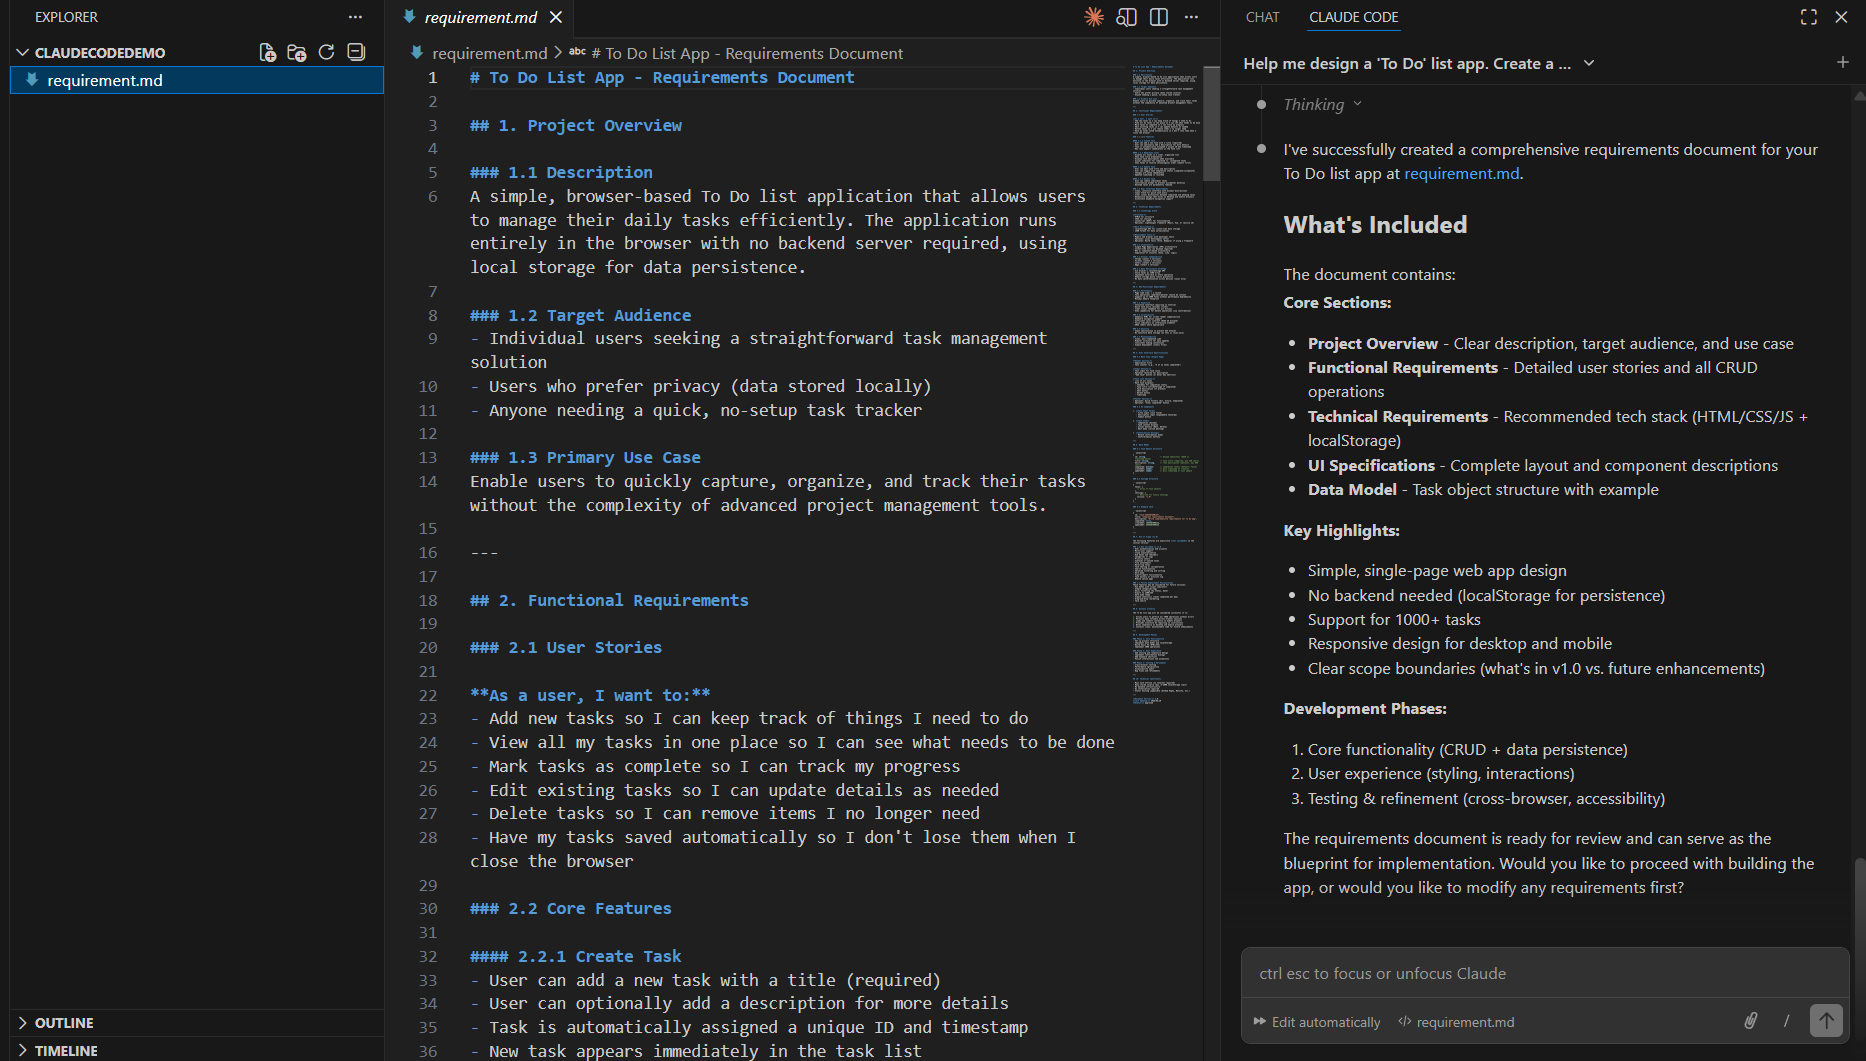
- After that requirements.md file gets generated with the full project requirements.
Use @ to reference files:
One useful feature of Claude Code is that you can reference existing files using the @ symbol.
- For example, I prompted by referring the generated requirements.md file:
Create tasks based on @requirments.md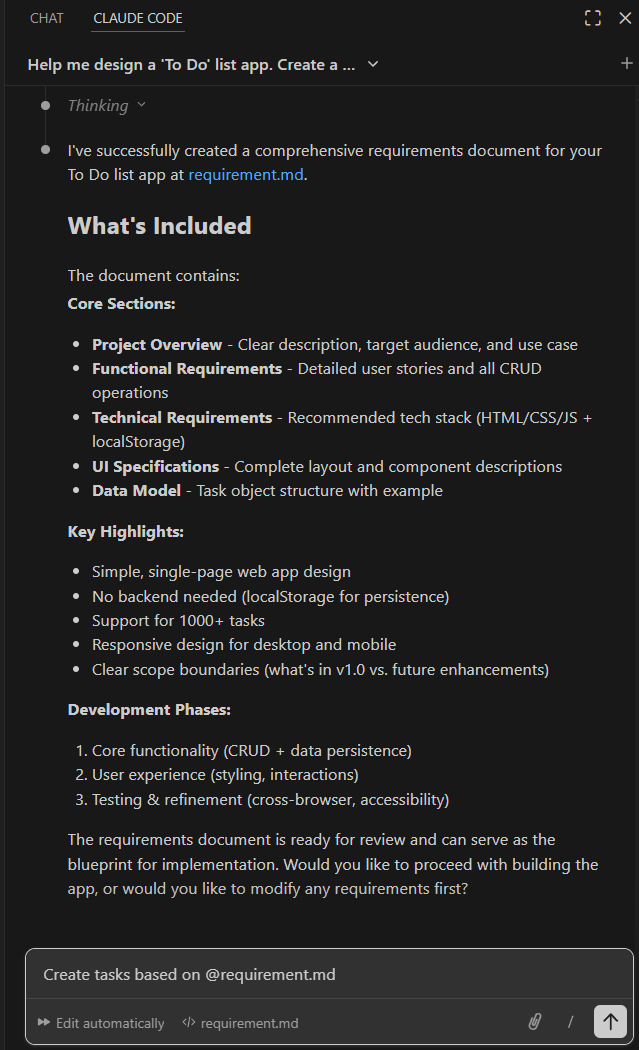
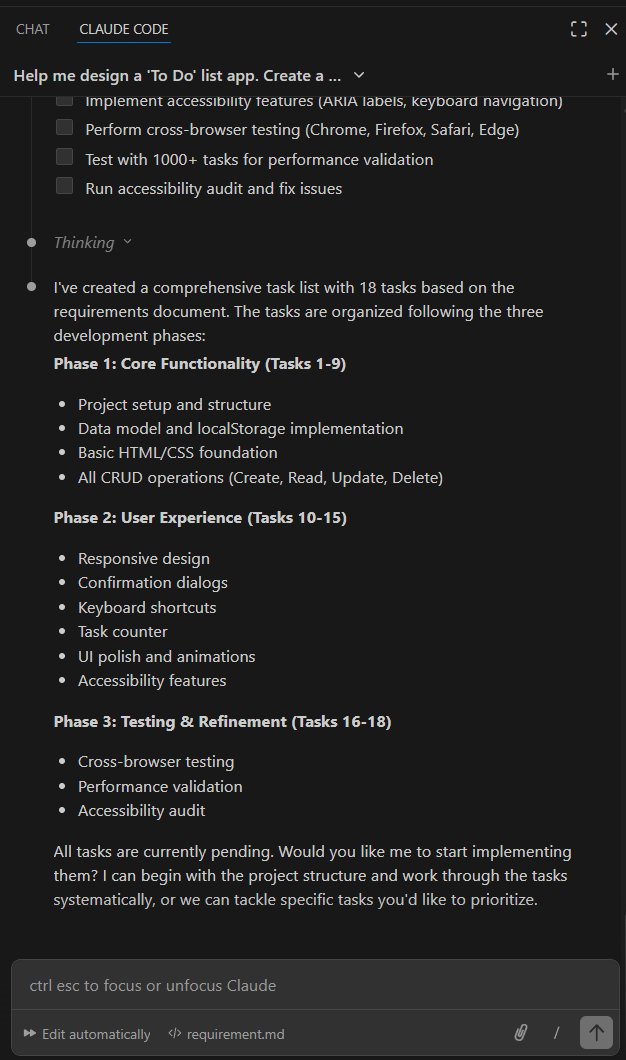
- Claude Code then generated a task list for the implementation. If required, you can further tweak the tasks by prompting again.
- Once you are fine with the tasks, go ahead and prompt:
Yes start implementing the tasks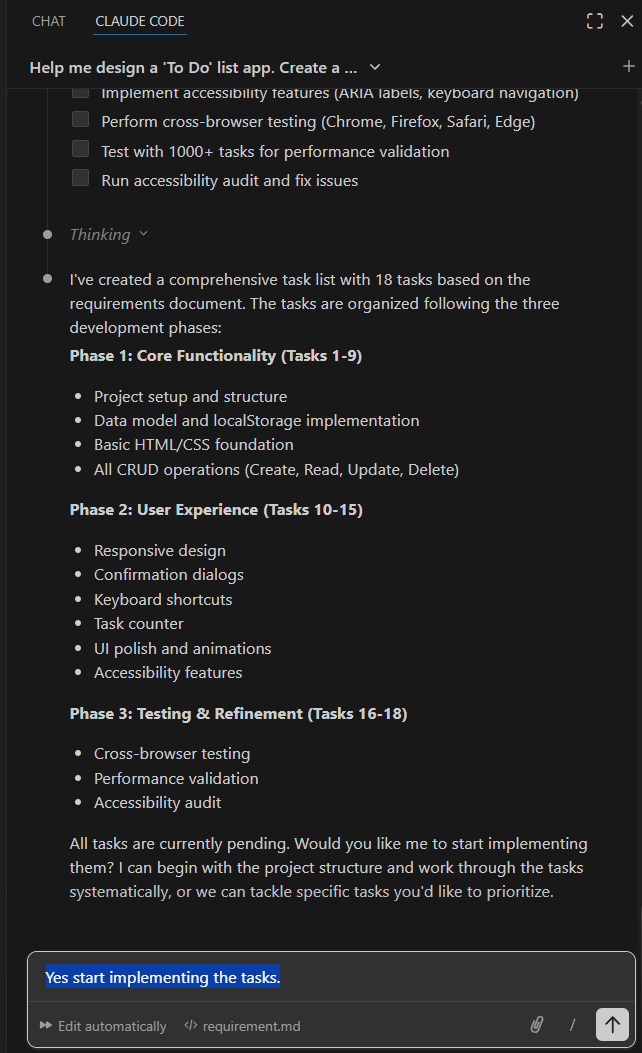
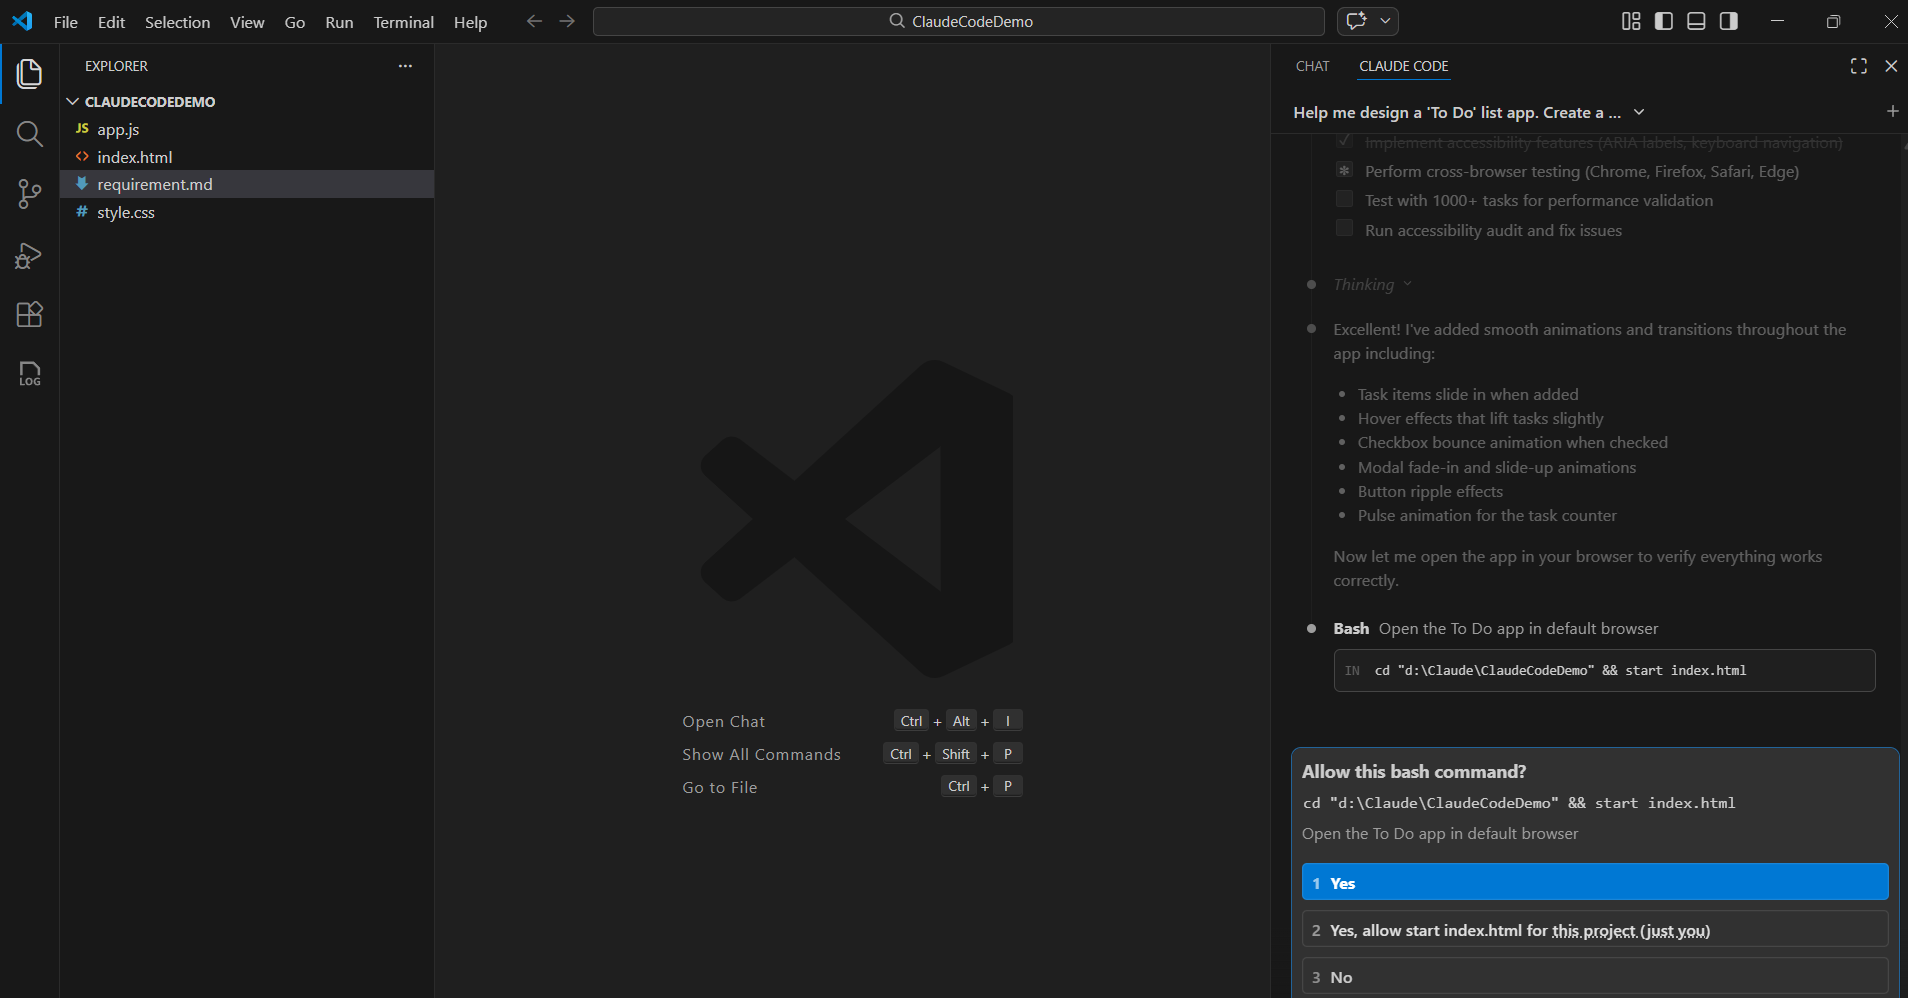
- Claude Code then generates the required code files (HTML, JavaScript, and CSS). It also redirects you to open the
index.htmlfile. Allow the redirection.
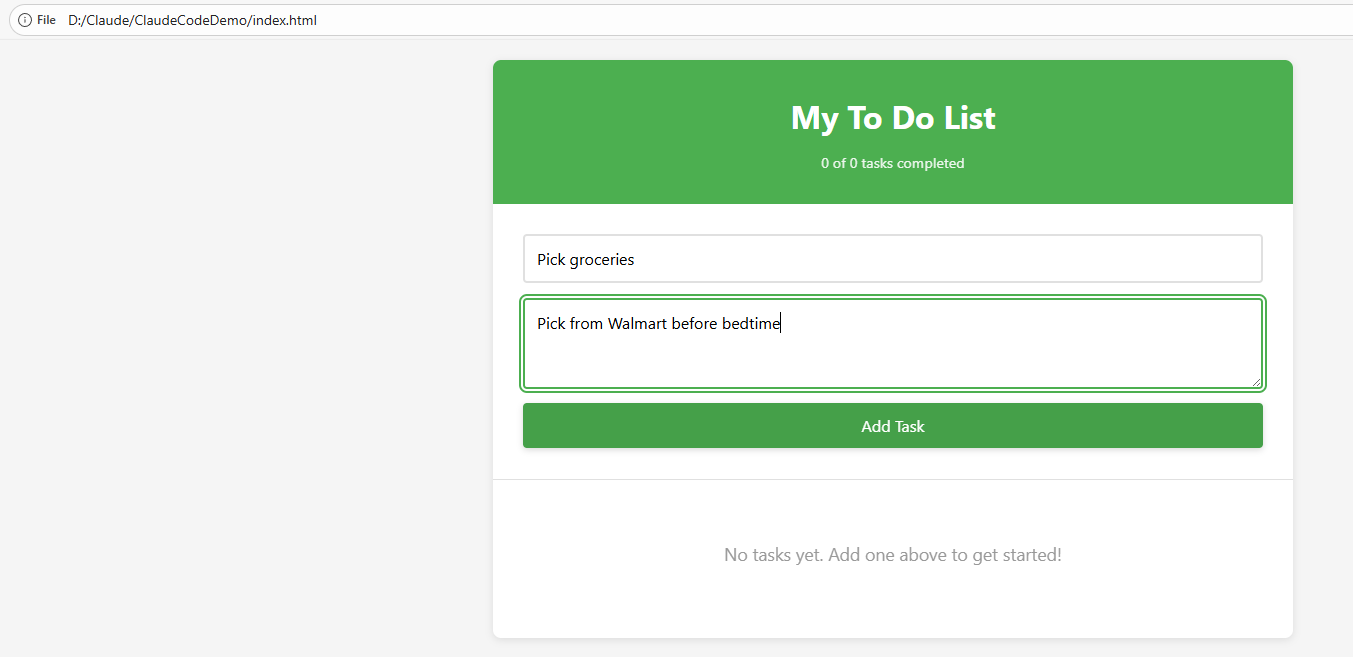
- You will now be presented with a working To-Do List application.
That’s it! We have successfully installed Claude Code, connected it with VS Code, and built our first working To-Do List application using Plan mode.
To understand how to organize your project using CLAUDE.md, refer : Claude Code | Organize Your Project Using CLAUDE.md
🙂

![[Step by Step] Beginner : Create a PCF control and add it to a custom page](https://rajeevpentyala.com/wp-content/uploads/2024/12/image-49.png)

Leave a reply to Claude Code | Organize Your Project Using CLAUDE.md – Rajeev Pentyala – Technical Blog on Power Platform, Azure and AI Cancel reply