In the previous blog post Build an Agent with ‘Knowledge’ and ‘Agent Flow’, I explained how to create a simple registration agent using both Knowledge and an Agent Flow.
n that setup, the Agent Flow was not part of a Topic — it was invoked directly by the agent through the configured instructions. While that worked well for registering participants, we can enhance the experience further by triggering the Agent Flow from a Topic.
The enhanced agent functions as follows:

Let’s learn how to configure a Topic that triggers the Agent Flow.
In this scenario, we’ll use Adaptive Cards and conditions to enhance the user experience and add basic validations.
Before creating the Topic, open the existing Participant Registration Agent Flow (from the previous blog post) and set the option to:
Only when referenced by topics or agents
This ensures the flow is triggered only through a Topic or another Agent, maintaining better control and structure in your conversation.

Lets proceed with Topic creation.
Creating a Topic:
- Inside your Agent, navigate to Topics tab
- Click Add a topic > From blank

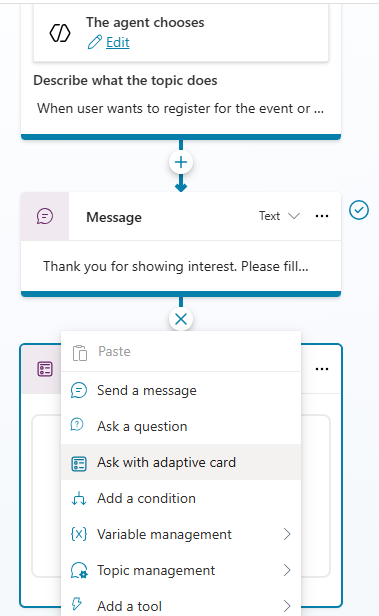
- Inside the Topic, start by adding a Message action and set the message text as:
Thank you for showing interest. Please fill following details:
- Next, add an Adaptive Card by selecting Ask with adaptive card from the actions list. Refer Create an Agent and Use Adaptive Cards for detailed steps on designing an adaptive card.
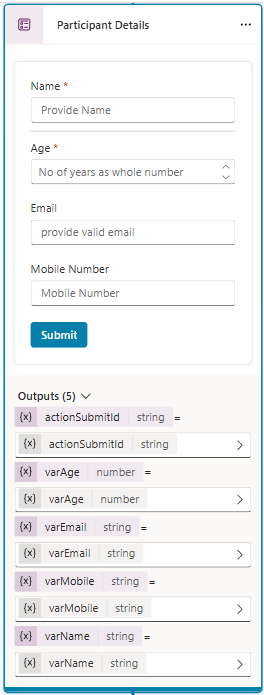
- Add Name, Age, Email, and Mobile Number fields to the Adaptive Card — it should look as shown below.
- Next, add a simple condition to ensure that the participant’s age is greater than 12.
This is just one example — you can implement your own business rules and validations, showcasing the flexibility that Topics provides.

- If the age is valid, proceed with registration by calling the Agent Flow.
- Under All other conditions branch, add the Participant Registration agent flow as shown below. This ensures that when the validation passes, the Topic triggers the flow to create a new participant record in Dataverse.

- Fill in the input parameters of the Agent Flow by passing the values captured from the Adaptive Card — namely,
varName,varEmail, andvarMobile. - Next, capture the output parameter of the Agent Flow (
regid) in a variable named RegId. This allows the topic to receive the registration ID generated by the flow and use it in the next step of the conversation.

- Next, add a Generative Message action to the topic to generate a confirmation message along with a motivational quote.

- I used a Formula option to dynamically generate the input message for the Generative Message action, as shown below.
- Note : If you prefer a simpler approach, you can use a standard Message action instead to display a fixed confirmation message.

- We’re now done with the Topic configuration. Provide a name for the topic and click Save.
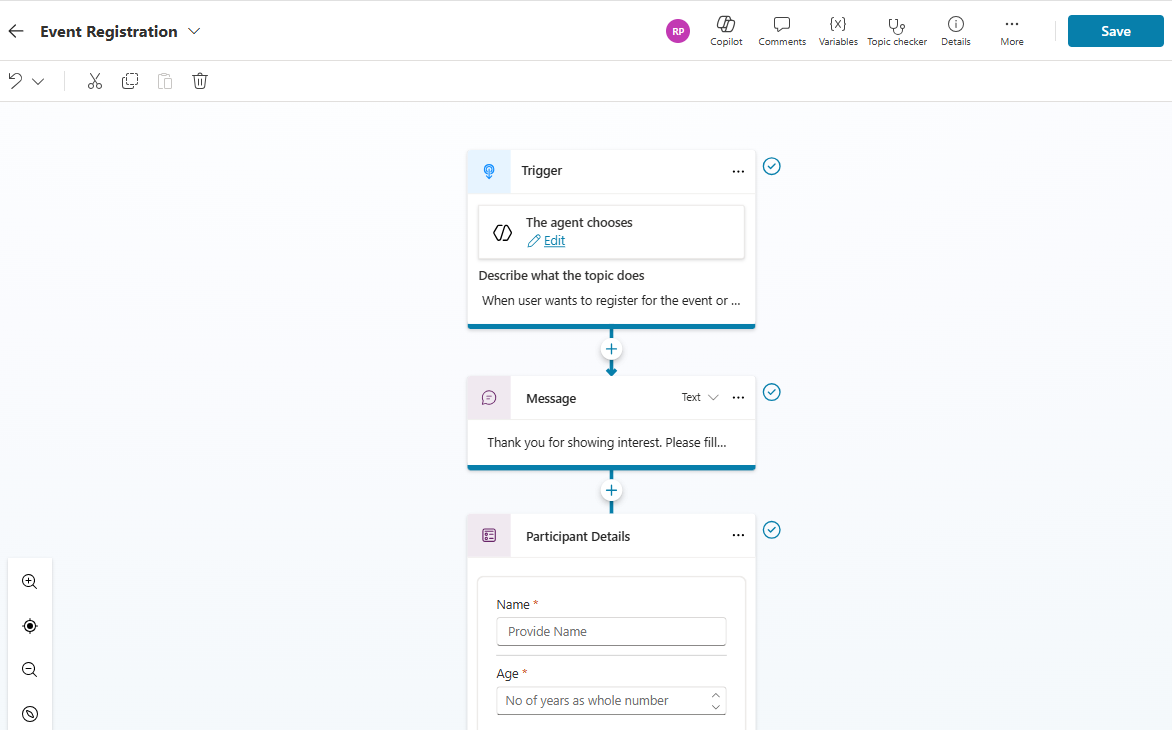
With that, we’ve successfully created the Event Registration Topic. 🎉
You can now test the Agent by using prompts like the ones shown below:

This concludes our enhanced Copilot Studio scenario — where we integrated Topics, Adaptive Cards, and Agent Flows to deliver a more interactive and intelligent registration experience.
🙂


Leave a reply to Using ‘Code Interpreter’ to Process Excel Files in Copilot Studio Agents – Rajeev Pentyala – Technical Blog on Power Platform, Azure and AI Cancel reply