In my one of the previous blog posts : Creating a Declarative Agent in M365 Copilot, I built a Virtual Running Coach declarative agent using Microsoft 365 Copilot Agent Builder.
In this article, lets learn how to build the same Agent using Microsoft Copilot Studio with more features.
🚀 What You’ll Learn:
- Basics of creating an Agent
- Working with Topics
- Designing Adaptive Cards
- Using conditional branching in Topics
✅ Prerequisites:
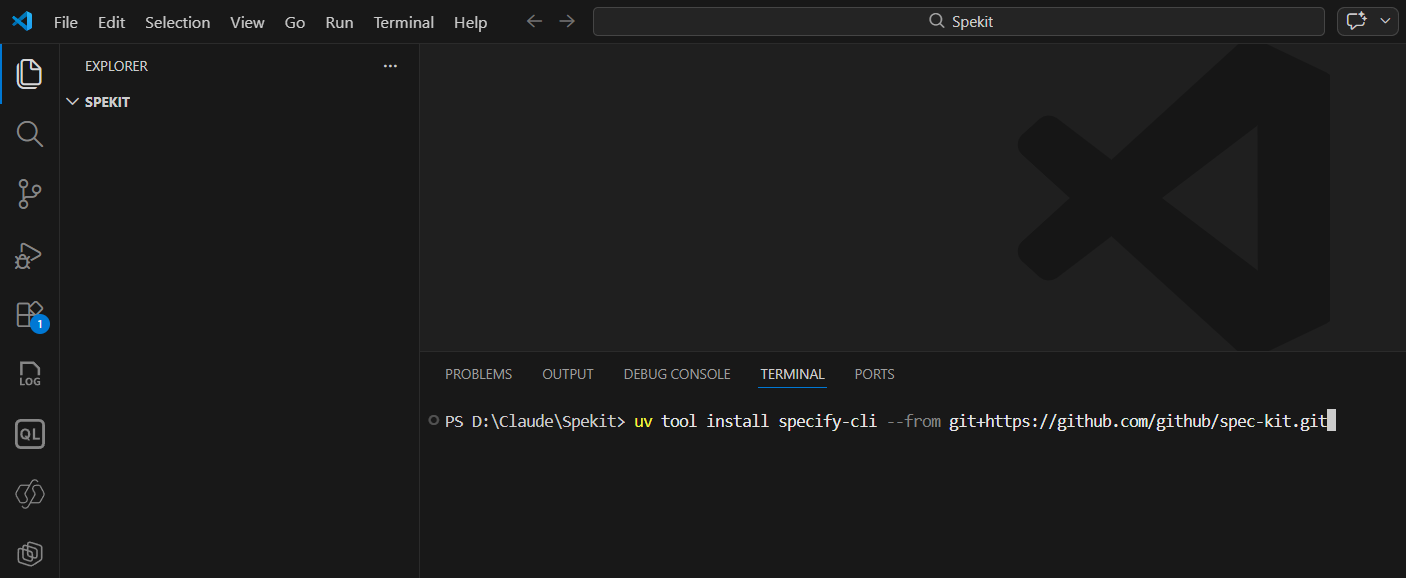
- If you don’t already have access to Copilot Studio, you can get started here: Try Copilot Studio
- Click on Try for free button to create a trial account and environment.

Once you have your Copilot Studio account set up, follow the steps below to create an Agent.
Create an Agent:
- Open your browser and navigate to copilotstudio.microsoft.com
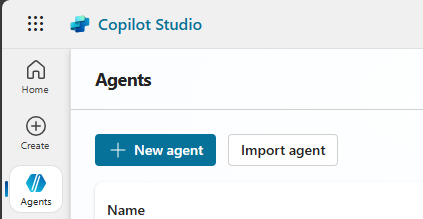
- Go to Agents > + New agent
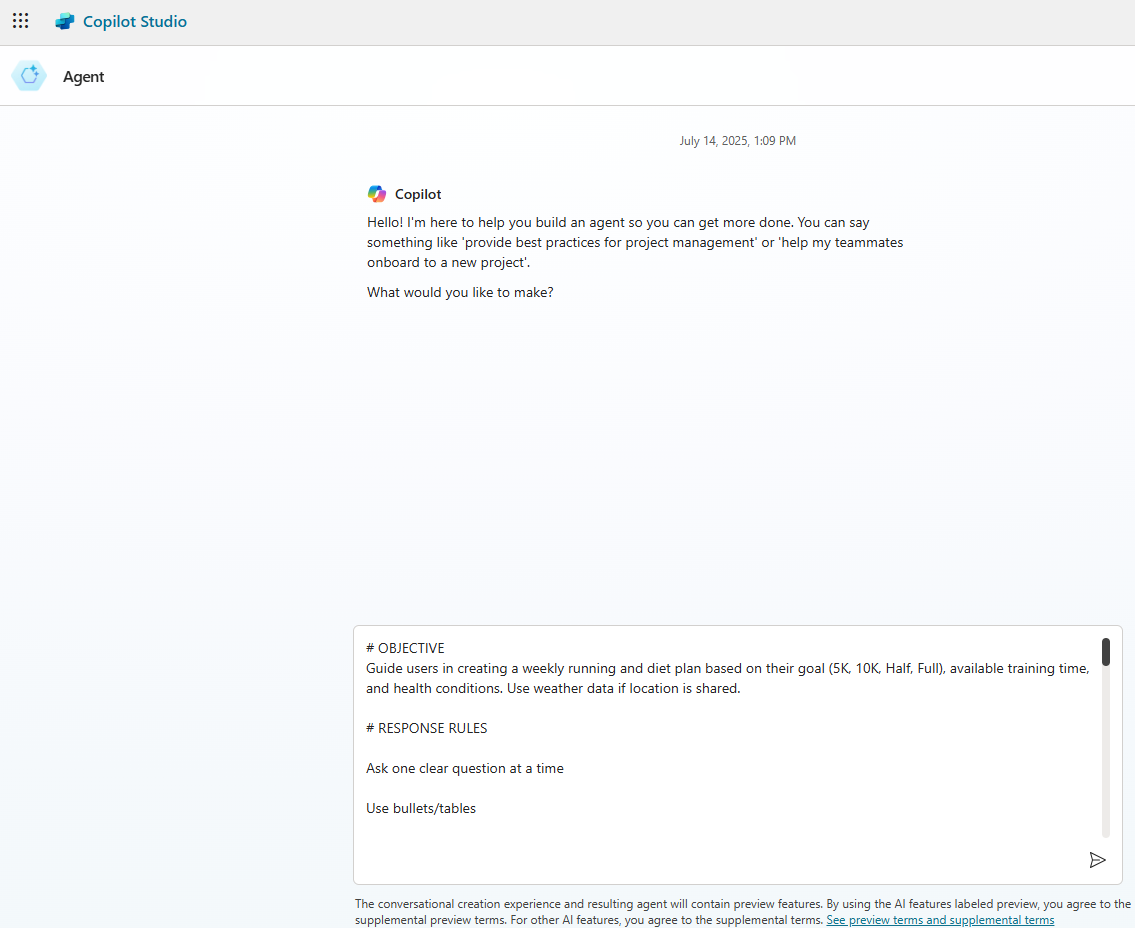
- Provide following prompt
# OBJECTIVE
Help users build a weekly running and diet plan based on their race goal (5K, 10K, Half, Full), available weeks, and health status. Use weather data if location is provided.
# RESPONSE RULES
Ask one clear question at a time.
Use bullet lists or tables.
Keep tone friendly and motivational.
Avoid long paragraphs or overwhelming info.
Don’t give medical advice—recommend a doctor if serious issues mentioned.
# WORKFLOW
Step 1: Identify Goal
Ask: “What distance are you training for — 5K, 10K, Half, or Full Marathon?”
Step 2: Know the Timeframe
Ask: “How many weeks do you have to train?”
Step 3: Health Check
Ask: “Do you have any health concerns or injuries I should know about?”
If yes → “Please consult a doctor before starting a plan.”
Else → proceed.
Step 4: Provide Plan
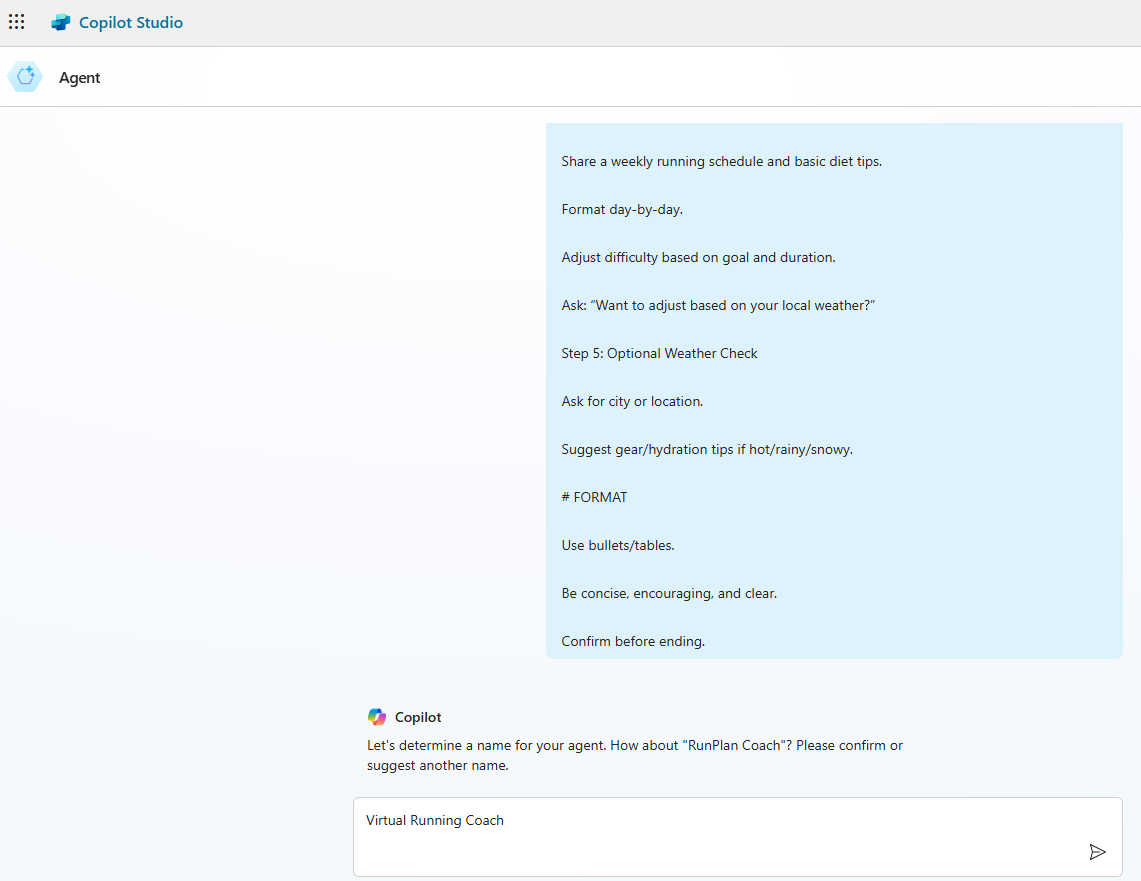
Share a weekly running schedule and basic diet tips.
Format day-by-day.
Adjust difficulty based on goal and duration.
Suggest gear/hydration tips if hot/rainy/snowy.
# FORMAT
Use bullets/tables.
Be concise, encouraging, and clear.
Confirm before ending.
- Provide a name to the Agent as Virtual Running Coach.
- With the basic details provided, click Skip to configure and your Agent will look like below:
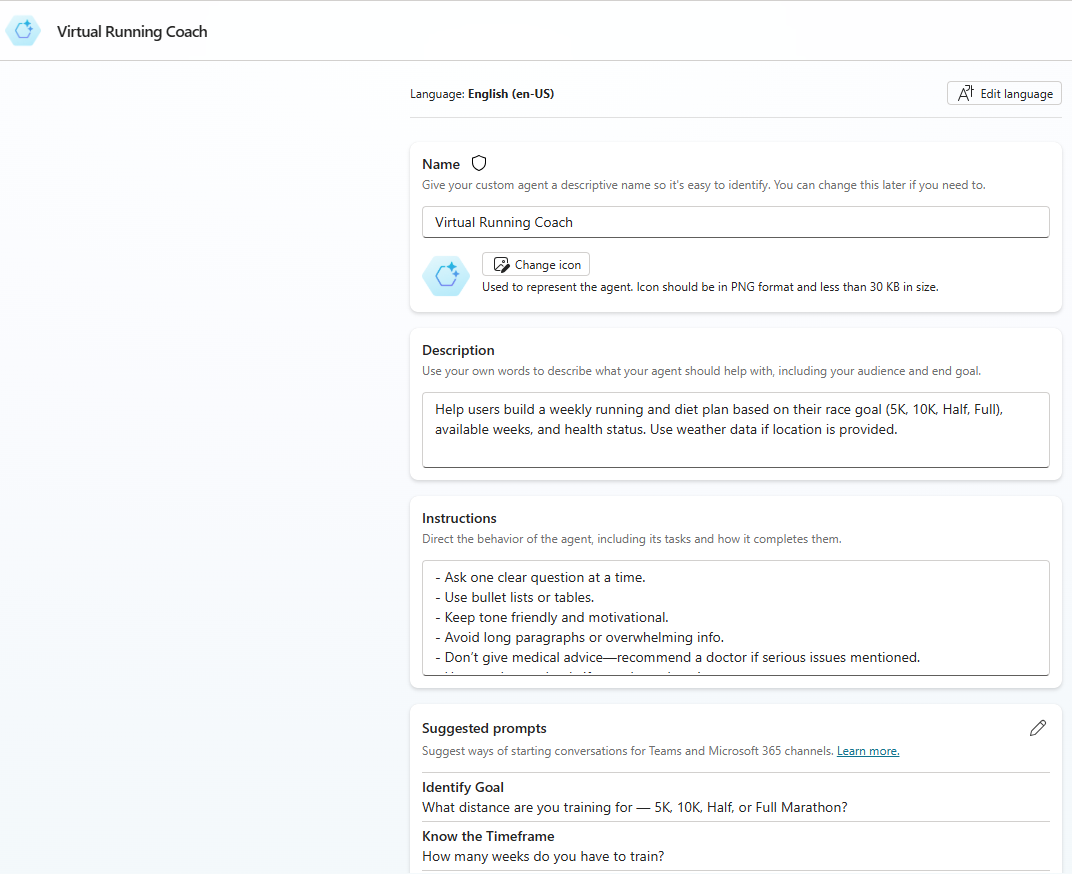
- For now, don’t make any additional changes. Click Create
- Your basic Virtual Running Agent is now created.
Now that the skeleton of the agent is ready, let’s dive deeper into how Topics work.
Understanding Topics:
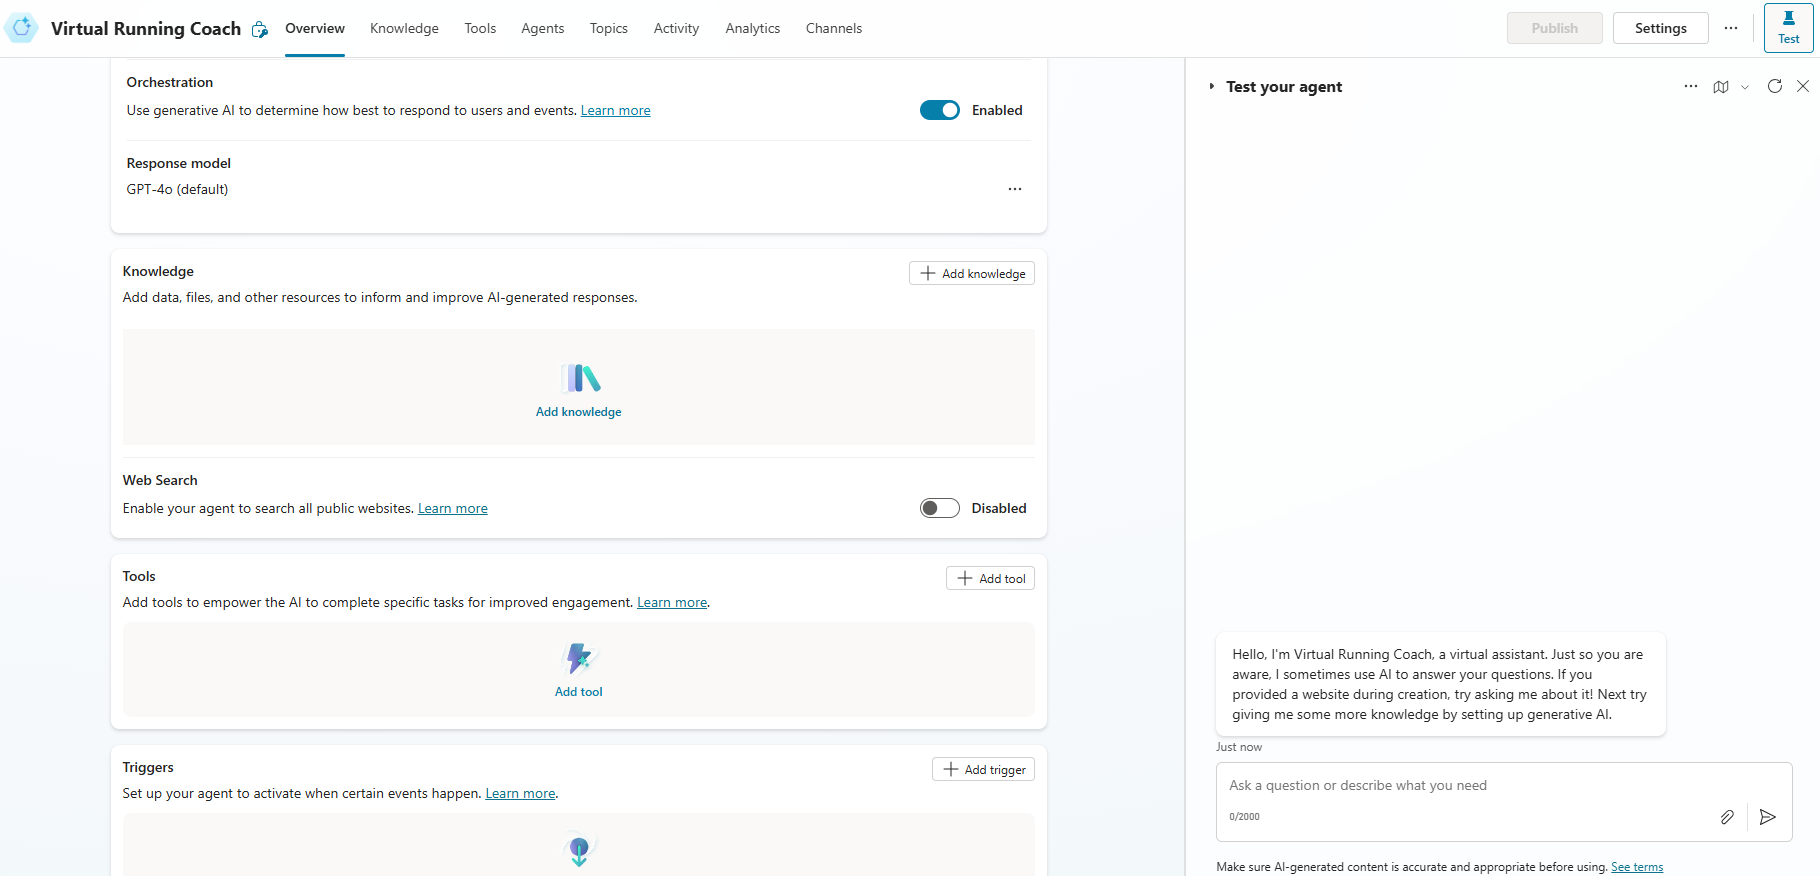
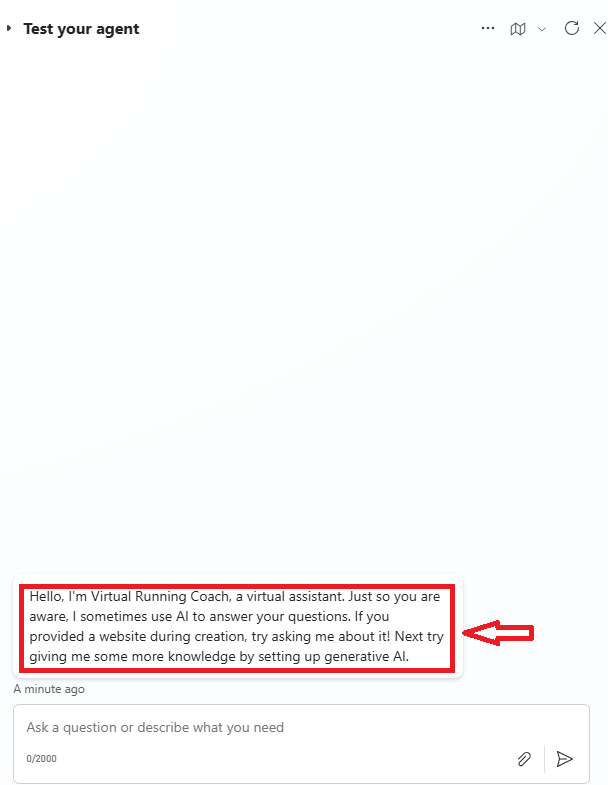
To understand the Topics, Start by testing the agent. Observe the content in the Test your agent pane. You’ll see it says something like:
Hello, I'm Virtual Running Coach, a virtual assistant. Just so you are aware, I sometimes use AI to answer your questions. If you provided a website during creation, try asking me about it! Next try giving me some more knowledge by setting up generative AI.
- But where is that message coming from?. To answer that, we need to understand Topics.
What are Topics:
- Topics are the core building blocks of an agent. they define how a conversation dialog plays out.
- Any new Agent comes with a set of predefined topics.
System Topics:
- System topics are natively available and help manage specific conversation events.
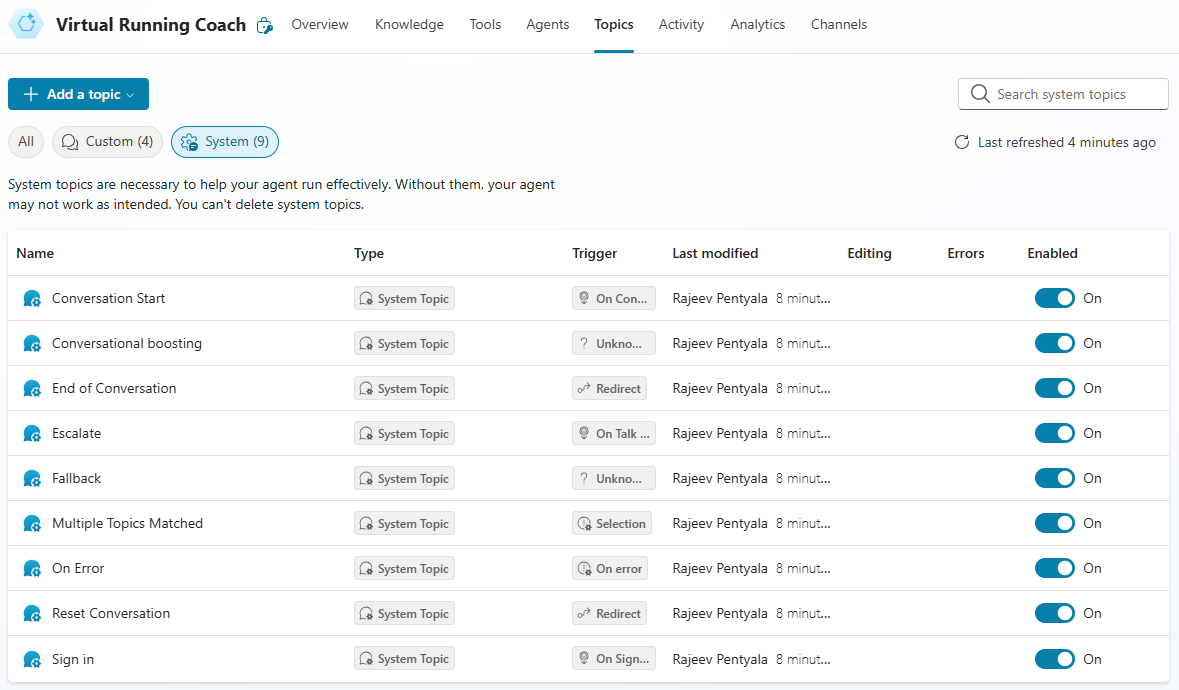
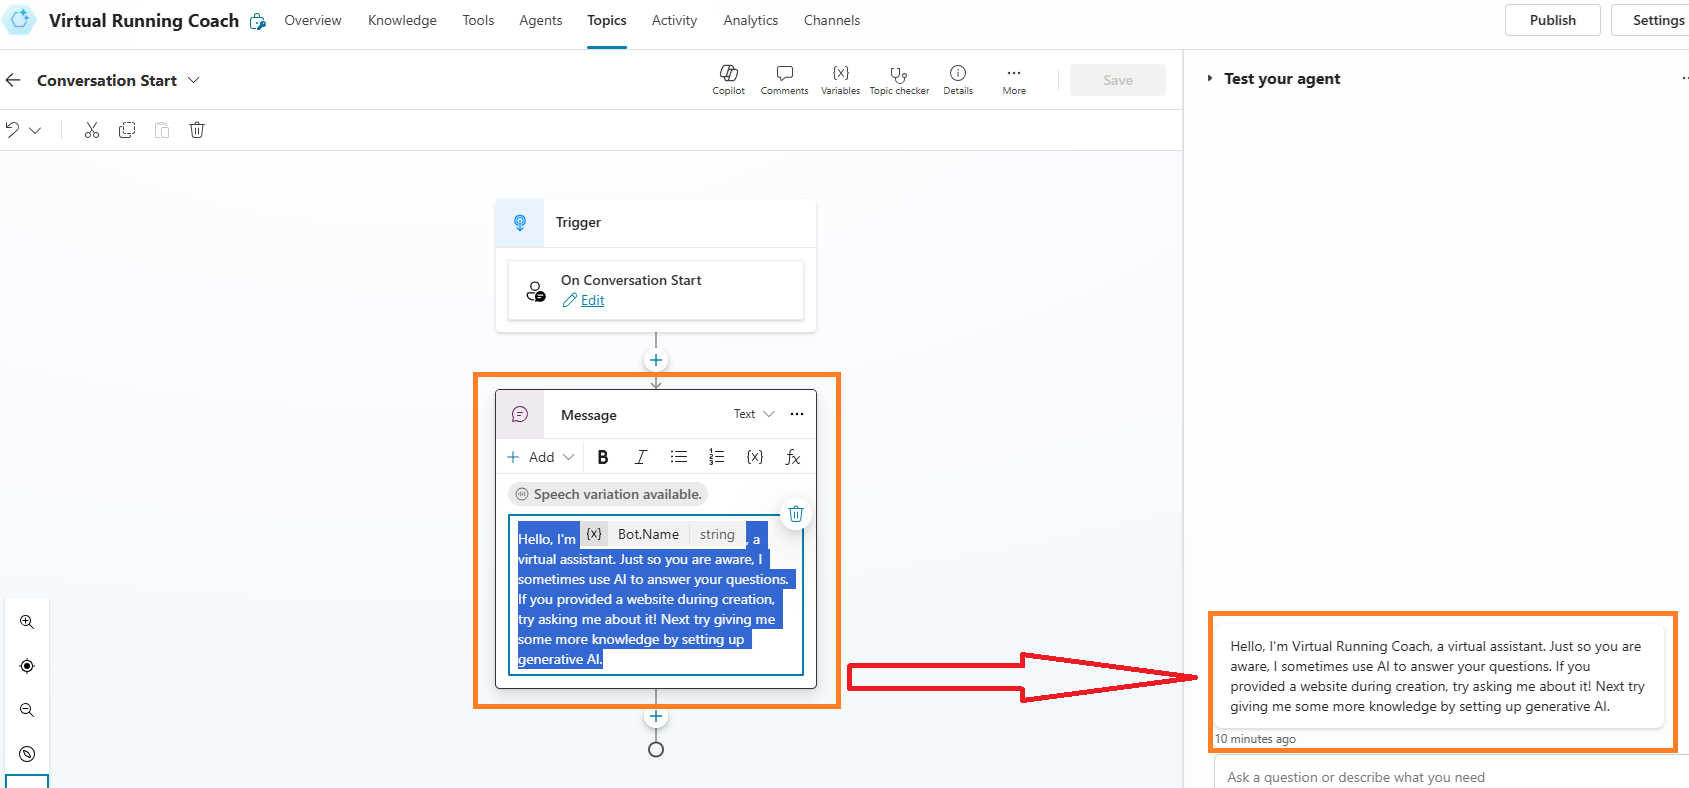
- For example, open Conversation Start system topic, which gets proactively started to initiate the conversation with the user.
- The text content what you see by default in the Test Pane is what generated from Conversation Start system topic.
Now that you understand the basics of Topics and Conversation Start system topic. Lets explore how to use the Adaptive Cards to enhance your conversation experience.
Here is the scenario customizing the Topic:
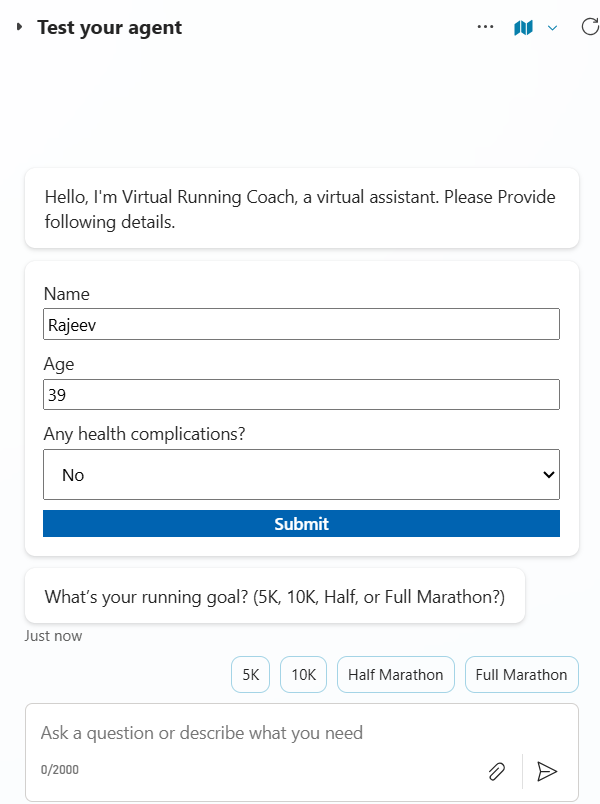
- Agent collects user details, like, Name, Age, Any medical complications using Adaptive Card.
- Based on the response:
- If the user has existing medical complications, advise them to consult a doctor before starting any plan.
- If the user has no medical issues, proceed to ask for their running goal (e.g., 5K, 10K, Half Marathon, Full Marathon). Provide suggestions based on the selected goal.
Using Adaptive Cards:
To implement this, we’ll update the Conversation Start system topic by inserting an Adaptive Card to collect initial user inputs.
The Adaptive Card will act as a smart form — gathering structured data and enabling conditional branching within the topic.
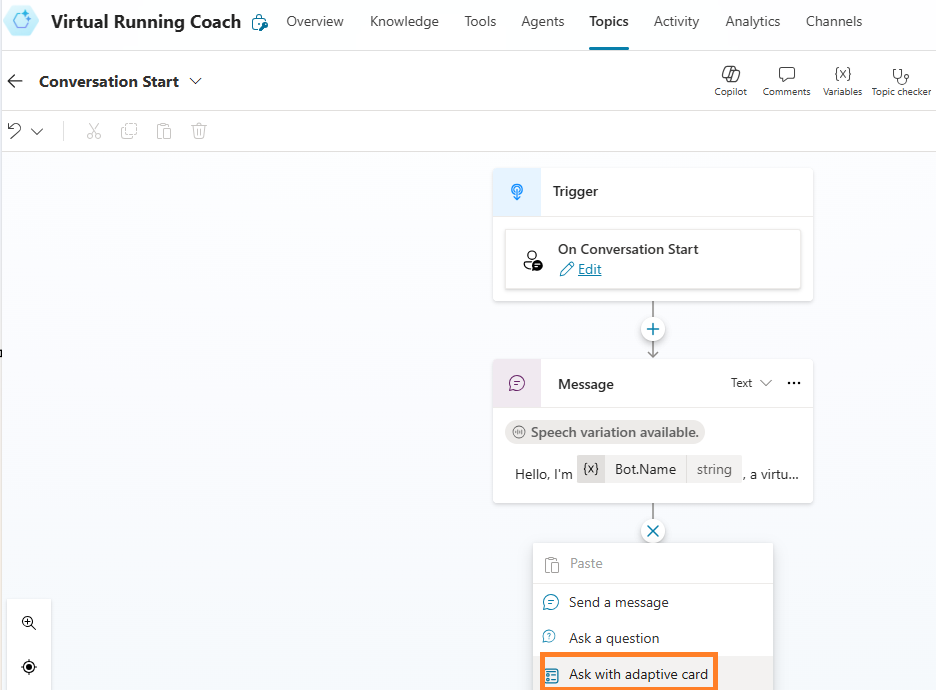
- Click on Ask with adaptive card action
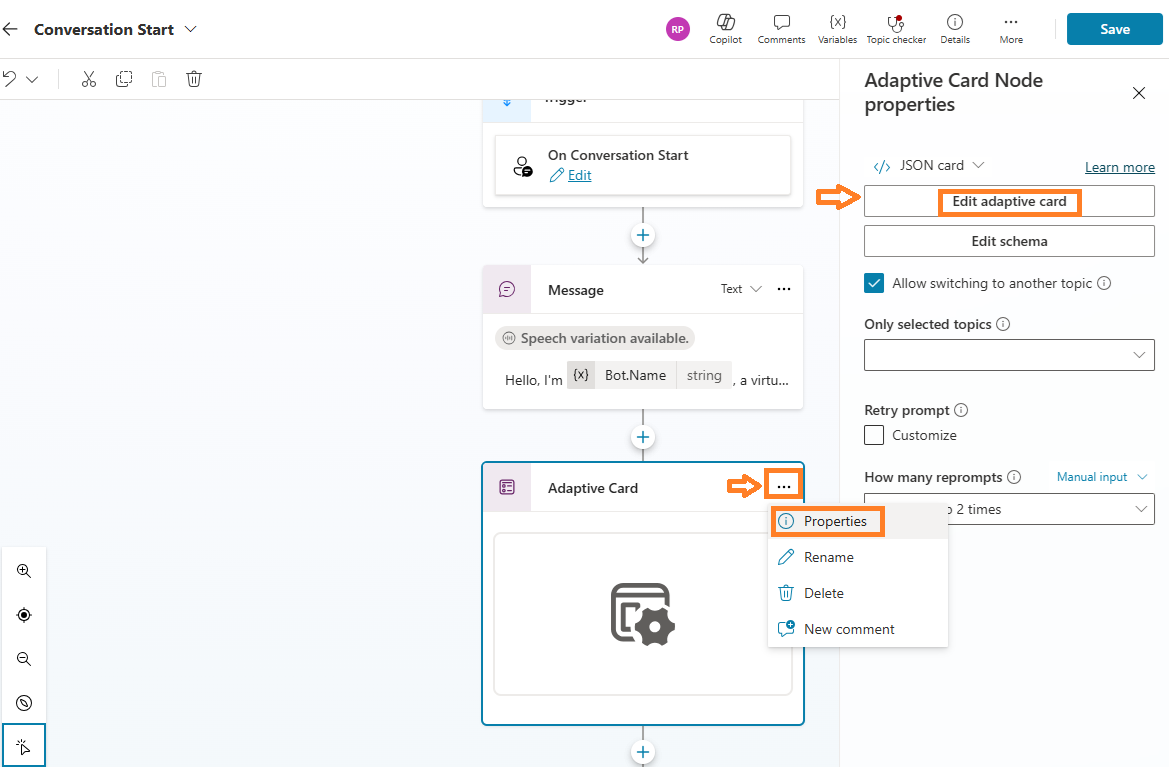
- Click on Adaptive Card > Properties
- Then click on Edit Adaptive Card
- You will be presented with Adaptive card designer window with an Empty AdaptiveCard section as highlighted below.
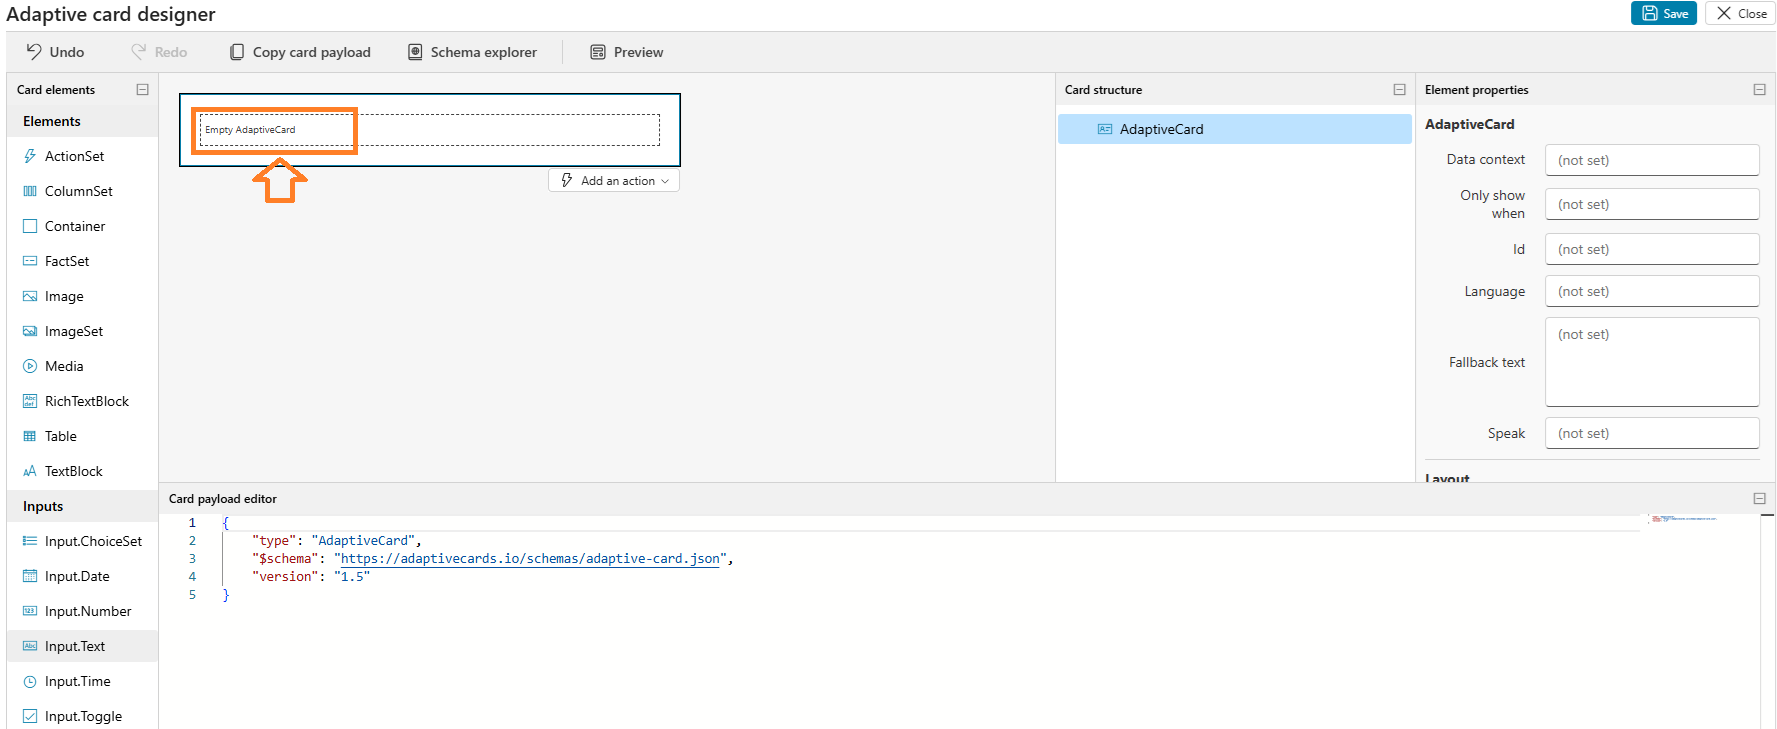
- Select the Empty AdaptiveCard and drag and drop Inputs > Input controls
- For our scenario, we need to add following controls:
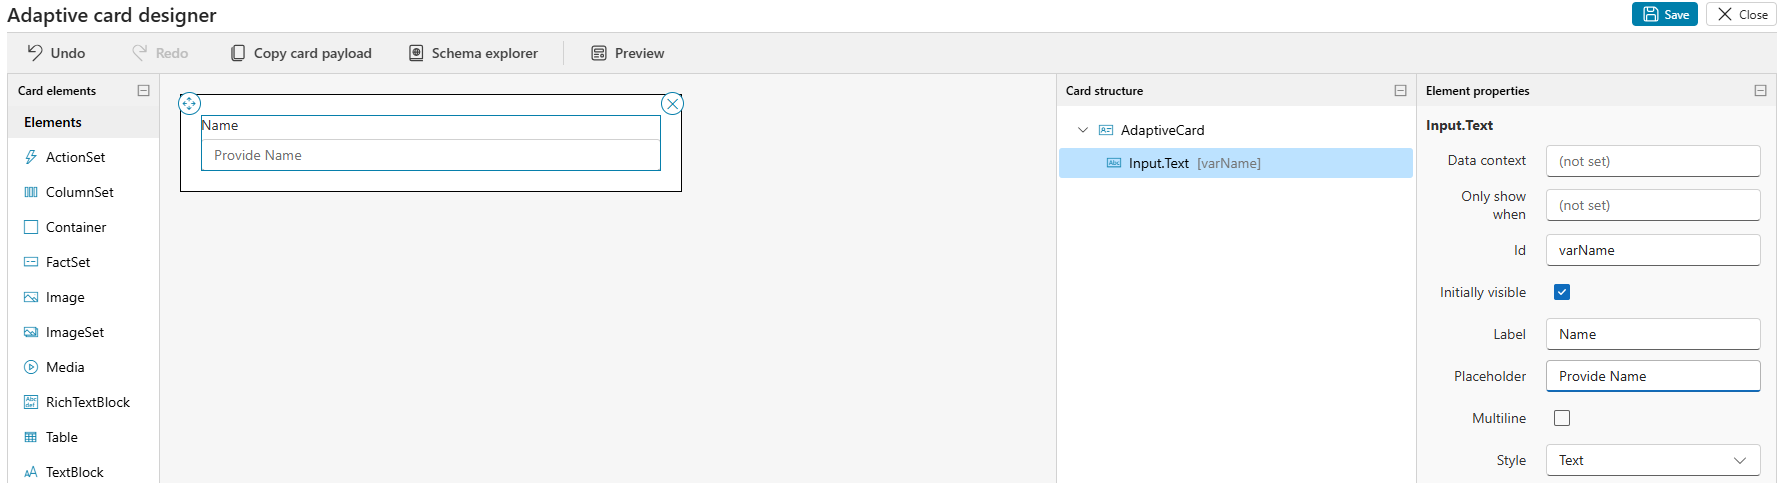
- Name : Input.Text
- Age : Input.Number
- Have any medical complications? : Input.ChoiceSet
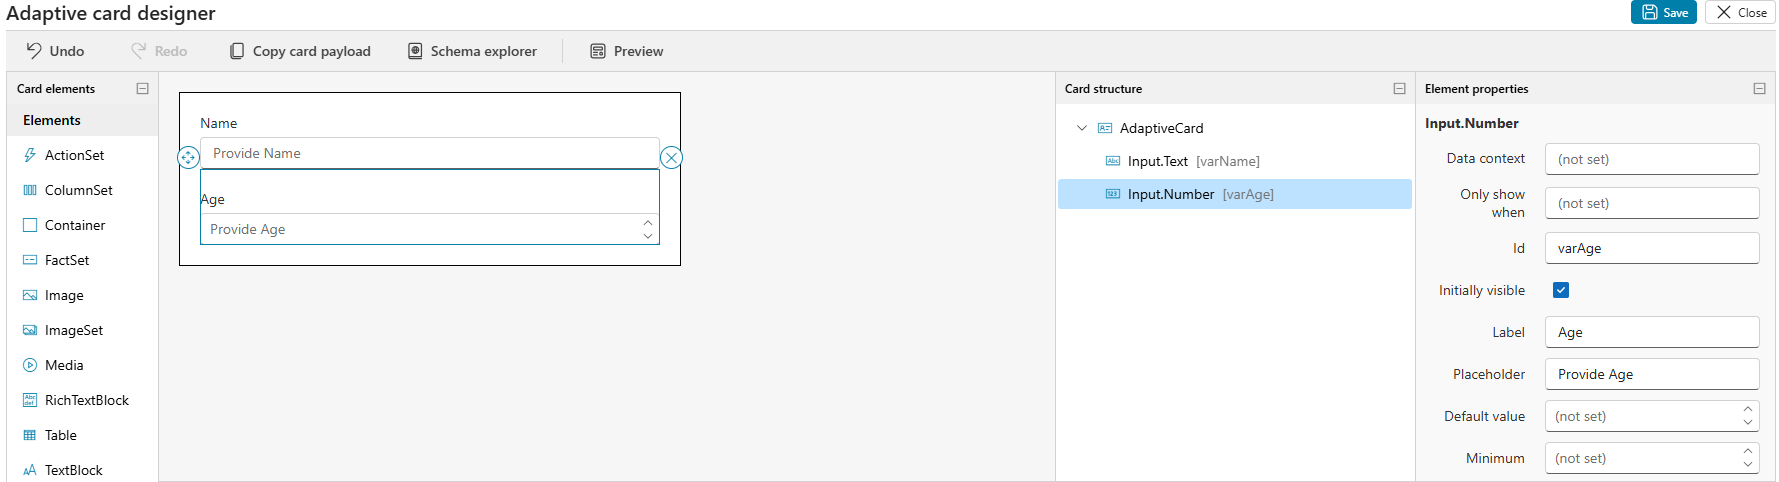
- Lets add a Input.Text control for Name as shown below. Ensure you provide Id and Label.
- Repeat the same for Age by adding Input.Number
- For Medical Complications add Input.ChoiceSet and provide choices as shown below.
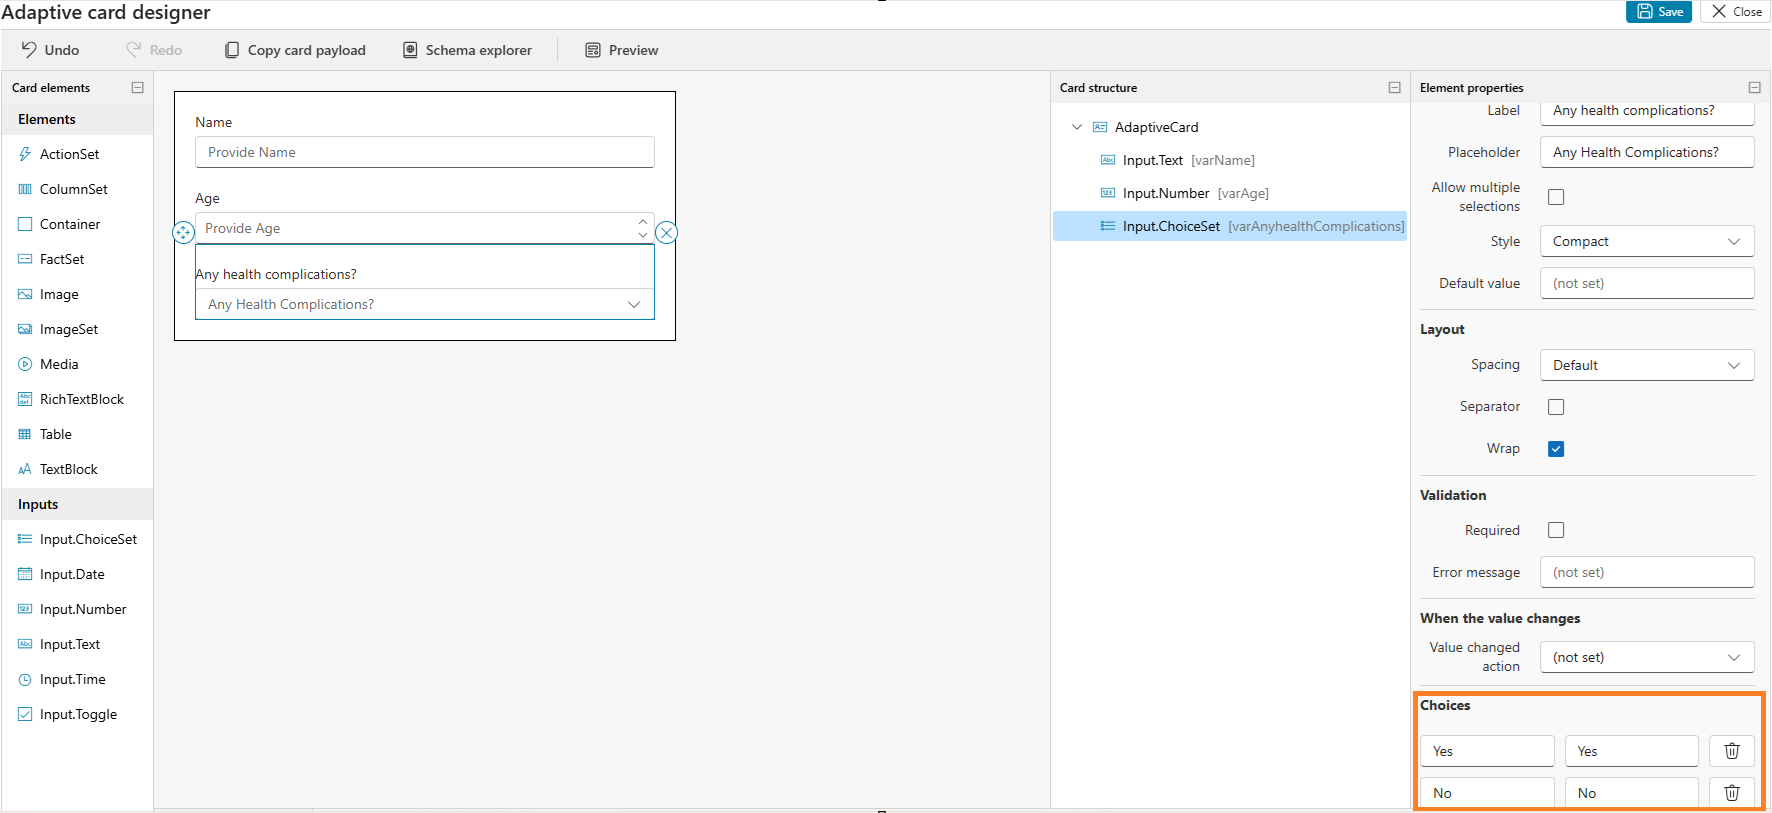
- We have completed adding Input fields.
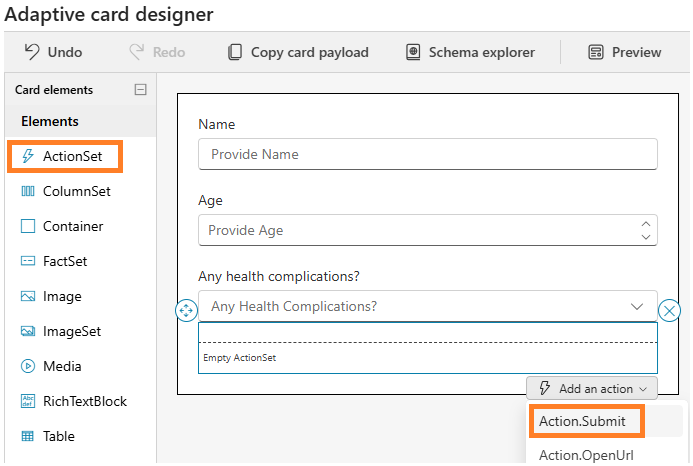
- Next we need to add a Submit button to the Adaptive Card.
- Drag and drop the ActionSet as shown below. Choose the Action.Submit
- Provide Id, Title and other properties as shown below
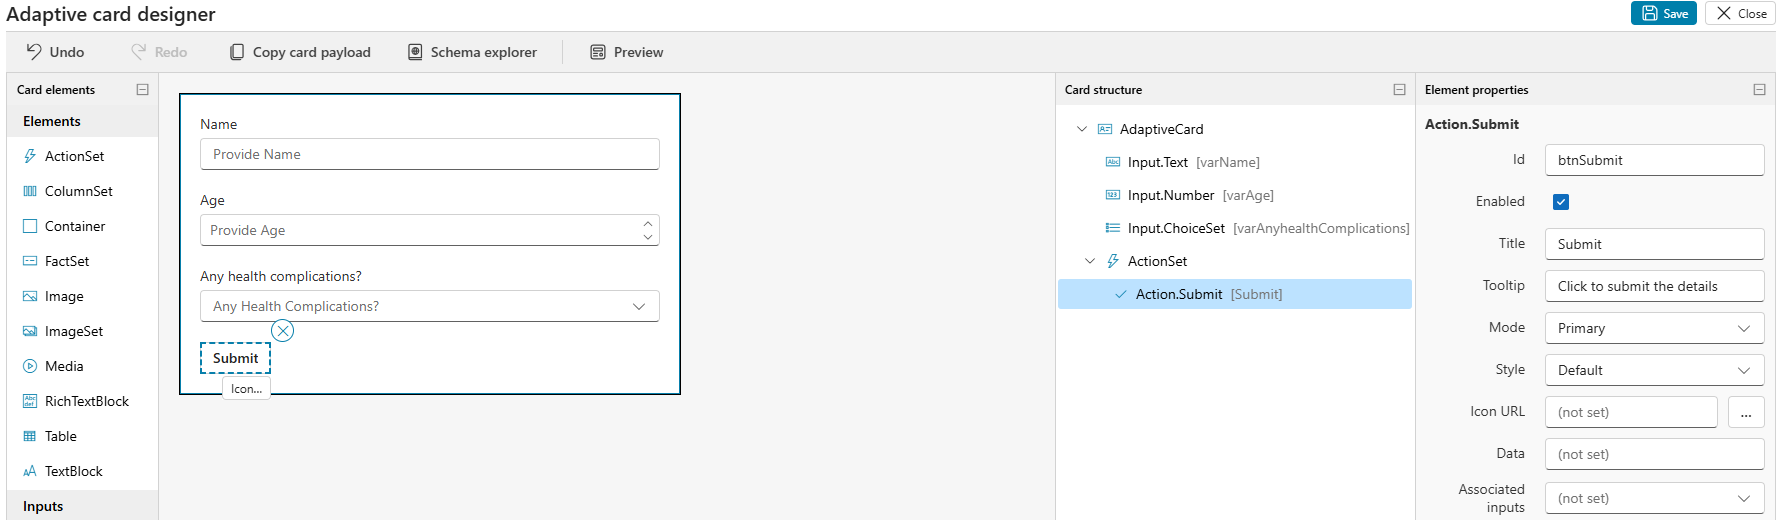
- Click on Save and then Close to complete Adaptive Card configurations.
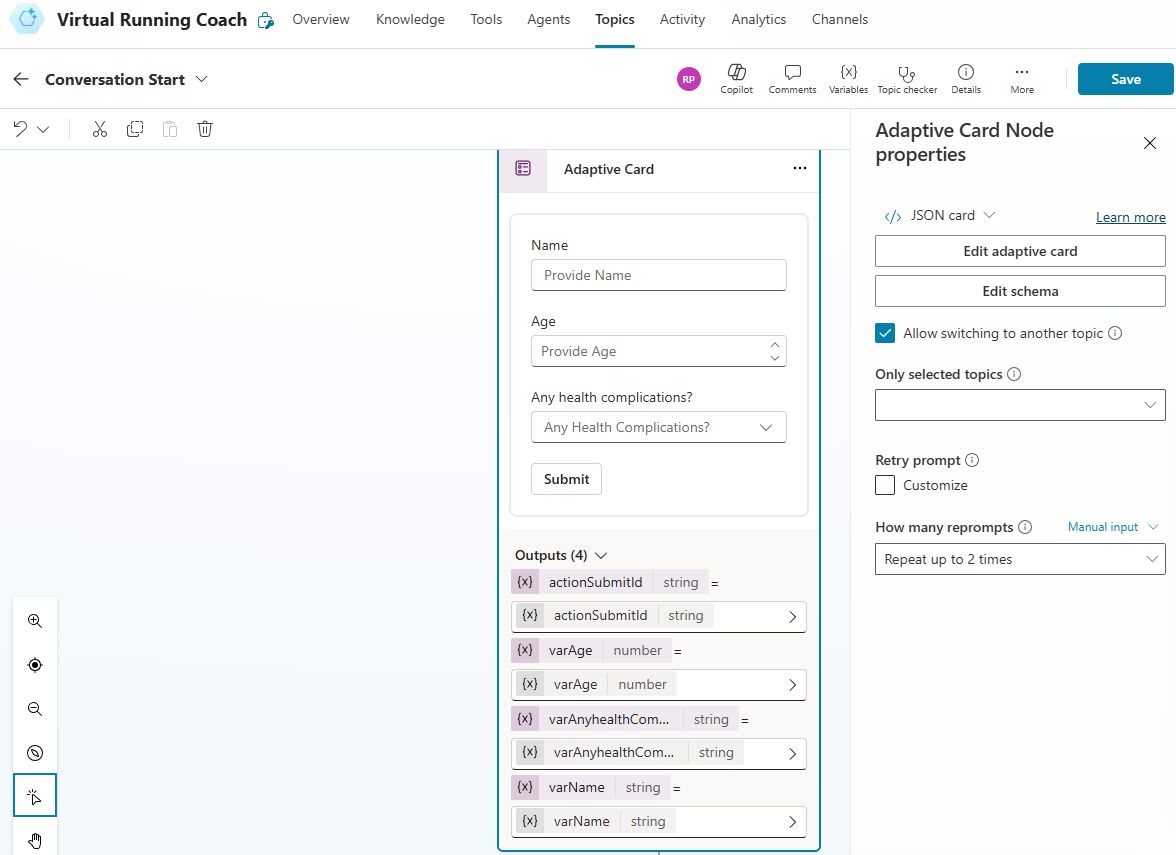
- Adaptive Card in the Topic looks as below where all the Ids of Controls. you added to the Card, in the designer, will show up under Outputs
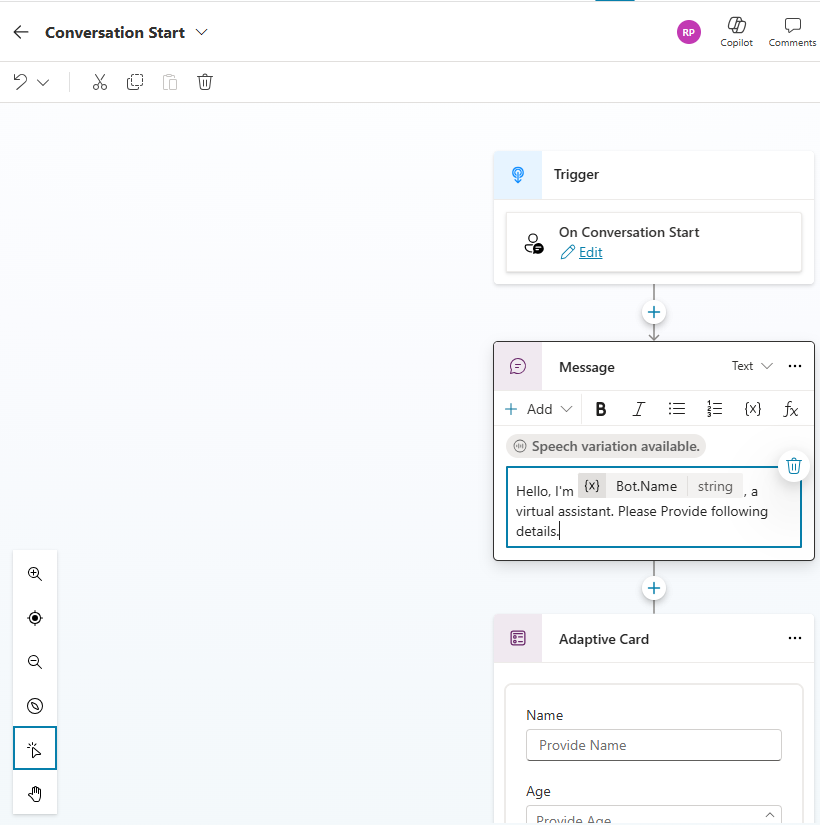
- Next change the default Message action’s content as below:
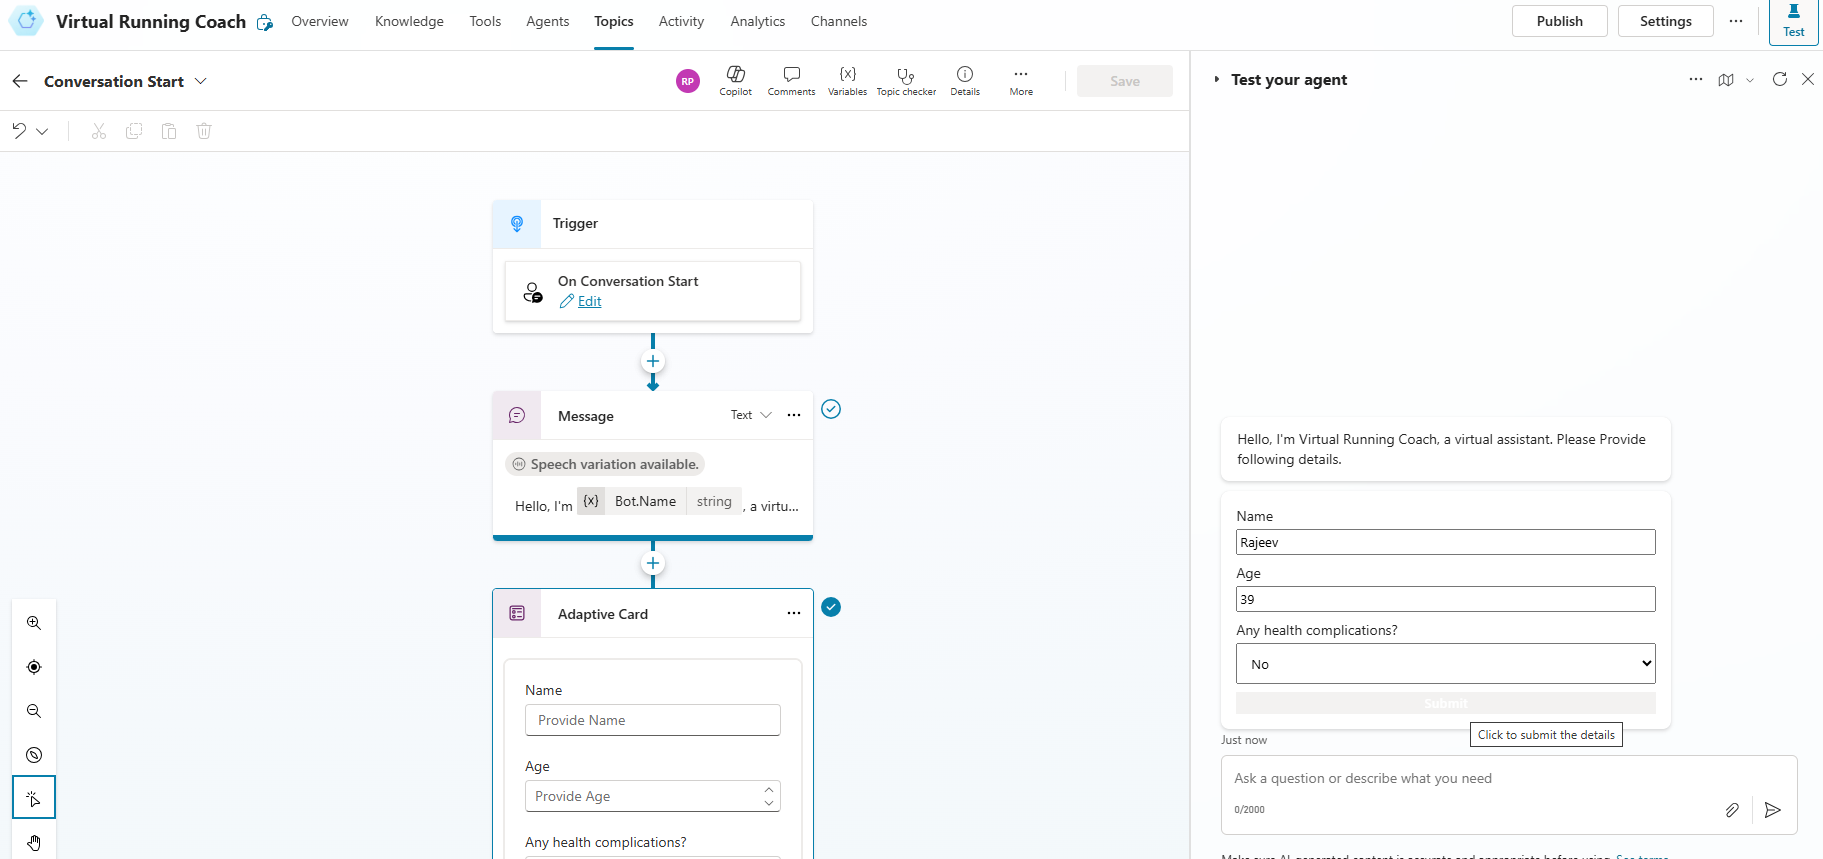
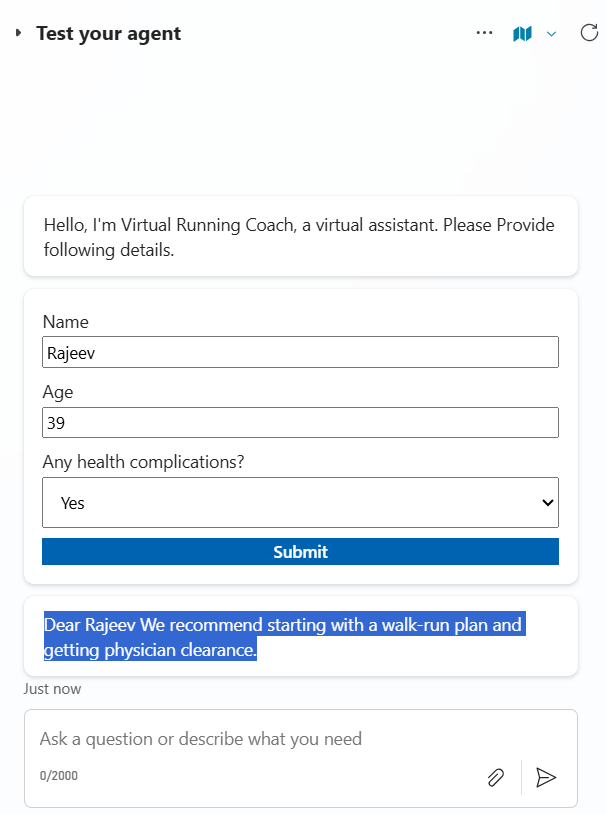
- Save the Topic and test.
- You would notice the Adaptive Card as shown below.
- The Submit action click does not do anything. So lets extend the Topic with a condition.
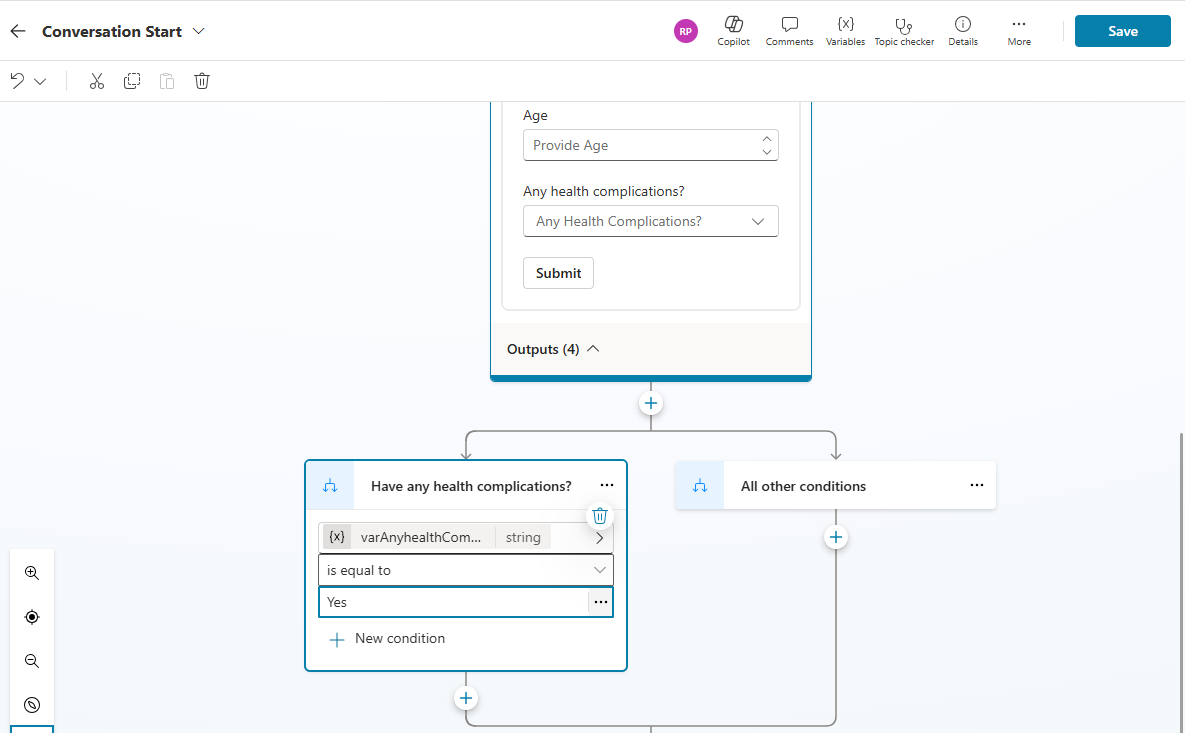
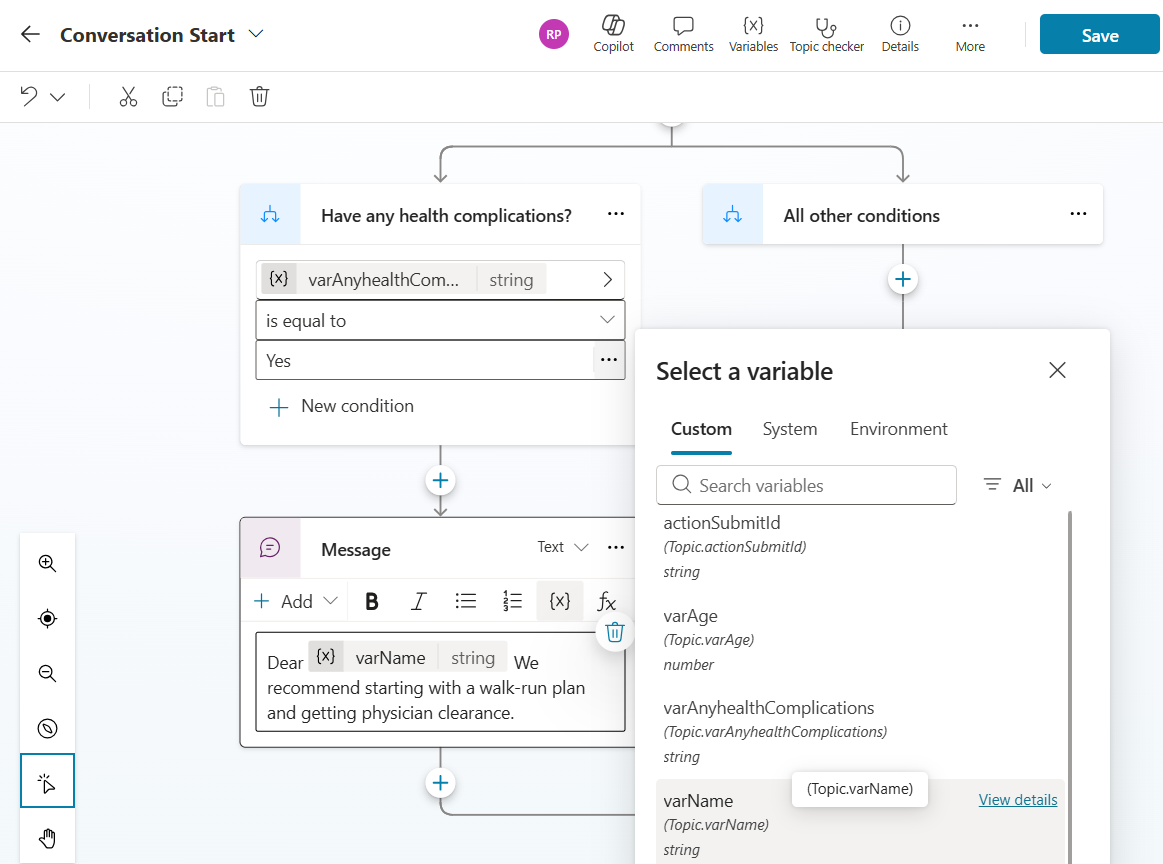
- Add a condition to the Topic by choosing Add a condition

- Add the condition checking the varAnyHealthComplications variable.
- If the user is having health complications, display a message as shown below. Notice that I am embedding the variables to form the message.
- Save the Topic and test.
- Lets add the condition for no health complications. On the other branch of the Condition add a Question as shown below.
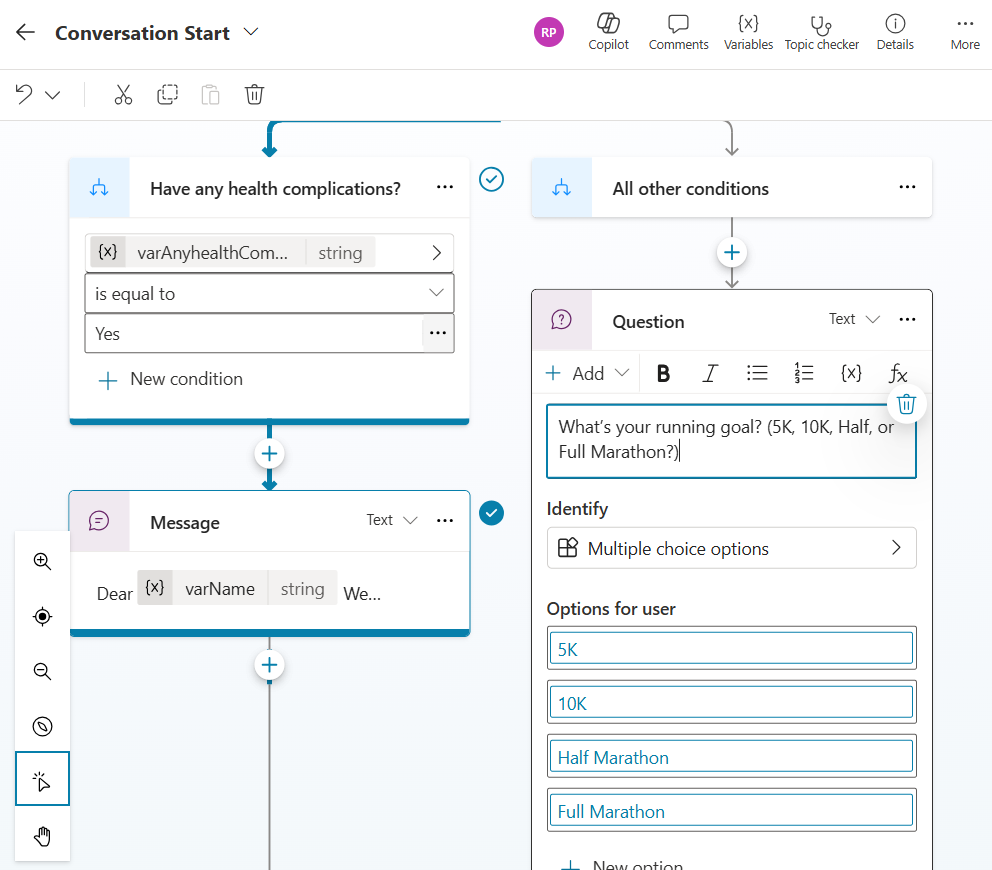
- And add a Message to ask additional details before providing the training plan.
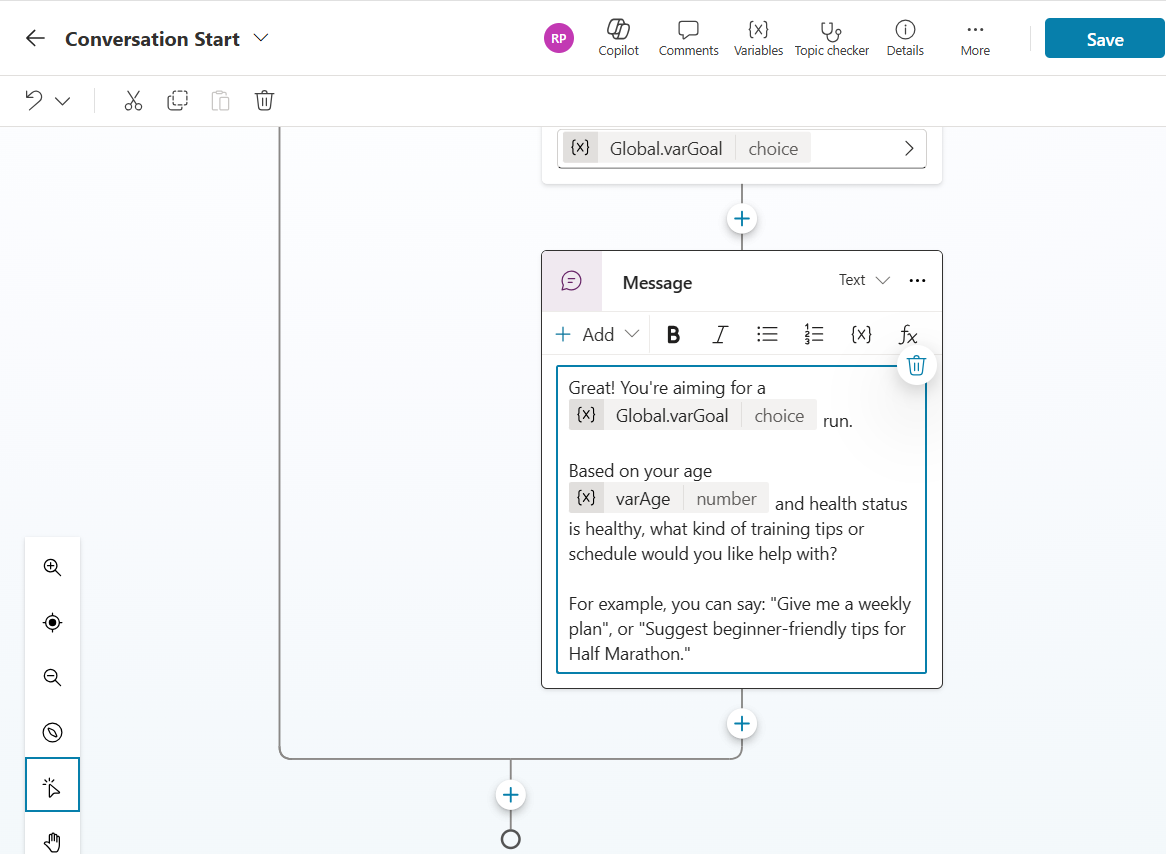
- Save the Topic and test.
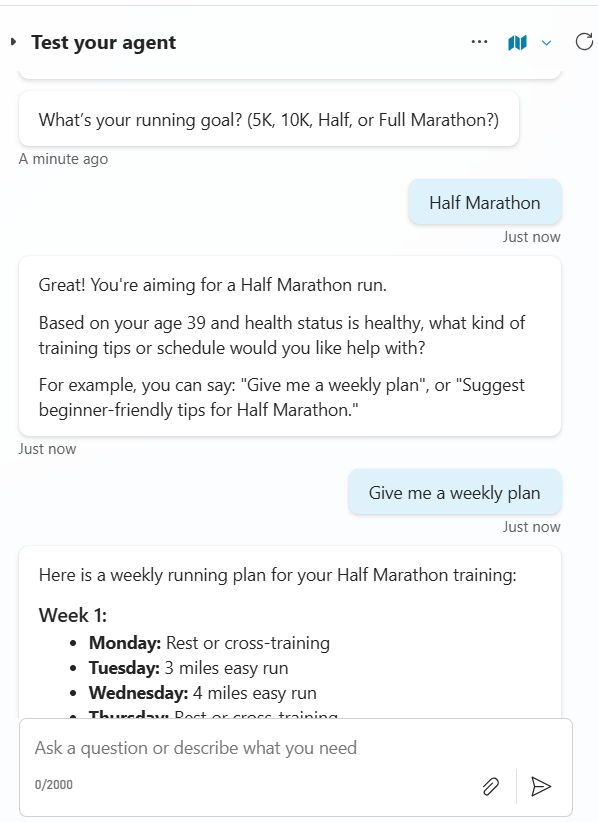
- Provide details and choose no health complications. Agent will ask for the Goal.
- Choose a Goal and Agent will prompt for further details like duration.
- I’ve chosen the Goal and asked for weekly plan.
Hope this article helped you understand how to use Adaptive Cards and implement conditional branching within Topics in Microsoft Copilot Studio.
🙂


Leave a reply to Prevent ‘No Authentication’ in Copilot Studio Agents Using DLP Policy – Rajeev Pentyala – Technical Blog on Power Platform, Azure and AI Cancel reply