In my previous blog post : [Step by Step] Power Pages : Set up Azure AD B2C I explained the steps to set up Azure AD B2C tenant and configure it as an Identity Provider for a Power Pages Website.

If you have completed all the Azure AD B2C setup steps mentioned in that blog post, your Power Page Website’s Azure AD B2C sign-up pane should appear as shown below:
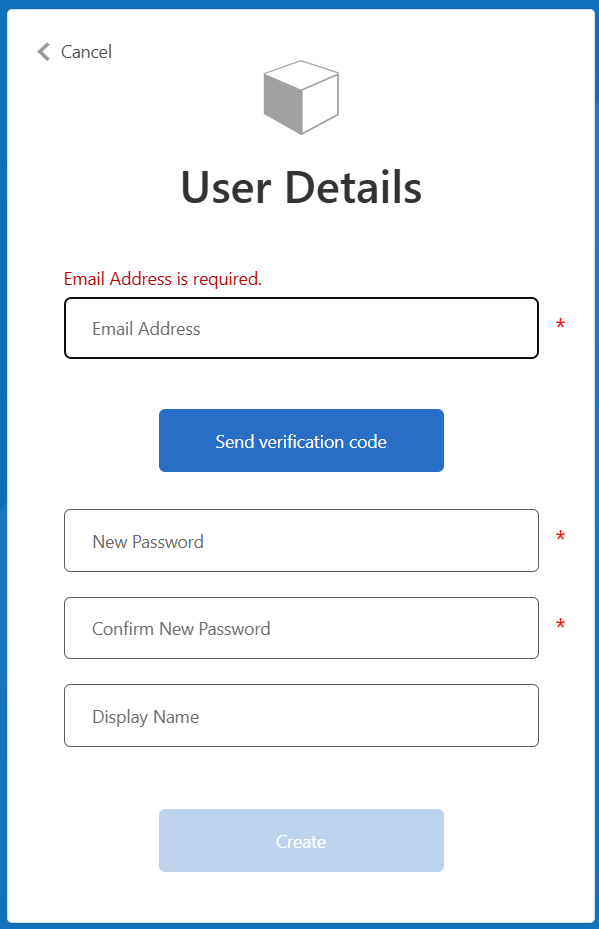
In the screen above, we validate the user’s ‘Email Address’ and capture the ‘Display Name’. After registration, a Contact record is created in Dataverse using the provided ‘Email Address’.
What if we need to capture additional details during sign-up and automatically populate them in the created Contact record in Dataverse? This can be achieved by configuring Claims Mapping.
What is claims mapping:
- a claim is information that describes a user’s identity, like an email address or date of birth.
- When you sign in to Power Pages website, it creates a token. A token contains information about your identity, including any claims that are associated with it.
- Claims mapping is a way to change the information that’s included in a token.
- Registration claims mapping modifies the claims that are emitted when you register for an application or a site.
- Login claims mapping modifies the claims that are emitted when you sign in to an application or a site
Now that you understand the basics, let’s dive into Registration Claims Mapping with a simple scenario. Let’s capture the Address and Telephone Number when a user signs up on a Power Pages website by following these steps:
Steps to capture ‘Phone Number’ and ‘Address’ during Power Page Websites Sign up Process:
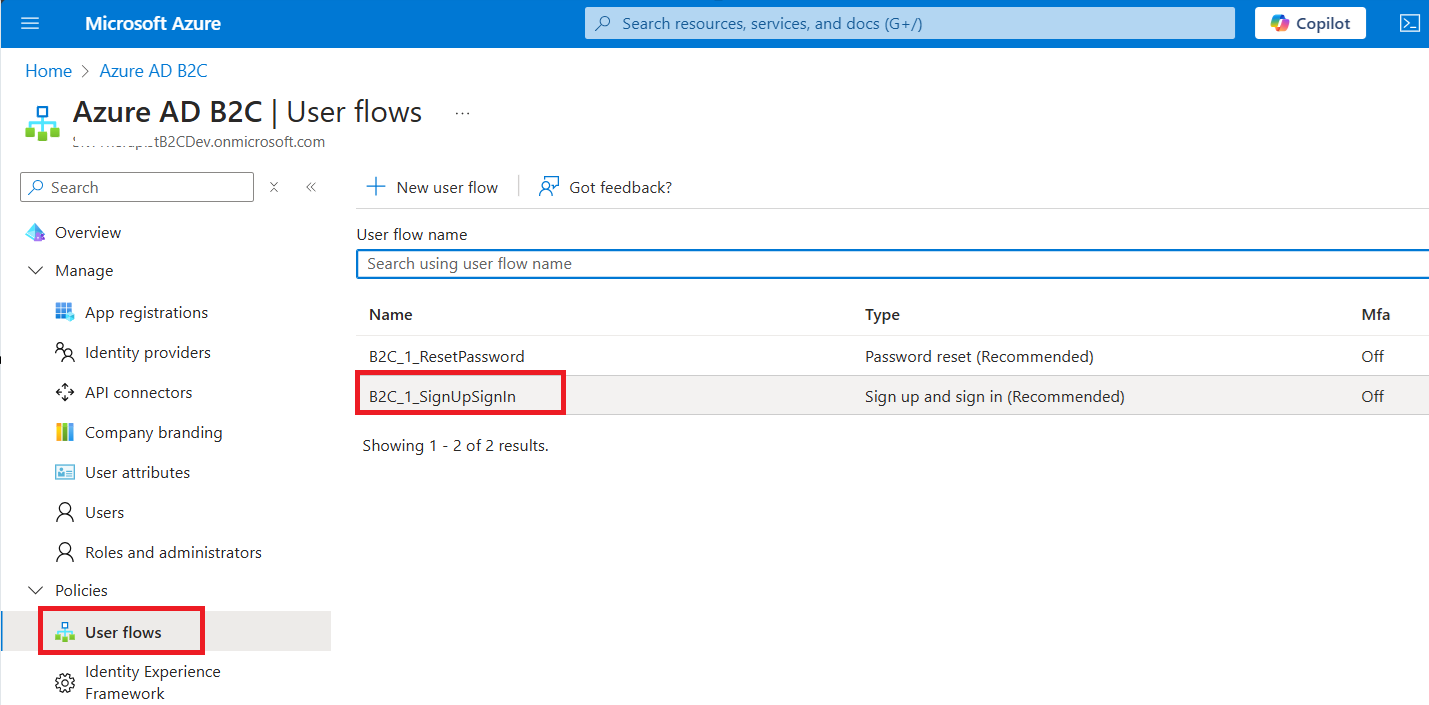
- Connect to Azure AD B2C tenant from Azure Portal
- Go to Policies > User flows
- Click on the Sign up and Sign in user flow.
- Click on Application claims

- You will be redirected to Application claims with the list of claims (i.e., Attributes).
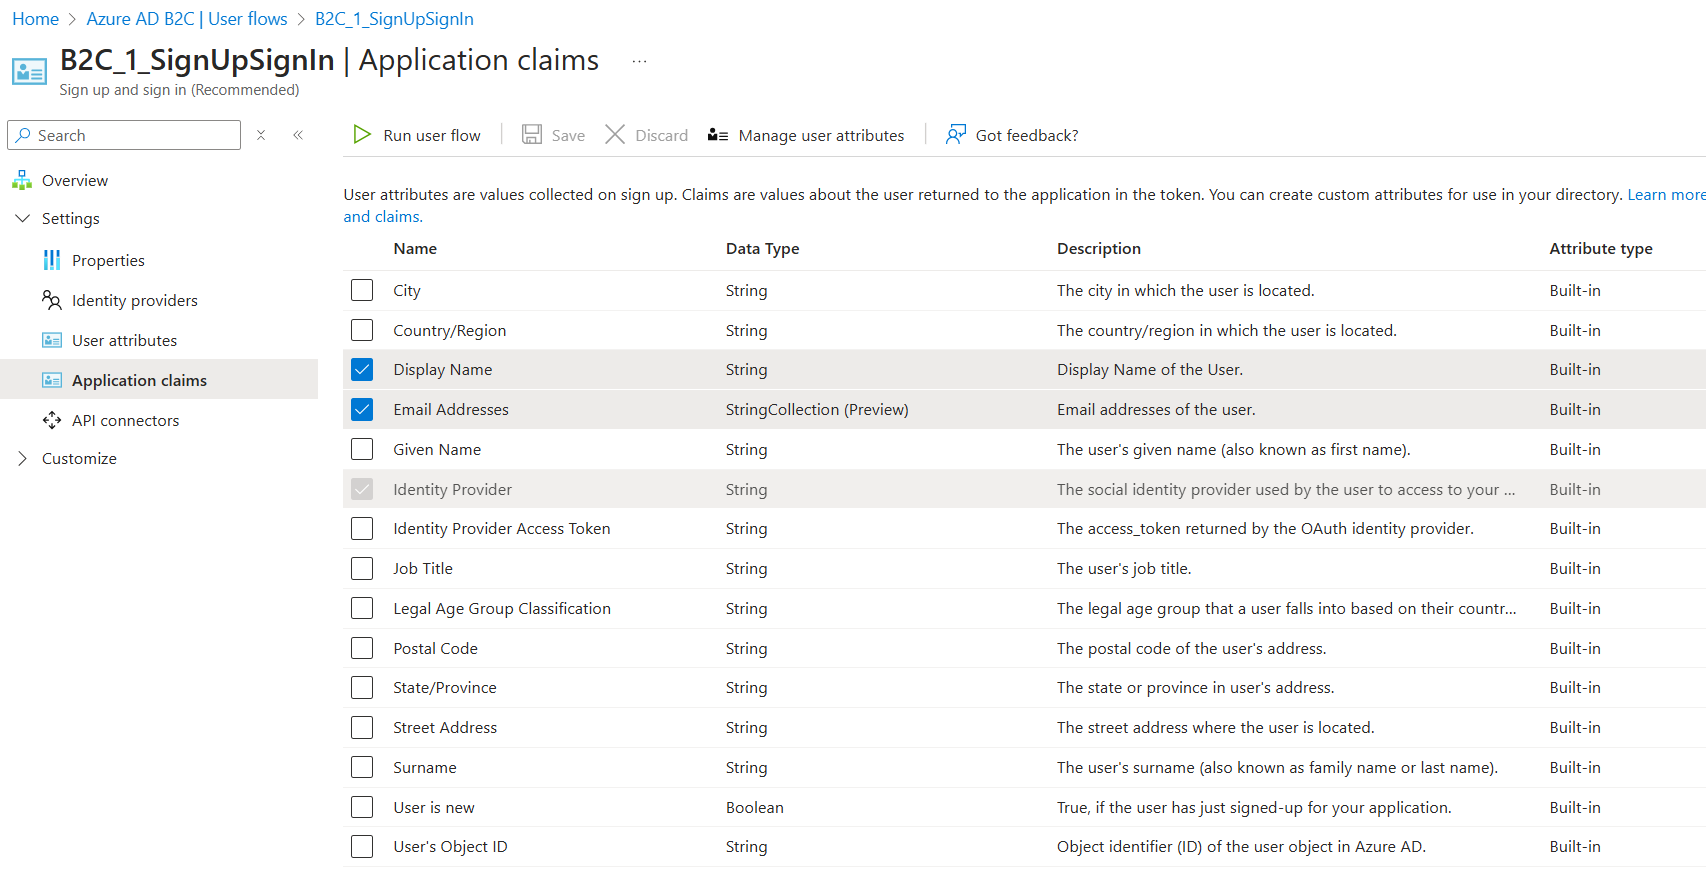
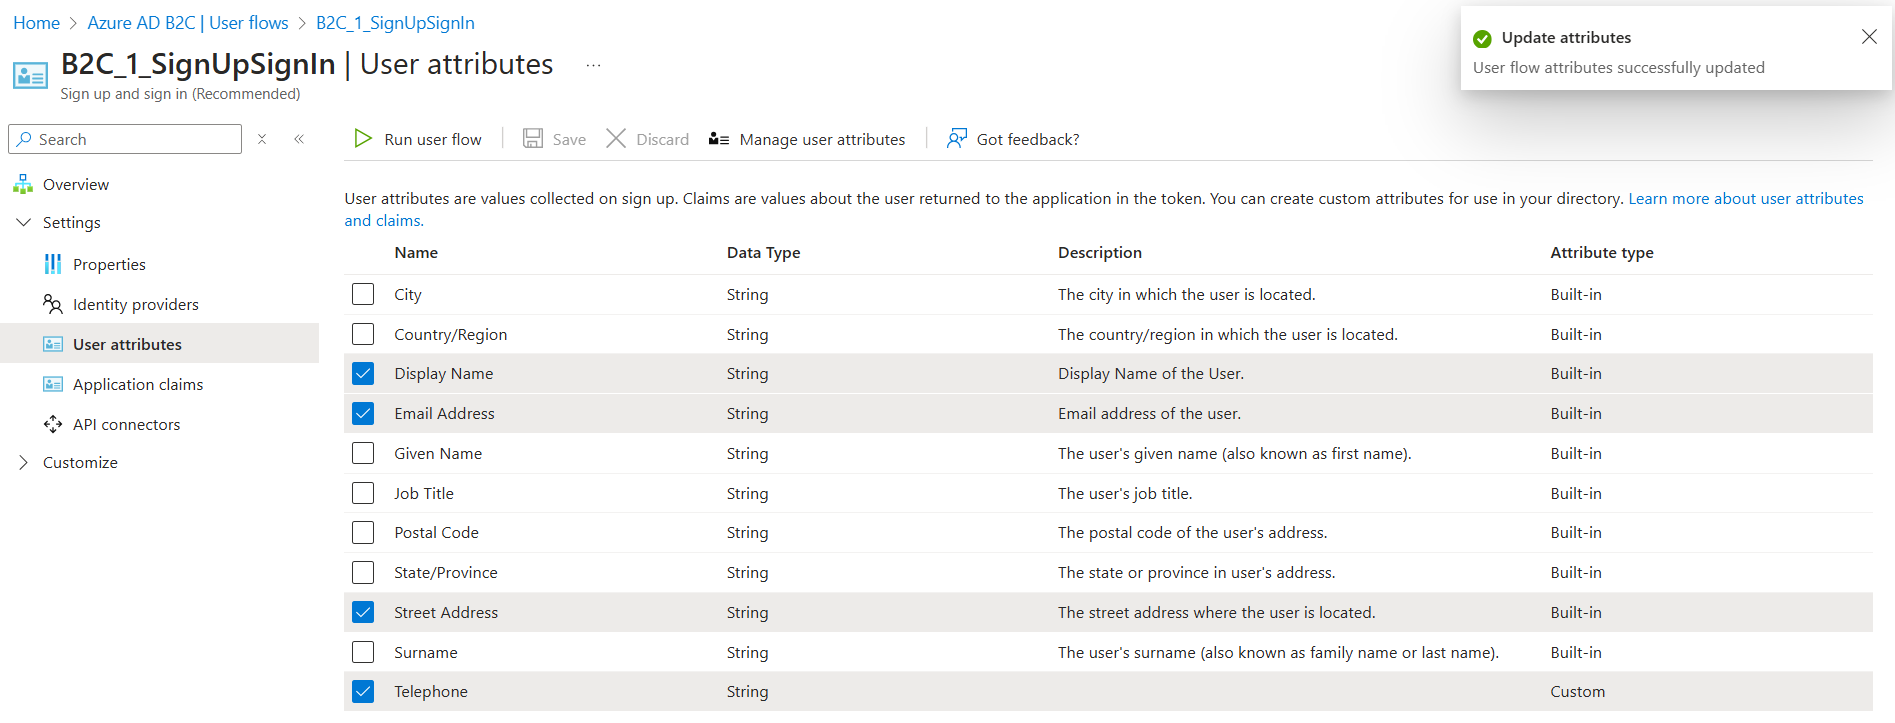
- In this scenario, we need to capture Address and Telephone information during signup and map it to the Contact record. If you notice there are already following highlighted Built-in attributes are available for capturing address data.
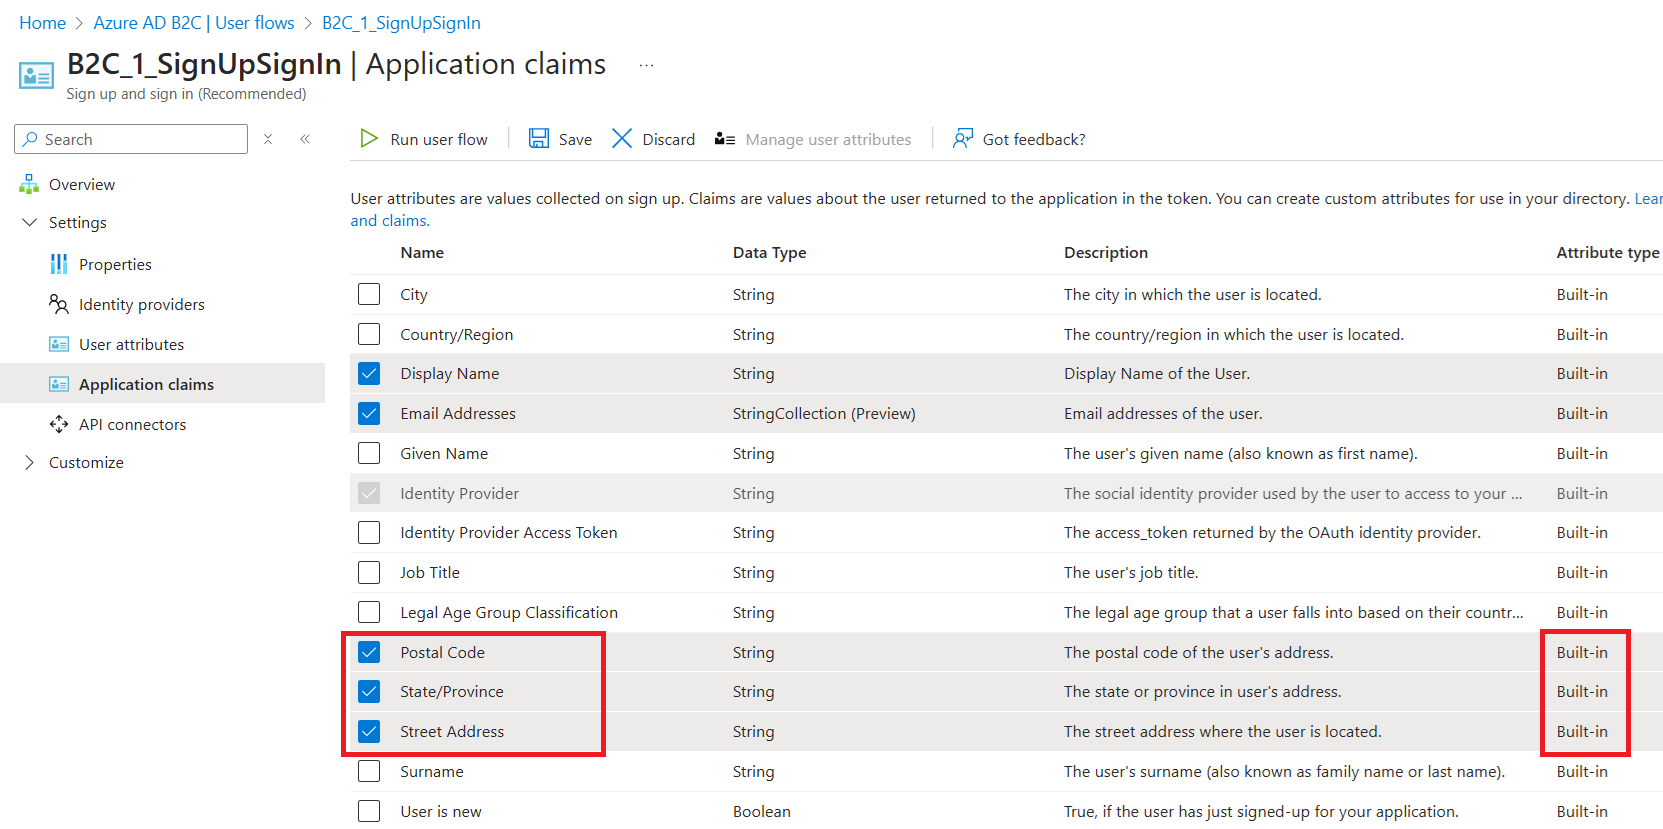
- However there is no Telephone attribute. So we need to create a new attribute.
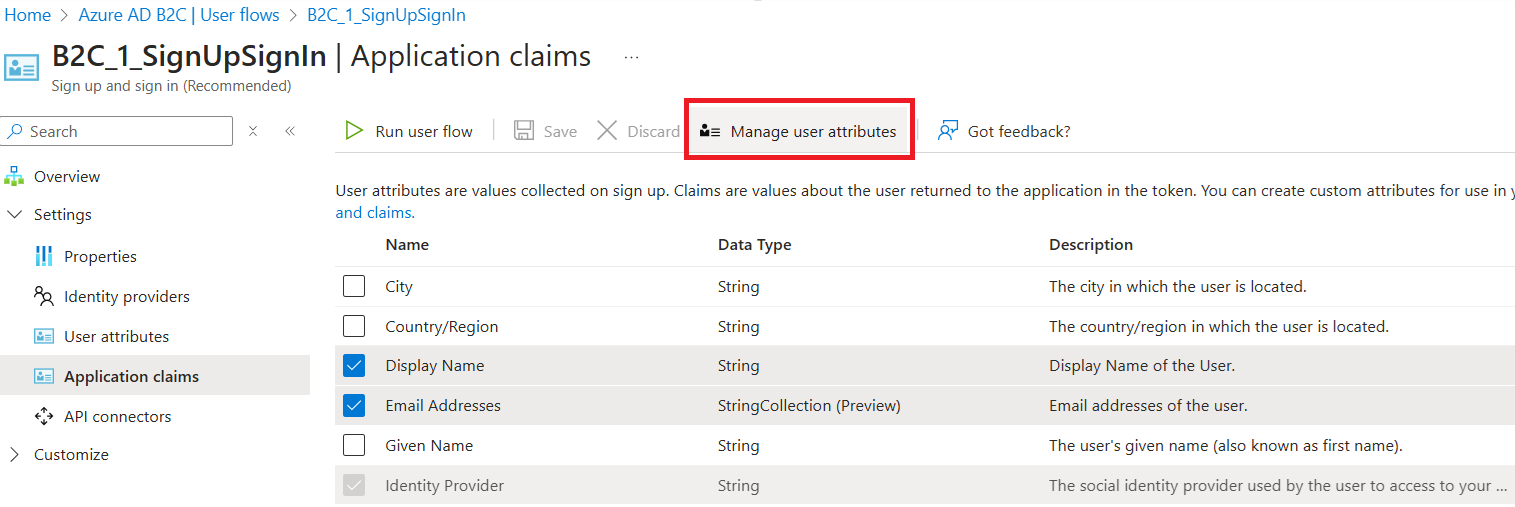
- To create a new attribute, click on Manage user attributes
- + Add a new Telephone attribute. Click on Create.
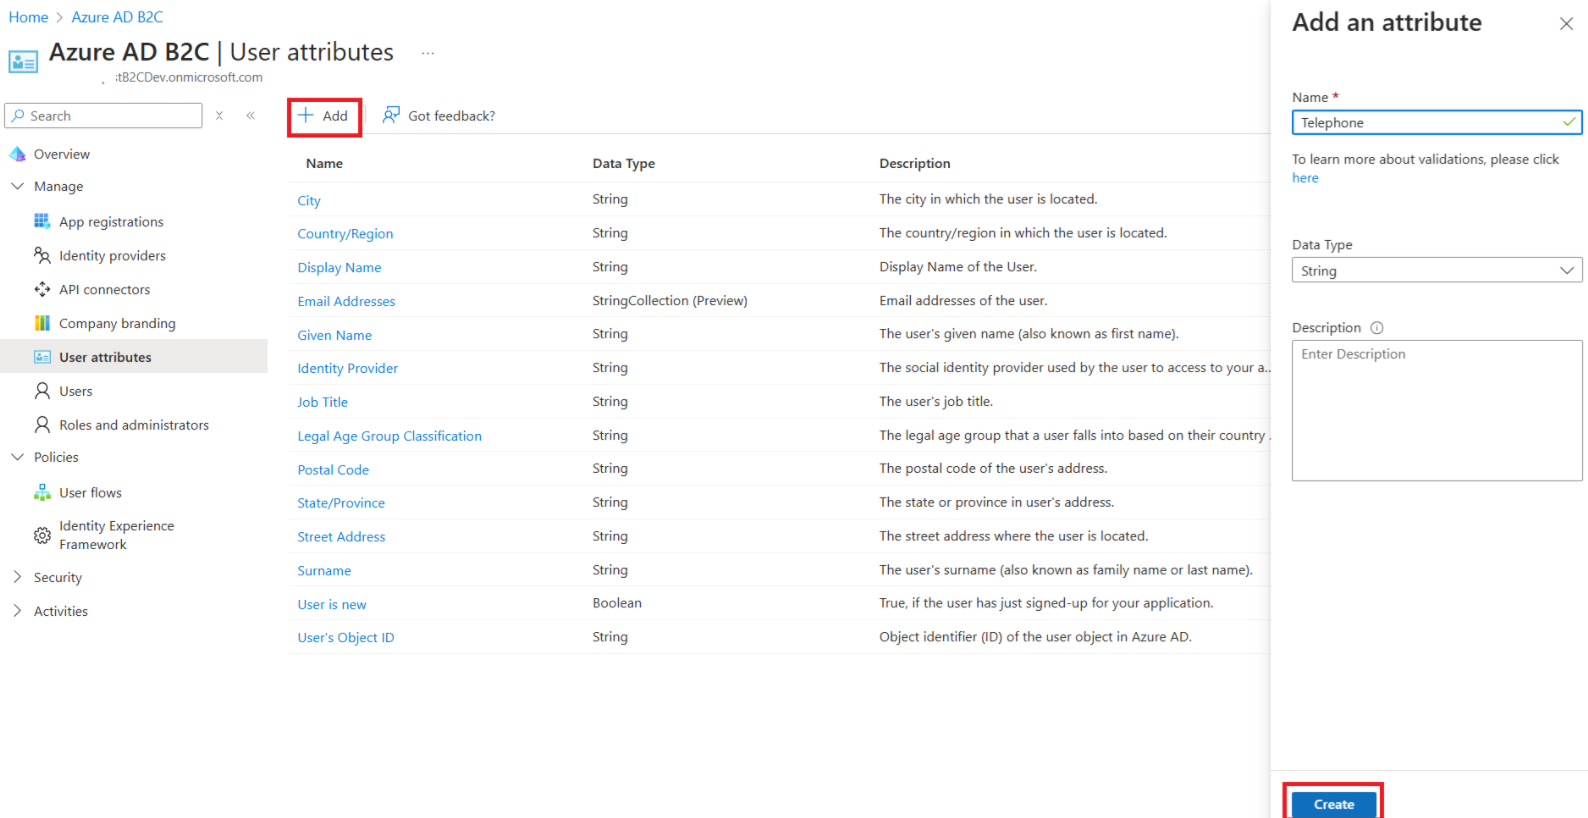
- New attribute Telephone has been created.
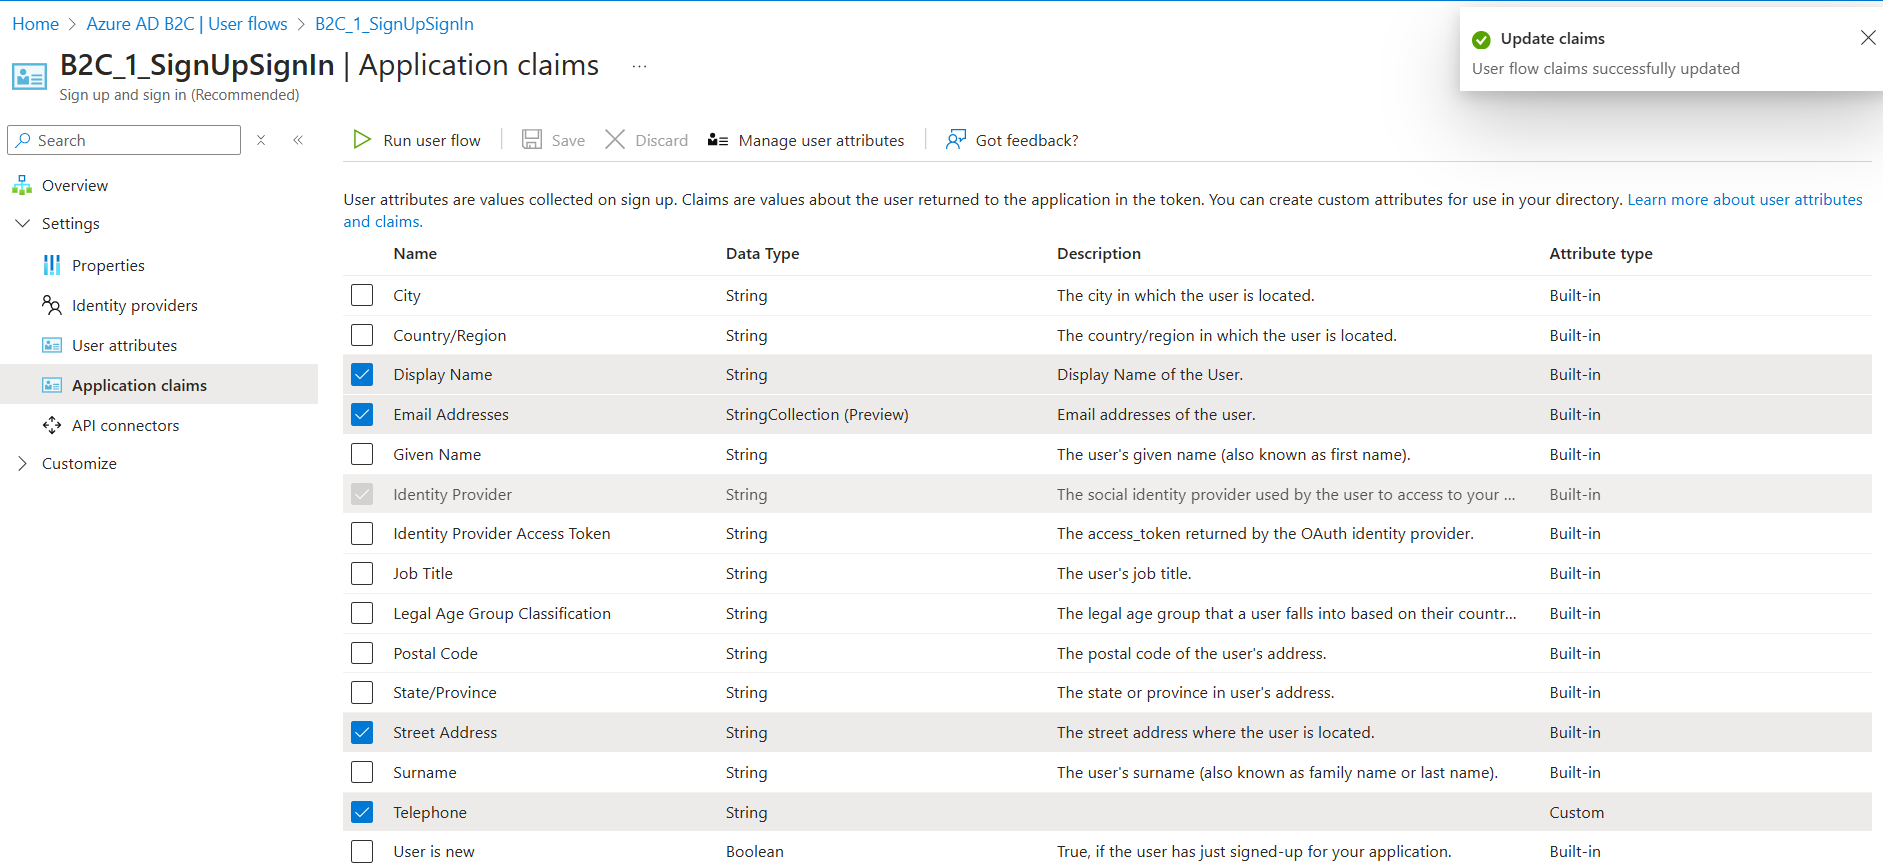
- Go back to Application claims. You will find the newly created Telephone attribute of type Custom

- With both Address and Telephone attributes/claims now available, select them and Save.
- Also, go to User attributes tab and select attributes and Save.
- This next step is critical: ensure you correctly copy the schema names of the Address and Telephone attributes schema names by following below steps.
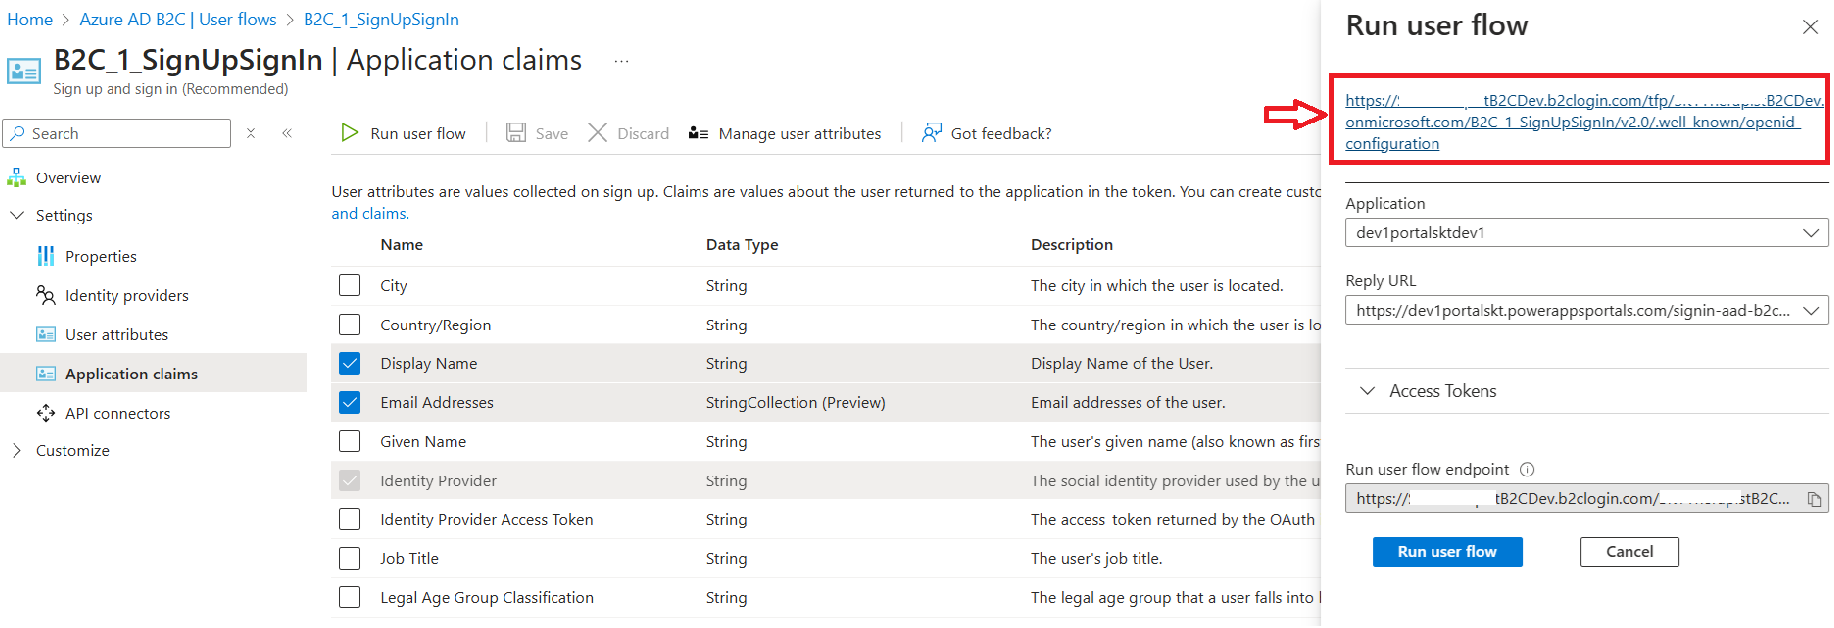
- Click on Run user flow

- Click on the following highlighted URL
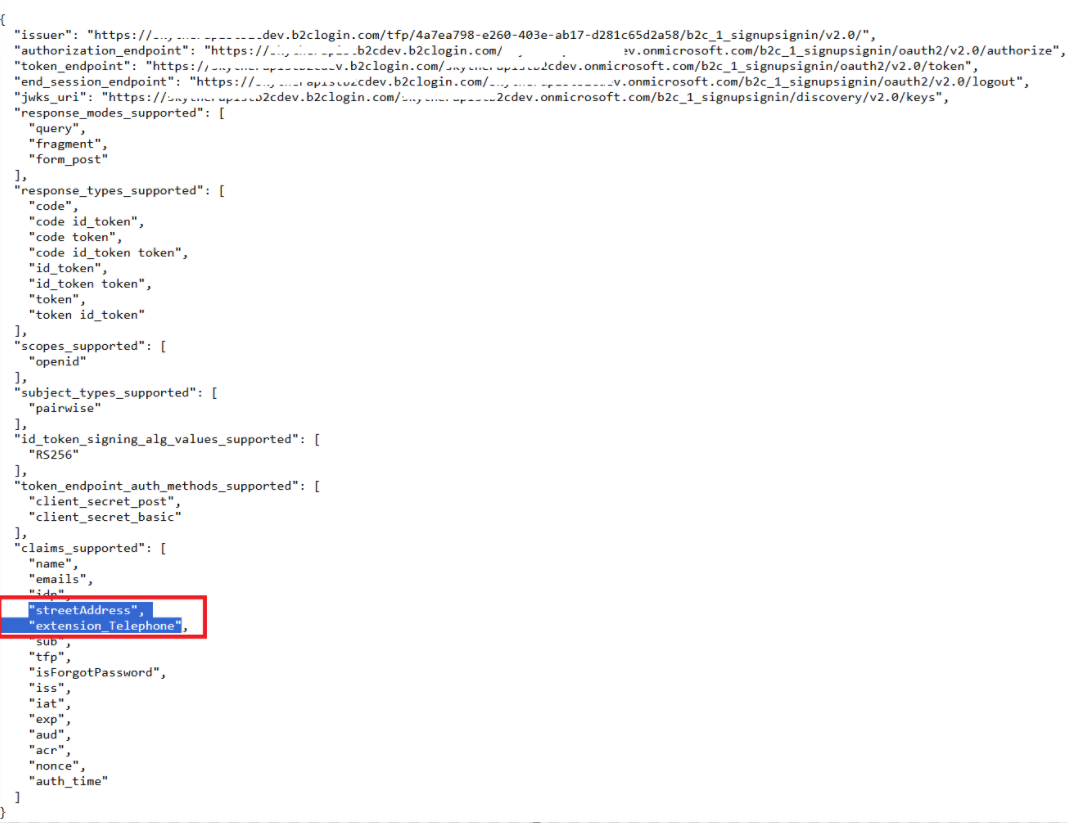
- From the JSON, copy the highlighted attribute schema names (i.e., streetAddress, extension_Telephone). We will be using these copied schema names in Power Pages Azure AD B2C Identity configuration pane.
The Azure AD B2C configuration is complete. We now need to configure Power Pages settings.
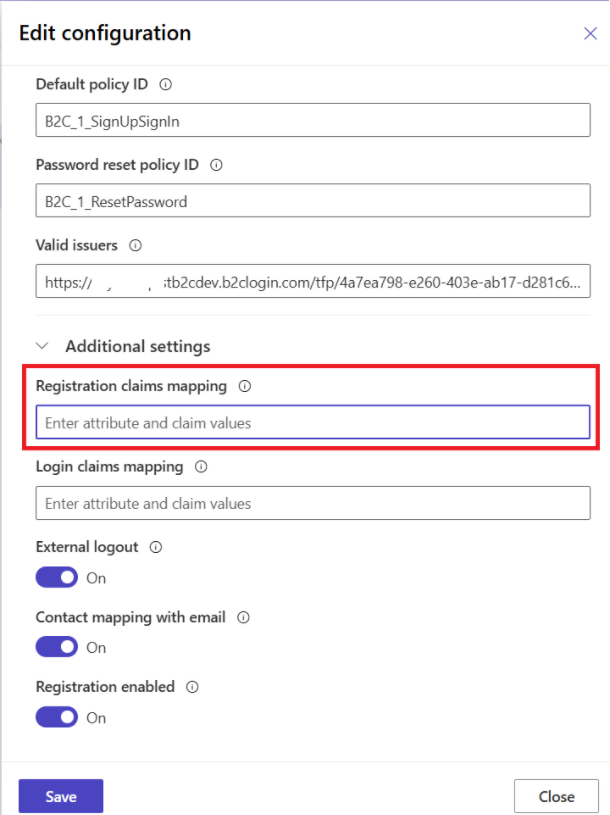
Power Pages Azure AD B2C Settings:
- Go to Power Pages Studio.
- Open Security > Identity providers > Azure AD B2C
- Expand Additional Settings
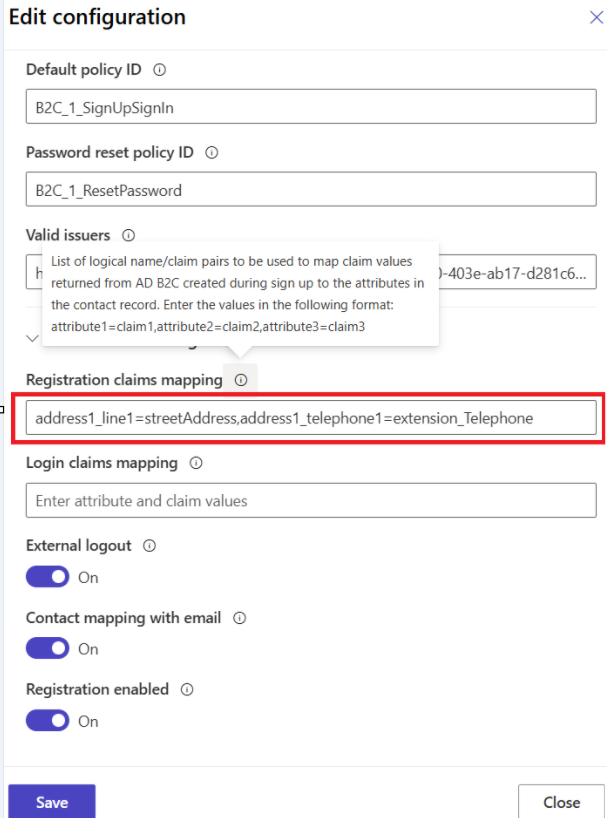
- We need to provide Registration claims mapping value as attribute1=claim1,attribute2=claim2 etc.
- ‘attribute1’ is logical name of Dataverse Contact table’s attribute
- ‘claim1’ is the schema name of Claim we copied in above steps (i.e., streetAddress, extension_Telephone)
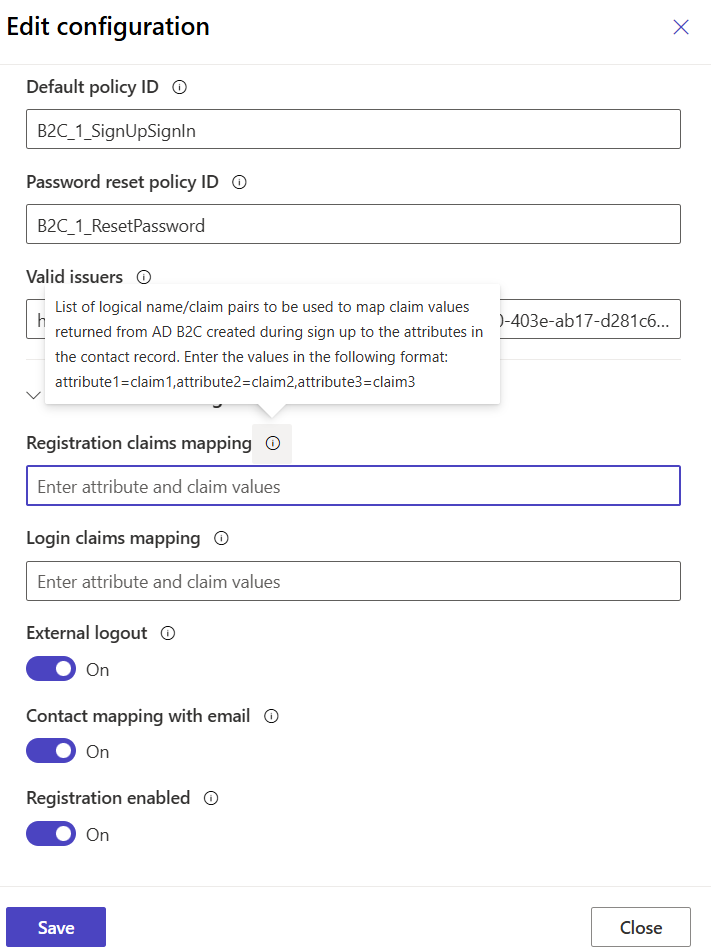
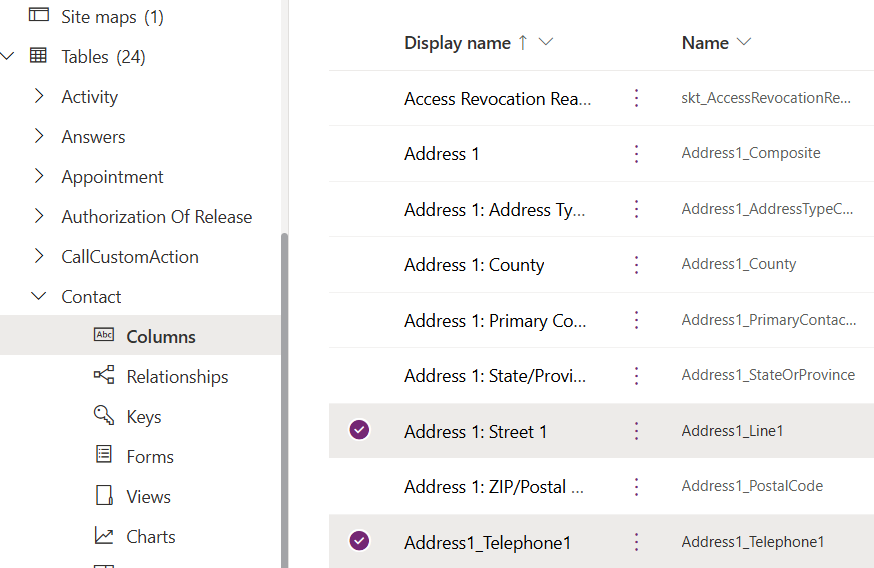
- Copy the logical names from Contact table (i.e., address1_line1, address1_telephone1) in lowercase.
- Now that we have both Contact tables logical attributes and B2C claim schema names, set the Registration claims mapping value as address1_line1=streetAddress,address1_telephone1=extension_Telephone and Save
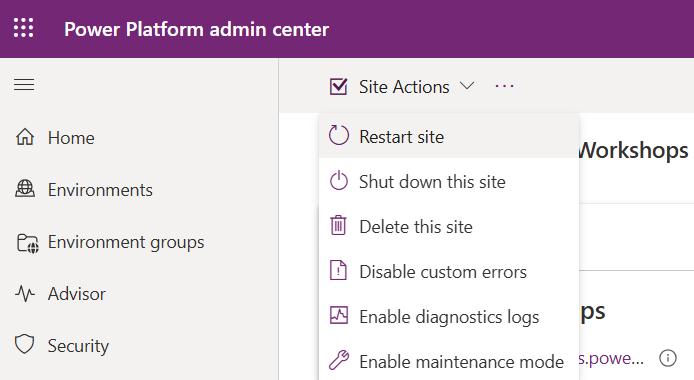
- Restart the Portal Website
- Open the Portal Website and try registration. You will now see Telephone and Street Address.
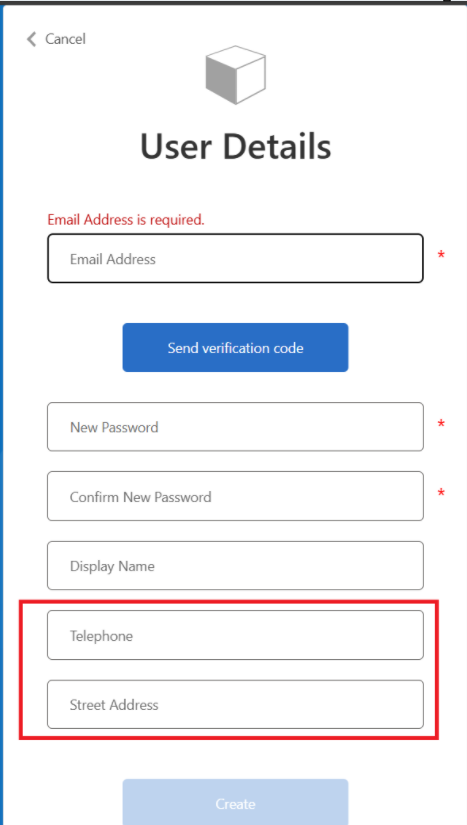
- I’ve provided following details and clicked on Create
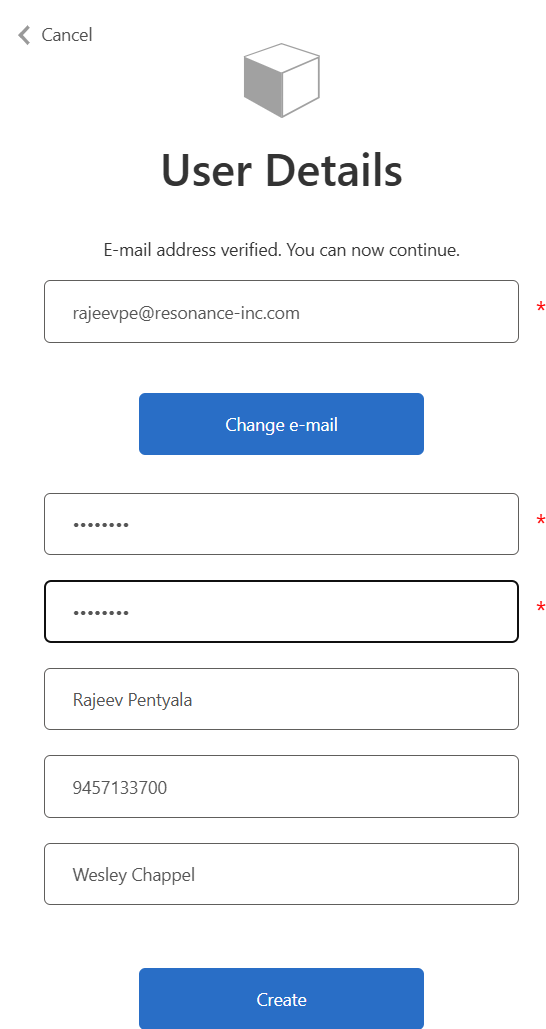
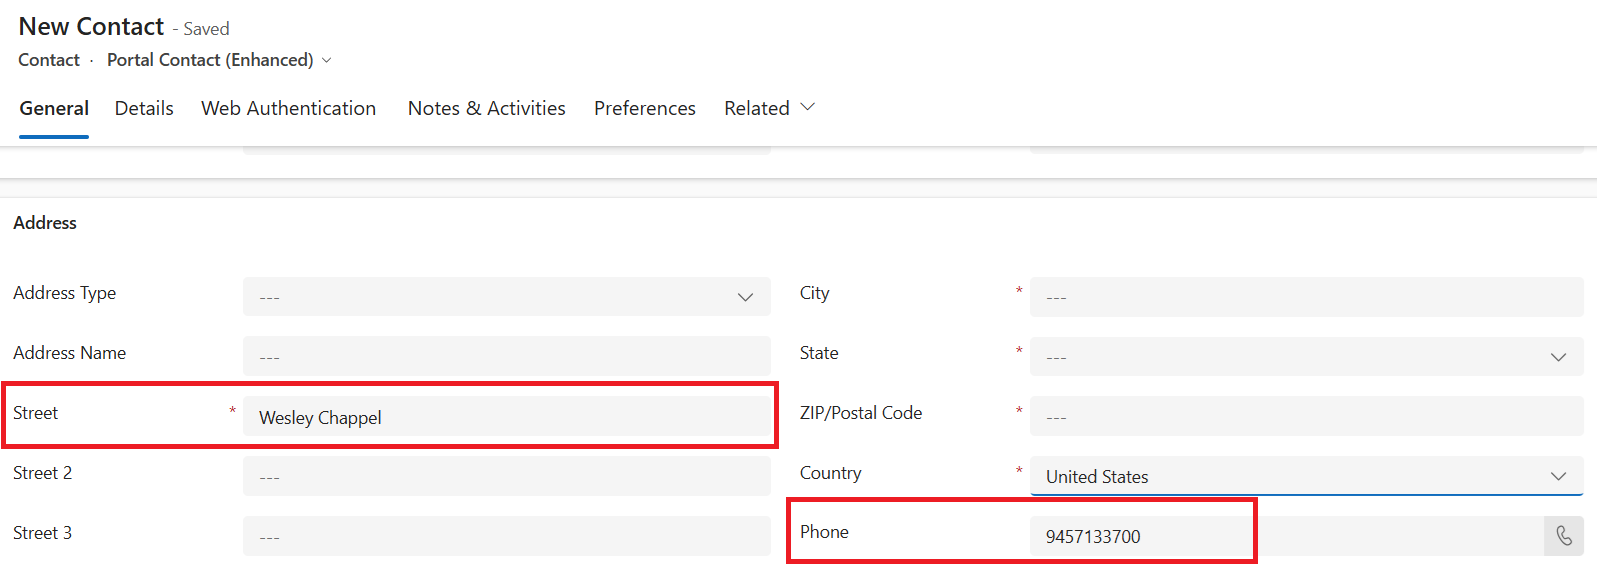
- Registration was successful, and the Contact record now has the populated Street and Phone fields from registration.
Hope you got an idea how the Registration claims mapping works. You can extend this by adding further attributes as per your requirement.

🙂


Leave a reply to Kstudsrud Cancel reply