In this post, we’ll walk through the step-by-step process of integrating a Cloud flow with a Power Pages site. We’ll use a ‘Contact Us’ scenario to illustrate the end-to-end process.
Scenario:
- I will be building a Contact Us‘ page with the following basic details
- When the user submits the details on the Contact Us page, they will be sent to a cloud flow. The cloud flow will process the details and send an email to the support team.
Its a three step process as listed below:
- Build the Contact Us page
- Configure a Cloud Flow with Email action
- Trigger the Cloud Flow from Contact Us page using jScript
Ensure you have a Power Pages website set up before proceeding. If you already have one, let’s get started.
Build the Contact Us page:
- Login to Power Pages maker studio.
- Click on Edit the Website

- Create a new Contact Us Page
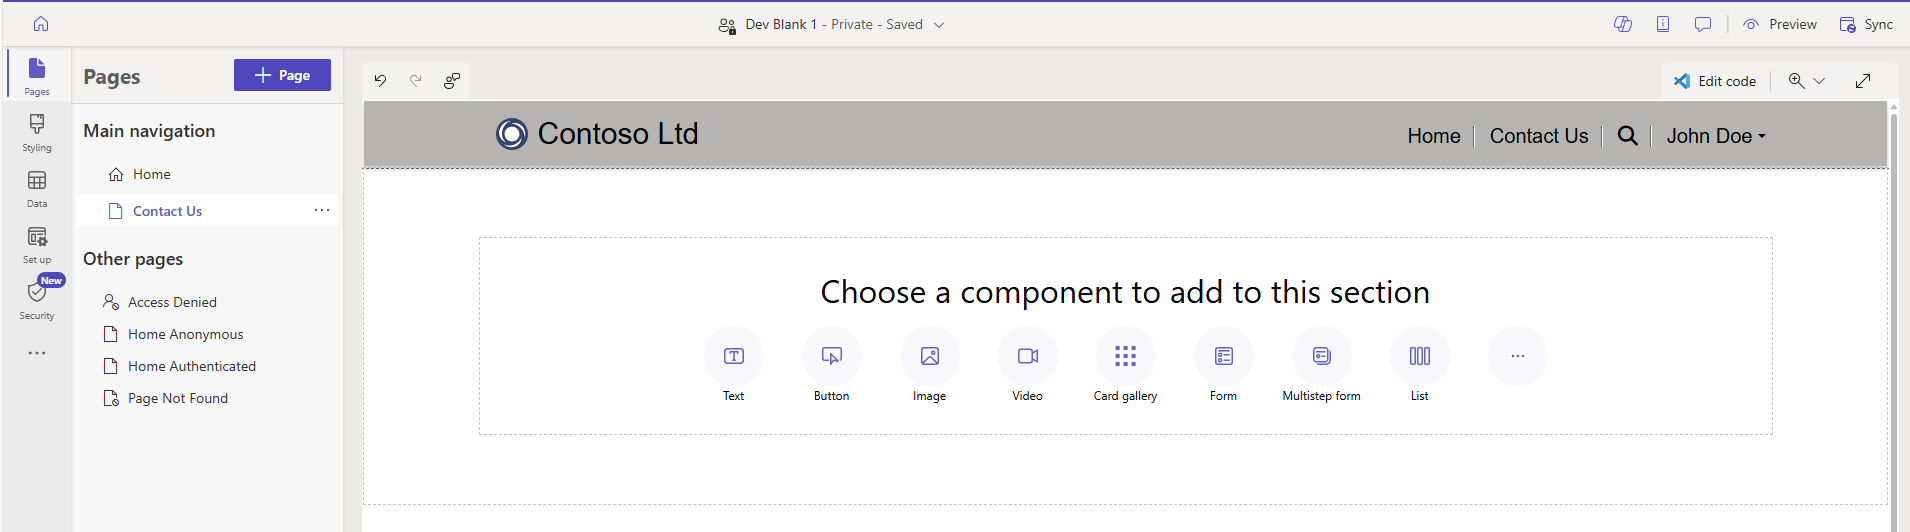
- Open the Contact Us page in code view by clicking on on Edit code > Open Visual Studio Code
- Contact Us page opens up in Visual Studio Code browsers extension as shown below. The page name will be Contact Us.en-US.webpage.copy.html
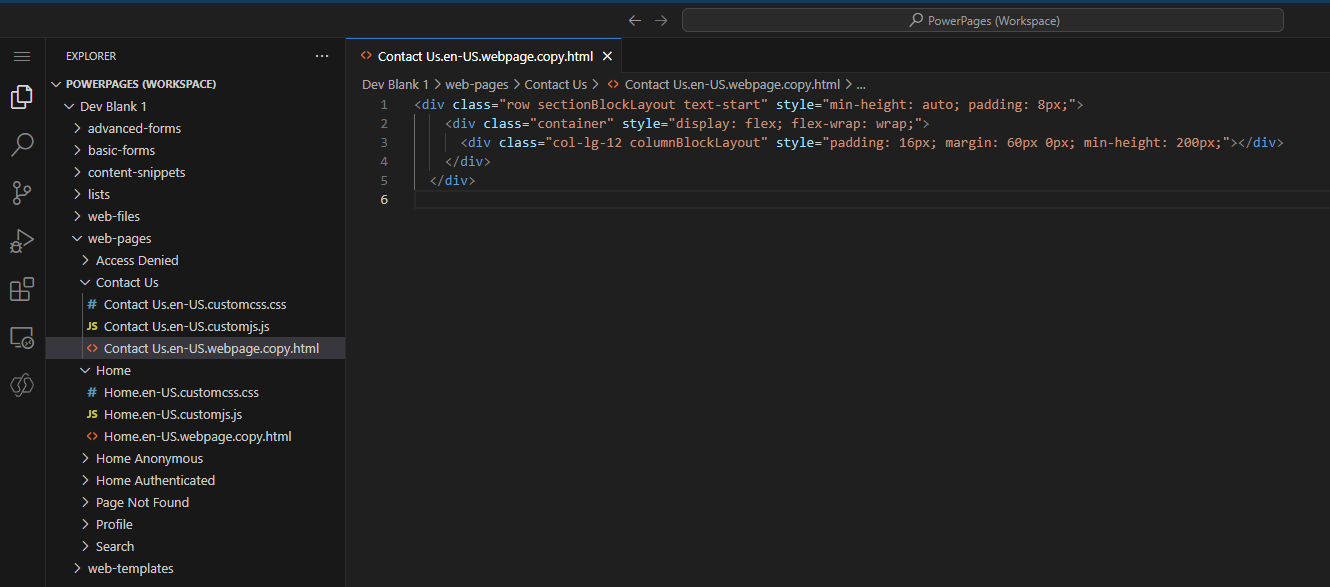
- To build the UI, Paste the following <HTML> code in the Contact Us.en-US.webpage.copy.html page.
 <div class="contact-form-container">
    <div class="form-group">
        <label for="name">Name:</label>
        <input type="text" id="txtname" name="name" required>
    </div>
    <div class="form-group">
        <label for="email">Email:</label>
        <input type="email" id="txtemail" name="email" required>
    </div>
    <div class="form-group">
        <label for="subject">Subject:</label>
        <input type="text" id="txtsubject" name="subject" required>
    </div>
    <div class="form-group">
        <label for="message">Message:</label>
        <input type="text" id="txtmessage" name="message" class="large-textbox" required>
    </div>
    <button type="button" class="submit-btn" onclick="SubmitFeedback()">Submit</button>
</div>

- Now, return to the Power Pages Maker studio and Sync the changes, and the page will render as shown below.
- The UI need some styling improvements. Open the Contact Us.en-US.customcss.css file in the browser’s VSCode and paste the following css.
.contact-form-container {
    max-width: 500px;
    margin: 0 auto;
    padding: 20px;
    box-shadow: 0px 0px 10px rgba(0, 0, 0, 0.1);
    background-color: #f9f9f9;
}

.form-group {
    margin-bottom: 15px;
}

.form-group label {
    margin-bottom: 5px;
    font-weight: bold;
}

.form-group input {
    padding: 10px;
    width: 100%;
    box-sizing: border-box;
    border: 1px solid #ccc;
    border-radius: 4px;
}

.large-textbox {
    height: 100px; /* Height of the textbox */
    padding: 10px; /* Padding inside the textbox */
    width: 100%; /* Full width of the container */
    box-sizing: border-box; /* Includes padding in the width calculation */
    border: 1px solid #ccc; /* Border style */
    border-radius: 4px; /* Rounded corners */
    text-align: left; /* Align text to the left */
    vertical-align: top; /* Align text to the top */
}

.submit-btn {
    padding: 10px 20px;
    background-color: #007bff;
    color: #fff;
    border: none;
    border-radius: 4px;
    cursor: pointer;
    font-size: 16px;
}

.submit-btn:hover {
    background-color: #0056b3;
}

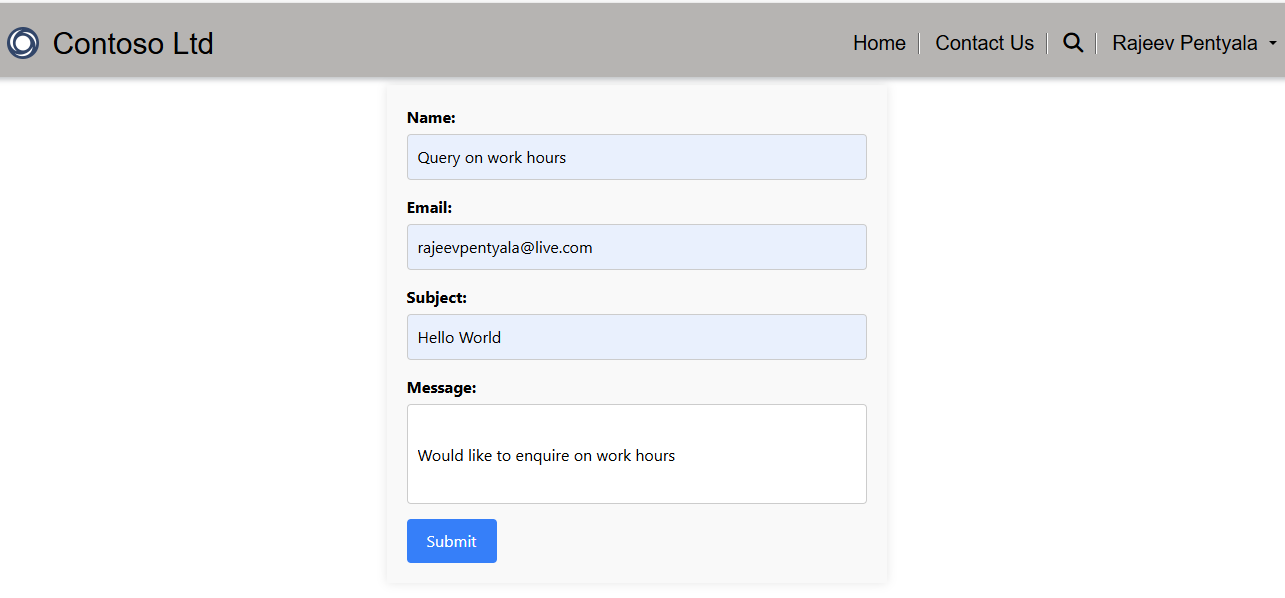
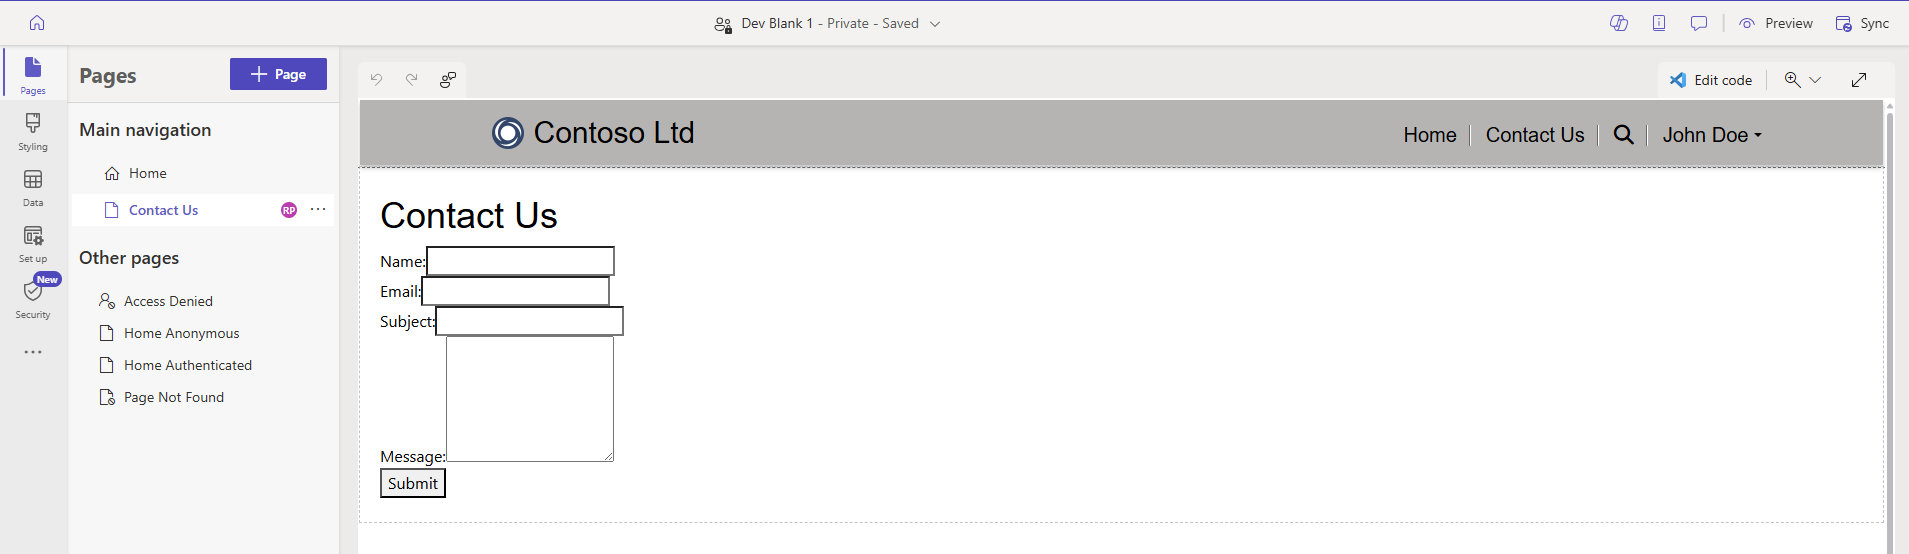
- Return to Power Pages Studio and Sync the changes. You should see the page transformed as shown below.

With that, the Contact Us page is ready, and it’s time to create the Cloud Flow.
Configure a Cloud Flow with Email action:
- Go to the Power Pages Studio
- Navigate to the Set up workspace, then select Cloud flows under Integrations.
- Select + Create new flow

- In the Create your flow popup, search for Power Pages.
- Select When Power Pages calls a flow trigger.

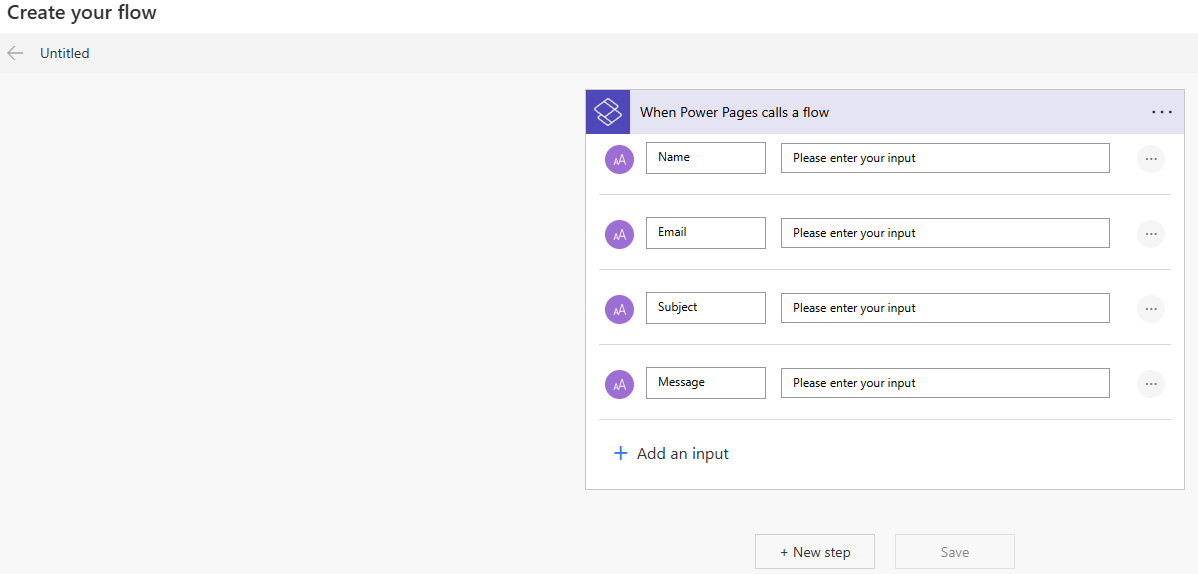
- Since we are capturing Name, Email, Subject and Message on the Contact Us form, we need to pass these inputs from the form to our Cloud Flow..
- Click on + Add an input

- Select type as Text

- Provide Name as input.

- Repeat the same for Email, Subject and Message. It should look as below once completed.
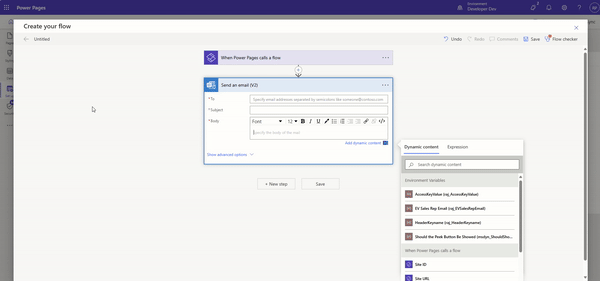
- Select any of your preferred Email action. I am choosing the Send an email (V2) Office 365 Outlook action.

- Map Email action fields with the input fields which we already defined.
- Note that I am using an Environment Variable in the To field to store the email address where the email should be received. You can use the same approach or hardcode your company’s support team’s email address.
- To send the response back from the flow to the Power Pages, we need to add Return value(s) to Power Pages action.
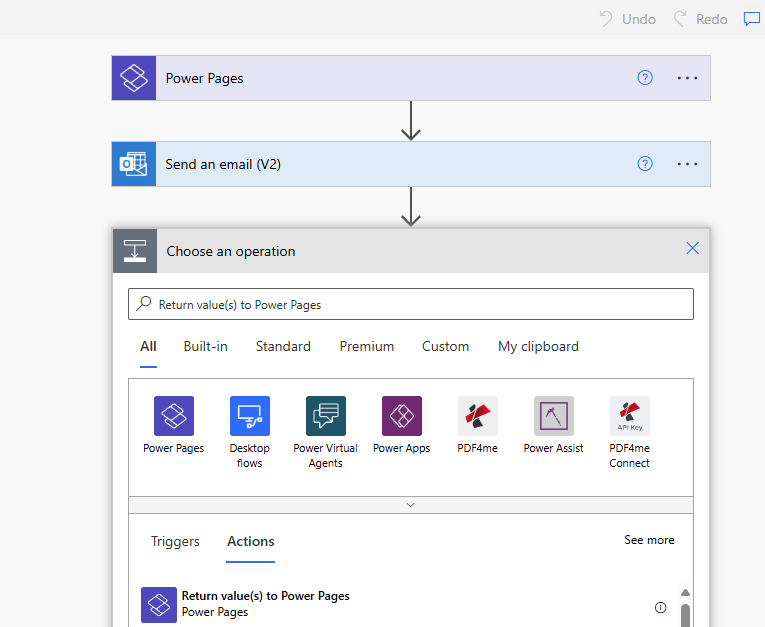
- Add a Response variable as shown below. In the value, you can either type a success message or capture any exceptions, if applicable.
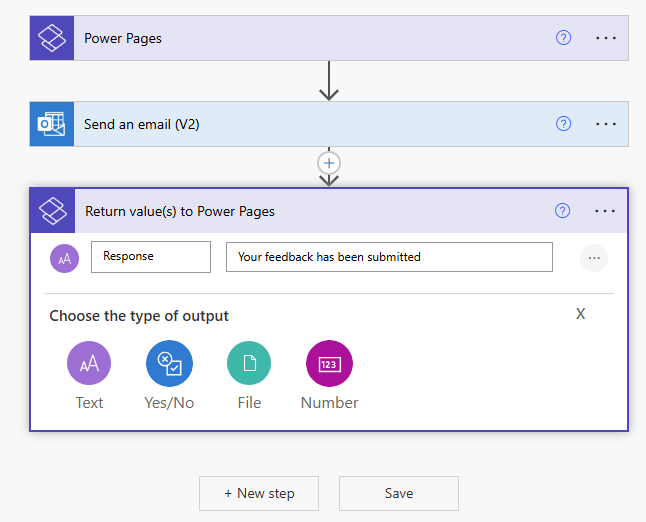
- Finally, give a name to the flow and Save.
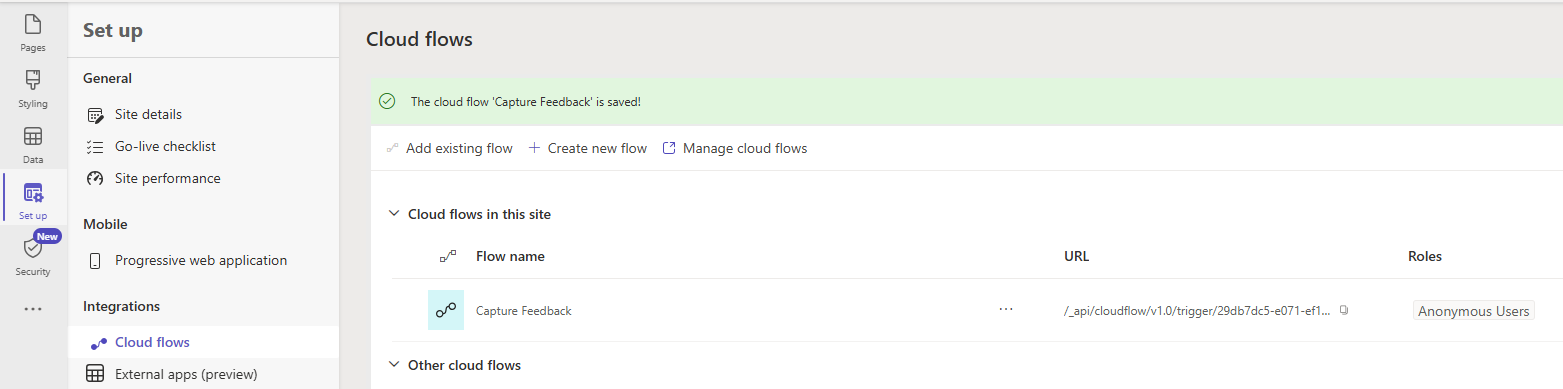
- You will be redirected to a screen as shown below. Copy the URL which we will be using in next section.
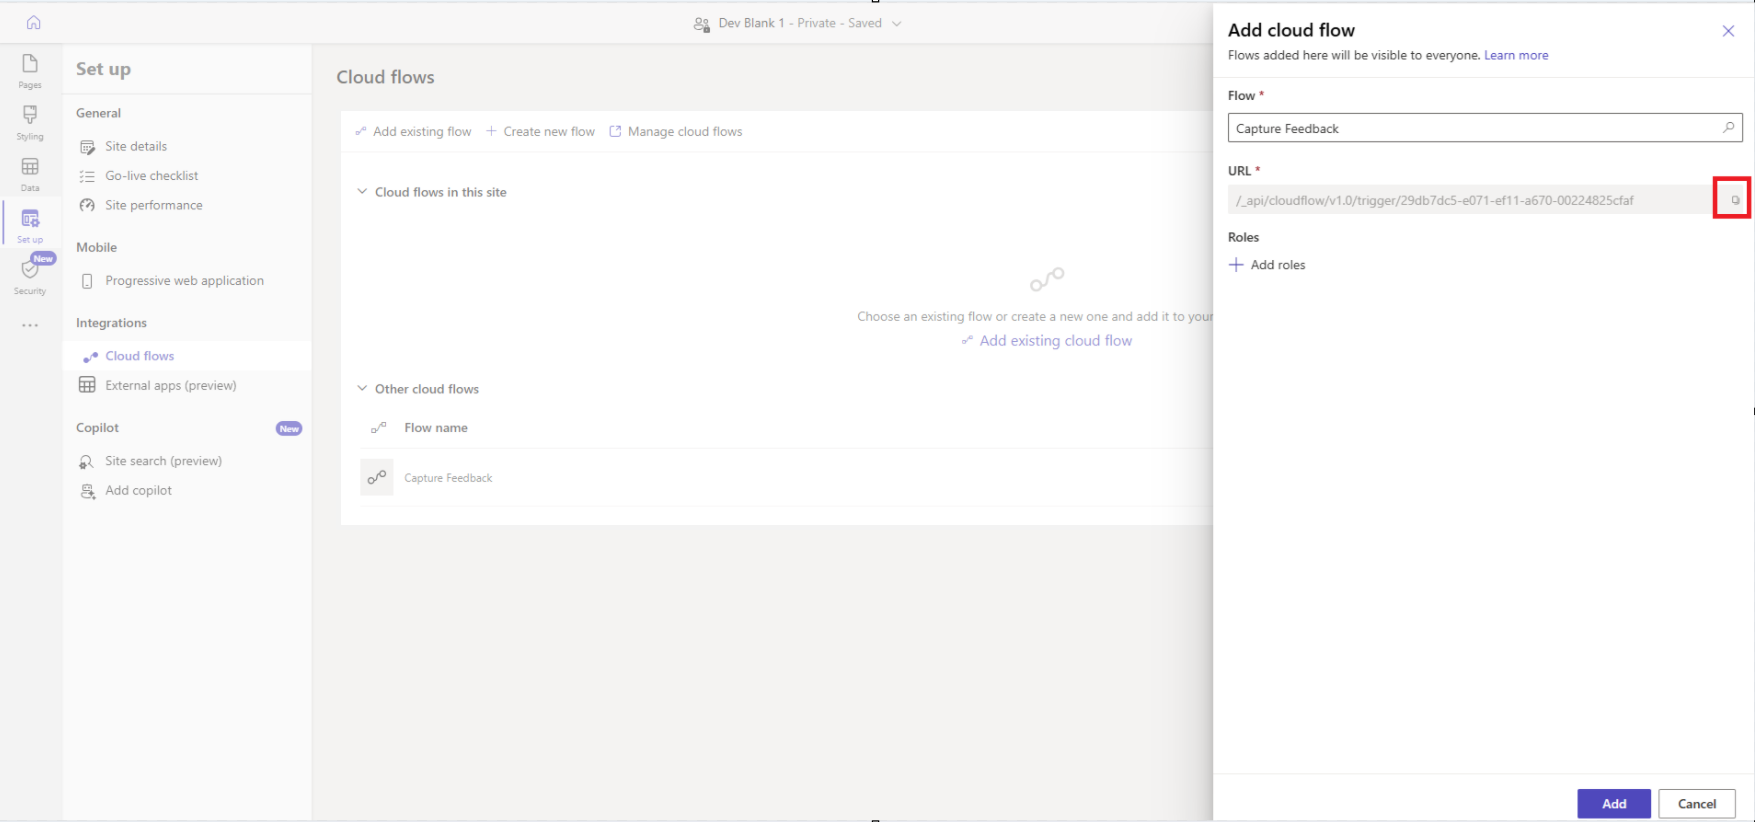
- Click on Add roles and select the web roles.

- Click on Add which adds the flow to our Power Pages website.
We have the Contact Us page UI and the flow setup. Now, we need to implement the logic to call the flow when the Submit button on the Contact Us page is clicked.
Trigger the Cloud Flow from Contact Us page using jScript:
In the Contact Us.en-US.webpage.copy.html from the VSCode
- Add the <script> block in the Contact Us.en-US.webpage.copy.html page. This script will read the Name, Email, Subject, and Message fields from the UI and pass them as a JSON payload to the flow URL, which we copied earlier..
  <script>
    function SubmitFeedback() {
     // Flow url copied in previous section.
      var _url = "/_api/cloudflow/v1.0/trigger/29db7dc5-e071-ef11-a670-00224825cfaf";

      var name = document.getElementById("txtname").value;
      var email = document.getElementById("txtemail").value;
      var subject = document.getElementById("txtsubject").value;
      var feedbackMessage = document.getElementById("txtmessage").value;

      var data = {};
      data["Name"] = name;
      data["Email"] = email;
      data["Subject"] = subject;
      data["Message"] = feedbackMessage;
      var payload = {};
            payload.eventData = JSON.stringify(data);
            shell
                .ajaxSafePost({
                    type: "POST",
                    url: _url,
                    data: payload
                })
                .done(function (response) {
                    const result = JSON.parse(response);
                    alert(result["response"]);
                })
                .fail(function () {
                    alert("failed");
                });

      return false; // Prevent form submission for demonstration purposes
  }
  </script>
- Save the page.
- Go back to Power Pages Studio and Sync
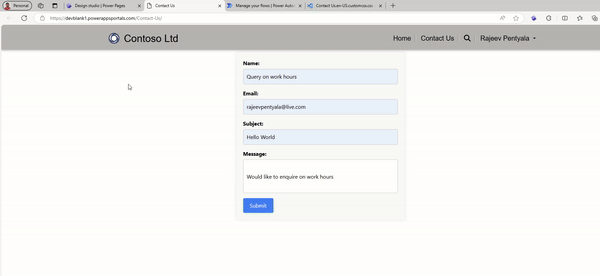
- Click on Preview.
- Go to the Contact Us page and submit the request. You should receive a response. Check the flow run, and you should see an entry there..
- Here is the full content of Contact Us.en-US.webpage.copy.html page along with HTML and Script.
<div class="row sectionBlockLayout text-start" style="min-height: auto; padding: 8px;">
  <div class="contact-form-container">
    <div class="form-group">
        <label for="name">Name:</label>
        <input type="text" id="txtname" name="name" required>
    </div>
    <div class="form-group">
        <label for="email">Email:</label>
        <input type="email" id="txtemail" name="email" required>
    </div>
    <div class="form-group">
        <label for="subject">Subject:</label>
        <input type="text" id="txtsubject" name="subject" required>
    </div>
    <div class="form-group">
        <label for="message">Message:</label>
        <input type="text" id="txtmessage" name="message" class="large-textbox" required>
    </div>
    <button type="button" class="submit-btn" onclick="SubmitFeedback()">Submit</button>
</div>

  </div>

  <script>
    function SubmitFeedback() {
      var _url = "/_api/cloudflow/v1.0/trigger/29db7dc5-e071-ef11-a670-00224825cfaf";

      var name = document.getElementById("txtname").value;
      var email = document.getElementById("txtemail").value;
      var subject = document.getElementById("txtsubject").value;
      var feedbackMessage = document.getElementById("txtmessage").value;

      var data = {};
      data["Name"] = name;
      data["Email"] = email;
      data["Subject"] = subject;
      data["Message"] = feedbackMessage;
      var payload = {};
            payload.eventData = JSON.stringify(data);
            shell
                .ajaxSafePost({
                    type: "POST",
                    url: _url,
                    data: payload
                })
                .done(function (response) {
                    const result = JSON.parse(response);
                    alert(result["response"]);
                })
                .fail(function () {
                    alert("failed");
                });

      return false; // Prevent form submission for demonstration purposes
  }
  </script>
🙂


Leave a reply to Power Pages | Strange issue with HTML controls | Rajeev Pentyala – Microsoft Power Platform Cancel reply