If you are new to PowerApps, please go through my previous blog
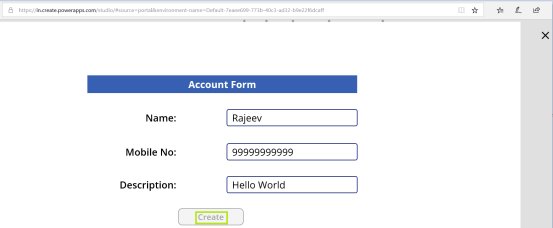
In this post, lets build an App with an Account Form and create the record in Dynamics 365.
Prerequisite:
- You must have a PowerApps account. Refer blog for details.
- Create a Microsoft Flow with logic to create an Account record in Dynamics 365
- Build an App and trigger Flow
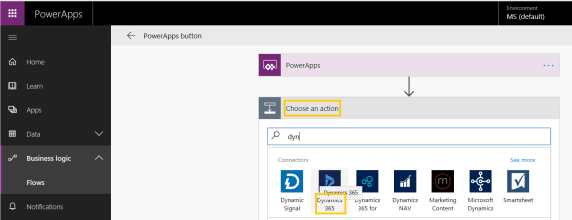
Steps to create Flow:
- Login to PowerApps Portal
- Navigate to Business Logic -> Flows -> Create from blank

- In the new Flow screen, Choose Action, select ‘Dynamics 365’
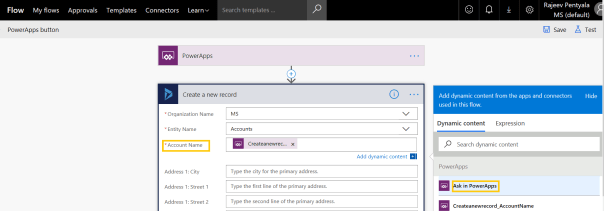
- Select ‘Create a new record’ from Actions.
- Now we need to put place holders in the fields which we pass data from PowerApp.
- To add a place holder to ‘Account Name’ field, select the field, in ‘Dynamics content’ window, click on ‘Ask in PowerApps‘ button.
- A new place holder will get added to ‘Account Name’ field.
- I repeated the above step for ‘Main Phone’ and ‘Description’ fields.
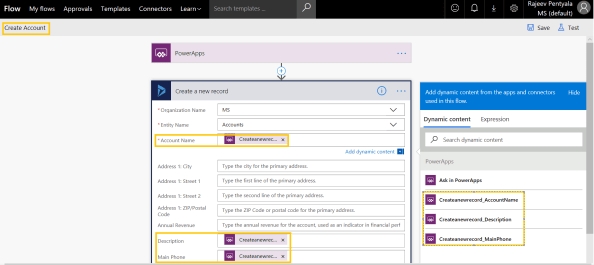
- Rename the Flow to CreateAccount and Save
Invoke Flow from PowerApp:
- To know, how to create a new App and add controls to form, refer my earlier blog
- To trigger the Flow, select the ‘Create’ button, go to ‘Action -> Flows’
- From the ‘Data’ window, select the flow created in above section (i.e.,CreateAccount)

- On ‘OnSelect’ event of button, trigger the Flow ‘CreateAccount’ by calling ‘Run’ method and passing the 3 placeholder parameters.
- CreateAccount.Run(txtName.Text,txtDesc.Text,txtMobile.Text)
- Thats it, now its time to test the App
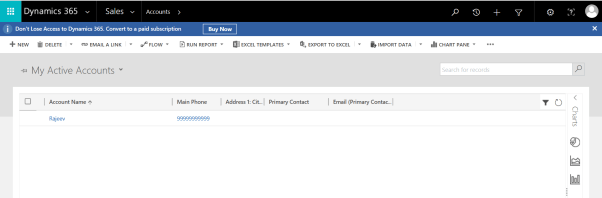
Test the App:
- Press F5
- Set the values and click ‘Create’

- Open the D365 App and you should see new ‘Account’ record.
Refer my earlier article to build an App using Excel as Data Source.
🙂


Leave a comment