Archive

Archive for the ‘Uncategorized’ Category

Query using ‘Not In’ filter – Advanced Find – Dynamics 365 – V 9.0

October 7, 2017 1 comment

In the previous versions of CRM, there is no option in Advanced Find, to query all ‘Case’ records that do not have a related task, as we don’t have option to execute ‘Outer Join’ (i.e., Not in).

In V9.0 release, a new ‘Does not contain data‘ option added to ‘Advanced Find’ to filter ‘Not In’ records.

Let’s get started to fetch all the ‘Accounts’ which does not have any associated ‘Contacts’

  • Open ‘Advanced Find’
  • Select ‘Account’ entity and from the Related entities choose OOB ‘Contacts(Company Name)’ relationship.
  • Choose ‘Does Not Contain Data’ from filter option.

Advanced Find - Not IN

  • Fetch XML will be as below

Fetch XML - Not IN

🙂

Advertisement

Dynamics 365 – V9.0 – Multiselect option sets walk through

October 7, 2017 4 comments

In this article I am going to walk through the new field type “Multiselect Option set” from V9.0.

As the name suggests, “Multiselect Option set” will allow User to choose multiple choices.

In this walk through, I am going add a new ‘Multiselect Option Set’ called ‘Branches’ on ‘Account’ entity to capture the Account presence across the country.

  • Create a new field of type ‘Multiselect Option Set’ to the Account entity. I chose existing Global option set ‘City’ for this example. Create new Options, if you dont want to go with Global option set.

D365 - Multiple Optionset

  • Add this field on ‘Account’ main form and Publish the customizations.
  • Open any of the existing Account record and Select the Branches.

D365 - Multiple Optionset - on form

  • Add ‘Branches’ field to the view

D365 - Multiple Optionset - on view

  • Search in ‘Advanced Find’

D365 - Multiple Optionset - Adv Find 1

  • Fetchxml would form as below

D365 - Multiple Optionset - Adv Find Fectchxml

Key Points:

  • Multi-select option sets are available for Unified Interface and the web client.
  • Multi-select option sets are available for the following form types: Main, Quick Create, and Quick View.
  • Multi-select option sets won’t be supported on legacy forms.

🙂

Azure Deployment Slots – Deploy and Swap

September 10, 2017 Leave a comment

Assume that you have your live application deployed on Azure running and you must deploy a hot fix.

The option you got is, you might want to take your application down for some time till your hot fix deployed.

How about you deploy the hot fix with no downtime, the answer is Azure “Deployment Slots”.

Create a Deployment Slot:

To use ‘Deployment Slots’, make sure you are running with Standard or Premium Azure Service Plan before adding a slot

  • Connect to Azure subscription and open your existing ‘App Service’
  • Under ‘DEPLOYMENT’ section, select ‘Deployment Slots’ and click on “Add Slot”

Azure - Deployment Slot

  • In the next screen, provide Slot name and choose ‘Configuration Source’. I gave my Slot name ‘Staging’ and in the ‘Configuration Source’:
    • If you choose your existing ‘App service’ all the settings including ‘Application Settings/Diagnostic Settings/…’ will be copied to this slot
    • Or you can choose ‘Don’t clone configuration….’ Option, if you want your slot to be clean and no carry over settings.

Deployment Slot - Add

  • Click ‘Ok’
  • After few seconds, you would get notification that your slot is ready
  • Once slot setup completed, your main App name will come as prefix of your slot (Ex: If ABC is my web app; my Slot name is ABC-staging)

Deployment Slot - Created

Publish Website to Slot:

  • Use Visual studio “Publish Web” option

Deploy - Connect Azure App Service

  • Select “Microsoft Azure App Service” and choose your main “App Service” and “Deployment Slots -> {Slot}”

Deploy - Slot

  • Click “Publish”
  • After publishing, your slot would work as any other Web App. You can give the slot URL to test to run BVT

Deployment Slot - Open Staging

Swap Slot:

  • Once you feel your slot is fine and can be promoted as main App
  • Click on ‘Swap’

Swap - 1

  • Select ‘Source’ and ‘Destination’
    • Main Web App would always represent as “production”
    • “Staging’ is the name of your slot

Swap - 2.PNG

  • Click Ok
  • It would take couple of minutes to complete Swap
  • Once Swap completes, end users who are accessing would start getting new build with virtually no down time.

Useful points:

  • If any errors are identified in production after a slot swap, roll the slots back to their pre-swap states by swapping the same two slots immediately
  • You can check your available ‘Deployment Slots’ by opening your Service Plans.

Check you available Slots.PNG


🙂

Retrieve Members of a Records Access Team and migrate Access Teams between Organizations

July 23, 2017 3 comments

Most of you know that an Access team owns no records and has no security roles assigned to it.

Records will be shared with an Access team, and the team is granted access rights on records such as Read, Write and Append.

OOB Opportunity Access Team

By default, we would get one OOB Opportunity Access Team and we can enable “Access Team” for required entities by selecting “Access Teams” option in entity customization’s.

Enable Access Team

We can add “Access Team” to the form’s sub grid and keep adding the users

Add Access Team Sub Grid.PNG

Below is the sample code to retrieve the members of Access Team for a record (i.e., Opportunity in this case)

Code Snippet:

Private void GetUsersFromOpportunitySalesTeam(IOrganizationService service, Guid opportunityId, Guid teamTemplateId)        {

var fetchUsersFromSalesTeam = @”<fetch>

<entity name=’opportunity’ > <attribute name=’name’ />

<filter type=’and’>

<condition attribute=’opportunityid’ operator=’eq’ value='” + opportunityId + @”‘ />       </filter>

<link-entity name=’principalobjectaccess’ from=’objectid’ to=’opportunityid’ link-type=’inner’ alias=’poa’ >

<attribute name=’objectid’ alias=’objectid’ />

<link-entity name=’team’ from=’teamid’ to=’principalid’ link-type=’inner’ >

<link-entity name=’teamtemplate’ from=’teamtemplateid’ to=’teamtemplateid’ >

<filter type=’and’>

<condition attribute=’teamtemplateid’ operator=’eq’ value='” + teamTemplateId + @”‘/> </filter>

</link-entity>

<link-entity name=’teammembership’ from=’teamid’ to=’teamid’ link-type=’inner’ intersect=’true’ >

<link-entity name=’systemuser’ from=’systemuserid’ to=’systemuserid’ link-type=’inner’ >

<attribute name=’fullname’ /> <attribute name=’systemuserid’ />

</link-entity>   </link-entity> </link-entity>  </link-entity>   </entity>

</fetch>”;

var teamMembers = service.RetrieveMultiple(new FetchExpression(fetchUsersFromSalesTeam));

// Retrieve User Guids

if (teamMembers!= null && teamMembers.Entities.Count > 0) {

foreach (var teamMember in teamMembers.Entities){

if (teamMember.Attributes.Contains(“systemuser5.systemuserid”) && teamMember.Attributes[“systemuser5.systemuserid”] != null) {

Guid userId = new Guid(((AliasedValue) teamMember.Attributes[“systemuser5.systemuserid”]).Value.ToString());

}

}

}

How to get the “Access Team Id” (i.e.,teamTemplateId)

  • Make a retrieve call “teamtemplate” entity and retrieve the Id by Name field (i.e., Opportunity Sales Team Template)
  • Or you can get the GUID from URL of “Access Team Template”

Points to ponder:

  • “Access Team” is not a solution aware component and cannot be added to the Solution to move across the organizations.
  • If you have an Opportunity Access Team sub grid on Account form and if you move the customization’s from Dev to Test organizations, the sub grids will break, if you cannot maintain the “Access Team” with same Id
  • To move Access Teams between Organizations with same Guid’s, below are couple of ways
    • A console application (Link)
    • XRMToolbox Plug-in (Link)

🙂

StyleCop warnings failing the build in Visual Studio

Recently we got a VS project from a third party and when we try to build the project, we were getting StyleCop warnings as errors and breaking the build.

In below screen if you notice, even if all were ‘StyleCop’ warnings (i.e., Starts with SA….) build got failed with errors.

StyleCop violations as Build Errors

Reason:

  • By default, StyleCop violations only appear as warnings however StyleCop violations can be configured to fail the build by adding below tag in your project file (i.e., .csproj)

<StyleCopTreatErrorsAsWarnings>false</StyleCopTreatErrorsAsWarnings>

  • Coming to our reason of build failure was above line added in my Project file.

Fix:

  • Open the project file (i.e., .csproj) in notepad and remove the <StyleCopTreatErrorsAsWarnings>false</StyleCopTreatErrorsAsWarnings> tag.
  • Save the file
  • Open the Project in Visual studio and Clean & Rebuild.

🙂


The specified organization already has an active Website Binding for this site – Dynamics 365 Portals

We have 2 Portal solutions (i.e., Partner Portal and Custom Portal) enabled in our CRM organization and when I tried to configure ‘Custom Portal’ in a Web App, I could not, as the “Adxstudio Portals Website” drop down was disabled and defaulted to ‘Partner Portal’.

Active Website Binding

Reason:

  • ‘Partner Portal’ solution configured first, and it created a record in ‘Website Bindings’.
  • As design, portals defaults to ‘Partner Portal’ solution, if there was an active Website Binding.

Fix:

  • Go to the ‘Website Bindings’ in CRM, by navigating to “Advance Find -> Website Bindings”.

Website Bindings

  • Delete the website binding record

🙂

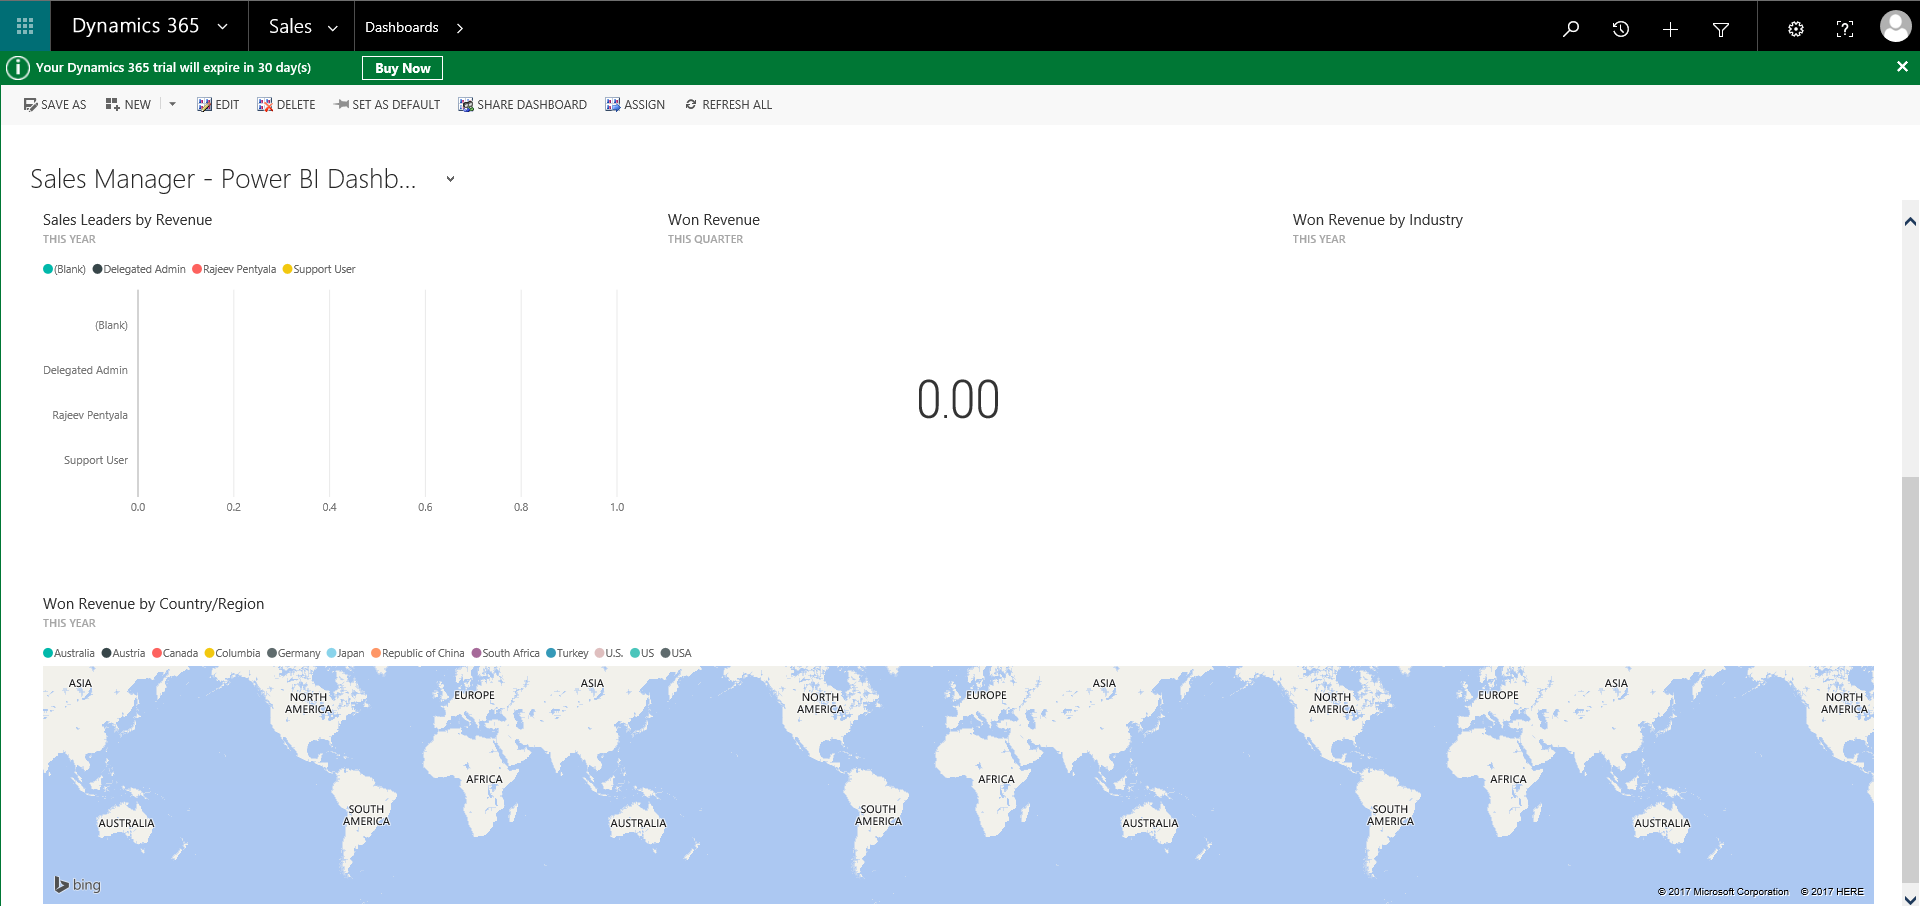
(Step By Step) Surface Power BI Reports in Dynamics CRM Dashboard

In this article, I am going to provide ‘Step-by-Step’ details on how to:

  • Add ‘Power BI’ subscription to your existing Office 365
  • Connect to your ‘Dynamics CRM Organization’ from BI
  • Render Power BI reports in CRM Dashboard.

What’s Power BI and How is it different from SSRS?

  • Power BI offers basic data wrangling capabilities like Excel’s Power Query.
  • It also lets you create interactive visualizations, reports and dashboards with a few clicks and handle files that are too large for Excel.
  • On the other hand, SSRS is meant for “static” reports. Something that will be shown always as defined and printable.

Steps to add ‘Power BI’ subscription:

  • As a pre-requisite, create your 30 days Dynamics 365 free trail.
  • Login to ‘Portal.office.com’ and open ‘Admin’ dashboard
  • Go to ‘Billing -> Purchase services -> Power BI (free) -> Buy now
    • Note: This requires you to provide credit card details and INR 2 will be charged after successful purchase.

D365 - Power BI

  • After successful purchase, open ‘PowerBI.com’ on another tab of the browser and click ‘Sign In’

D365 - Power BI - Start

  • Click ‘Start’

Connect to Dynamics CRM organization from Power BI:

  • To connect to CRM Organization from ‘Power BI’, you need to install one of the ‘Content Packs’

D365 - Power BI - Content Packs

  • Click on ‘Get’ button from ‘My organization’ section
  • From the available list, choose any of the Dynamics CRM related Apps (I chosen ‘MS Dynamics Online Sales Manager’ for this demo, from the ‘Apps’ tab)

D365 - Power BI - CRM Sales Manager Pack


  • Click on ‘Get it now’ and you will be asked to provide CRM credentials.
    • Provide ‘CRM Organization URL’ details and ‘Last Month Of the Fiscal’

D365 - Power BI - Connect To CRM

    • Choose ‘Authentication Method’ as ‘OAuth2’

D365 - Power BI - Connect To CRM - OAuth

  • Post successful login, you would see ‘Importing Data’ message

D365 - Power BI - Connected To CRM - Importing Data

  • Give it few seconds and you would see beautifully rendered reports

D365 - Power BI - Connected To CRM - Dashboards.PNG

Display ‘Power BI’ reports in CRM Dashboard:

In previous versions of CRM, only option to bring ‘Power BI’ reports are by placing an IFrame in Dashboard and set the PowerBI URL. Its easily configurable now.

  • Connect to your Dynamics CRM Organization
  • Go to ‘Settings -> Administration -> System Settings -> Reporting -> ‘Allow Power BI….’=Yes

D365 - Enable embed Power BI

  • Create a new Dashboard
  • Select the placeholder and from the Report add options, click ‘Power BI Tile’

D365 - New Dashboard - Add Power BI Tile

  • Pick one of the available ‘Power BI Reports’

D365 - Add Power BI Tile - Pick Dashboard

  • Save the Dashboard
  • Go to ‘Sales -> Dashboard’ and pick the created ‘Dashboard’

D365 - Open Dashboard in D365

🙂

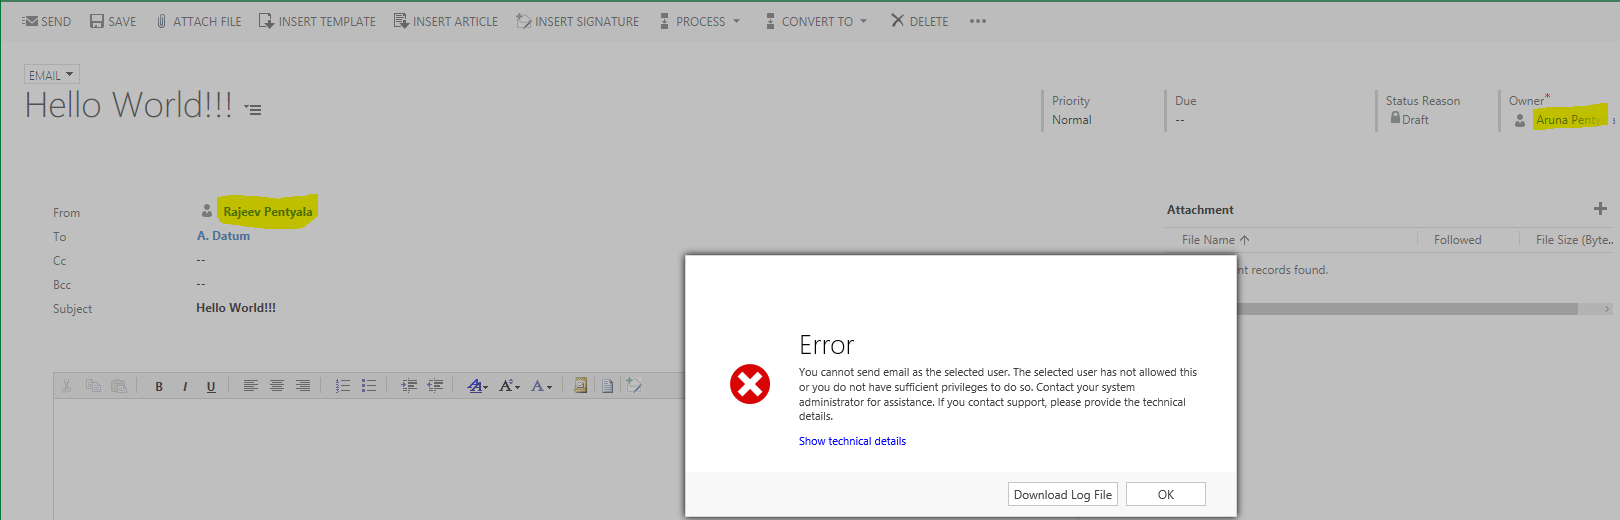
Dynamics 365 – Error while sending mail on behalf of another user

Recently one of my users complained that they could not send mails on behalf of another users.

Unable to send email on behalf of another user

Issue was because of missing privilege and a setting at actual user, whom the other user trying to send on behalf of

Reason and fix:

To explain this better, I have 2 Users in my system

  • ‘Aruna’ : Having ‘Salesperson’ security role
  • ‘Rajeev’: Having ‘System Administrator’ security role

Issue coming up when ‘Aruna’ trying to send email as ‘Rajeev’ (i.e., Email.From=’Rajeev’)

To allow ‘Aruna’ send email as ‘Rajeev’ below 2 conditions has to be met

  • Provide ‘Send Email as Another User’ privilege to Aruna’s ‘Salesperson’ Security Role

Security Role - Send email as another user

  • Actual User (i.e., Rajeev) should enable ‘Select whether users can send email for you‘ option in his Personal Settings.

Personal Options - Other users can send email

🙂

ADX Web Site Compilation Error – The type ‘System.Object’ is defined in an assembly that is not referenced.

Recently while compiling my ADX web site, I was getting below compilation exception from all my .ascx (Views) files.

Compiler Error Message: CS0012: The type ‘System.Object’ is defined in an assembly that is not referenced. You must add a reference to assembly ‘System.Runtime, Version=4.0.0.0, Culture=neutral, PublicKeyToken=b03f5f7f11d50a3a’

Issue was bit strange as I already had “System.Runtime’ dll referred in the website

Fix:

  • Open the Web.config file and add below tag inside the <compilation> tag

<assemblies>

<add assembly=”System.Runtime, Version=4.0.0.0, Culture=neutral, PublicKeyToken=b03f5f7f11d50a3a” />

</assemblies>

  • Your <compilation> tag should look as below

<compilation debug=”true” targetFramework=”4.5″>

<assemblies>

<add assembly=”System.Runtime, Version=4.0.0.0, Culture=neutral, PublicKeyToken=b03f5f7f11d50a3a” />

</assemblies>

</compilation>

Note:

  • If your <compilation> tag already had <add assembly=”…”> tags, add only <add assembly=”System.Runtime…> tag to the existing tags.

🙂

Categories: ADX, CRM, Uncategorized Tags: ,

Solution Import Failures / Publish Customizations Failures – Dynamics 365

February 12, 2017 3 comments

Recently we upgraded our organizations to Dynamics 365 and we were getting solution import failure while moving solutions between organizations.

Below are different kind of error messages popped up.

  • Getting Dependency Calculation There was an error calculating dependencies for this component. Missing component id {0}
  • Failure trying to associate it with CustomControlDefaultConfig
  • Can’t insert duplicate key for an entity

Reason:

  • In our case the root cause for all these import failures was “customcontroldefaultconfig” component with Custom entities.
  • If there is any orphan record exists in “CustomControlDefaultConfigBase” table it would cause solution import failure or ‘Publish Customizations’ error.
  • The issue seems a product issue and got fixed in Service Update 5 of CRM 8.1.0 but resurfacing again in Dynamics 365.

Prevention Tip:

  • If you are adding an entity to your solution, always add ‘Primary key’ field
    • In the source environment open the Solution being imported
    • Open each Entity and expand Fields
    • Make sure that every entity has its “Primary Key” added to the solution.

solution-add-primary-key-field-of-entity

Fix:

CRM On-Premise

  • Check if any orphan records in CustomControlDefaultConfigBase tabel. (Use below queries)
    • SELECT * FROM CustomControlDefaultConfigBase WHERE PrimaryEntityTypeCode NOT IN (SELECT ObjectTypeCode FROM Entity)
  • Note: before continuing, a backup database is recommended.
  • Delete from the Target environment the CustomControlDefaultConfig records with orphaned Object Type Codes:
    • DELETE FROM CustomControlDefaultConfigBase WHERE PrimaryEntityTypeCode NOT IN (SELECT ObjectTypeCode FROM Entity)

CRM On-line

  • Create console application to delete the orphan record in CustomControlDefaultConfigBase using CRM SDK
  • Refer this URL for code.

🙂