In this article, let’s explore the Power Pages plugin for GitHub Copilot CLI and Claude Code provides an AI-assisted workflow for creating, deploying, and managing modern single-page application (SPA) sites on Power Pages.
I will be using Claude Code for this walkthrough.
Note: At the time of writing, this feature is in preview, so some behaviors or prompts may slightly vary as Microsoft continues to improve the experience.
Prerequisites
Software’s:
Before we begin, make sure the following software is installed on your machine.
| Component | Minimum version | More information |
|---|---|---|
| Node.js | 18.0 or later | Download Node.js |
| Power Platform CLI (PAC CLI) | Latest | Install PAC CLI |
| Azure CLI | Latest | Install Azure CLI |
| GitHub Copilot CLI or Claude Code | Latest | GitHub Copilot CLI or Claude Code |
| Visual Studio Code and Power Platform Tools extension (Optional) | Latest | Download VS Code and Install Power Platform Tools |
Power Platform:
- A Power Platform environment with Power Pages enabled
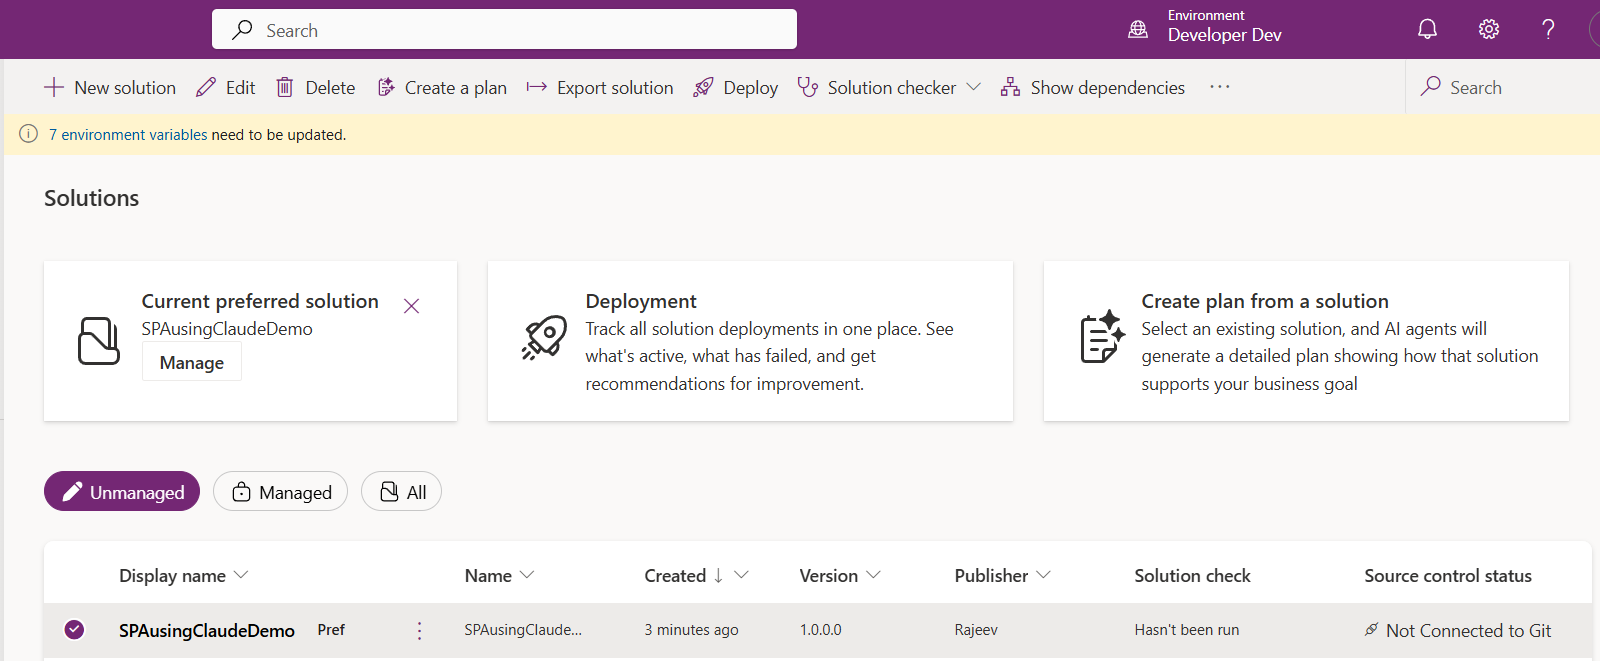
- A preferred solution in your environment (optional, but recommended as a best practice)
Step 1 — Install the Power Pages Plugin for Claude Code
- The Power Pages plugin is installed via a single PowerShell command. This bootstraps the full plugin stack — marketplace registration, skill download, MCP tool wiring, and auto-update — in one shot.
- Open PowerShell and run:
iwr https://raw.githubusercontent.com/microsoft/power-platform-skills/main/scripts/install.js -OutFile install.js; node install.js; del install.js
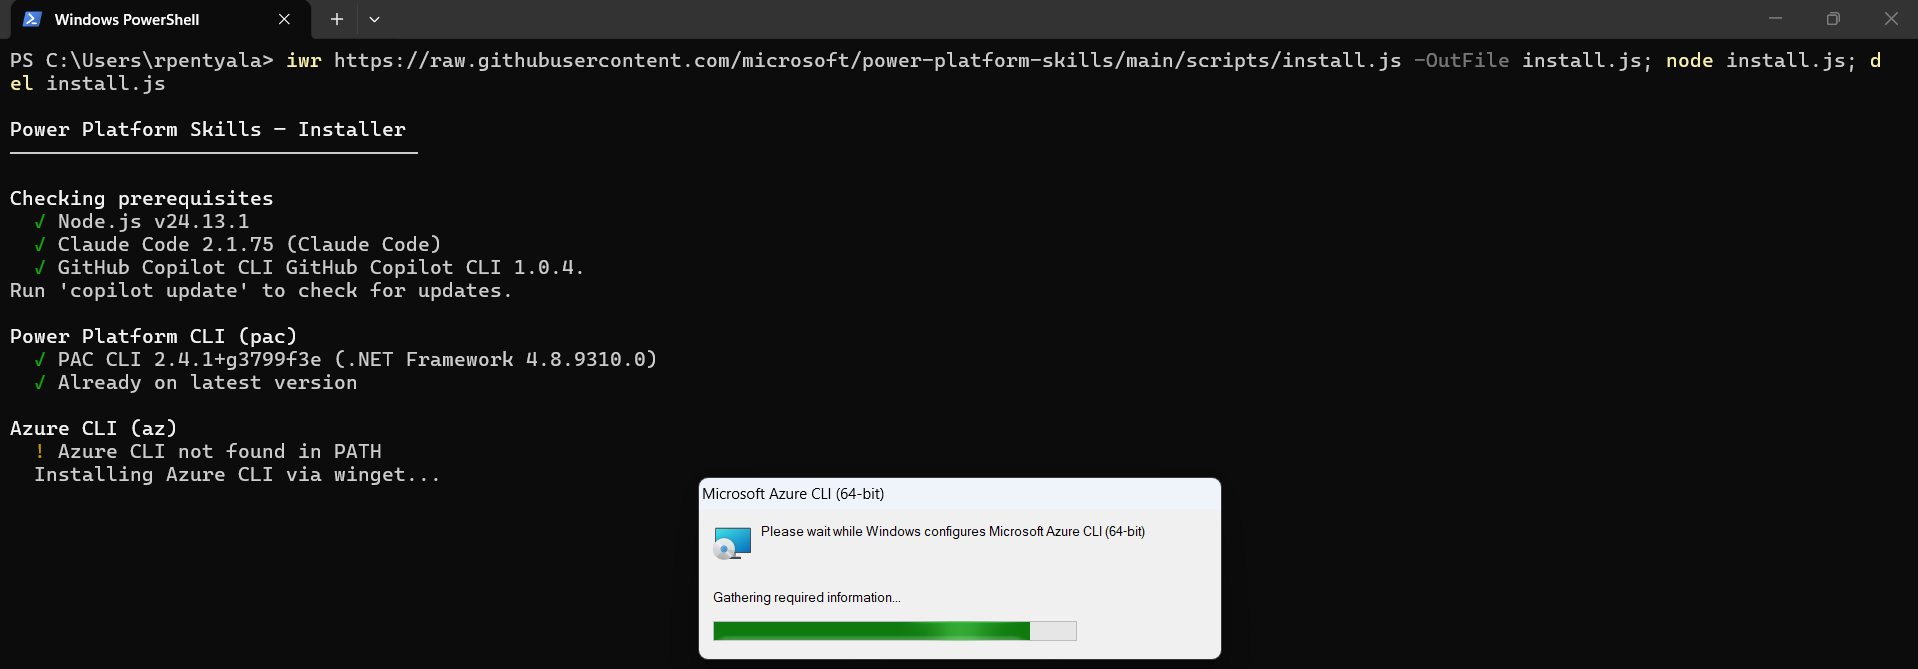
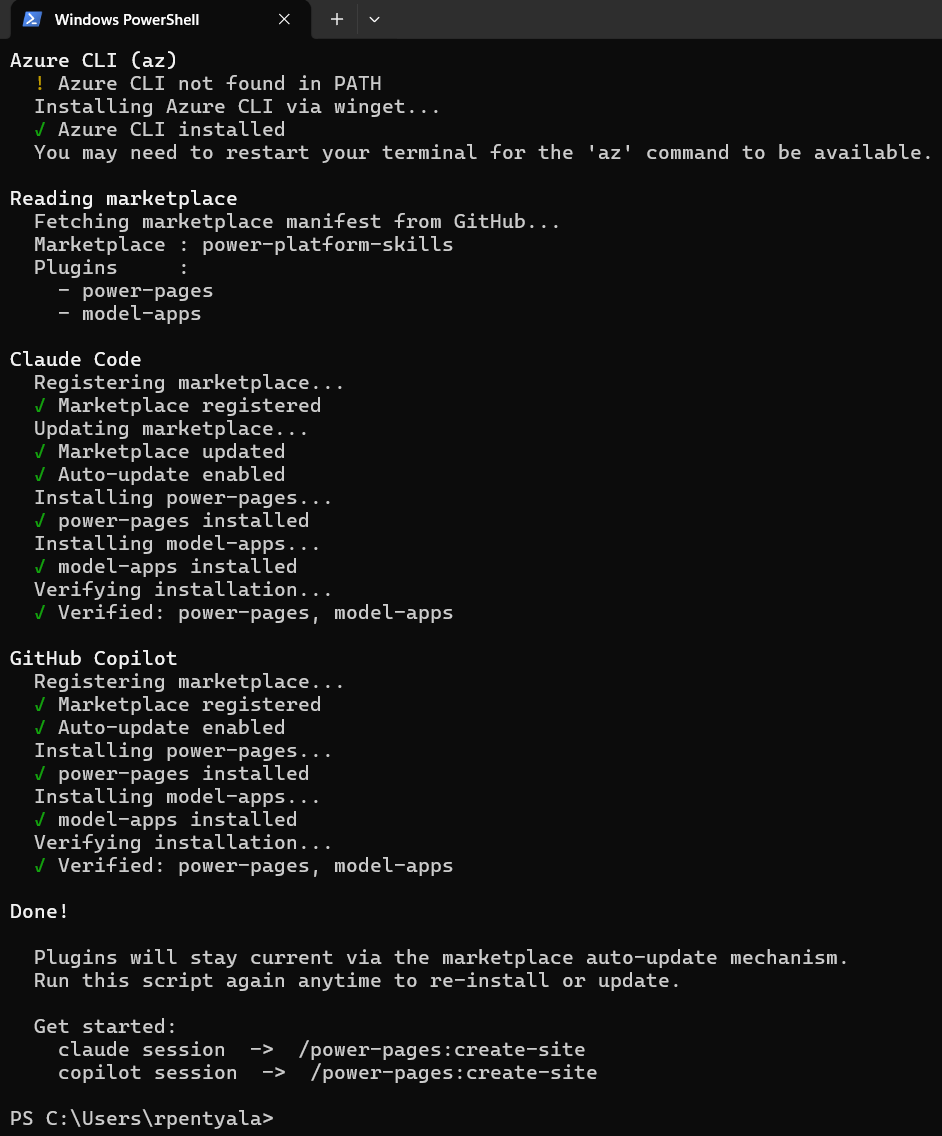
- The script automatically detects Claude Code, registers Microsoft’s marketplace, and installs the power-pages plugin.
Optional: Inspect the installed files
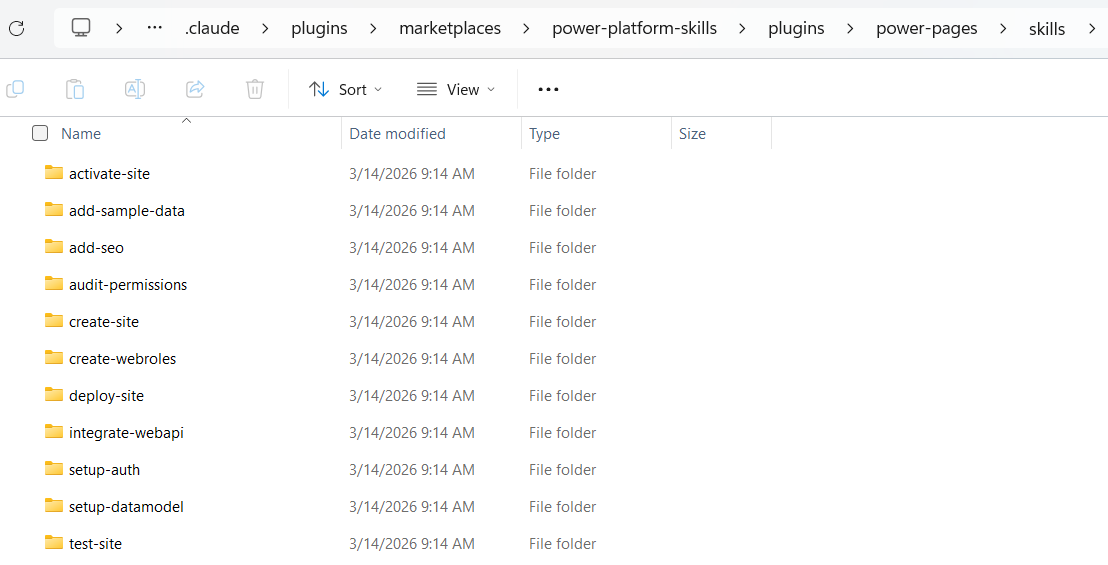
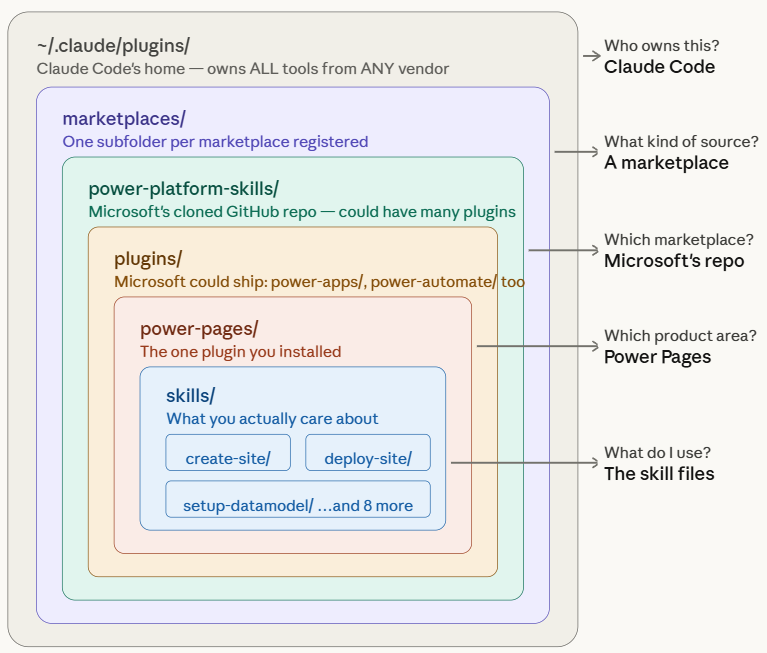
- If you’re curious like I was and want to see what got created after installation, navigate to:
C:\Users\<your-username>\.claude\plugins\marketplaces\power-platform-skills\plugins
- You should see the installed power-platform-skills folder and its related plugin files.
- The
power-platform-skillspackage is downloaded from Microsoft’s GitHub repository: microsoft/power-platform-skills GitHub project.
- If the generated folder structure feels overwhelming at first, refer to the diagram below.
Verify the installed skills
- To verify the installation, open a Claude Code session and run:
/plugin list
- You should see power-pages listed under Installed with status enabled.
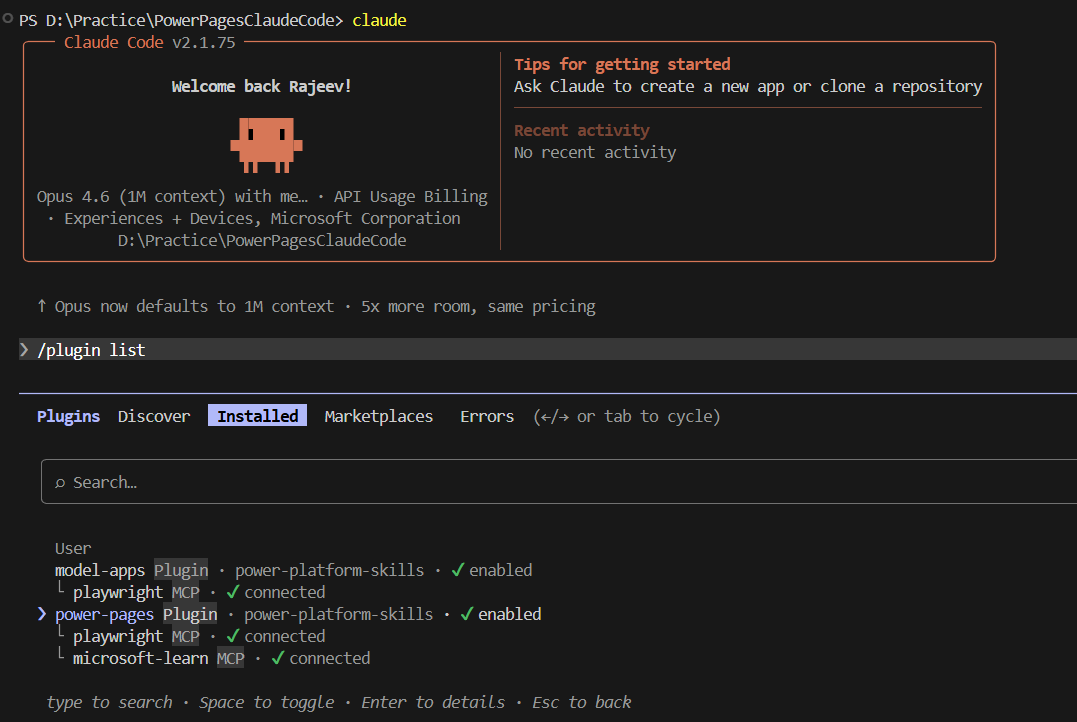
- Note: The plugin also wires up two MCP tools automatically — playwright (used by the test-site skill) and microsoft-learn (used by setup-datamodel and integrate-webapi).
Step 2 — Authenticate PAC CLI and Azure CLI
The Power Pages skills rely on both PAC CLI and Azure CLI being authenticated before they can interact with your environment.
Authenticate PAC CLI:
- Open Command Prompt or PowerShell.
- Run:
pac auth list

- If your environment is listed with a star (
*), you are already authenticated. If not, run:
pac auth create --environment https://<your-environment>.crm.dynamics.com
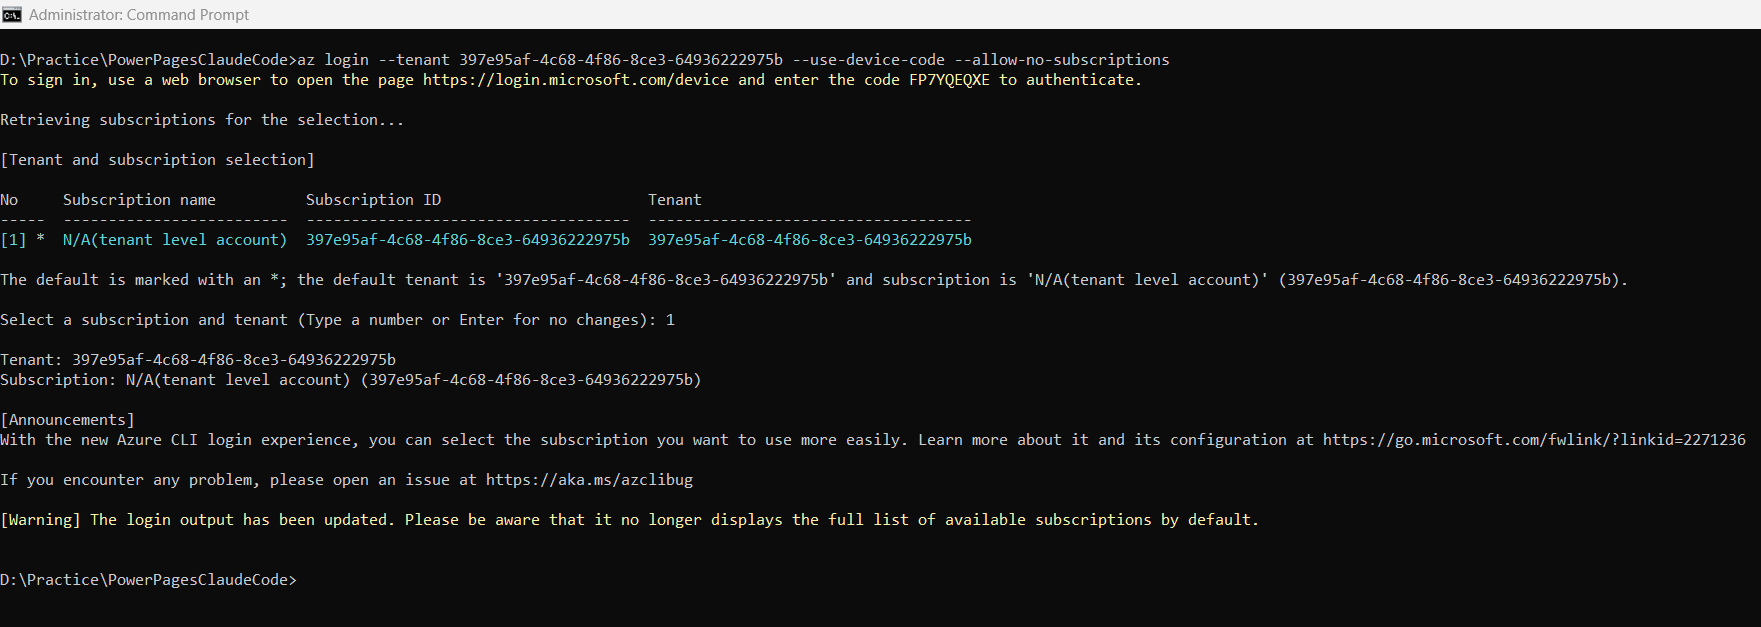
Authenticate Azure CLI:
- Use the
az loginwith the device code option. - Open the Command Prompt
- Run:
az login --tenant <your-tenant-id> --use-device-code --allow-no-subscriptions
- Tip: To find your Tenant ID, go to Power Pages Home → Settings → Session details.
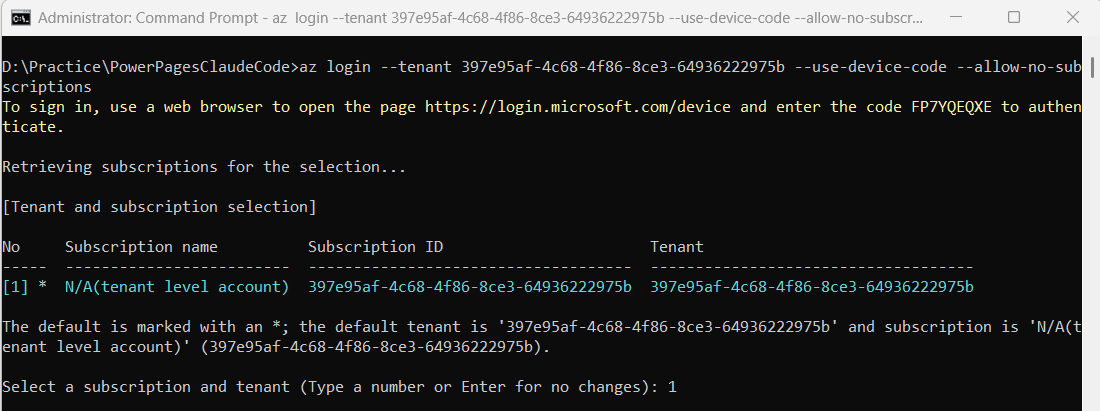
- Open https://login.microsoft.com/device in your browser. Sign in using the same account you use to connect to Power Platform, and enter the device code shown in the terminal.
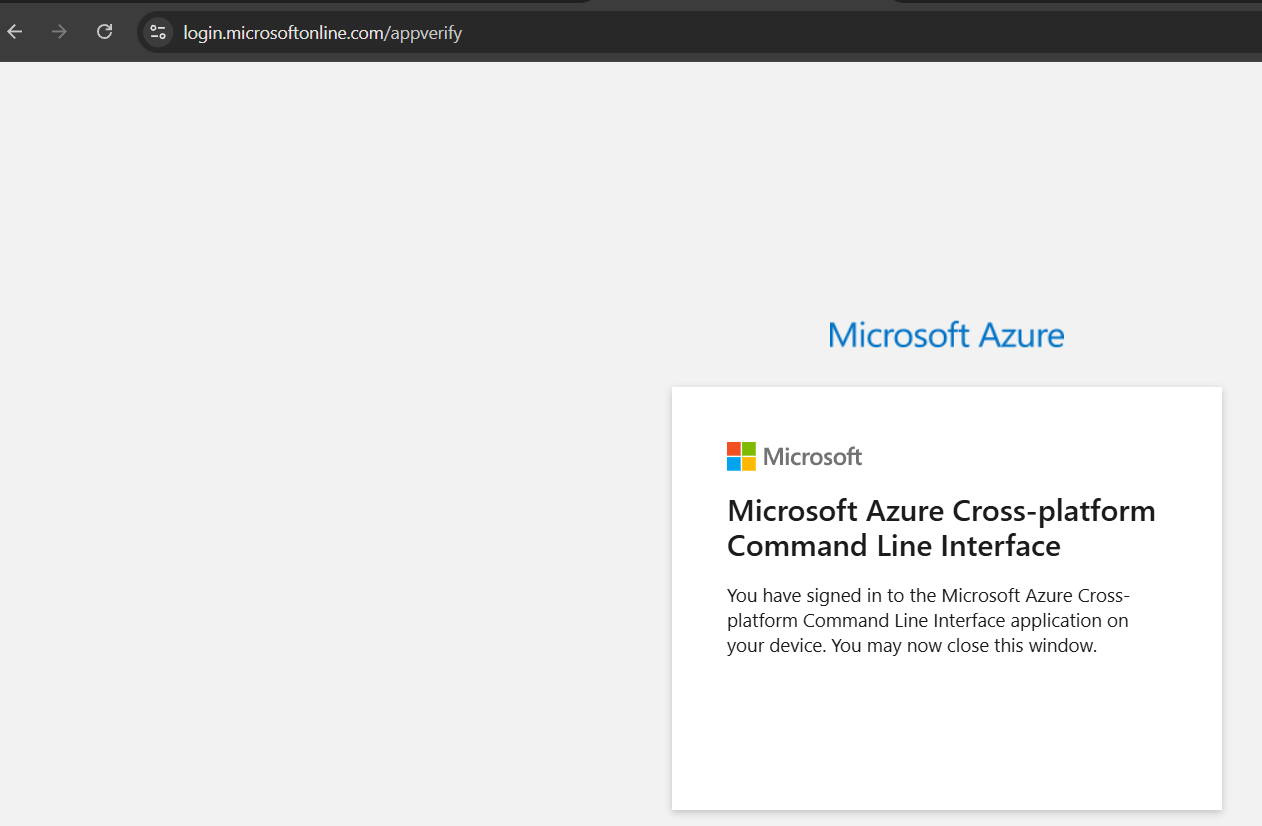
- Once authentication succeeds, Azure CLI will display the signed-in account details.
Step 3 — Create the Power Pages Site
Now that the prerequisites are ready, let’s create the site.
Open a Claude Code session from your project folder and run the create-site skill.
- Create a new empty folder. In my case, I used:
D:\Practice\PowerPagesClaudeCode
- Open VS Code Terminal or Command Prompt, navigate to the folder, and run:
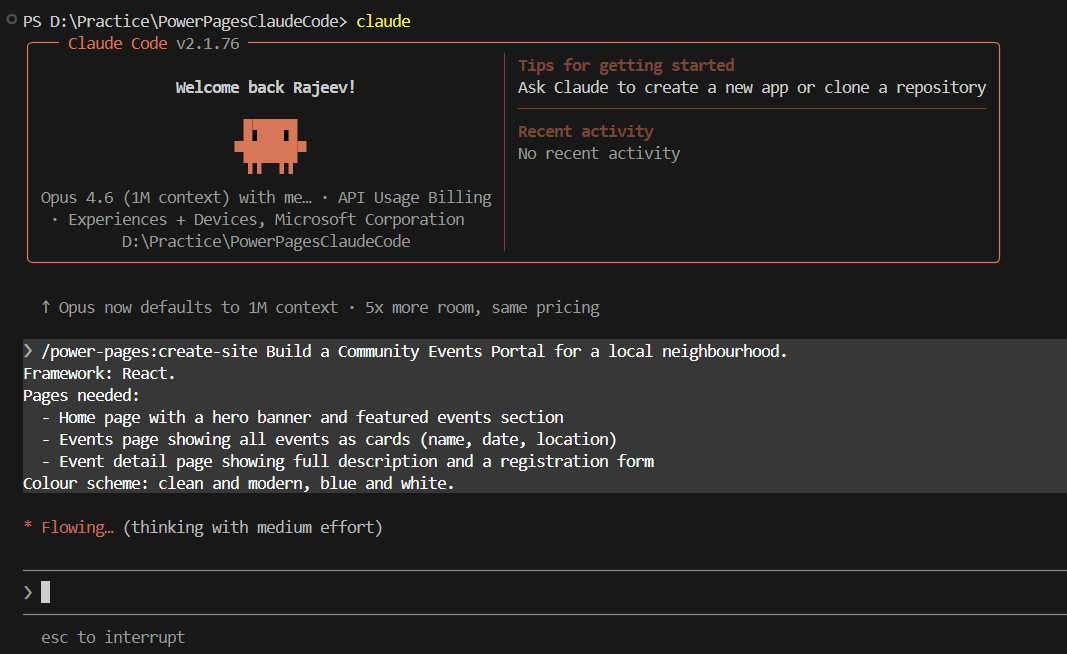
claude
- In the Claude Code session, enter:
/power-pages:create-siteBuild a Community Events Portal for a local neighbourhood.Framework: React.Pages needed: - Home page with a hero banner and featured events section - Events page showing all events as cards (name, date, location) - Event detail page showing full description and a registration formColour scheme: clean and modern, blue and white.Keep it simple — no categories, no map, no newsletter signup.
- Answer the follow-up questions as prompted.
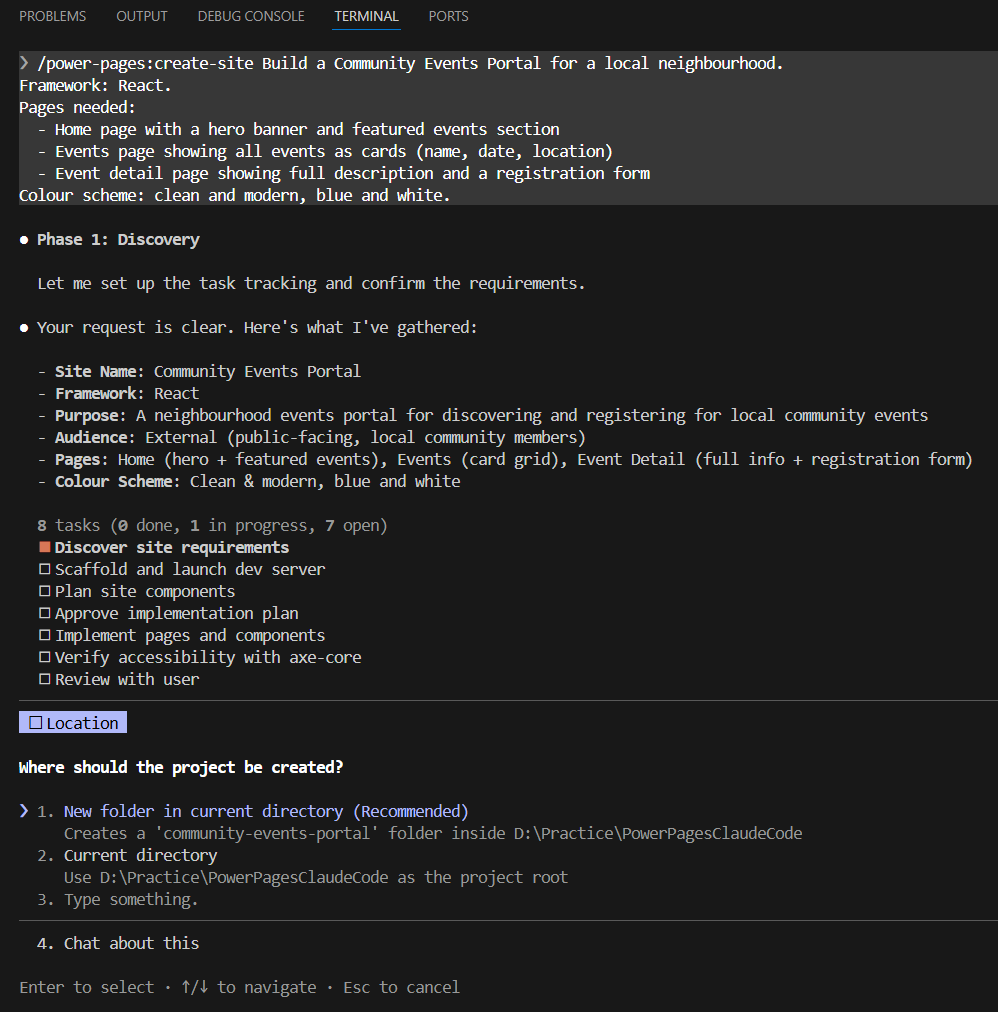
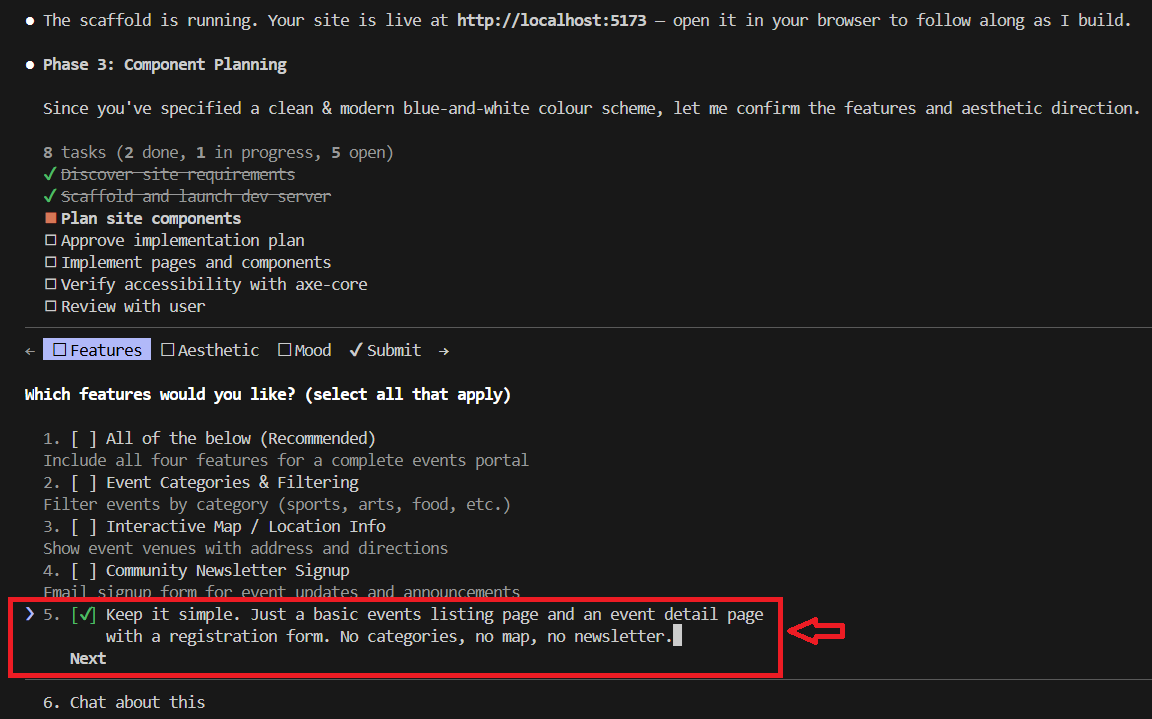
- Claude Code will ask you to select features. Choose option 5 — Type something and type:
Keep it simple. Just a basic events listing page and an event detail page with a registration form. No categories, no map, no newsletter.
- Continue answering the prompts until the skill completes.
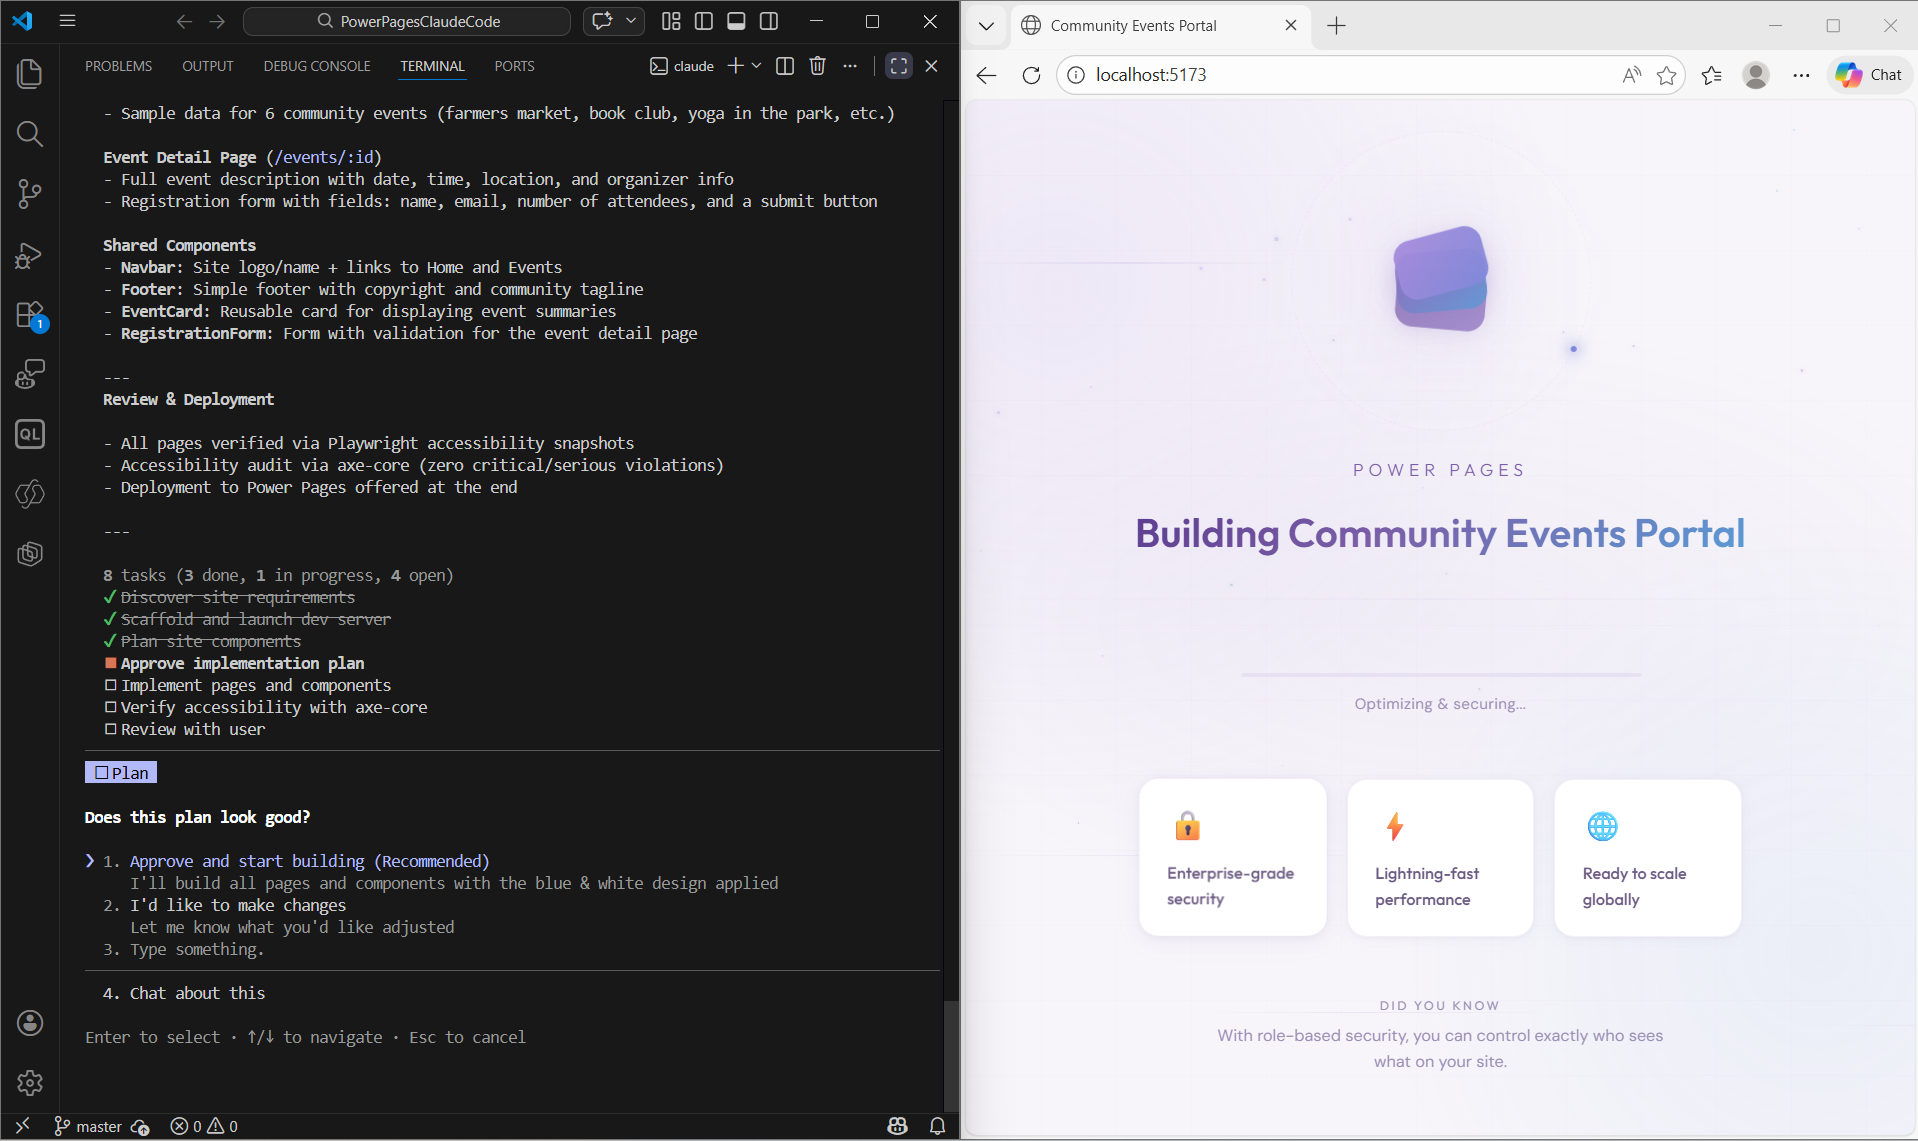
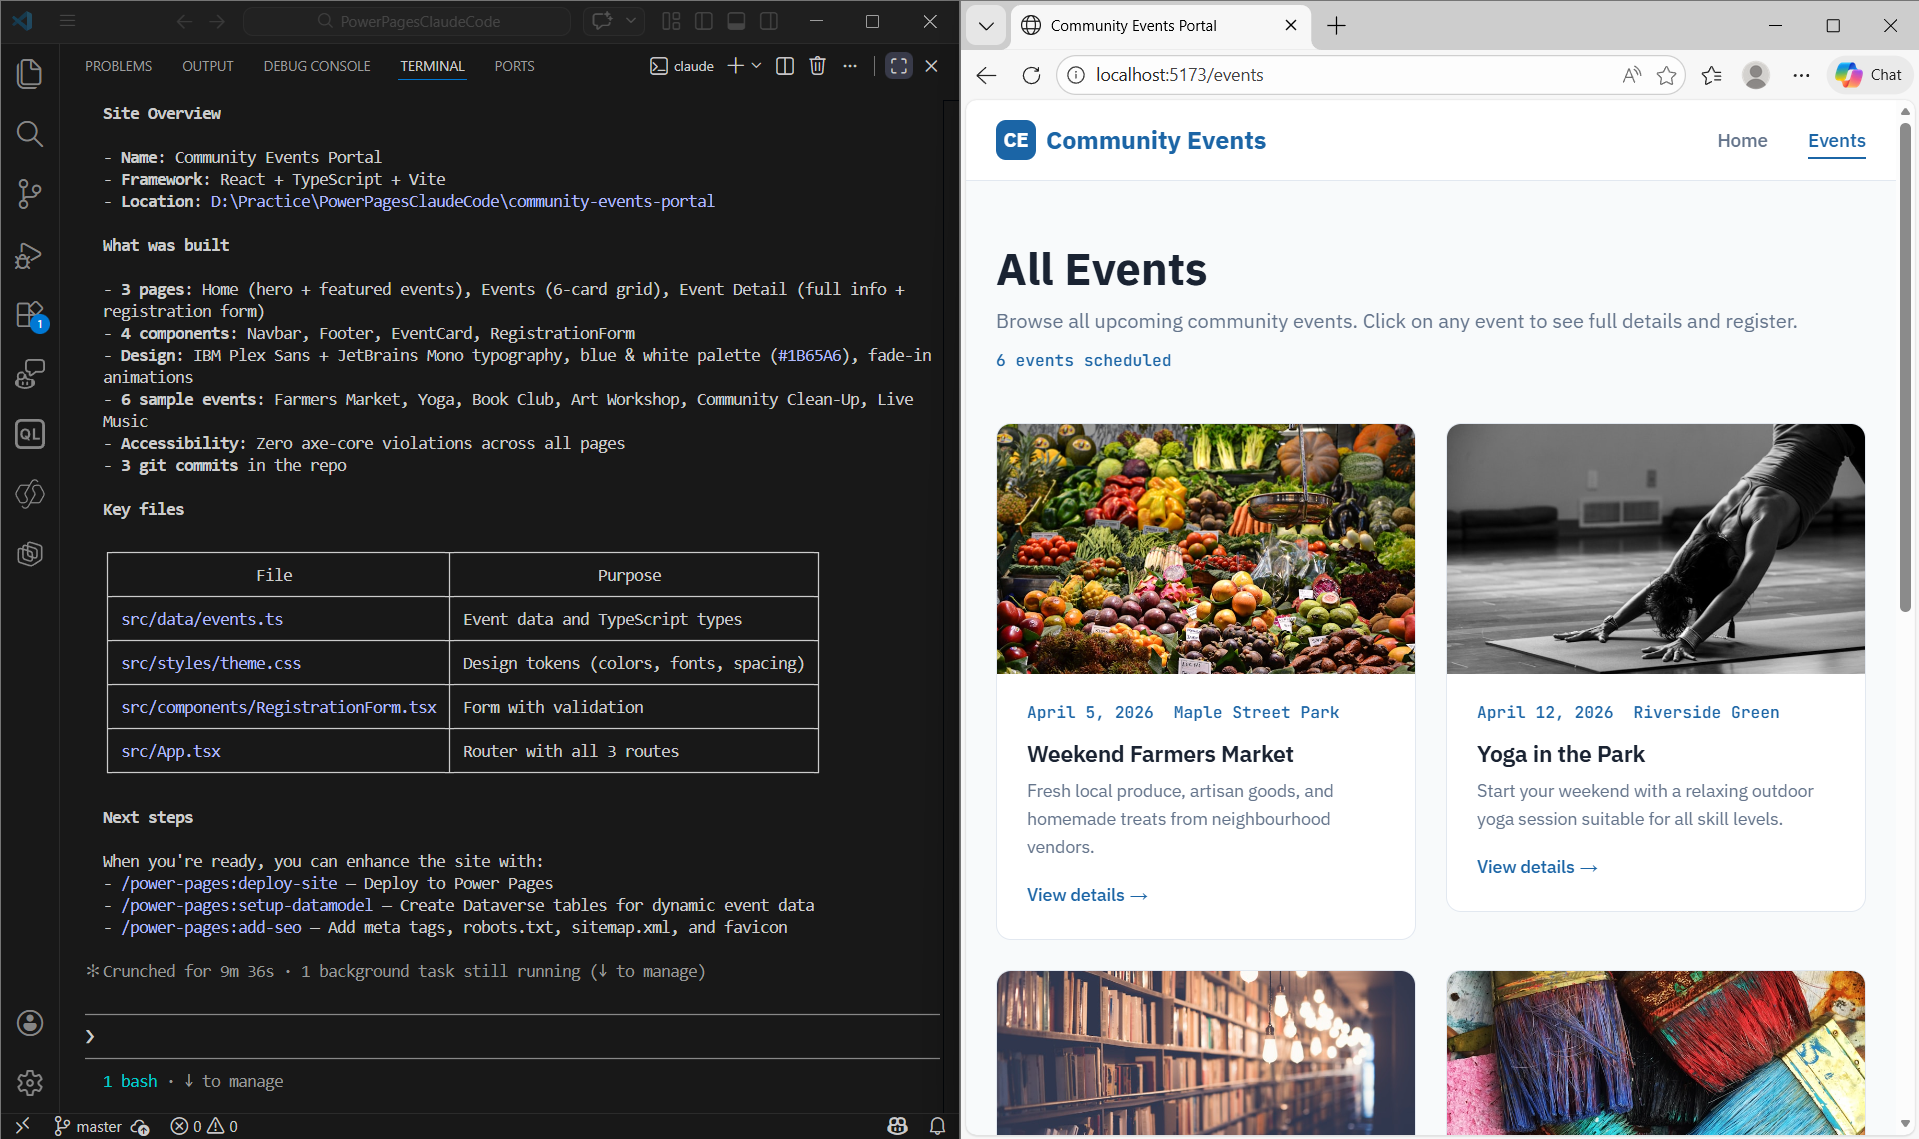
- The skill scaffolds the project, installs dependencies, and opens a live browser preview.
Step 4 — Set Up the Dataverse Data Model
After the /power-pages:create-site skill completes, Claude Code suggests the next steps, such as deploying the site.
Before deploying, I recommend creating the Dataverse data model first.
This is a good learning habit — validate your tables in Dataverse before wiring them to the frontend.
- In the Claude Code session, run:
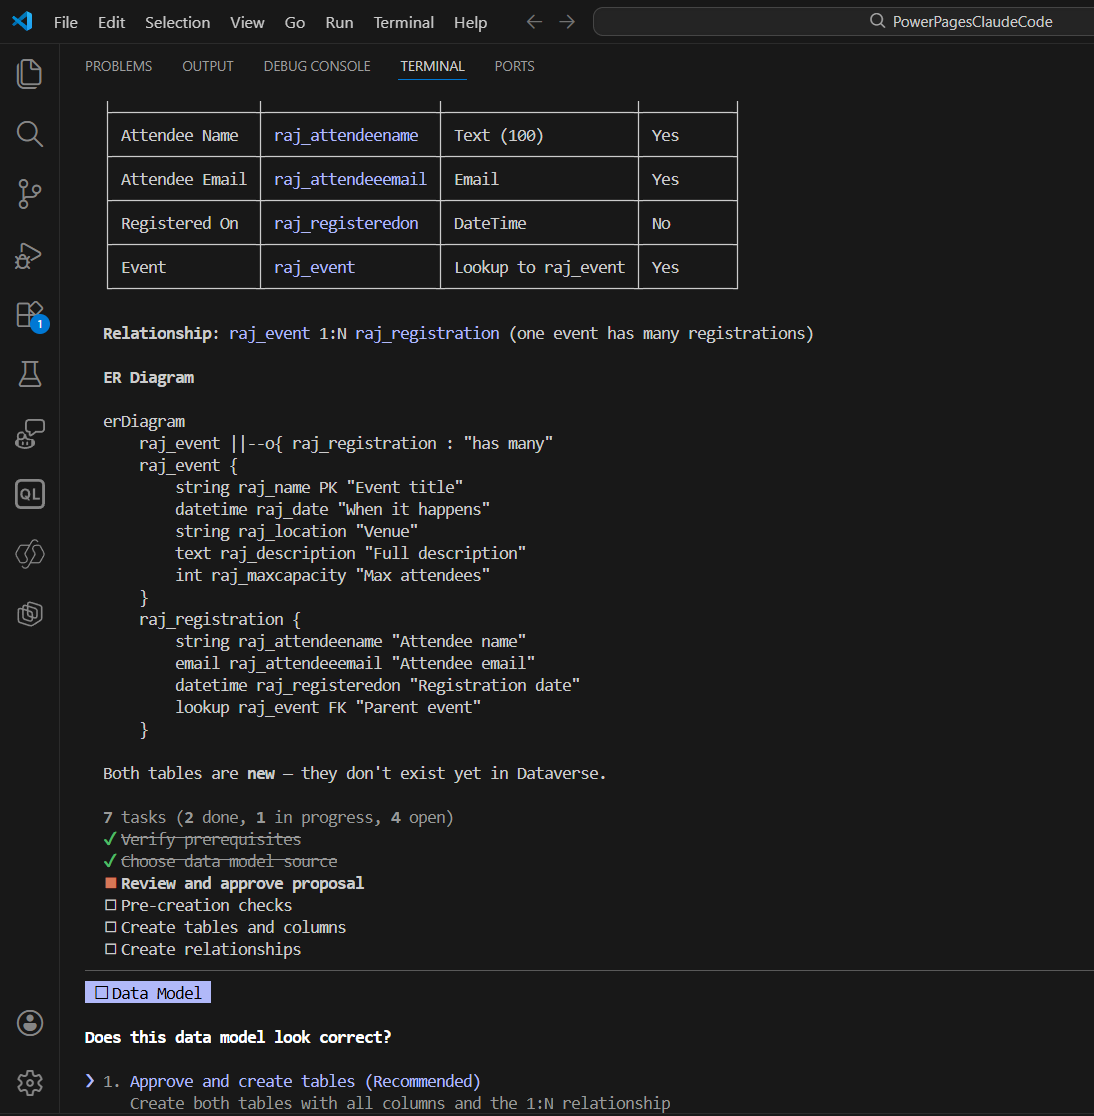
/power-pages:setup-datamodelI need two Dataverse tables for a Community Events Portal.My publisher prefix is raj_ — use this prefix for all table and column names.Table 1: Event (raj_event)- raj_name (Text, required) — event title- raj_date (DateTime, required) — when the event happens- raj_location (Text, required) — venue name and address- raj_description (Multiline Text) — full event description- raj_maxcapacity (Whole Number) — max attendees allowedTable 2: Registration (raj_registration)- raj_attendeename (Text, required) — full name of attendee- raj_attendeeemail (Email, required) — attendee email address- raj_registeredon (DateTime) — when they registered- raj_event (Lookup, required) — lookup to raj_event tableRelationship: One raj_event can have many raj_registrations (1:N).Use my existing preferred solution in Dataverse.
- Note: My preferred solution’s publisher prefix is
raj_, so I used that in the prompt. You should use your own preferred prefix.
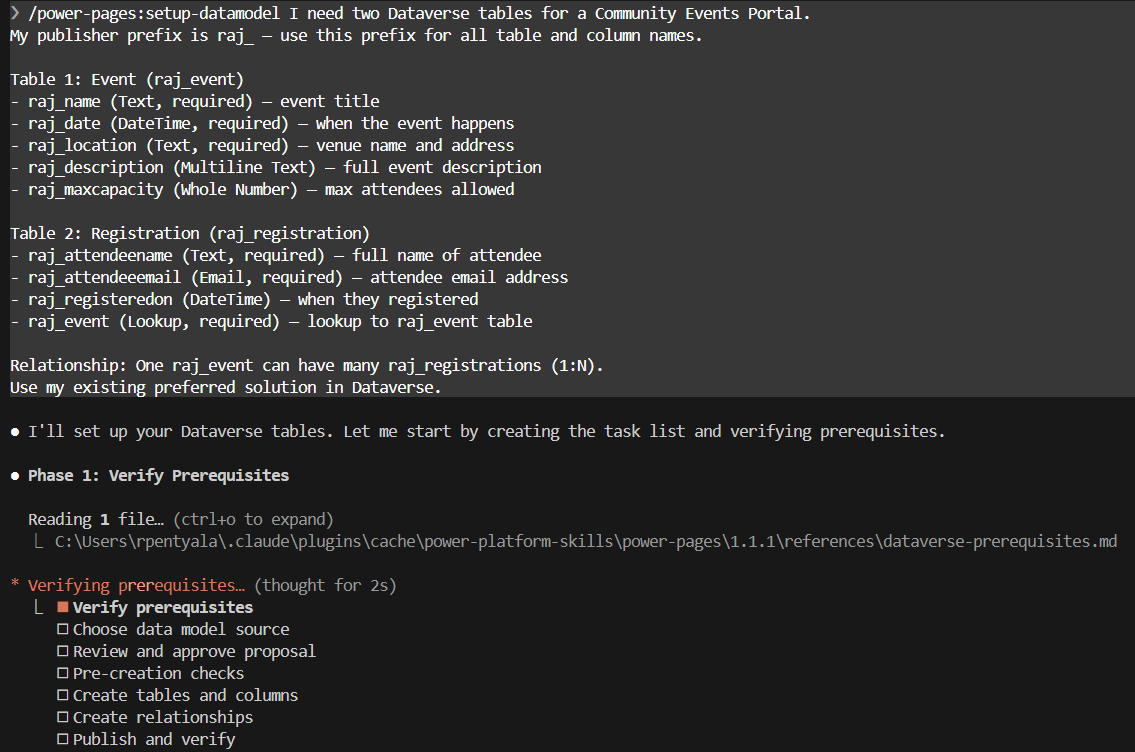
- A Data Model Architect agent analyzes your code, queries your environment for existing tables, and presents a proposal with an ER diagram.
- Review the proposal carefully before approving:
- Confirm the table names use your prefix
- Verify required fields are correctly marked
- Ensure the lookup on
raj_registrationpoints toraj_event
- If everything looks correct, choose Approve and create tables.
- The tables will then be created in Dataverse.
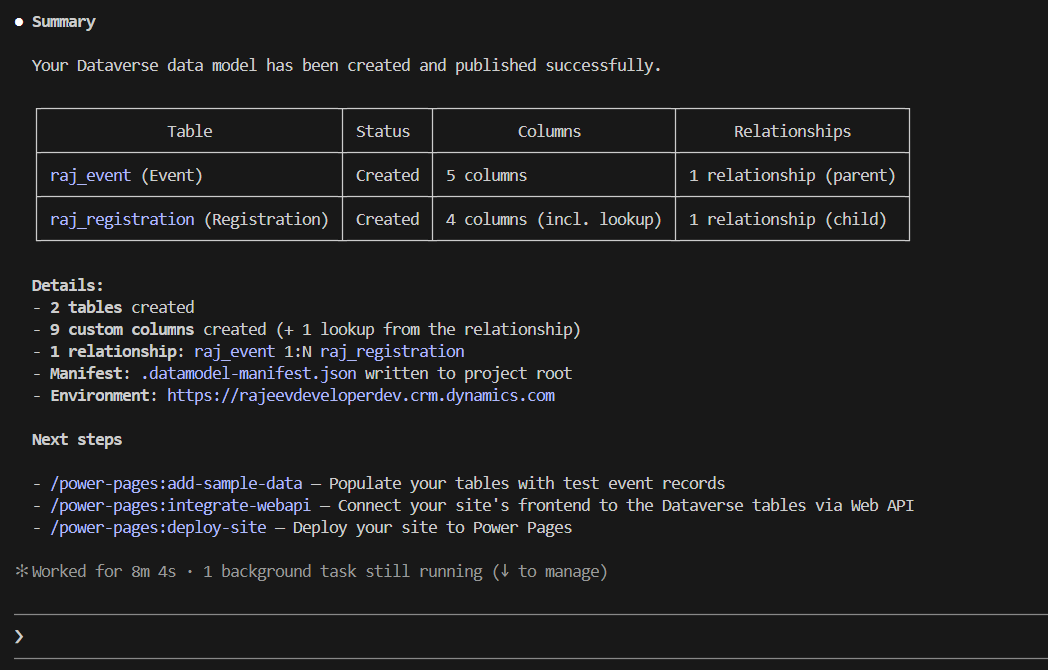
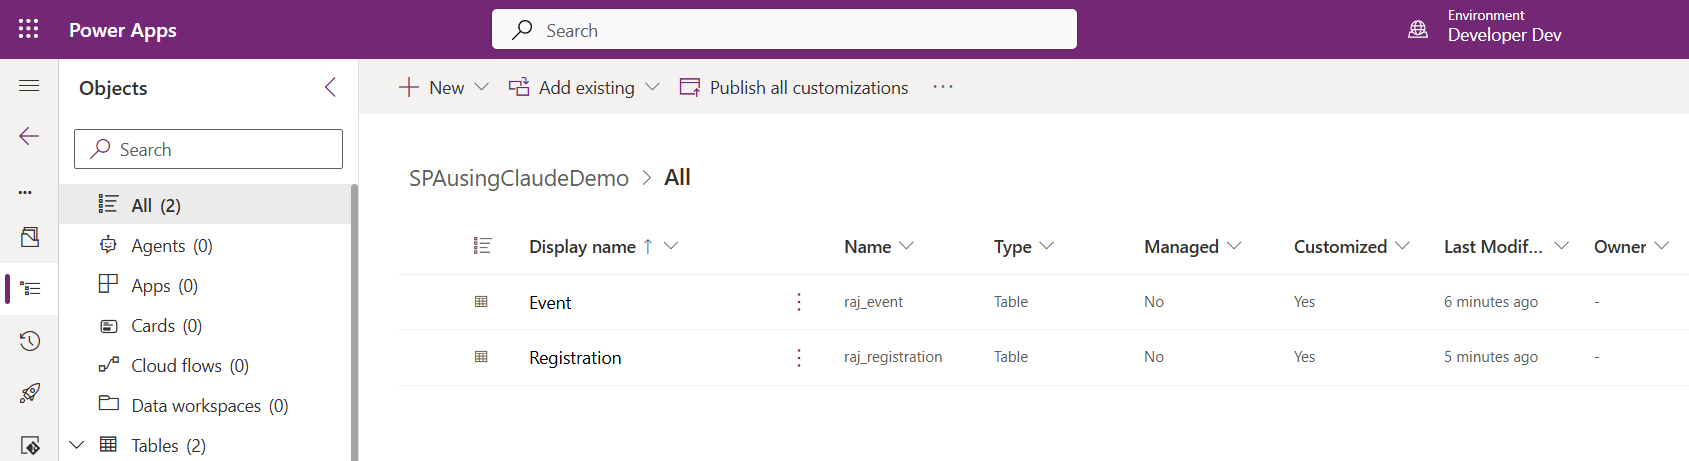
- To verify, go to: make.powerapps.com → Preferred Solution.
- Confirm that both Event and Registration tables exist with the expected columns.
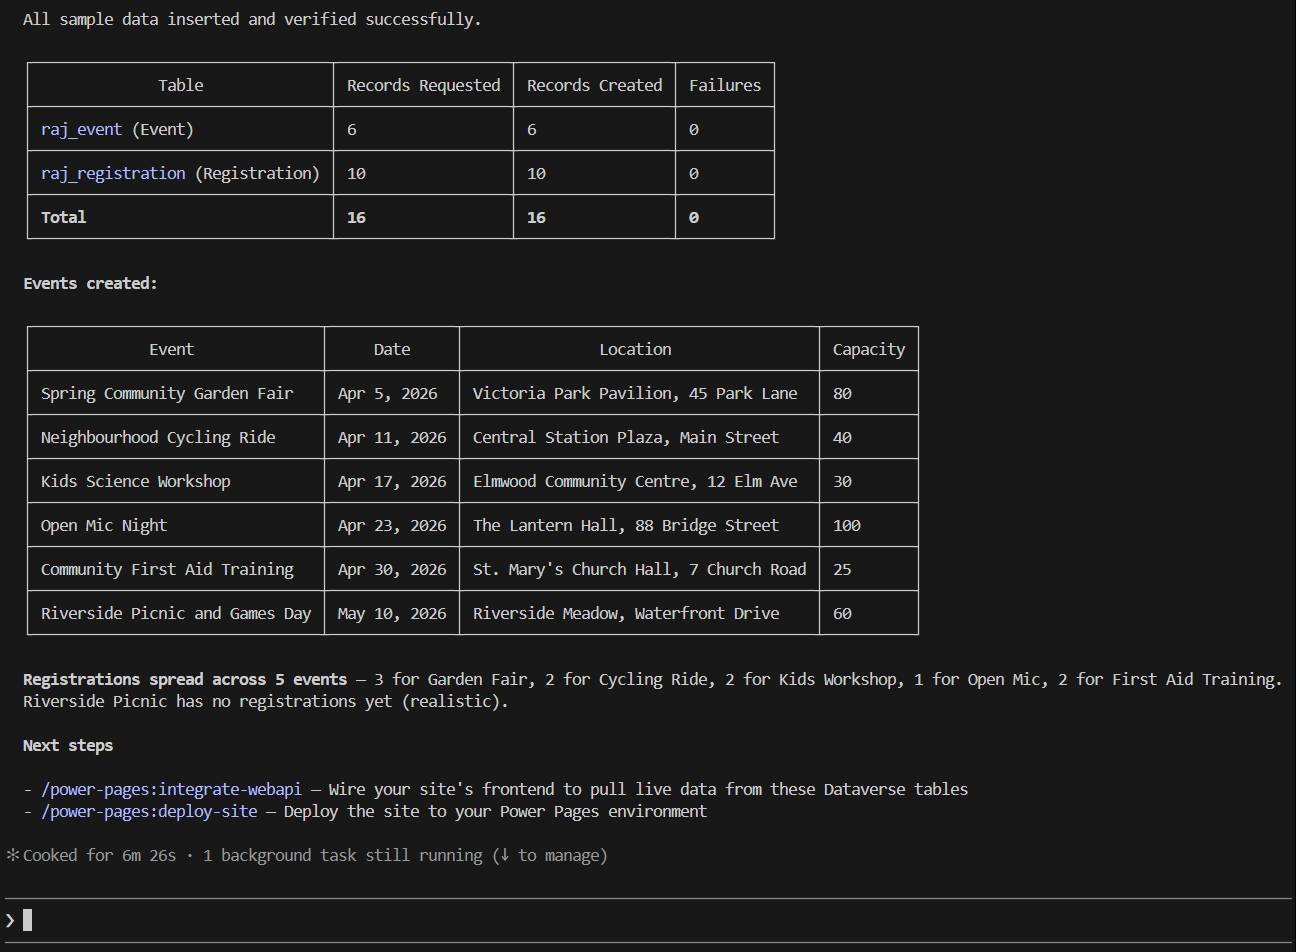
Step 5 — Add Sample Data:
With tables created, populate them with realistic test records so you can verify the Web API integration in the next step.
- Run:
/power-pages:add-sample-dataAdd 6 sample events and 10 registrations spread across those events.Events should be realistic community events with dates in the next 30 days, real-sounding locations in a city, and max capacity between 20 and 100.
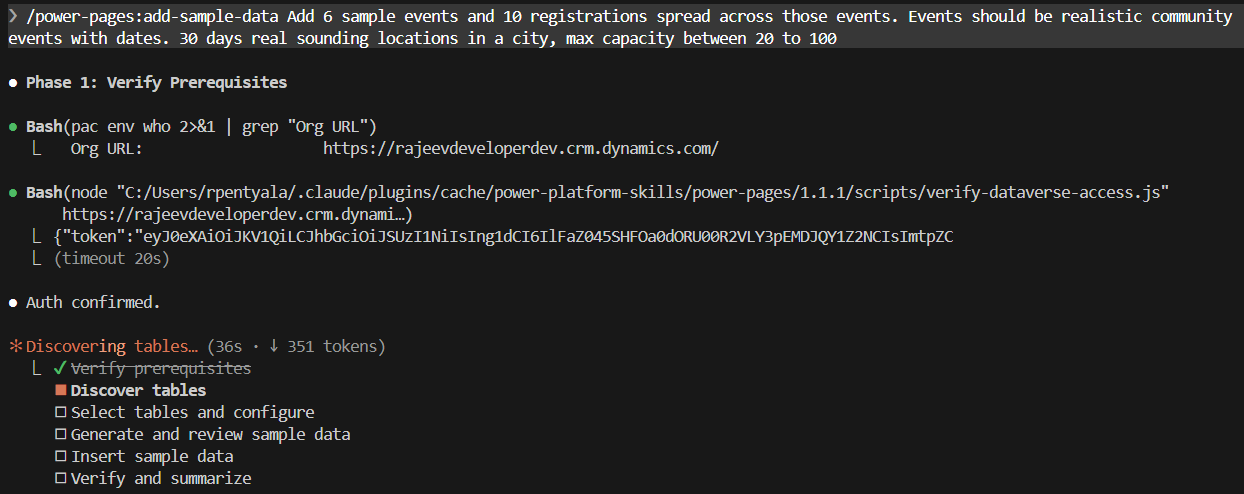
- The skill reads
.datamodel-manifest.jsonand inserts records in dependency order — Events first, then Registrations with correct lookup values.
Step 6 — Integrate the Dataverse Web API:
Now wire your React components to Dataverse so the site pulls live data instead of hardcoded mock data.
- Run:
/power-pages:integrate-webapi
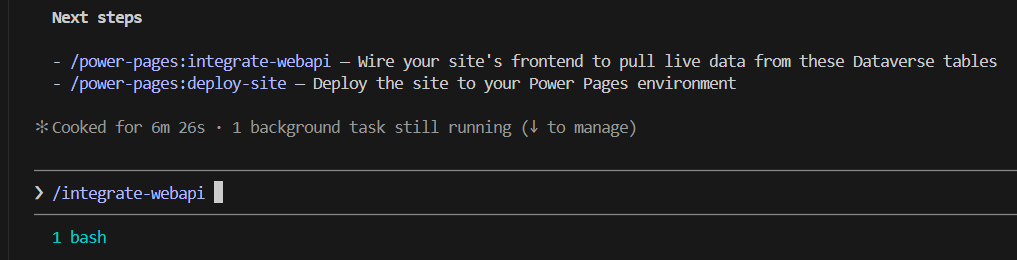
- Continue answering the prompts as Claude Code guides you through the process.
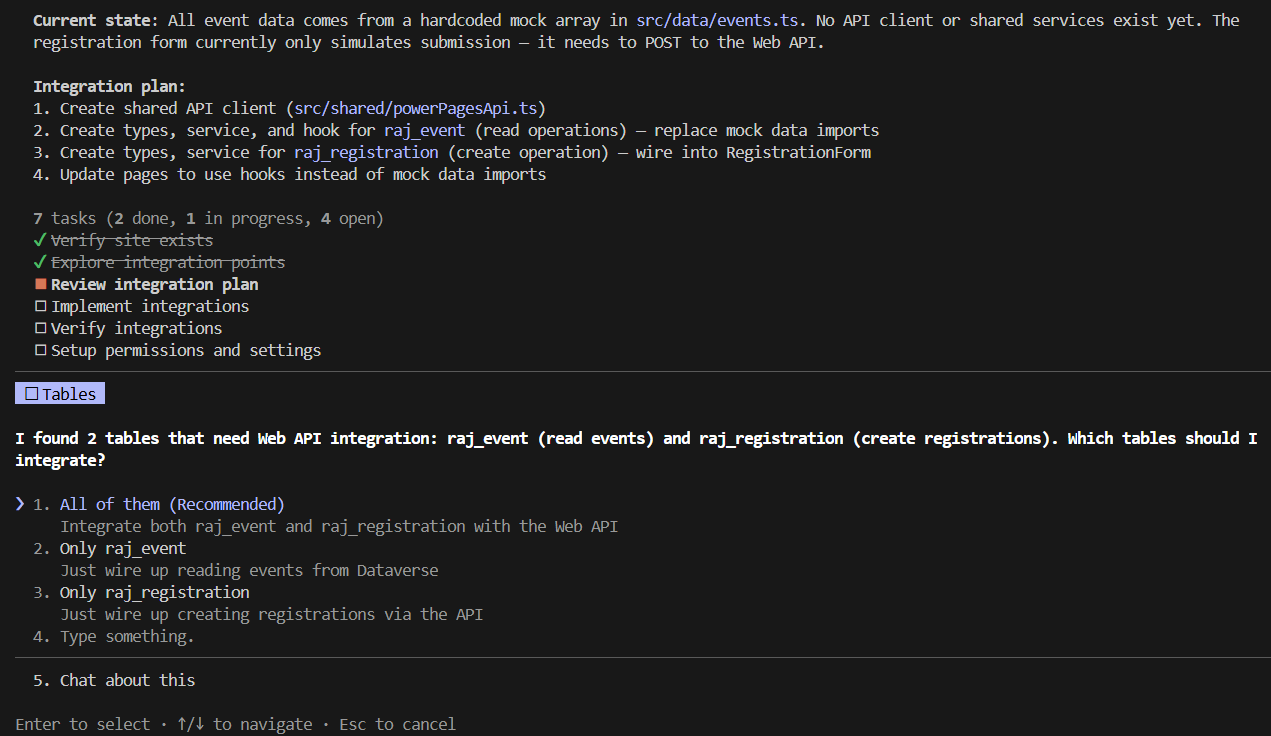
- The skill scans your codebase, maps React components to the Dataverse tables, and generates the required Web API integration.
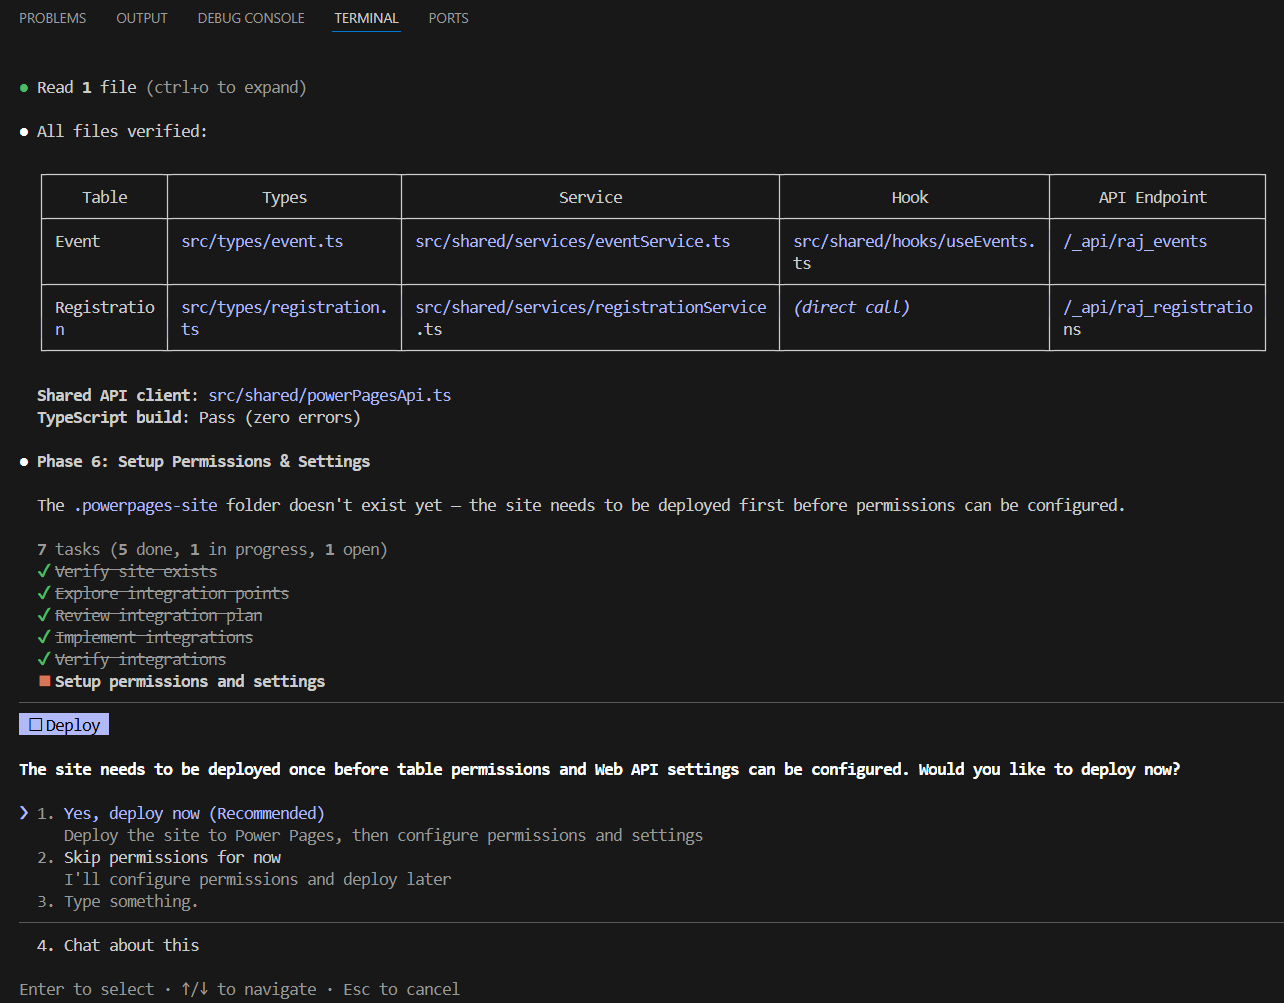
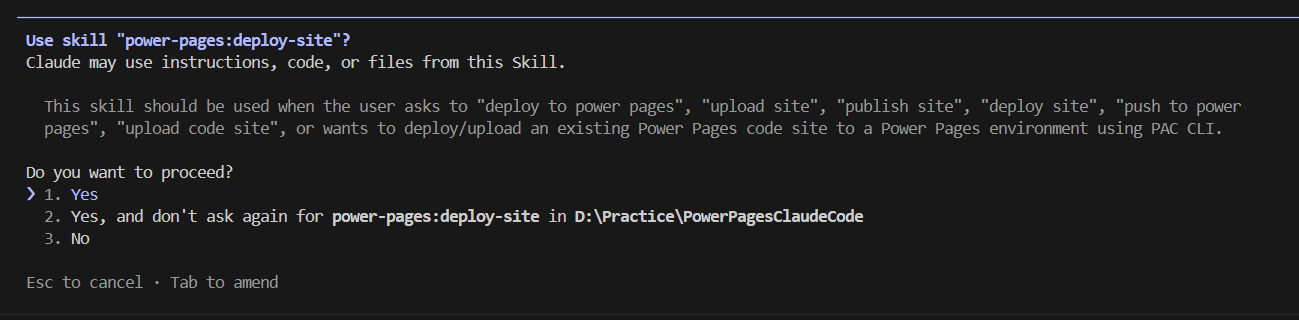
Step 7 : Deploy site to Power Platform:
After the Web API integration step, Claude Code prompted me to deploy the site.
Important: In my run, deployment was suggested as part of the next-step flow. Depending on your experience, you may also explicitly run the deploy skill.
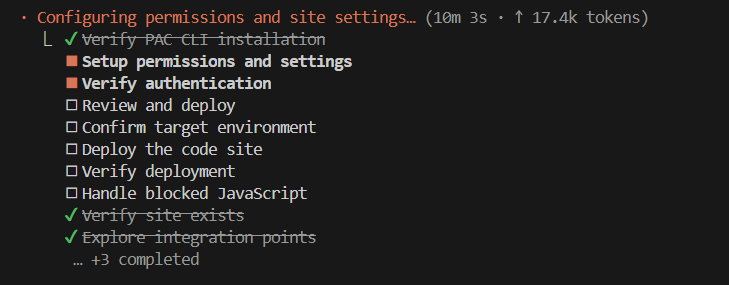
- If prompted, select: Yes, deploy now (Recommended)
- Skill completes the permissions setup.
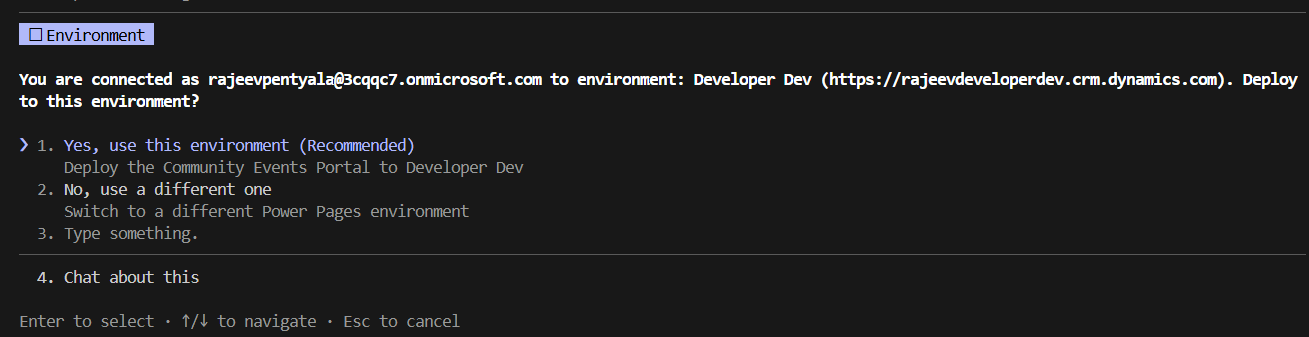
- Choose the Environment and continue.
- Because I had already authenticated in Step 2, the default environment (marked with a
*inpac auth list) was automatically selected.
- Because I had already authenticated in Step 2, the default environment (marked with a
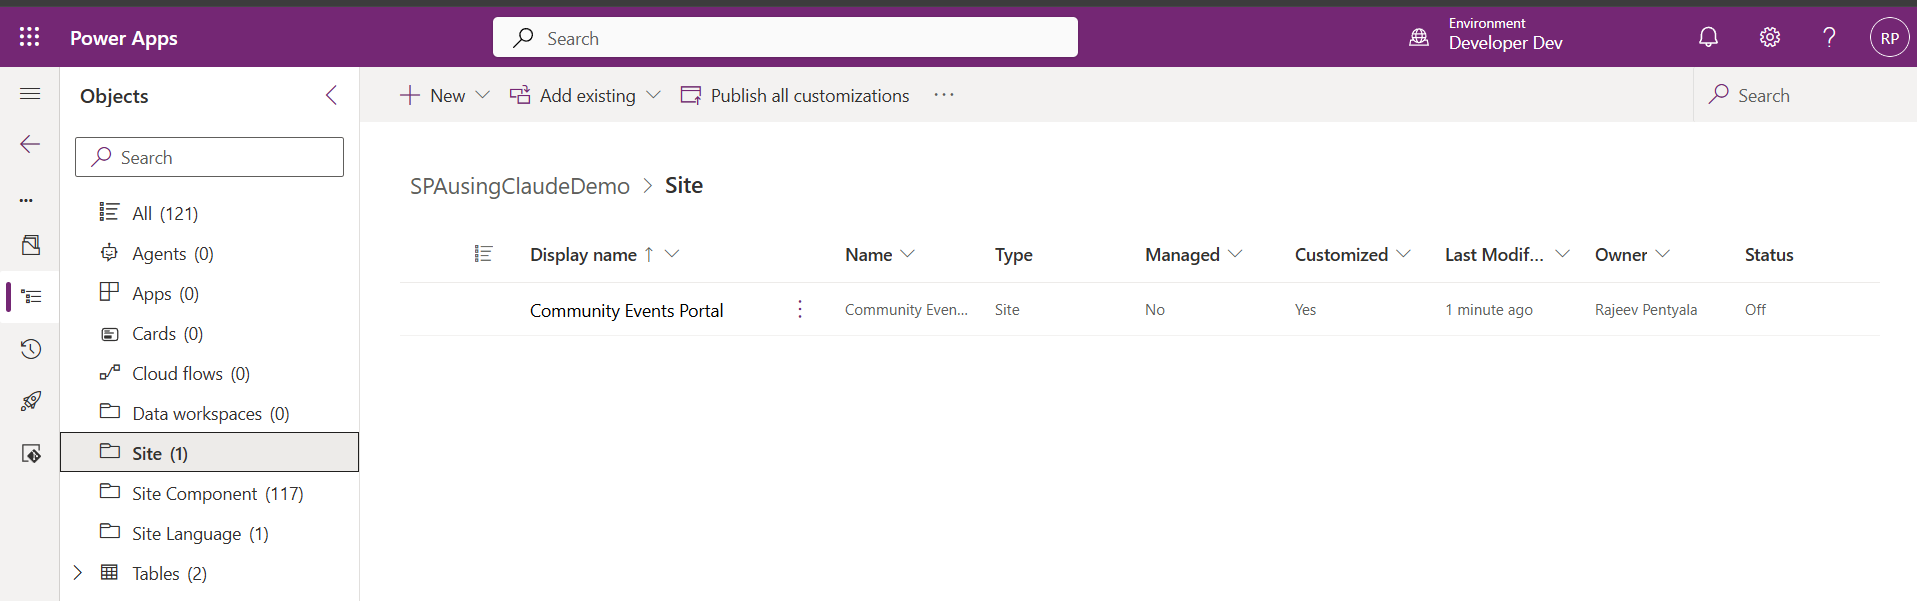
- Once deployment completes, go to: Power Platform > Solution. You should see the generated site components added to your solution.
Step 8 : Activate the site:
After deployment, Claude Code prompted me to activate the site.
If prompted, select:
- Yes and proceed.
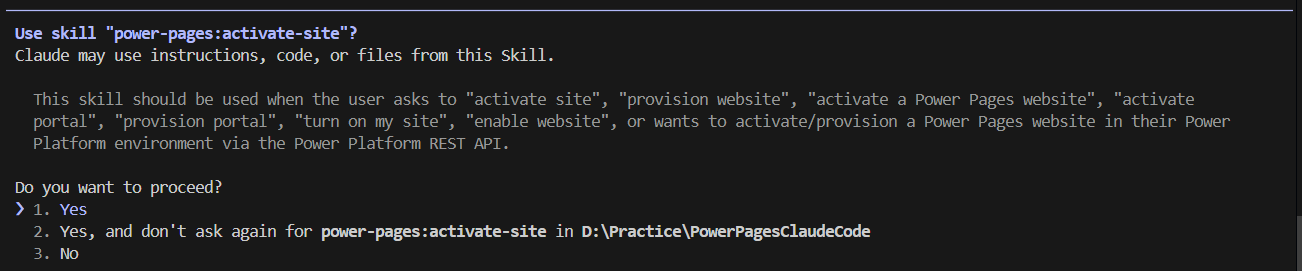
- Choose the recommended domain.
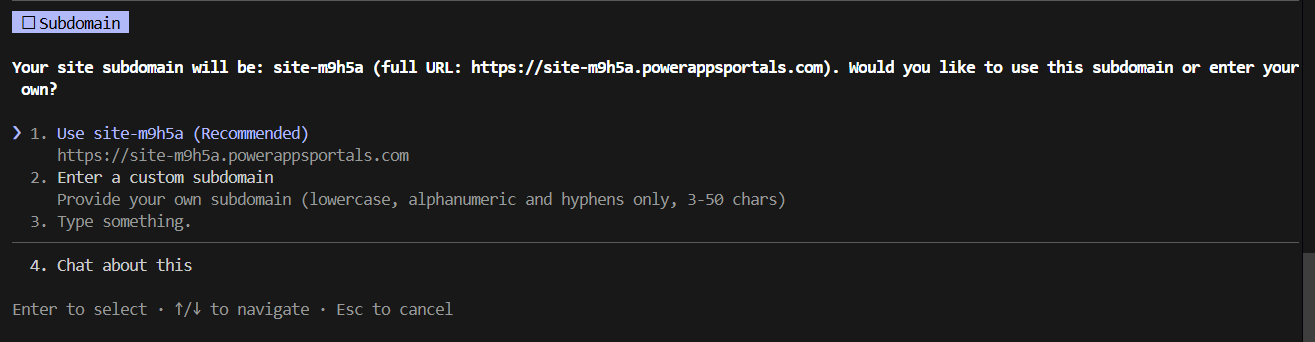
- Finally confirm the site activation.

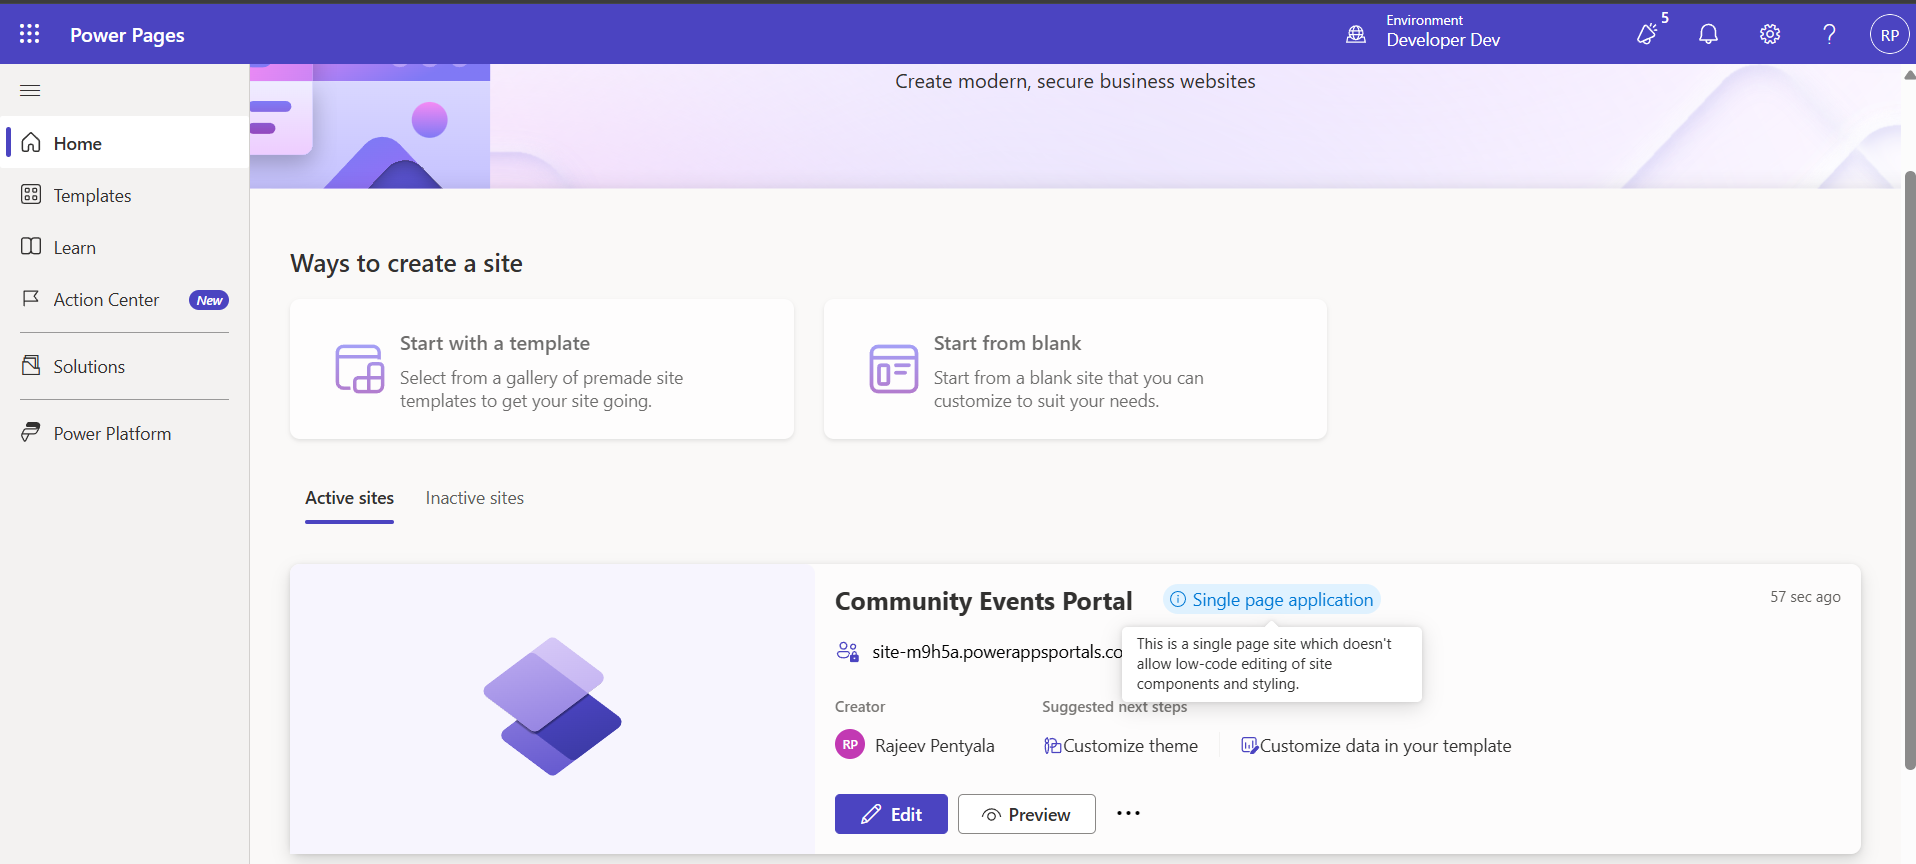
- Once the site is activated, go to the Power Pages Portal and you should the site up and running.
Step 9 — Test the Site and Troubleshoot Issues:
Now it’s time to test the site.
- Open the site from the Power Pages Portal
- You may be prompted to grant consent — accept and continue..

- The site should load, and at this point you can verify:
- Home page rendering
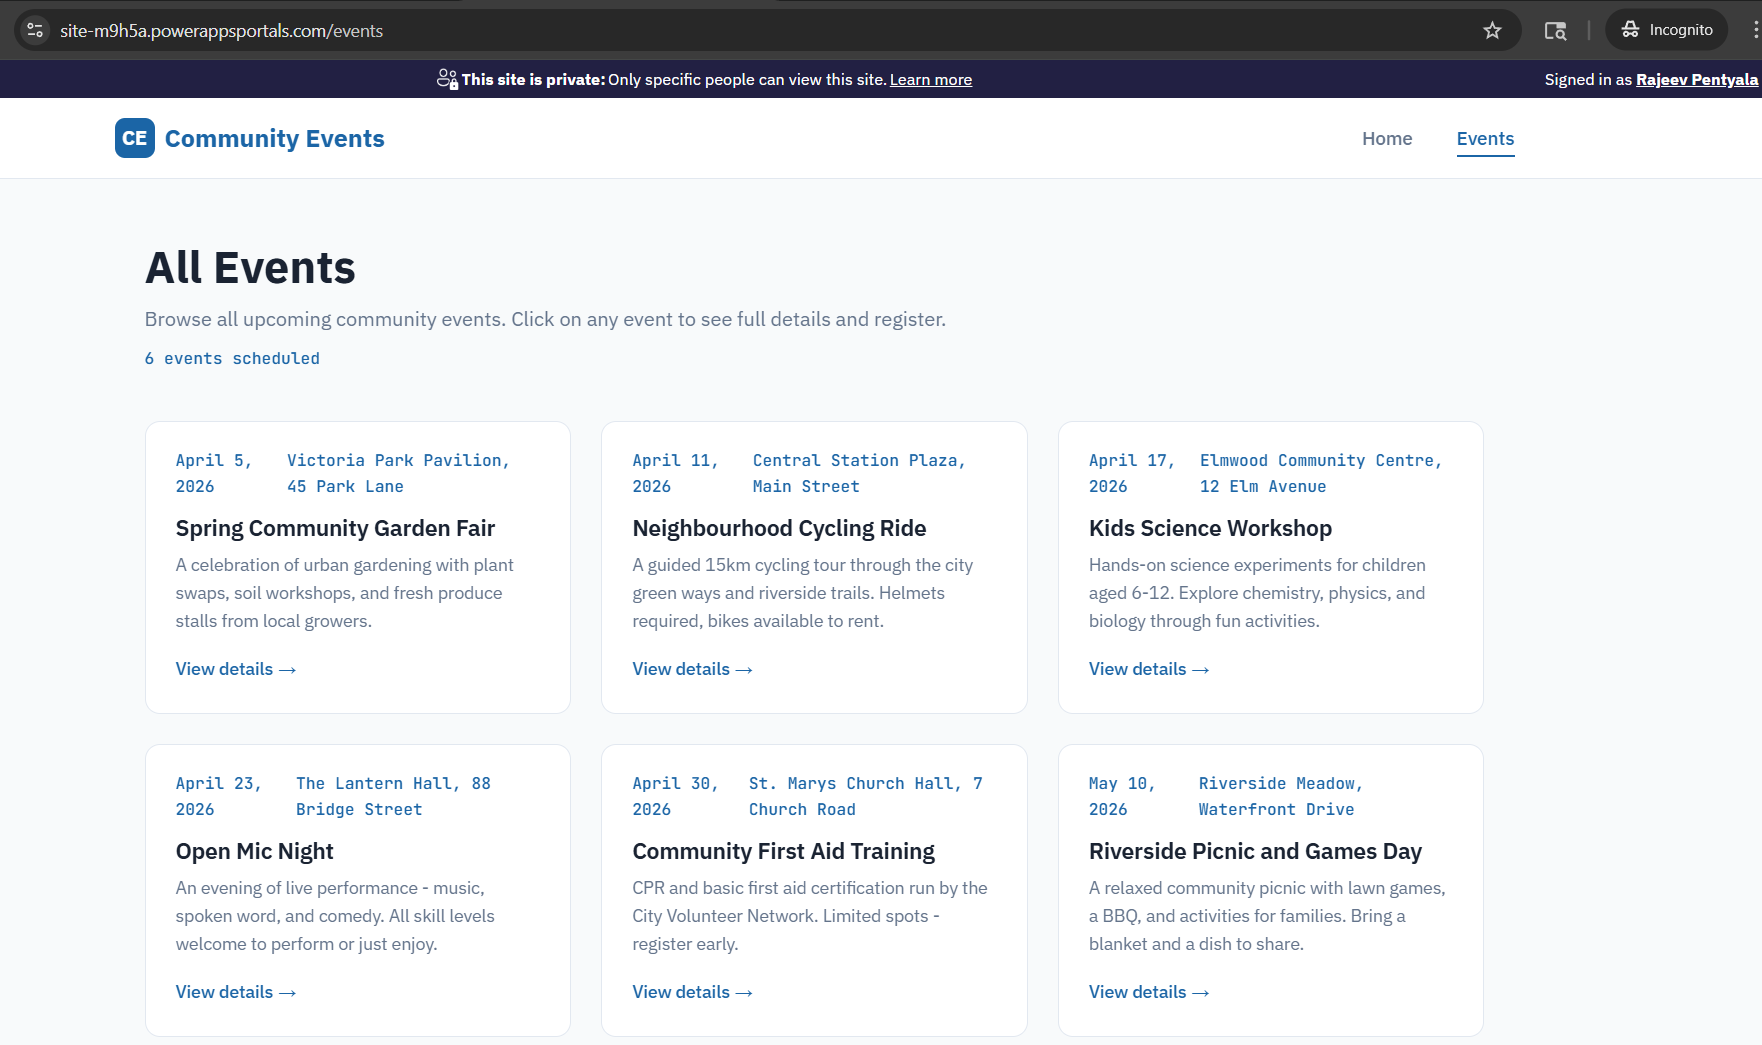
- Event listing page
- Event details page
- Registration form flow
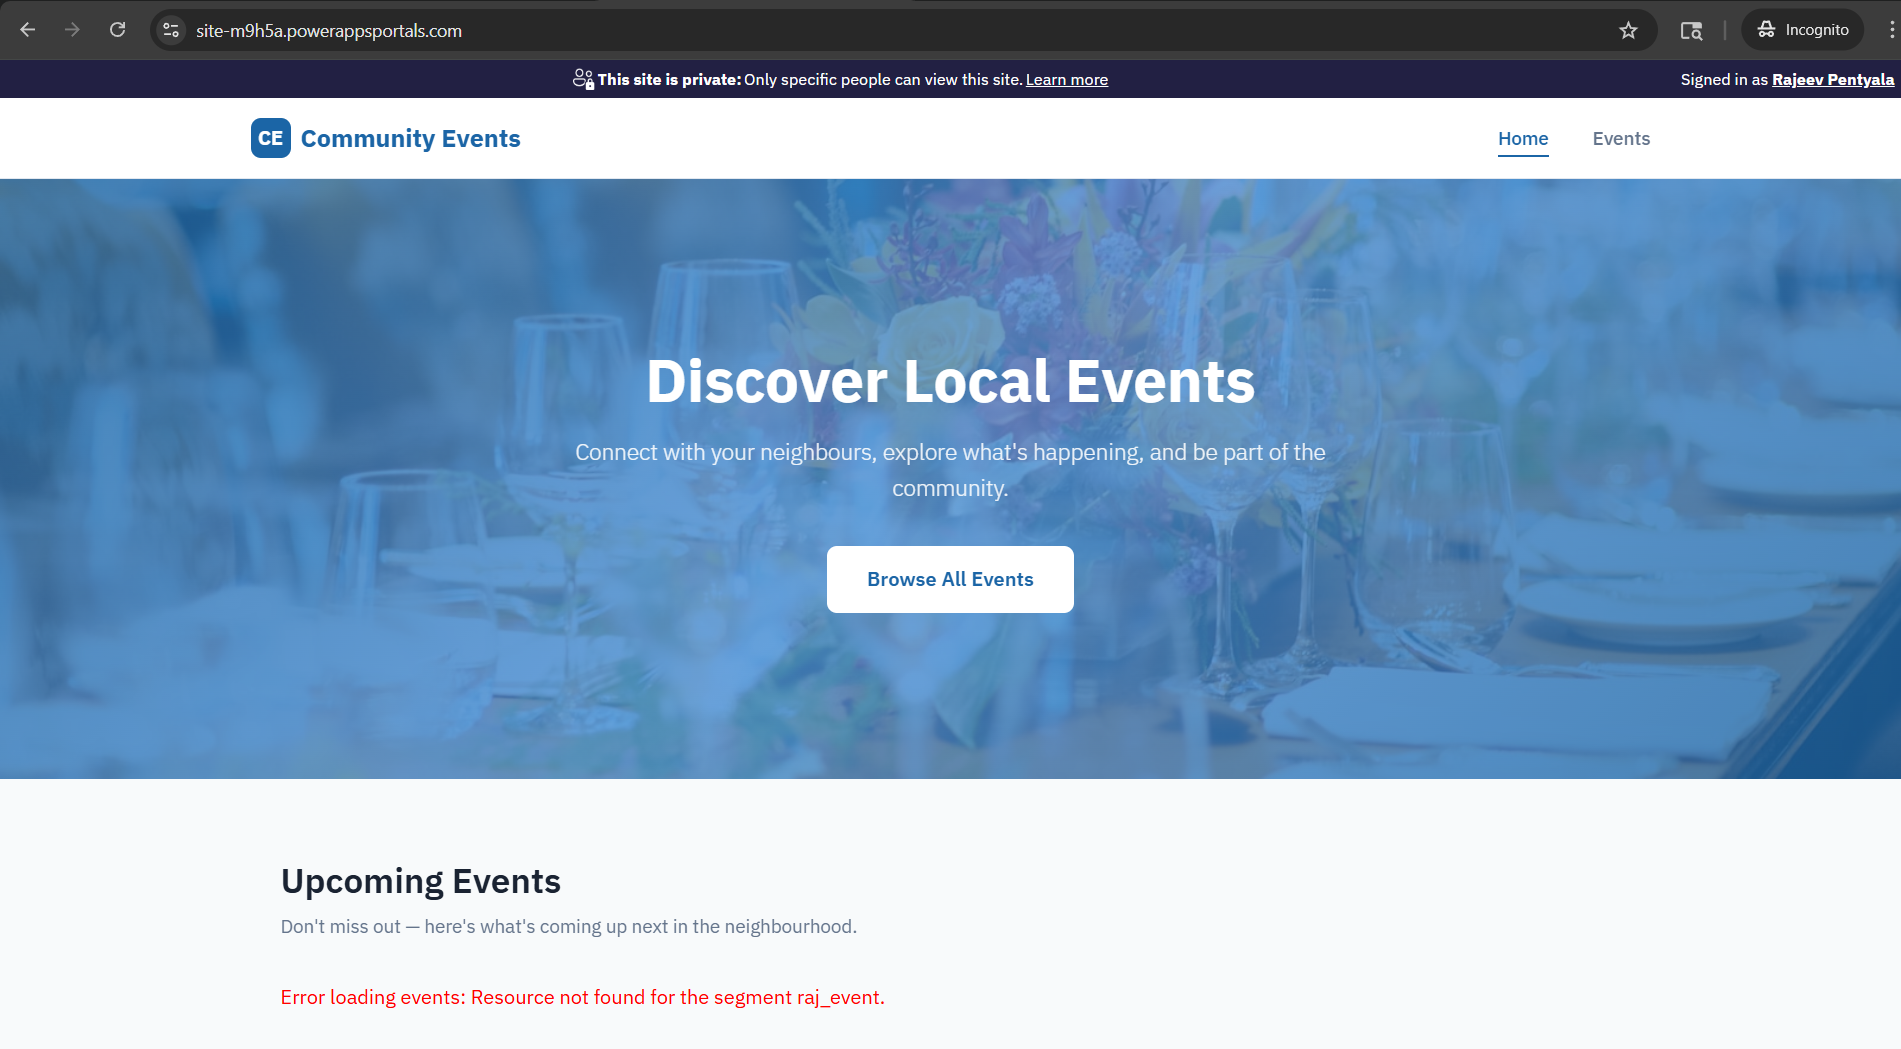
Troubleshooting in my case:
In my case, the site loaded, but the events did not appear, and the page showed an error message.
- I returned to Claude Code, explained the issue, and shared the error context.
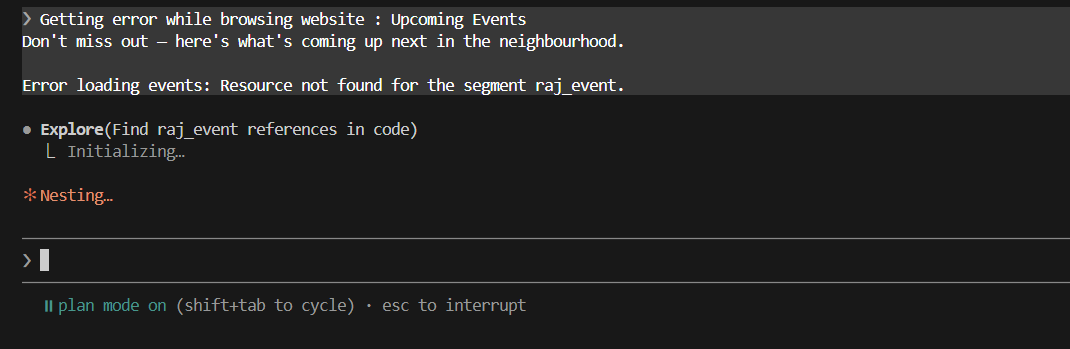
- Claude Code analyzed the issue, updated the relevant code/configuration, and guided me through the fix.
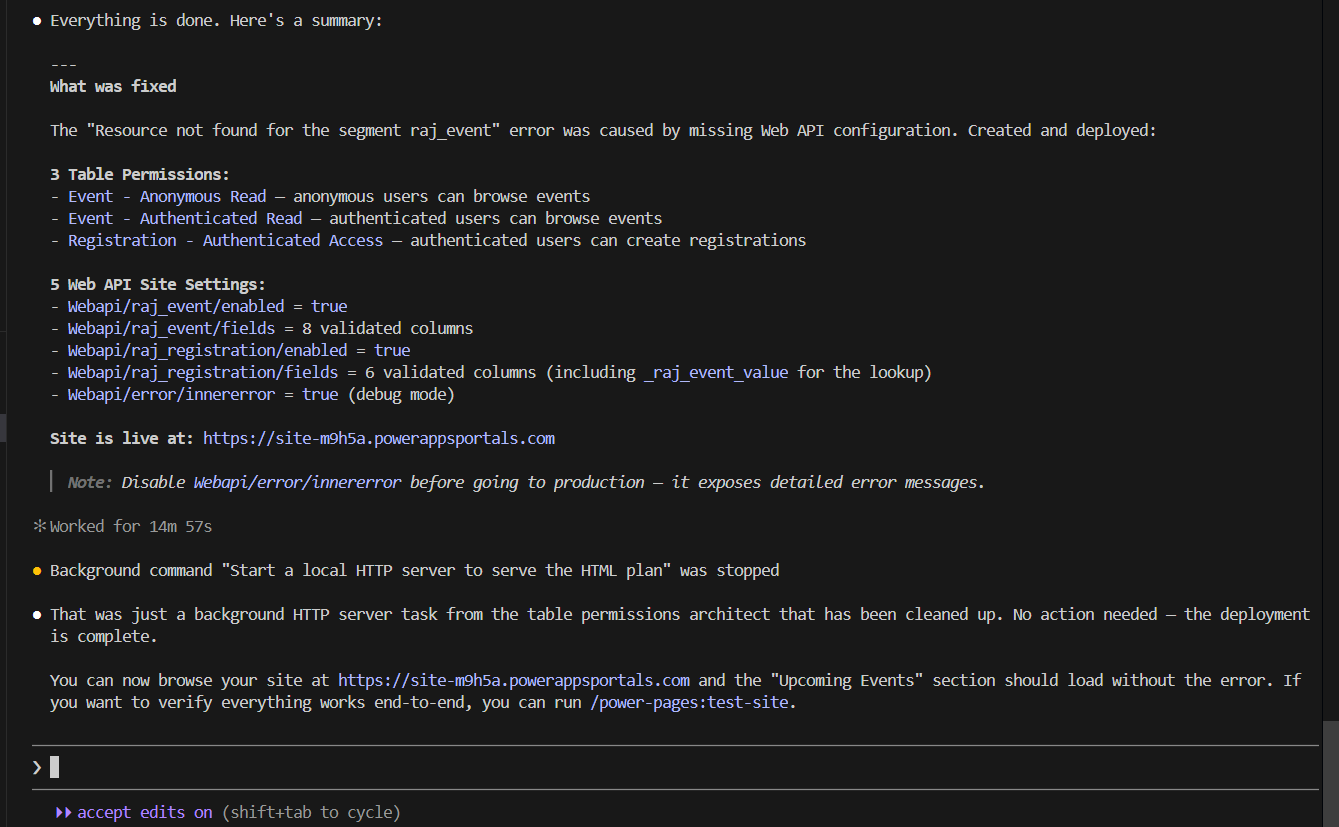
- After refreshing the site, the events loaded correctly.
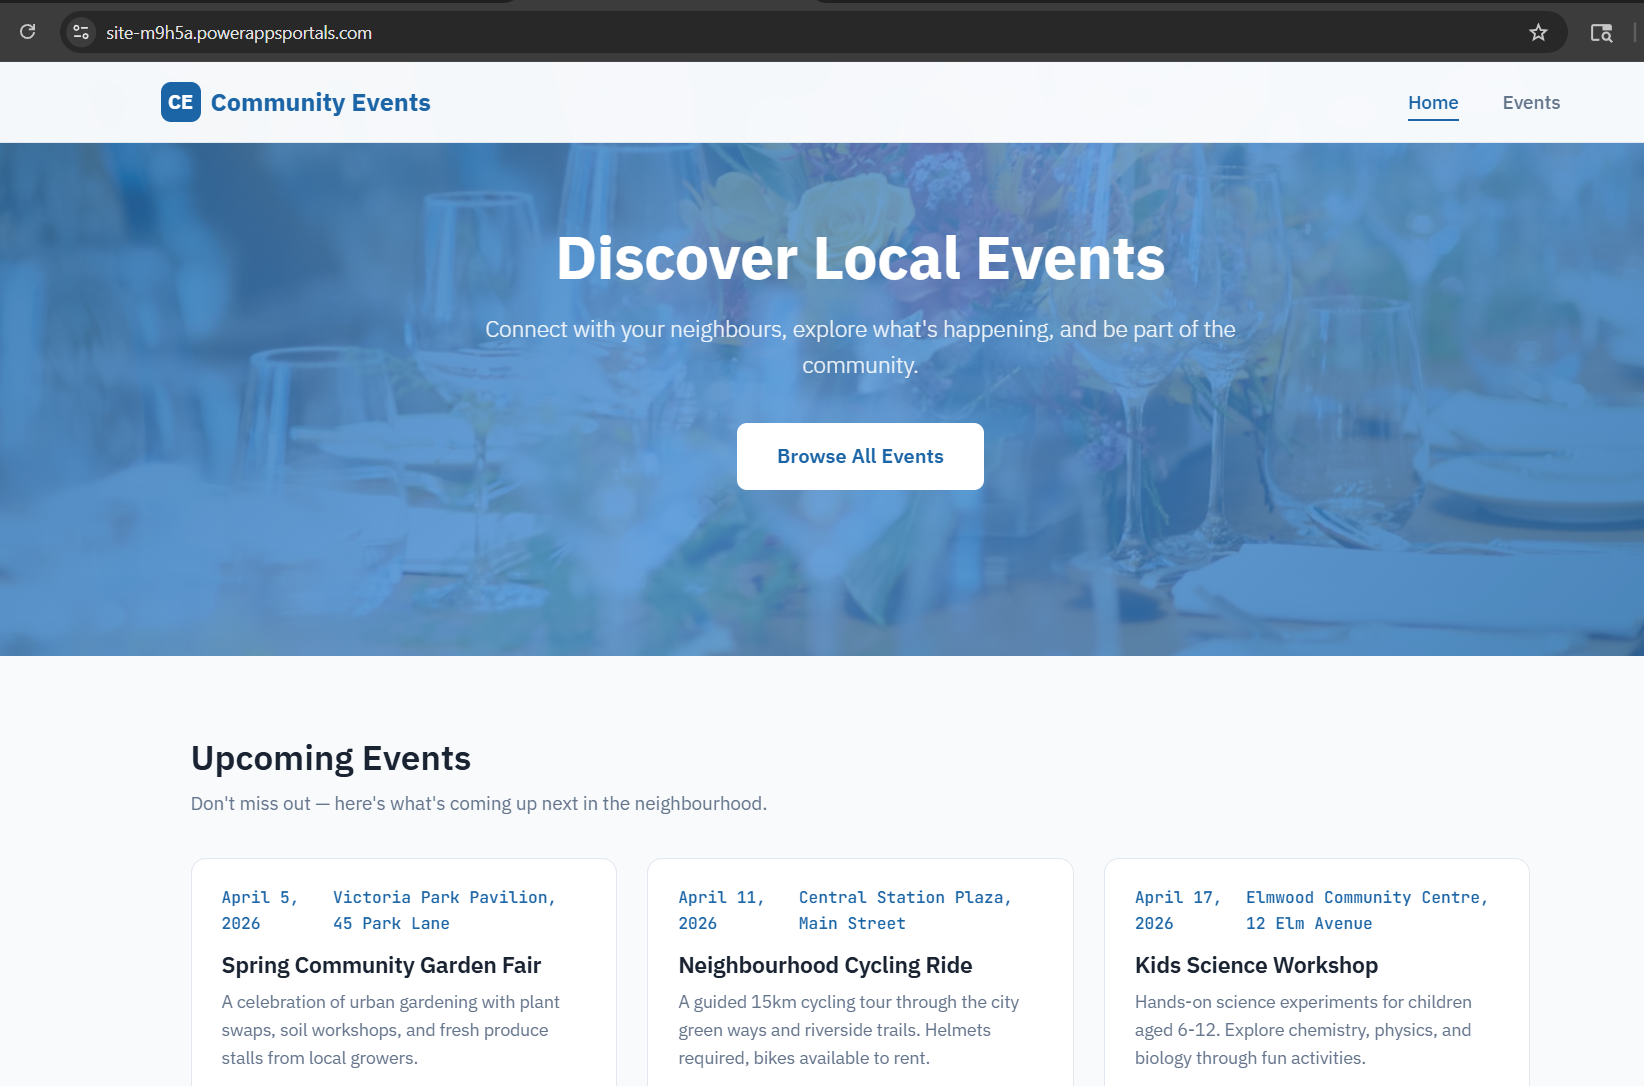
- I was then able to navigate through all pages successfully.
Hope this article helped you understand how to build a Power Pages SPA with a Dataverse data model using Claude Code. For developers who prefer a code-first experience, this is a very promising direction for building Power Pages solutions faster with AI assistance.
🙂


Leave a comment