If you are building agents in Copilot Studio, here’s something useful to know.
You can clone your agent as files into a local project, open it in VS Code, make changes, and sync those changes back to Copilot Studio using the Copilot Studio extension for VS Code.
You can also use source control (like Git) to version your agent definitions directly from VS Code, just like you would with any other code project.
Let’s now understand what the Copilot Studio extension for VS Code actually offers.
Copilot Studio extension for VS Code:
With this extension, you can:
- Clone agents from Copilot Studio to your local machine.
- Edit agent components using the agent definition language in YAML.
- Apply changes to your environment to preview and test updates in Copilot Studio
- Redeploy or Deploy your agent definition directly to an environment.
What We’ll Cover in This Article
In this article, I’ll walk you through the following features of the Copilot Studio VS Code extension:
- Clone a Copilot Studio agent to your local machine
- Understand the folder structure of the cloned agent
- Preview remote changes inside VS Code
- Make local changes to the agent in VS Code
- Upload your local changes back to Copilot Studio
For this walkthrough, I’ll use a simple agent so it’s easy to follow along.
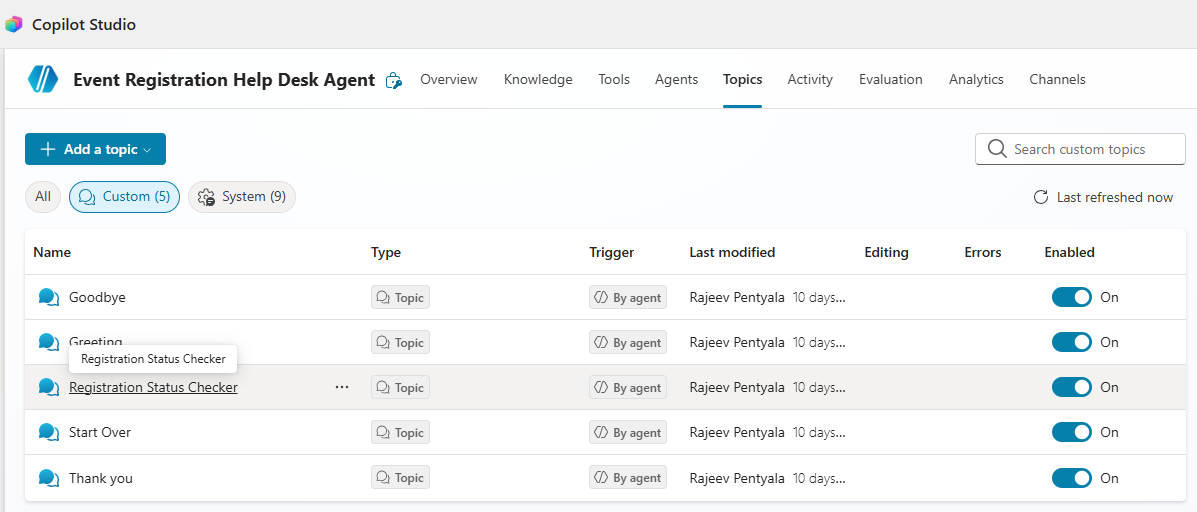
Copilot Studio Agent Details
- Agent name : Event Registration Help Desk Agent
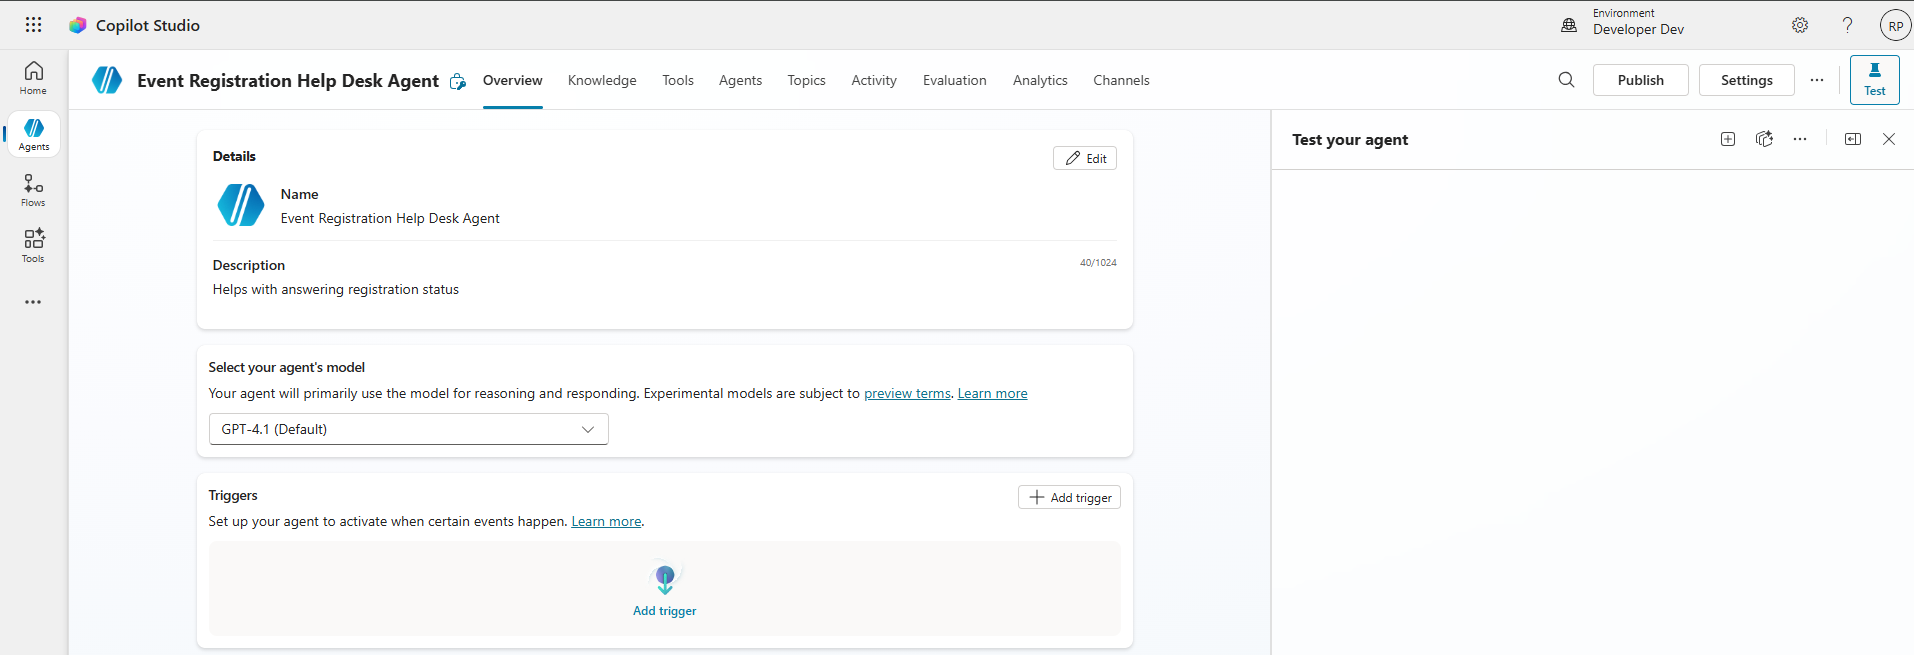
- It has following topics. The topic named Registration Status Checker is a custom topic. All other topics are out-of-the-box (OOTB) topics
Now that you understand the agent we’ll be working with, let’s move on to setting up the Copilot Studio extension for VS Code.
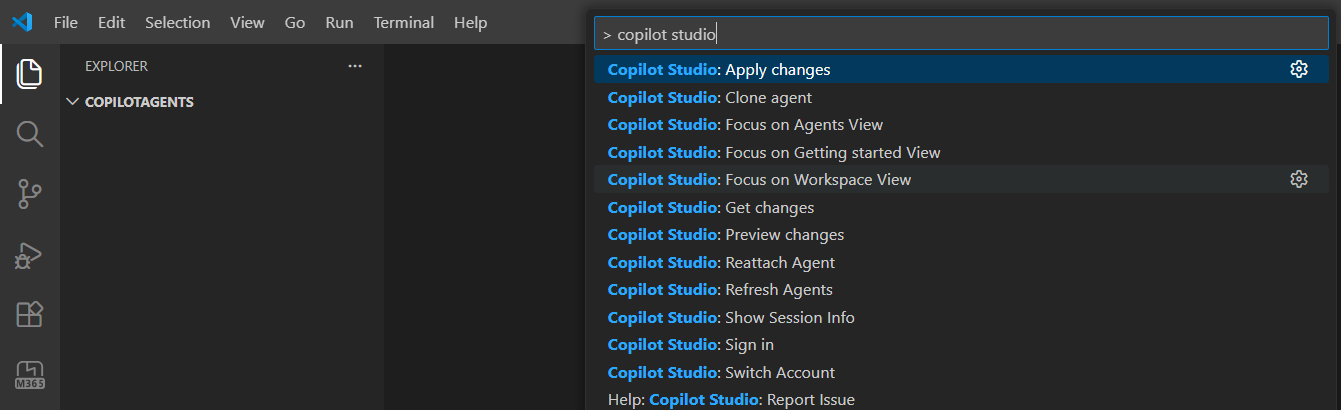
Install the Copilot Studio extension for VS Code:
- Open the Extensions tab in Visual Studio Code.
- Search and install the Copilot Studio extension.
- Wait for the installation to complete. If VS Code asks you to reload, click Reload when prompted.
- After installation:
- Look for the Copilot Studio icon in the activity bar. The icon appears with Copilot Studio branding.
- You will also notice new Copilot Studio commands available in the Command Palette.
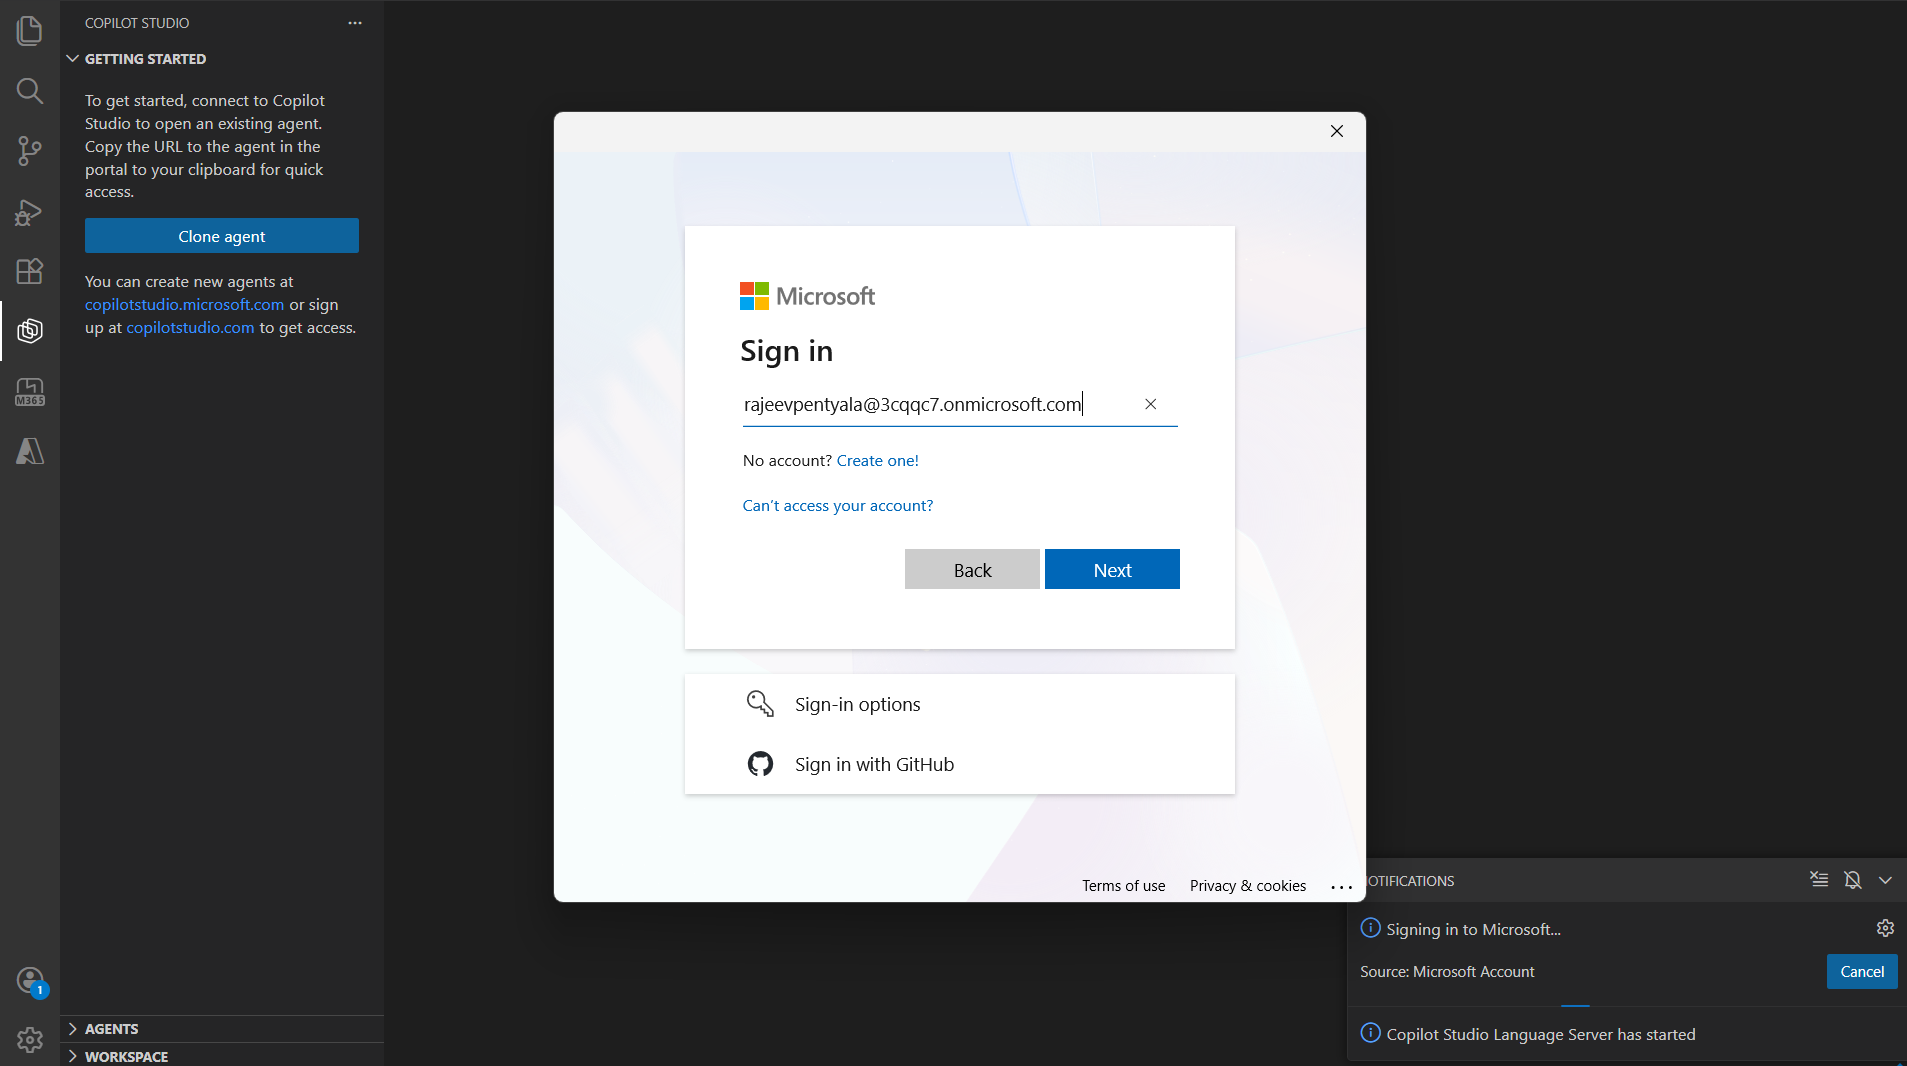
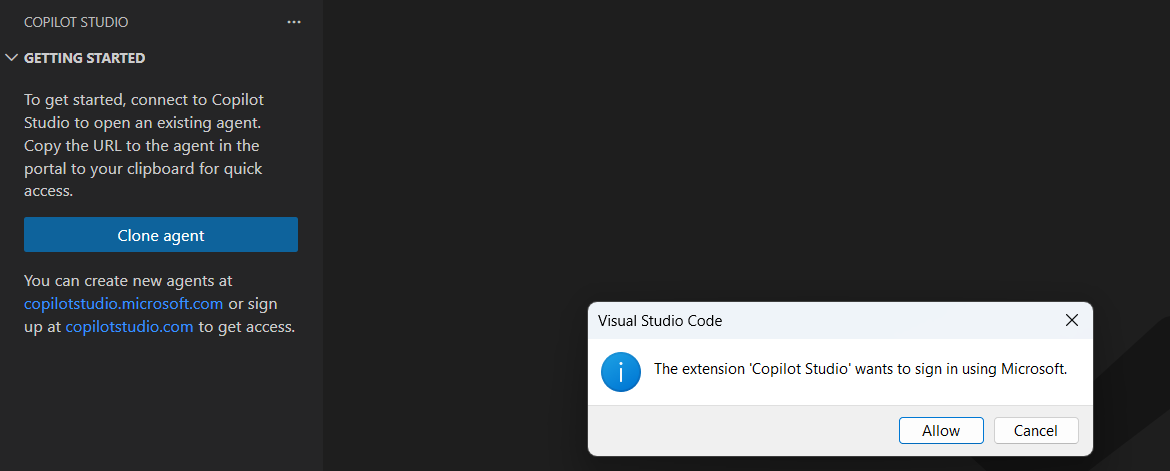
- Next, open the Accounts tab in the bottom left corner and click Sign in…Copilot Studio, as shown below.
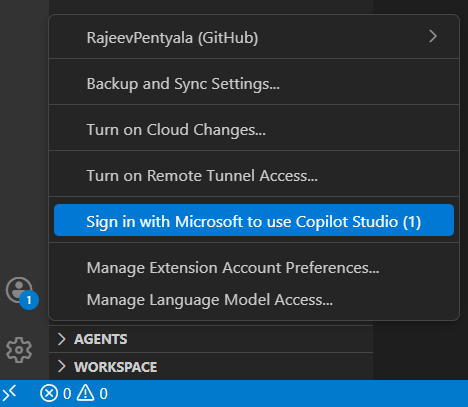
- Complete the sign-in process using your Copilot Studio account.
We’ve now successfully connected VS Code to our Copilot Studio account.
Let’s move on to cloning the agent locally.
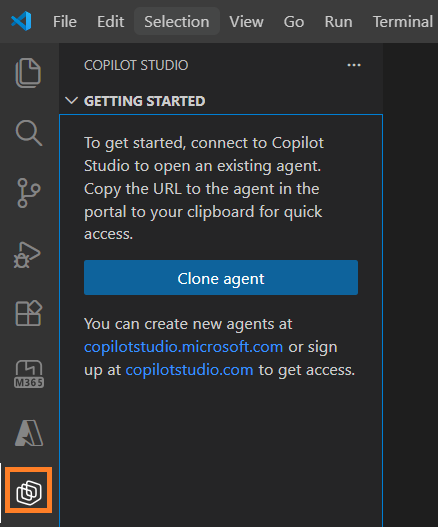
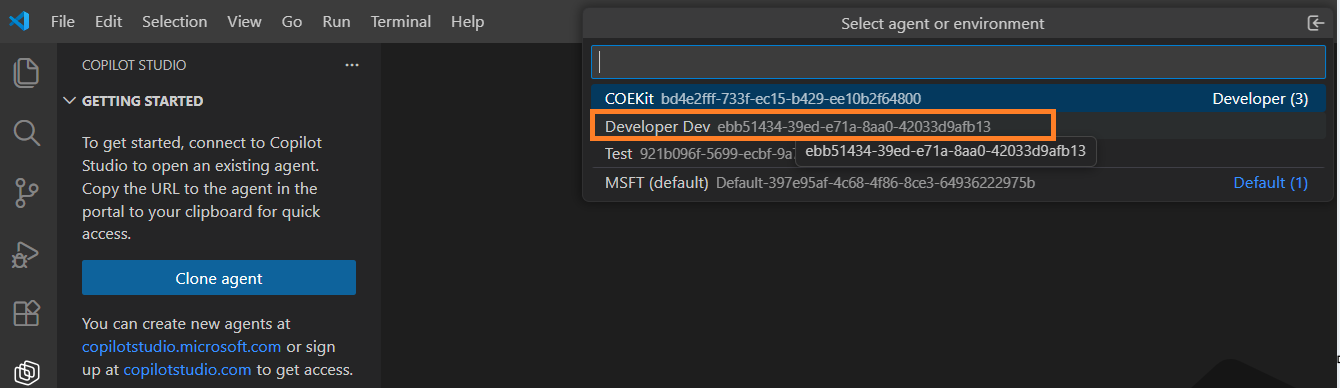
Clone the Copilot Studio agent in VS Code:
- Open the Copilot Studio pane, click on Clone agent.
- If you’re prompted to sign in again, complete the sign-in.
- Select the environment from the list.
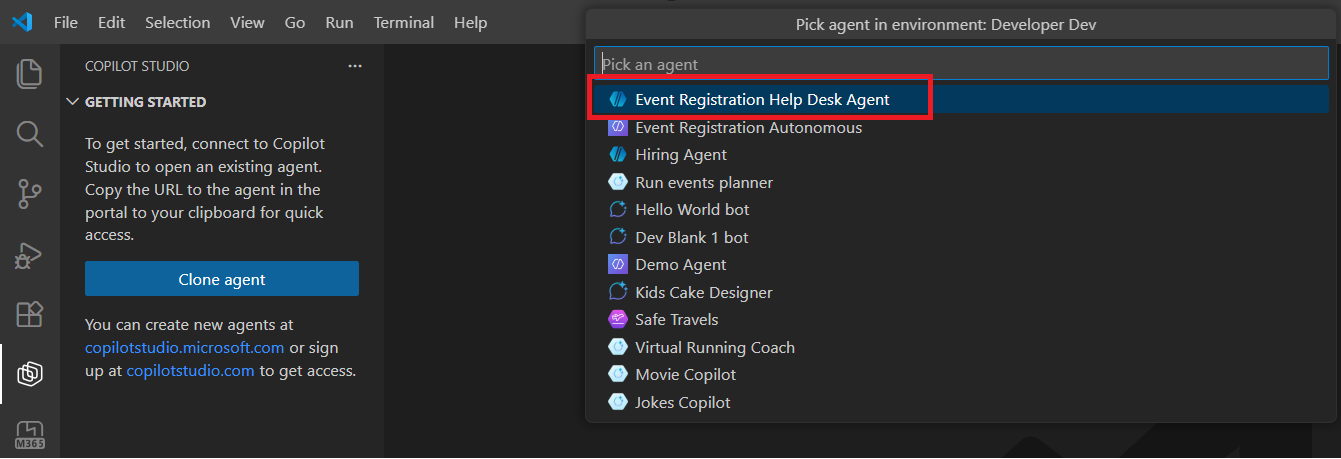
- Choose the Copilot Studio agent you want to clone.
- A file picker dialog opens.
- Navigate to your desired folder, or
- Create a new folder for the project.
- Click Select Folder to start the cloning process.
- Once the cloning process complete, The agent folder opens in VS Code explorer.
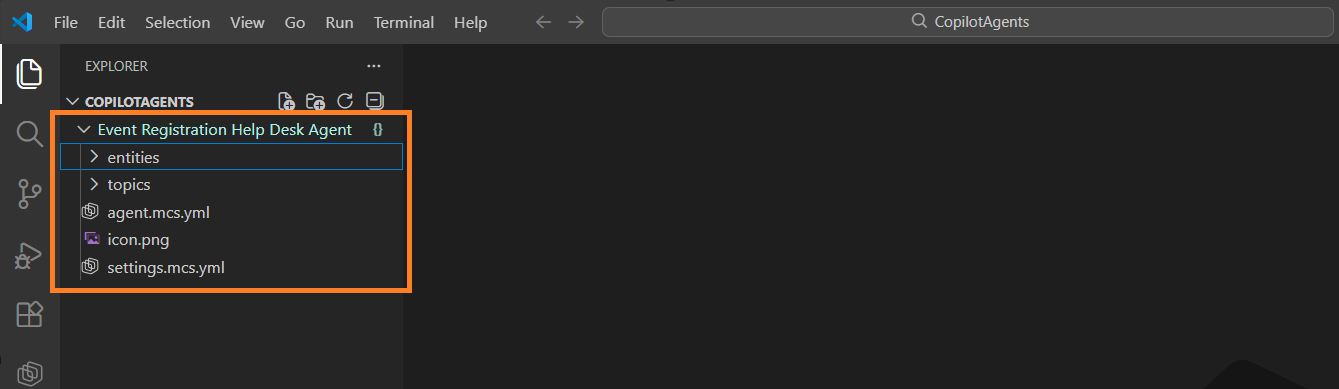
- You can navigate through the files as shown below. You can edit its components by using VS Code’s text editing features.
- The Copilot Studio extension provides IntelliSense, validation, and YAML language support to make editing efficient and error-free.
With this, we’ve successfully cloned the agent locally and are ready to explore the folder structure.
Preview Changes:
One useful feature of the Copilot Studio extension is that you can preview remote changes without immediately applying them. Let’s understand this with a simple example.
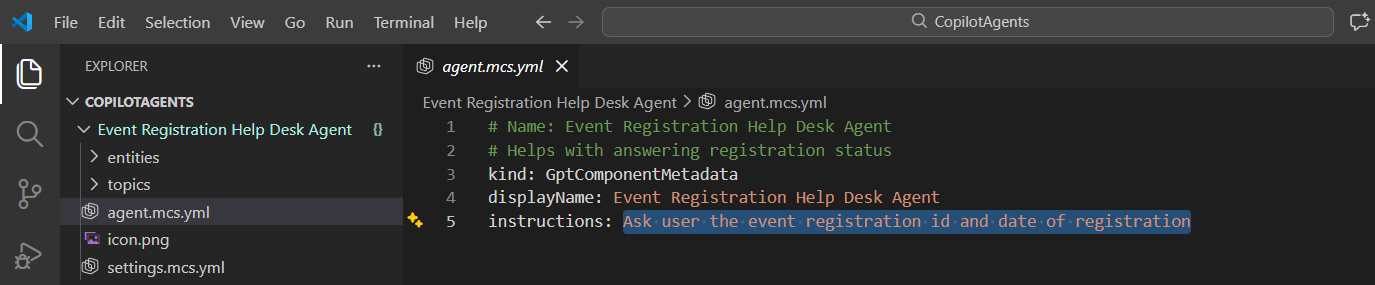
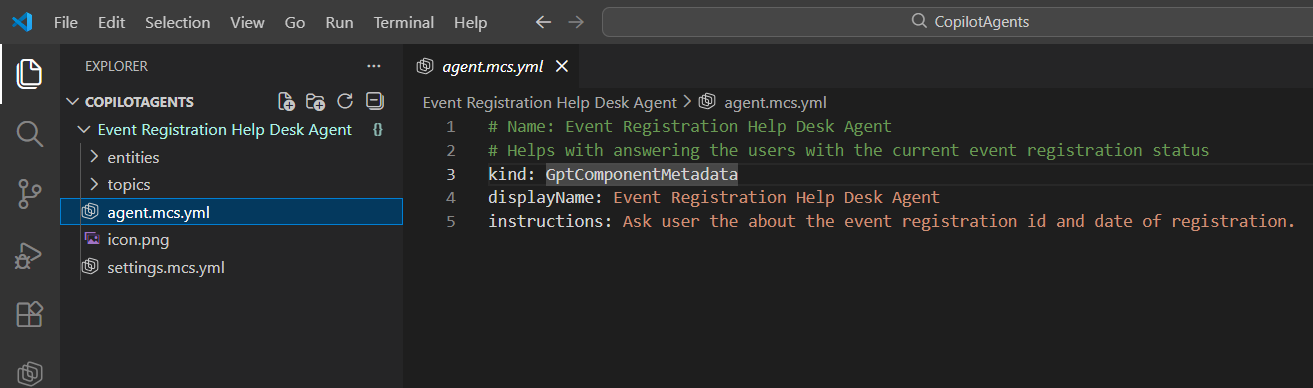
- In VS Code, open the agent.mcs.yml file from the Explorer.
Here you’ll see details like the Agent Display Name, Description, and Instructions.
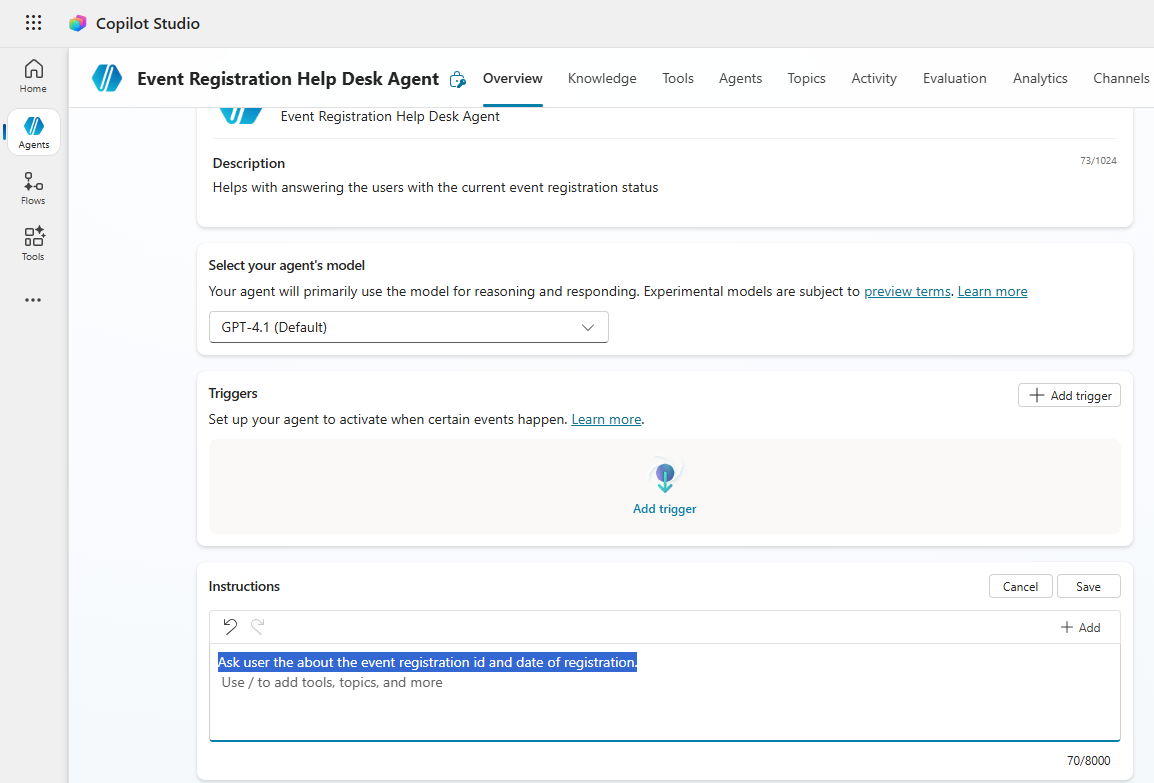
- Now open the same agent in Copilot Studio (browser). Update the Instructions field as shown in the screenshot and click Save.
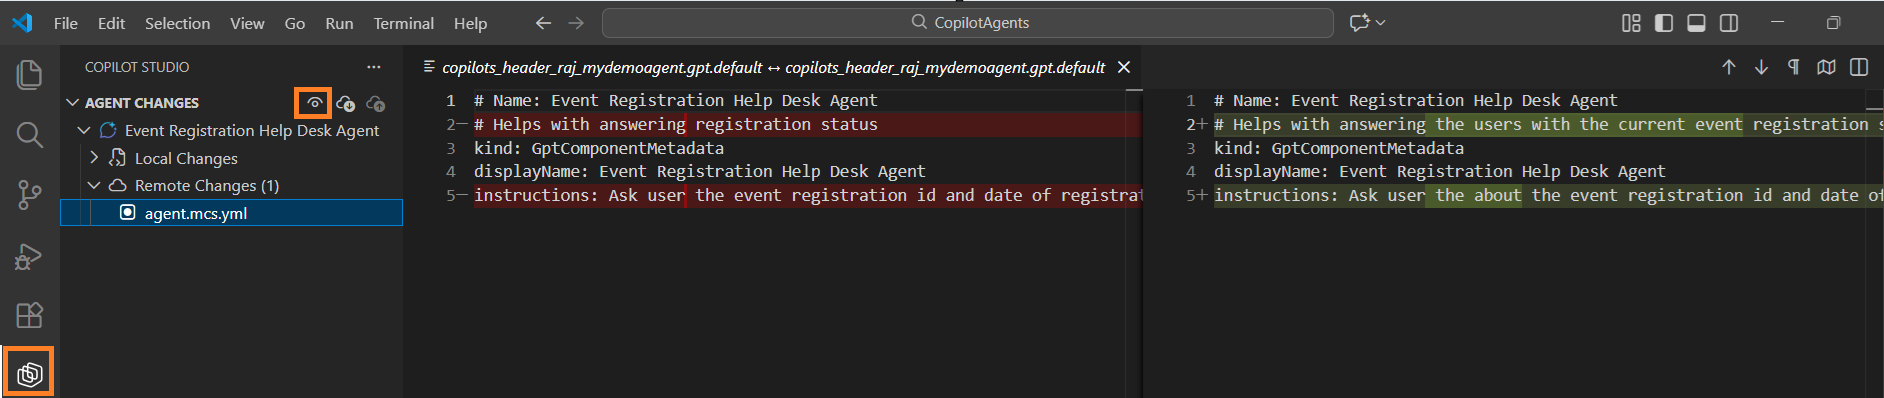
- Switch back to VS Code, open the Copilot Studio extension and click on Preview icon as shown below.
- You will see the remote changes under the Remote Changes folder.
- If you want to bring those changes into your local project:
- Click the Copilot Studio: Get Changes icon
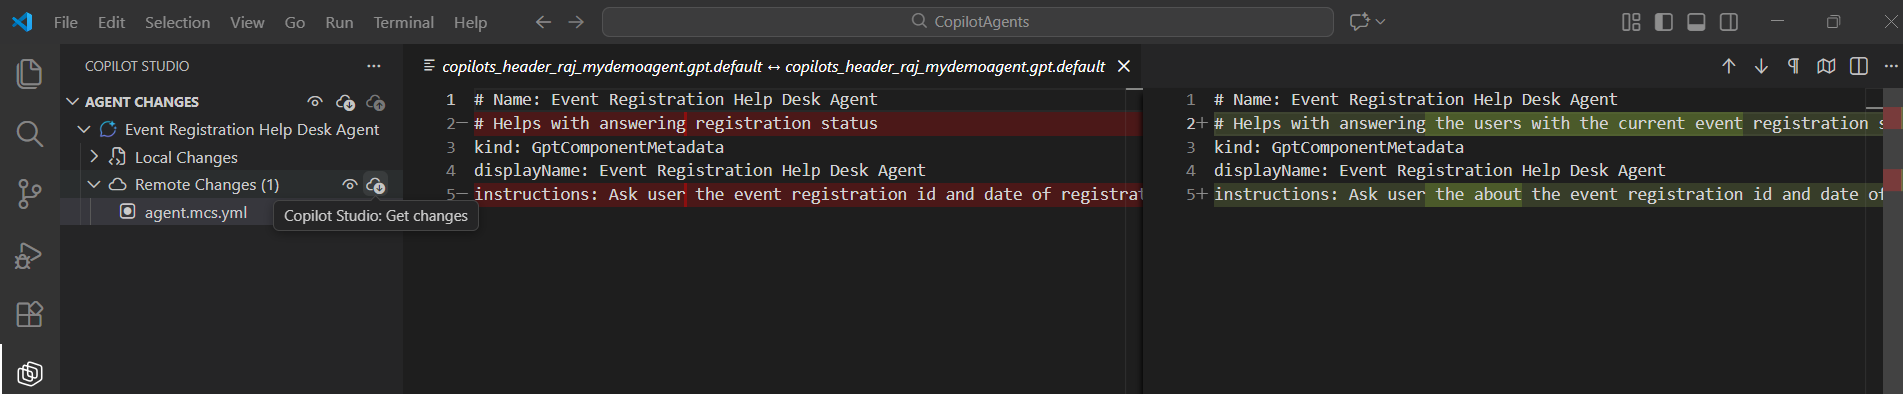
- The remote updates are then synced to your local files.
At this point, we have:
- Previewed remote changes.
- Applied those changes locally.
Now let’s move on to the next step: Making changes locally in VS Code and syncing them back to Copilot Studio.
Upload Local Changes Back to Copilot Studio (Remote):
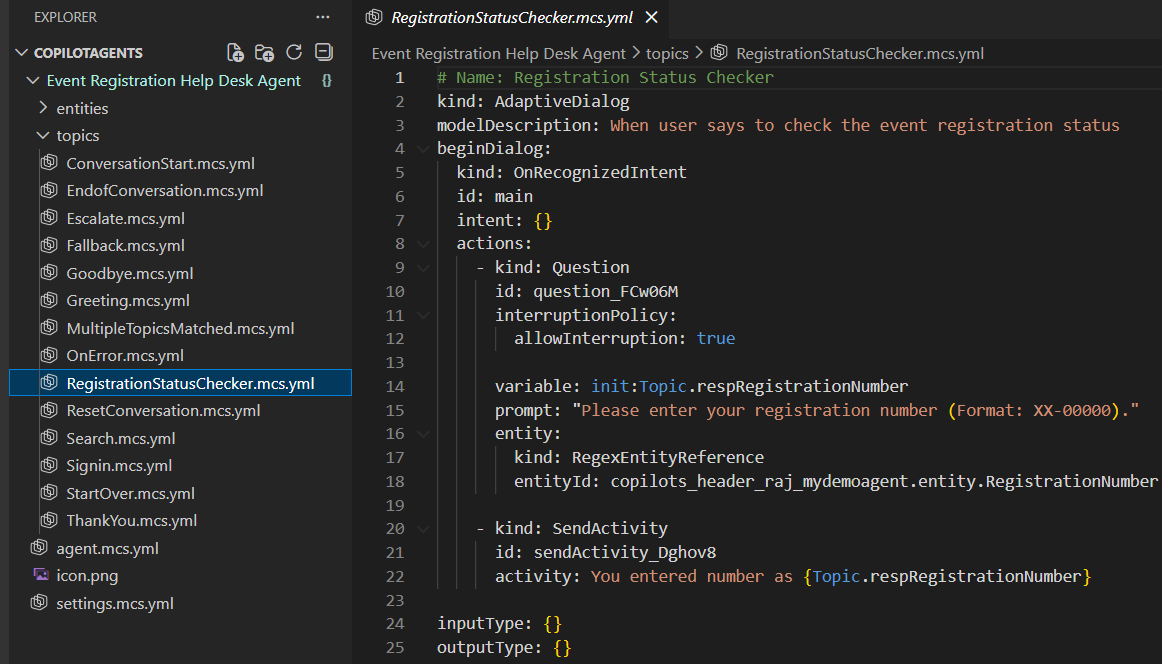
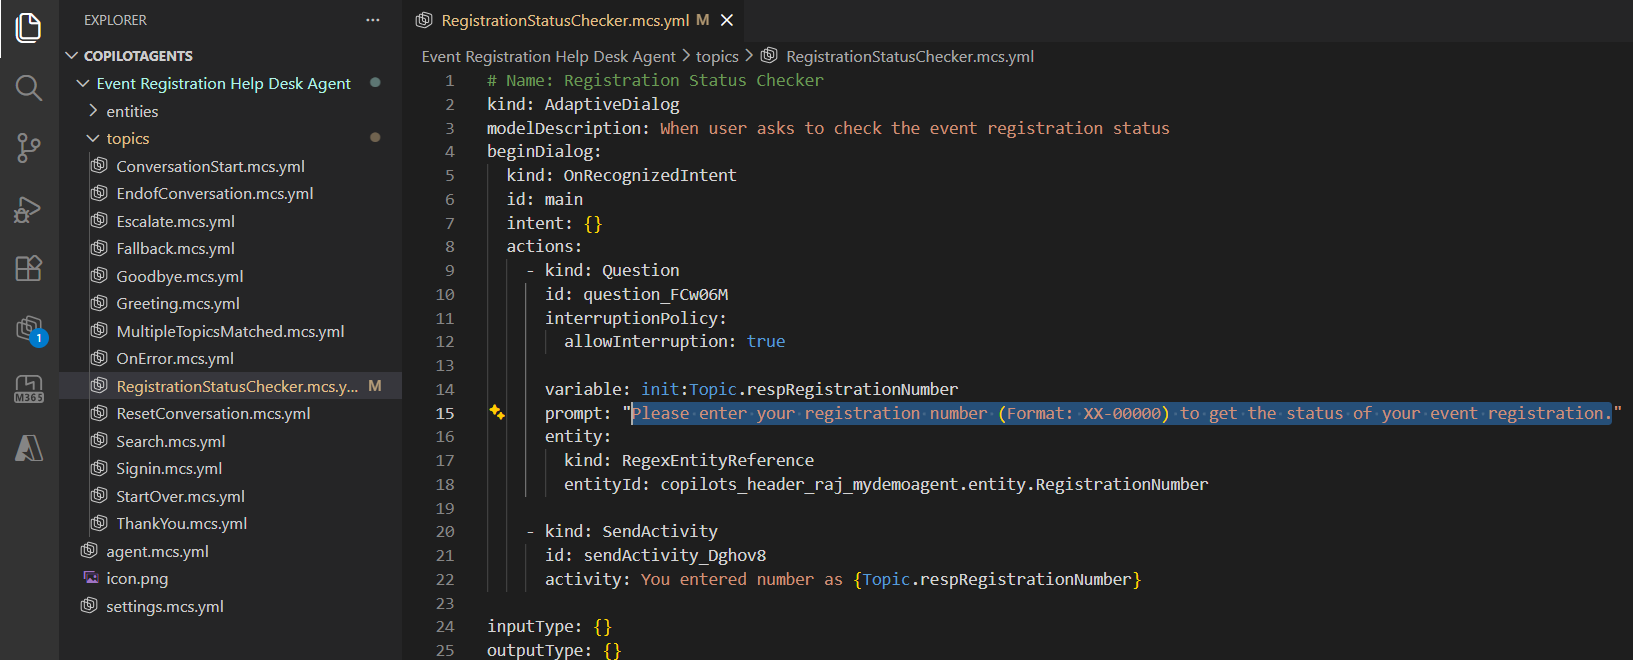
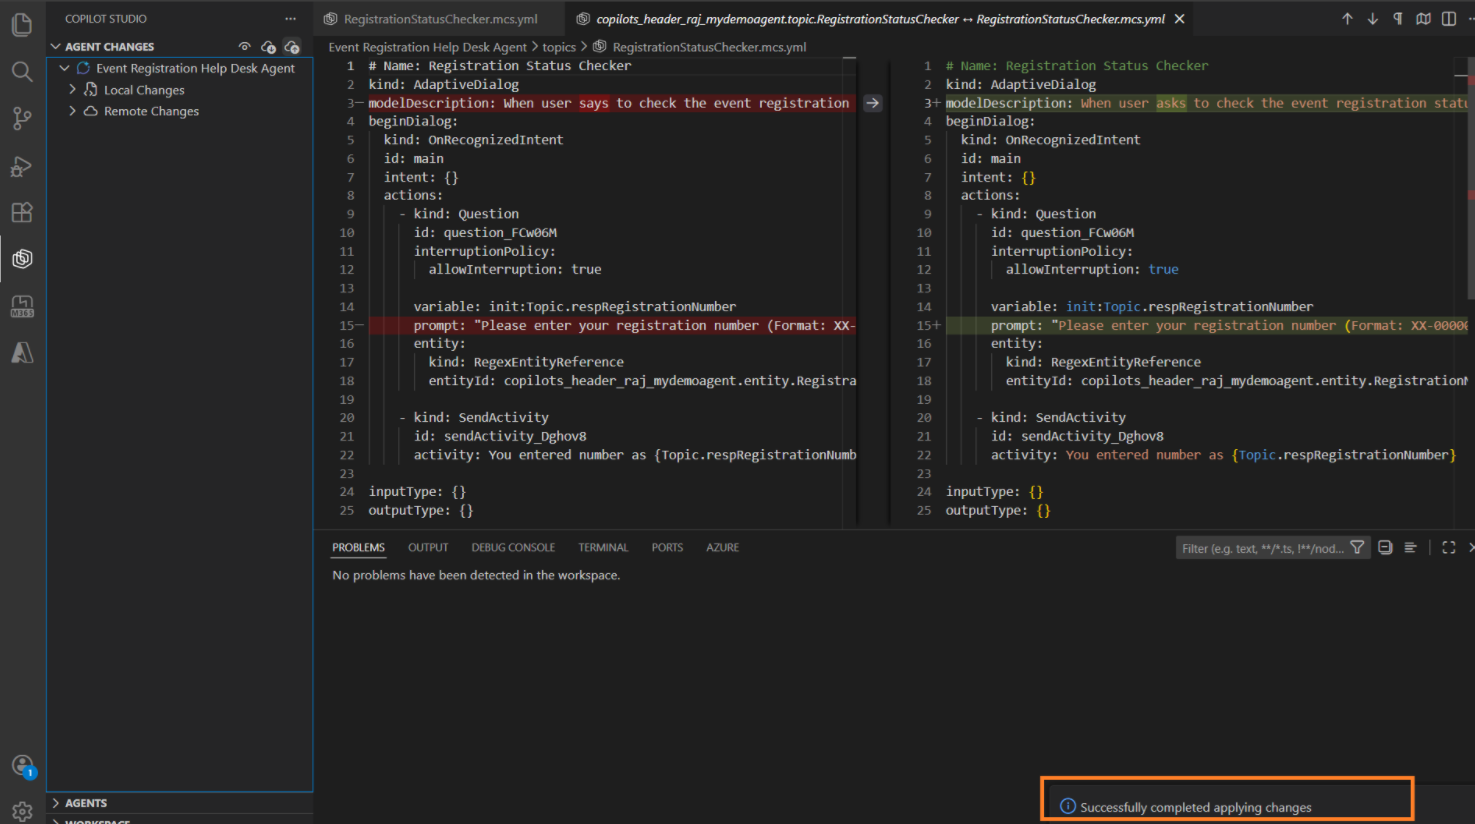
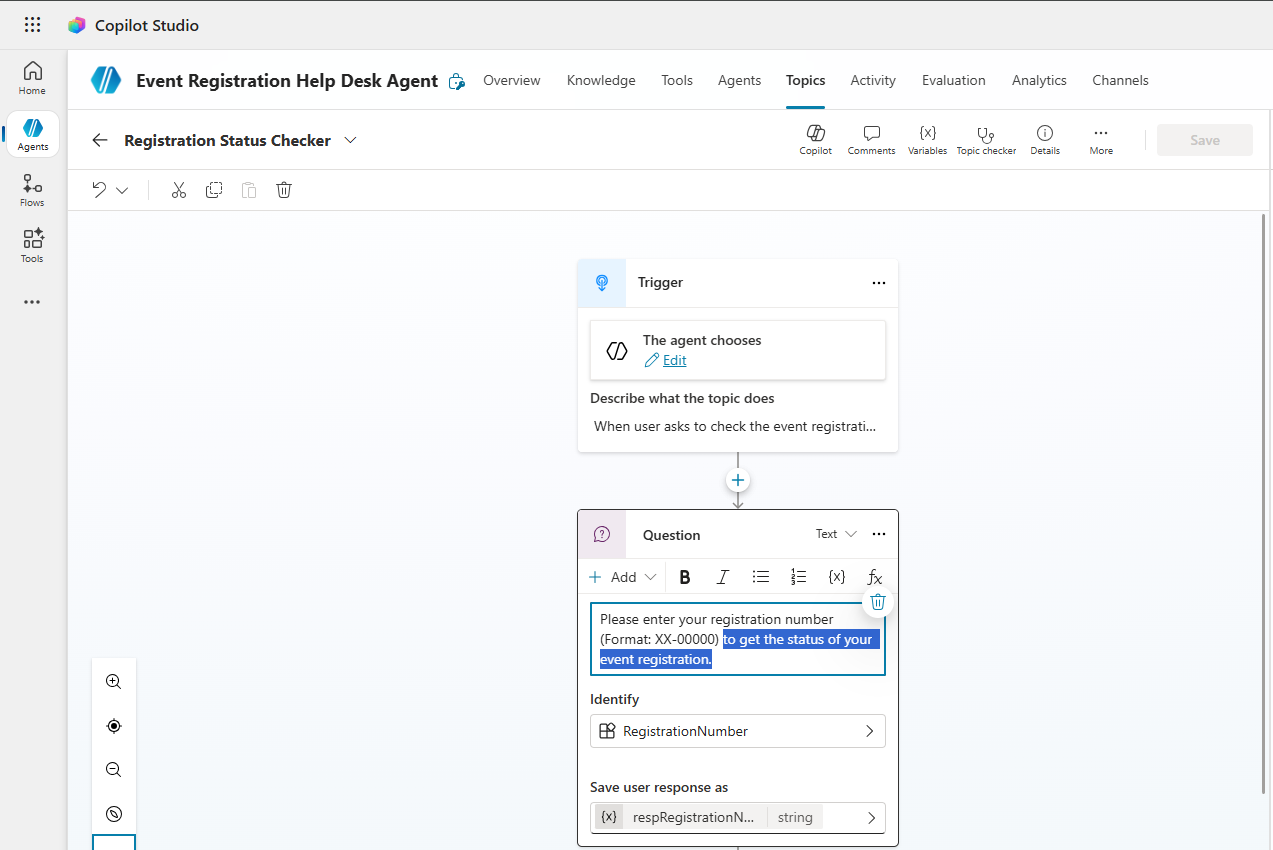
- In VS Code Explorer, open: topics > RegistrationStatusChecker.mcs.yml
- Update the prompt node (as shown in the screenshot). Save the file.
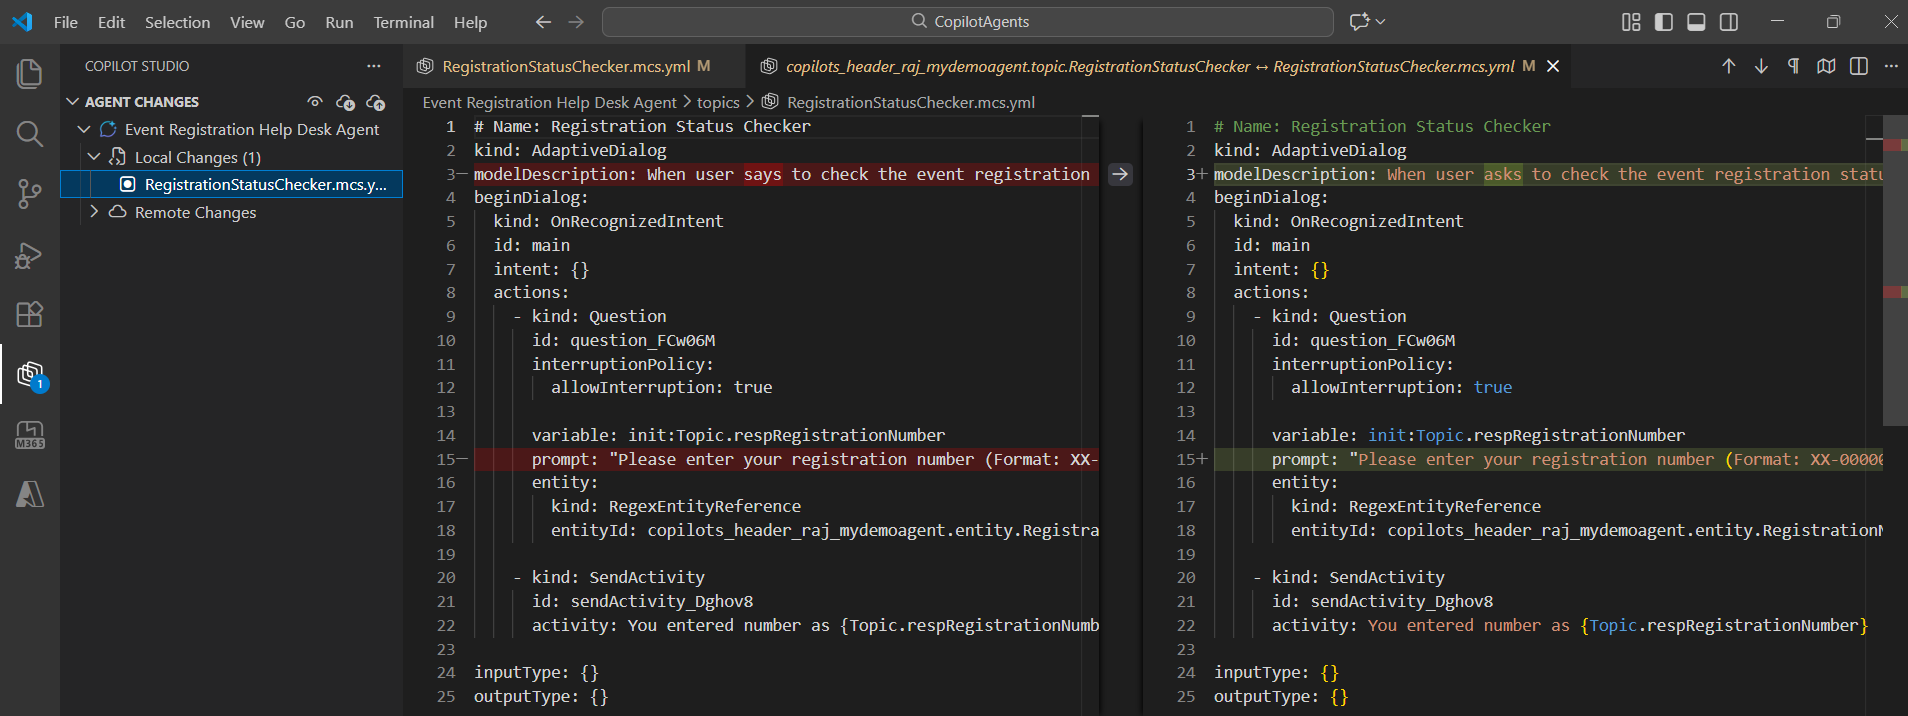
- Once you save, open the Copilot Studio extension tab. You’ll notice that the file RegistrationStatusChecker.mcs.yml file now shows differences between local and remote versions.
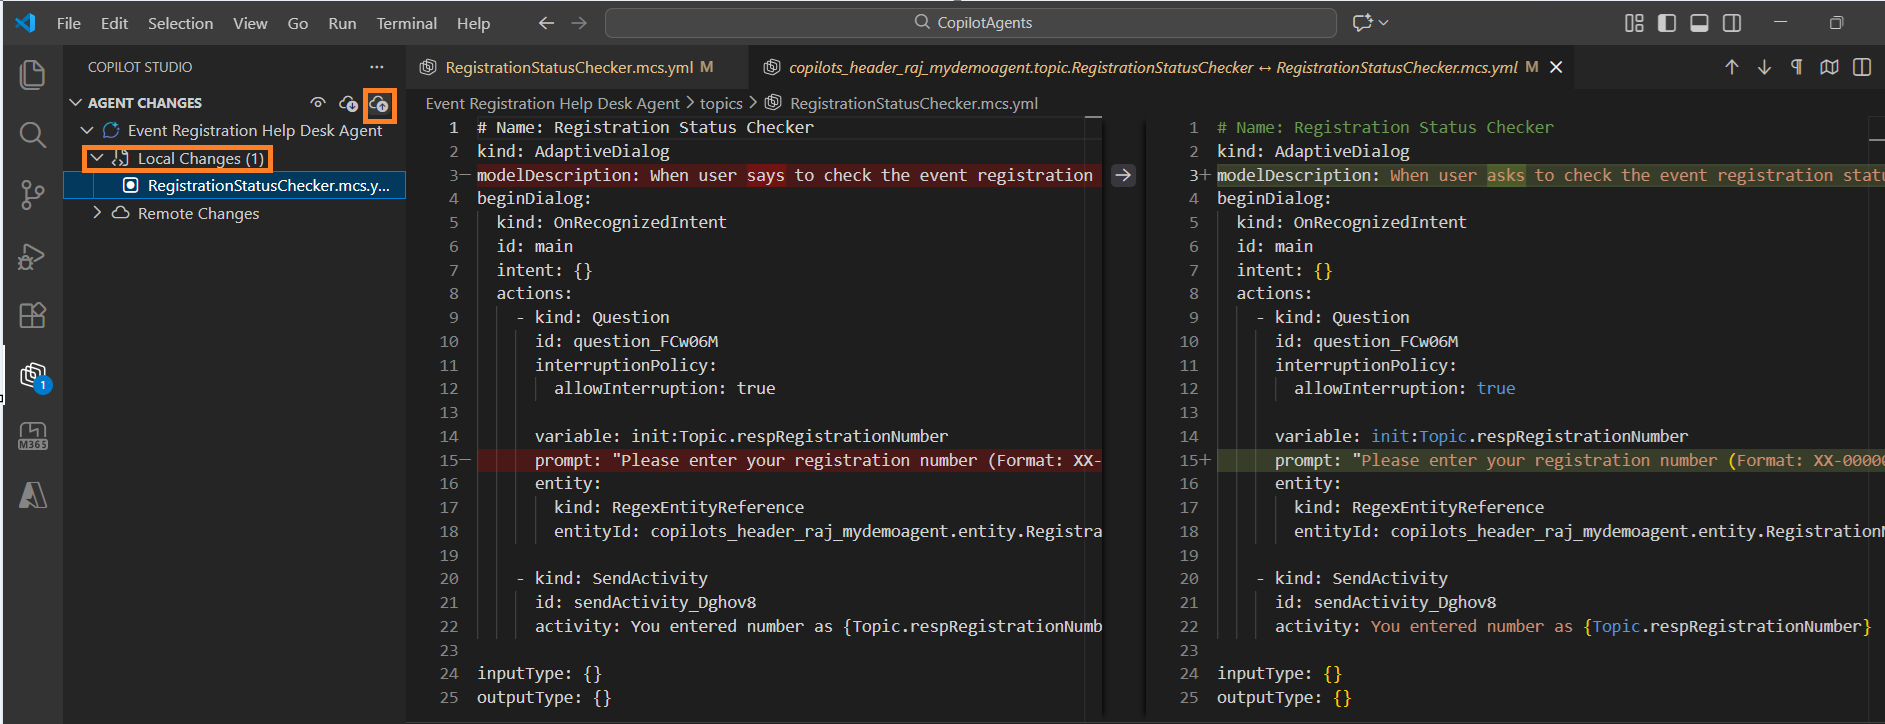
- To upload the local changes to remote, click on Copilot Studio : Apply Changes as shown below.
- You’ll receive a notification confirming whether the upload was successful
- After this, open the same topic in Copilot Studio (browser) and confirm that your changes are now visible.
- The apply action isn’t the same as a publish operation in Copilot Studio, and doesn’t publish the agent. You still need to publish separately from Copilot Studio if required.
How Change Conflicts Work:
There are a couple of important things to understand here:
- If there are remote changes that occur since you cloned the agent, you get a pop-up to inform you.
- Users can’t apply changes if there are remote changes that aren’t yet retrieved through the get command.
I hope you now understand the basics of using the Copilot Studio extension for VS Code to clone agents, make local changes, and sync them back to Copilot Studio.
Refer to the official Microsoft documentation for more details: Microsoft Copilot Studio extension for Microsoft Visual Studio Code
🙂


Leave a comment