In one of my previous articles : Build an Agent with ‘Knowledge’ and ‘Agent Flow’ , I created a simple Running Event Registration agent. It could:
- Answer user questions about the event—such as pricing and timing—using a Word document added as a knowledge source.
- Collect user details and create a registration record in a Dataverse table.
This worked well. But what if an end user wants to bulk register multiple participants at once, instead of submitting one registration at a time?
Let’s learn how to extend the agent to support bulk registrations.
In this article, we will enhance the agent to:
- Create a new Topic that prompts the user to upload an Excel file
- Allow the user to upload a sheet containing multiple registration records
- Add an AI Prompt to the Topic and enable Code Interpreter option to read and convert the Excel data
- Use an Agent Flow to loop through the records and create the registrations in the Dataverse table
Sample Excel File:
- For this walkthrough, I’ll be using a simple Excel file that contains multiple registration records

- I saved the excel file in my Downloads folder.

Now that you understand the scenario, let’s begin by creating the new Topic.
Create a new Topic:
Start by creating a new Topic named “Create Multiple Registrations in Dataverse.”
- Set the Trigger Description to: When user wants to bulk register for the event
- Add a Question node that prompts the user to upload the Excel file. Store the uploaded file in a variable named varRegistrationExcelFile.

Add an AI Prompt to Read the Excel File:
Once the user uploads the Excel file, the next step is to enable the agent to read and process the file.
- To do this, add a new AI Prompt tool to the Topic as shown below:
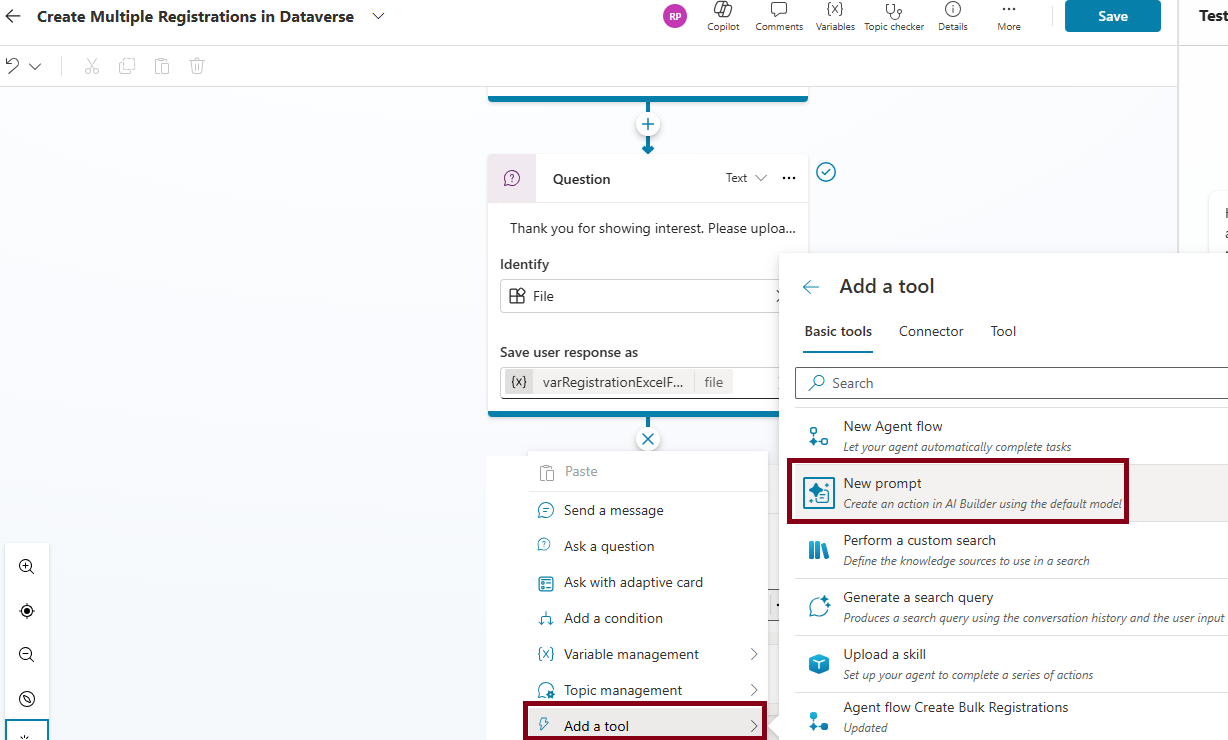
- In the Prompt designer, rename the prompt to ExcelToJSONParser
- In the Instructions field, paste the guidance shown below.
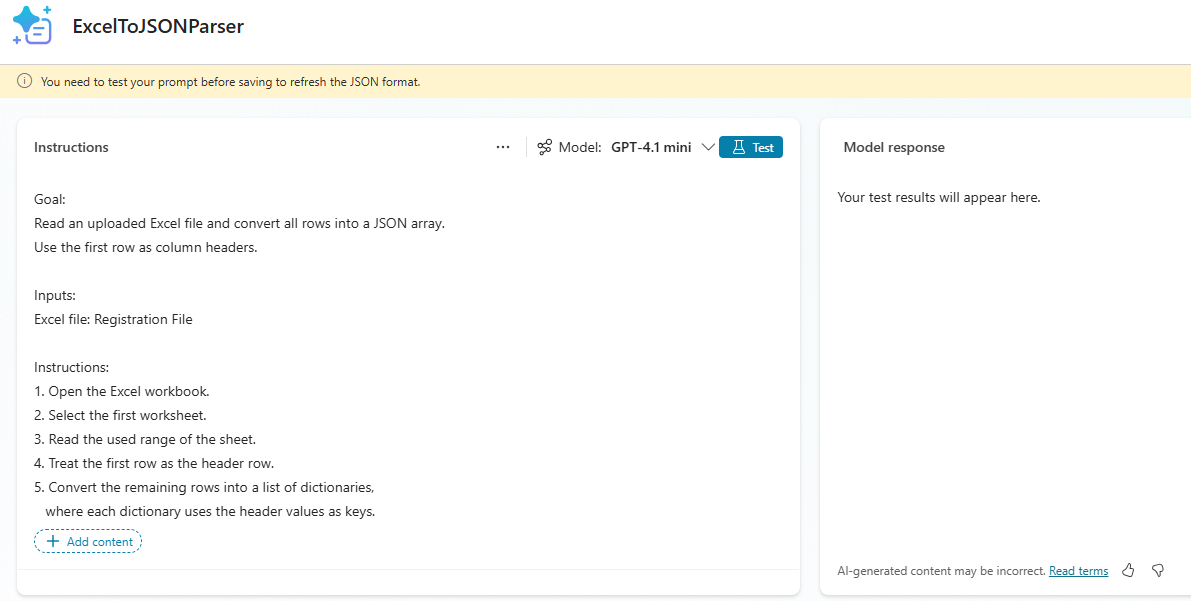
Goal:
Read an uploaded Excel file and convert all rows into a JSON array.
Use the first row as column headers.

Inputs:
Excel file: RegistrationFile

Instructions:
1. Open the Excel workbook.
2. Select the first worksheet.
3. Read the used range of the sheet.
4. Treat the first row as the header row.
5. Convert the remaining rows into a list of dictionaries,
   where each dictionary uses the header values as keys.
6. Convert the output into JSON.
7. Return ONLY the JSON array in the following format:

[
  { "Name": "John", "Age": 25, "Mobile": "1234567890" },
  { "Name": "Mary", "Age": 31, "Mobile": "9876543210" }
]

Guidelines:
- Do not summarize.
- Do not include additional text.
- Return only the JSON.
- Ensure the JSON is valid and properly formatted.
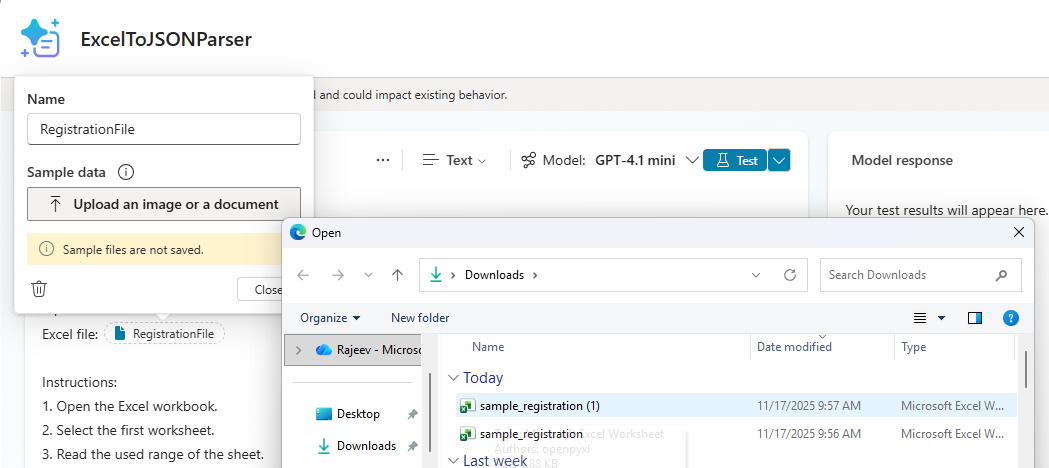
- In the instructions, the term Registration File is just a placeholder.
- Replace it with an Input of type Image or document. To add this input, type
/and select the as shown in the screenshot.
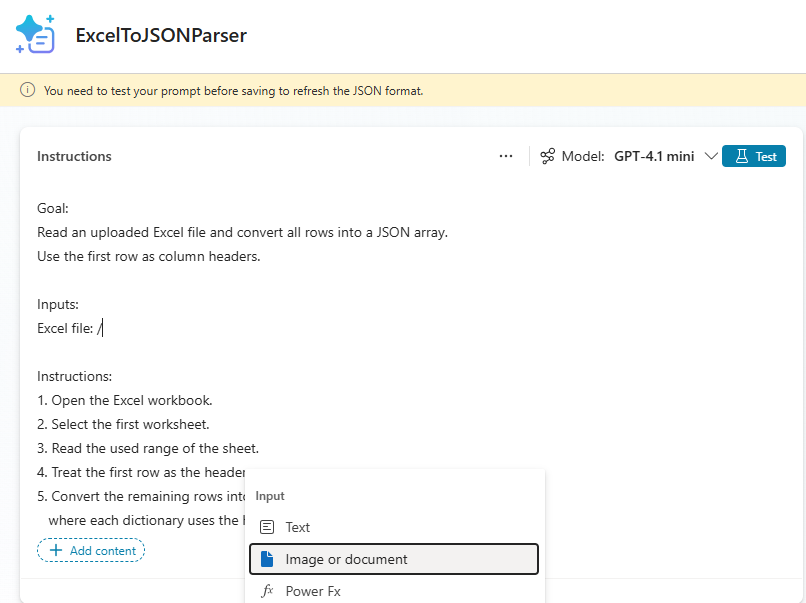
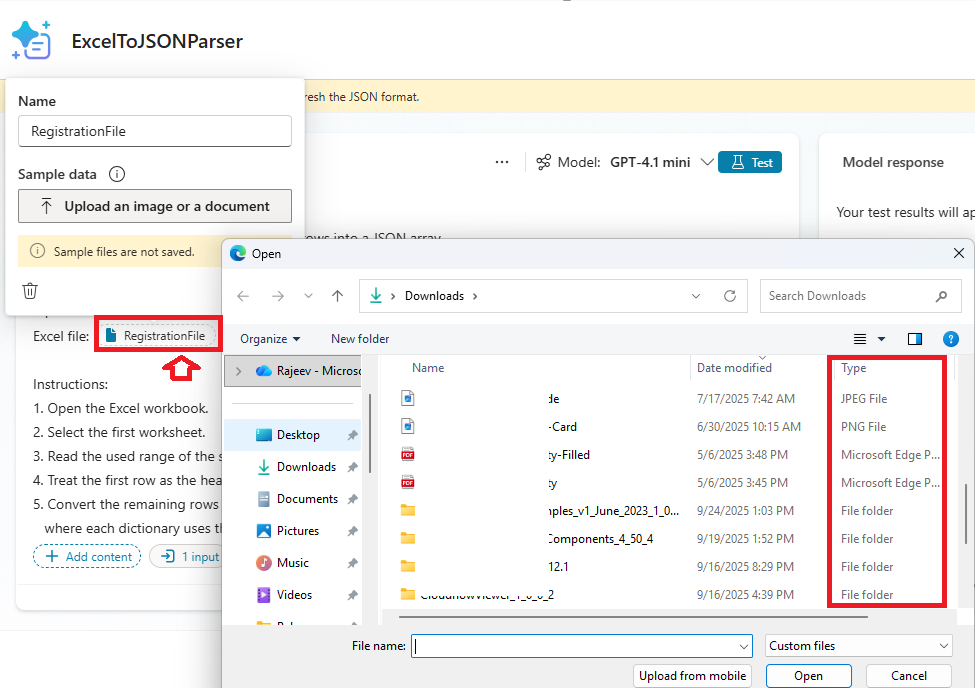
- Provide the Input Name as RegistrationFile. Then click on the Upload an image or document to upload a sample excel file to test the Prompt.
- However, you will immediately notice something interesting: The Excel file does not appear in the file picker, while other supported file types do.
- This is the key step. By default, an AI Prompt does not accept Excel files which is why the file picker didn’t show them earlier.
- To fix this, we need to enable Code Interpreter under Prompt > Settings as shown below:

- Ensure Enable code interpreter is Enabled
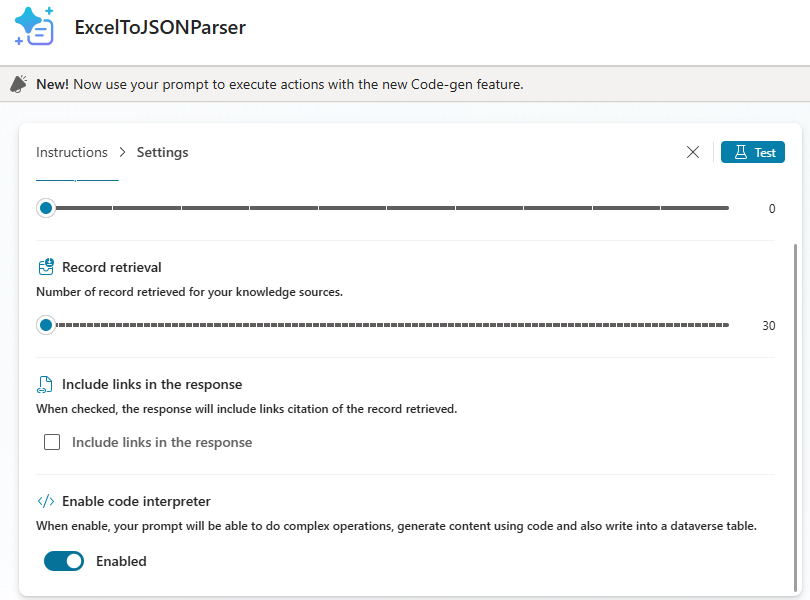
- Once the Code Interpreter option is turned on, Excel files will become visible in the upload dialog.
- Now select your sample Excel file and click Test to verify that the prompt can read and process the data correctly.

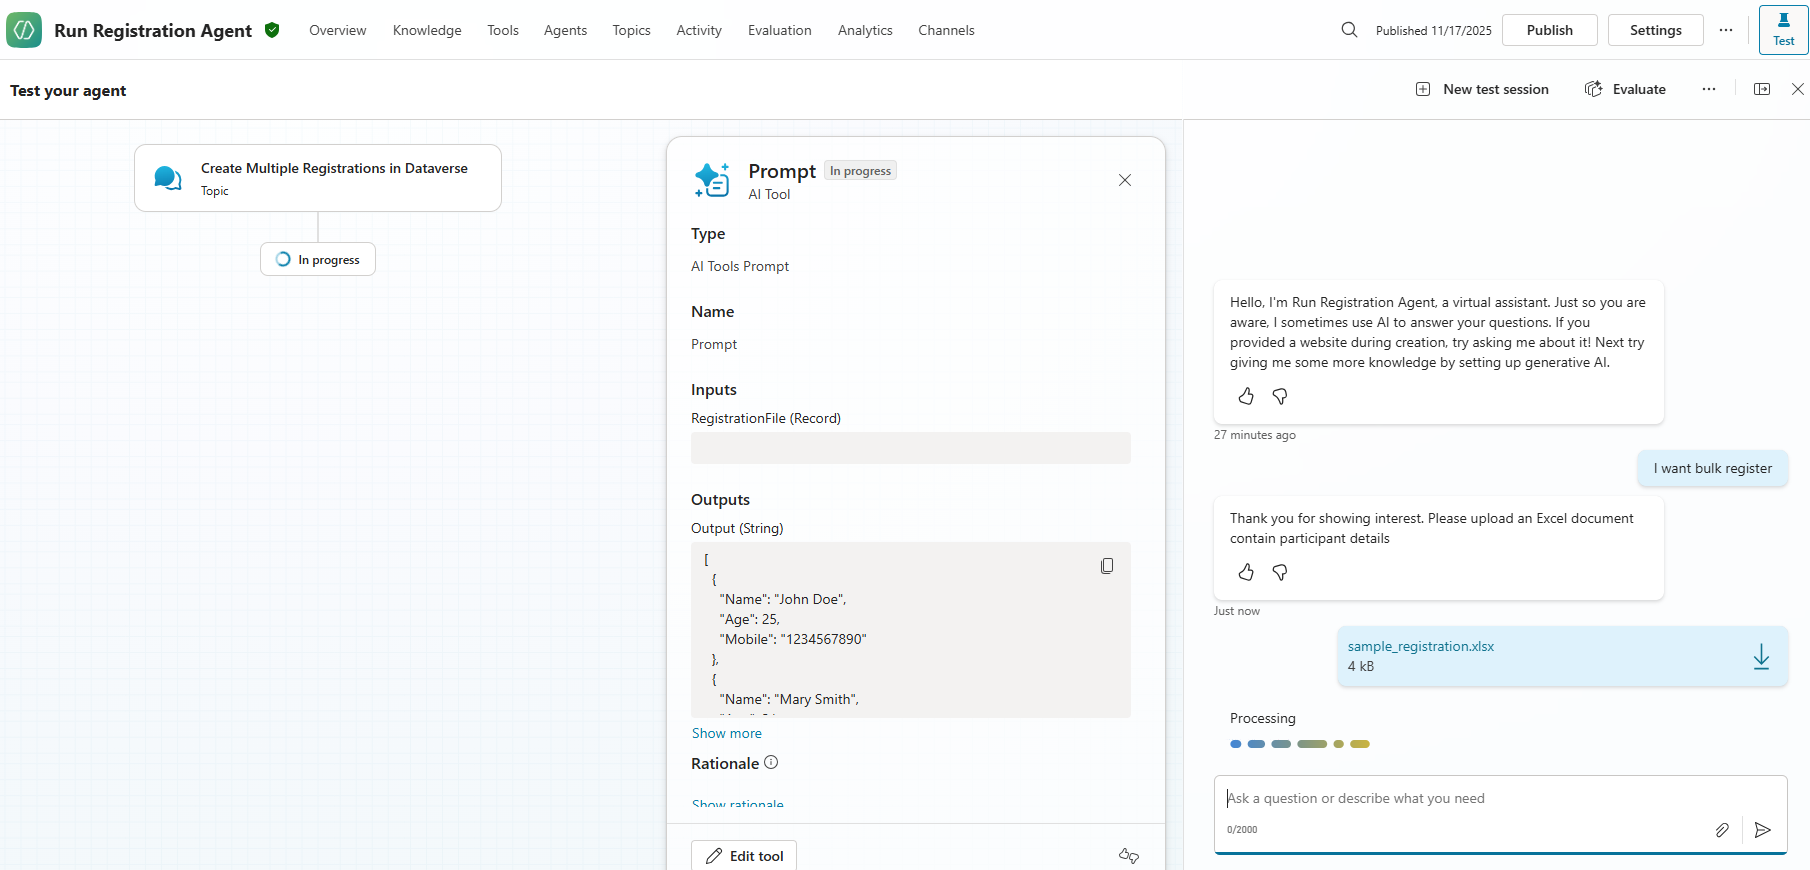
- The Prompt will read the Excel file and return the data in JSON format, as shown in the example below
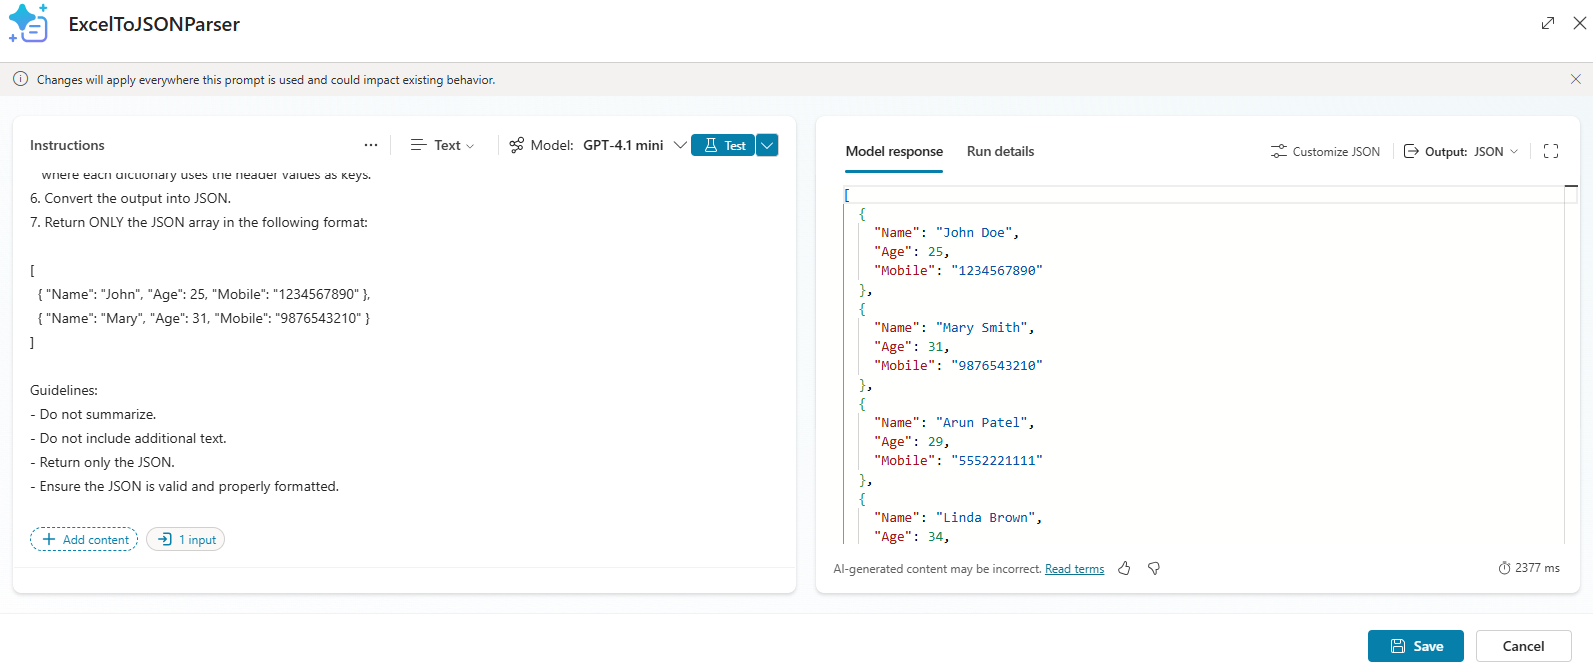
- Once you confirm that the output looks correct, save the Prompt.
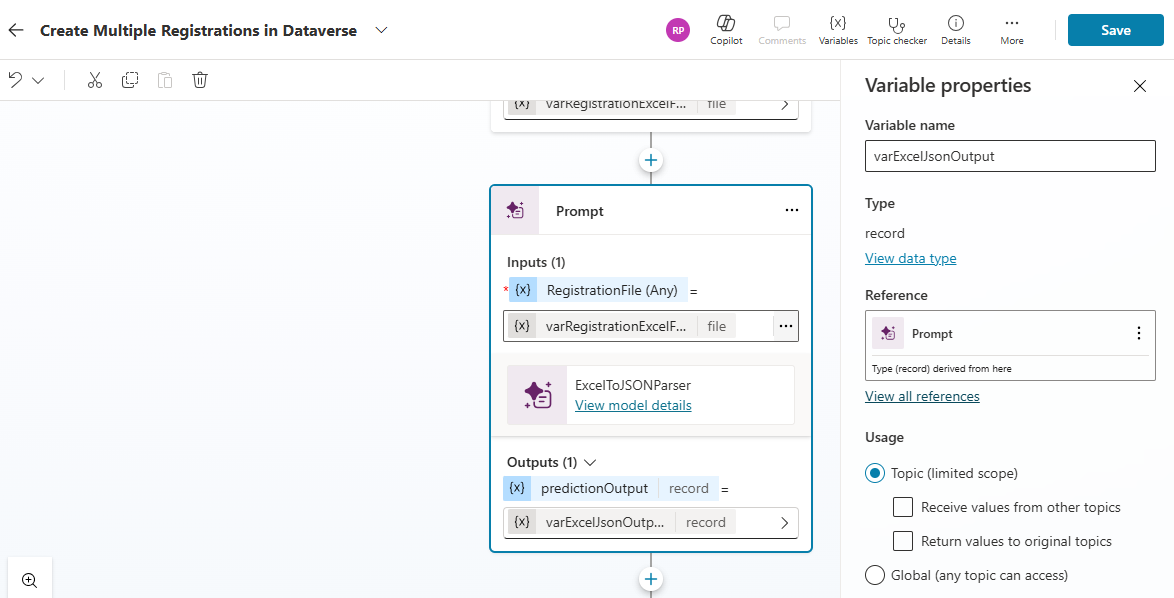
- Back in the Topic, pass the varRegistrationExcelFile variable—this is the file uploaded by the user—into the Prompt action.
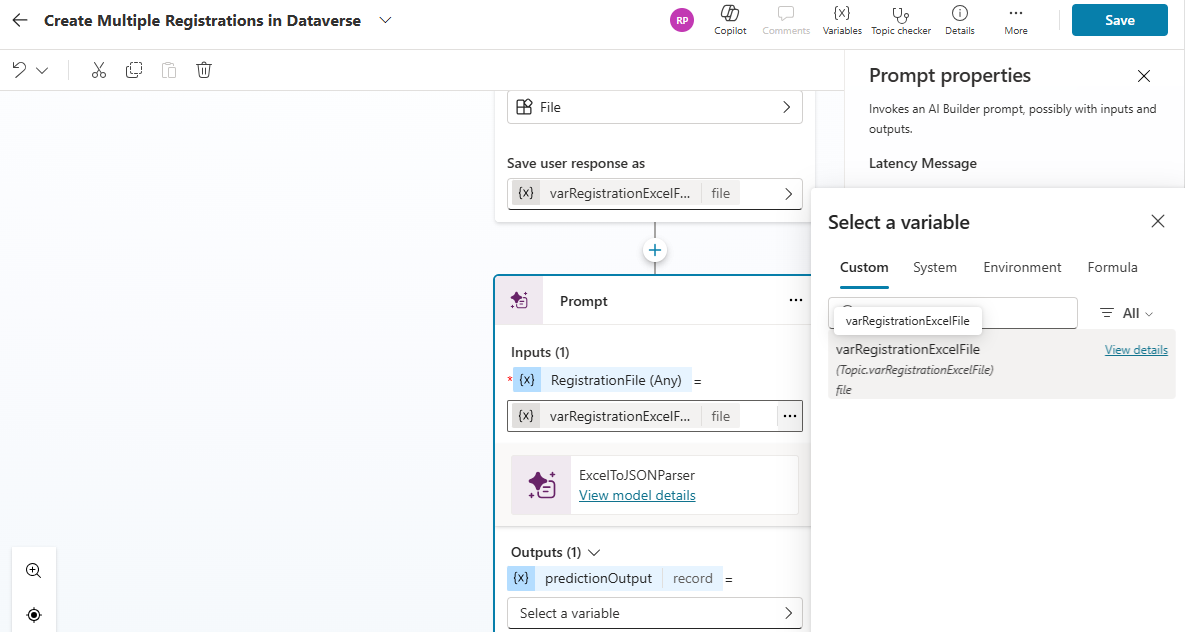
- Next, create a new variable named
varExcelJsonOutputunder the Outputs section to capture the JSON response returned by the Prompt action.
At this point, we have successfully built an AI Prompt—with Code Interpreter enabled—that reads the Excel file and returns the data as a JSON array.
Now the final step is to read this JSON array and create multiple records in the Dataverse table.
To do that, we will use an Agent Flow.
Create an ‘Agent Flow’ to parse JSON and create Dataverse records:
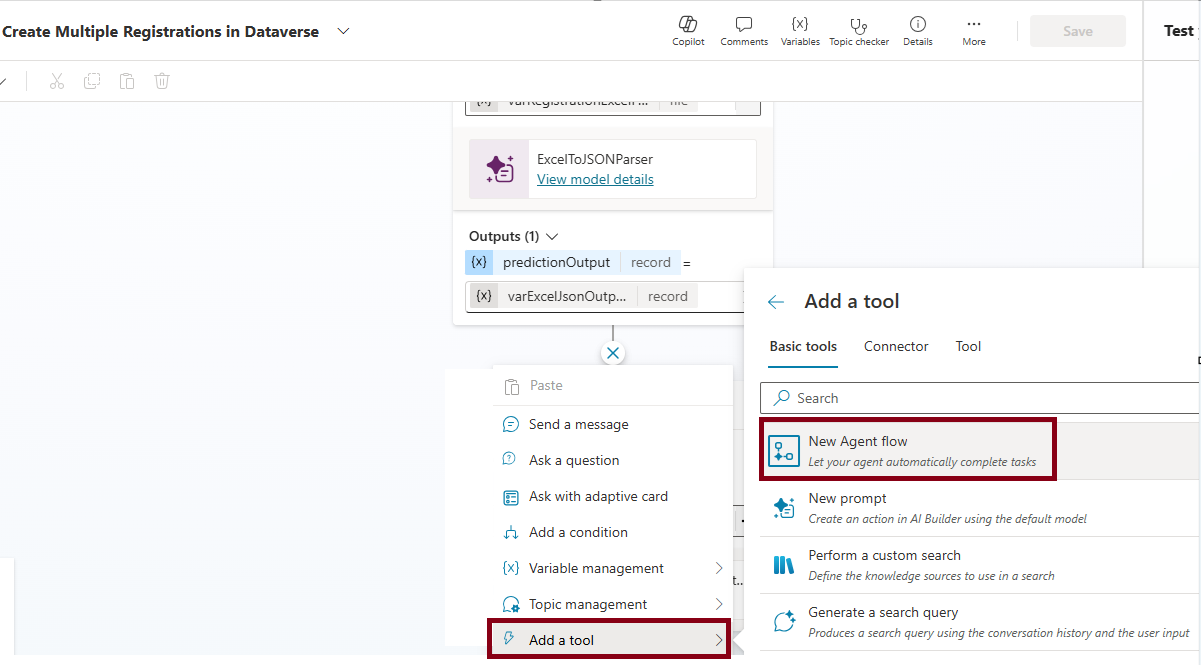
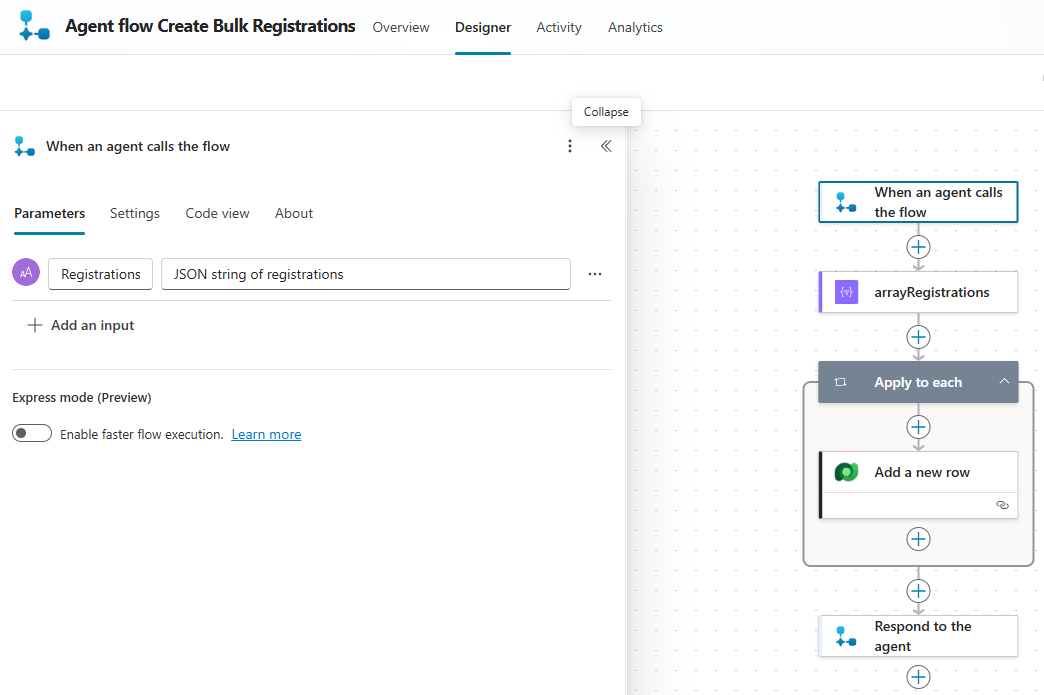
- In the Topic after the Prompt action, add a New Agent flow as shown below.
- Since this flow needs to work with the Excel data returned by the Prompt, add an Input parameter named
Registrations. This parameter will receive the JSON array that contains all the registration records extracted from the Excel file.
Parse the Excel Data and Create Dataverse Records
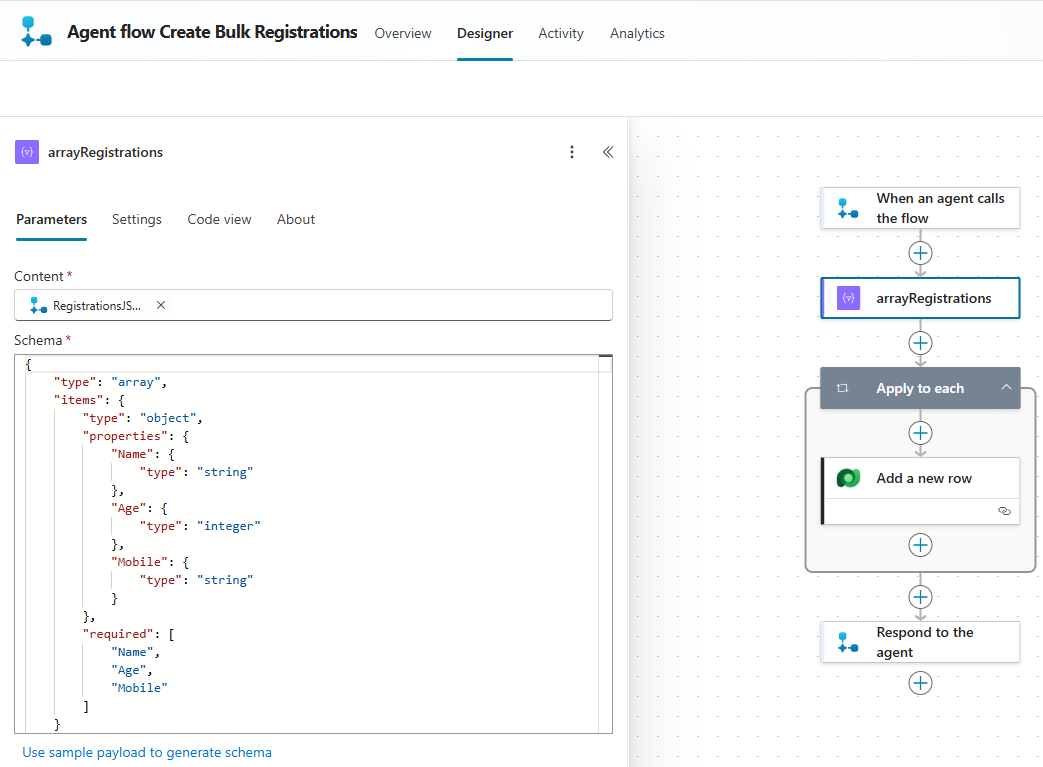
Next, we need to parse the JSON array sent from the Topic.
- Add a Parse JSON action and use the following schema to define the structure of the Excel data.
{
    "type": "array",
    "items": {
        "type": "object",
        "properties": {
            "Name": {
                "type": "string"
            },
            "Age": {
                "type": "integer"
            },
            "Mobile": {
                "type": "string"
            }
        },
        "required": [
            "Name",
            "Age",
            "Mobile"
        ]
    }
}
- Next to read the array records one by one and create a Dataverse record,
- Add Apply to each action
- Inside the loop, add the Dataverse → Add a new row action, pointing it to RunningEventRegistrations table, and map each field from the JSON to the corresponding Dataverse column.
- (If you want details about this table, refer back to the blog post mentioned earlier.)
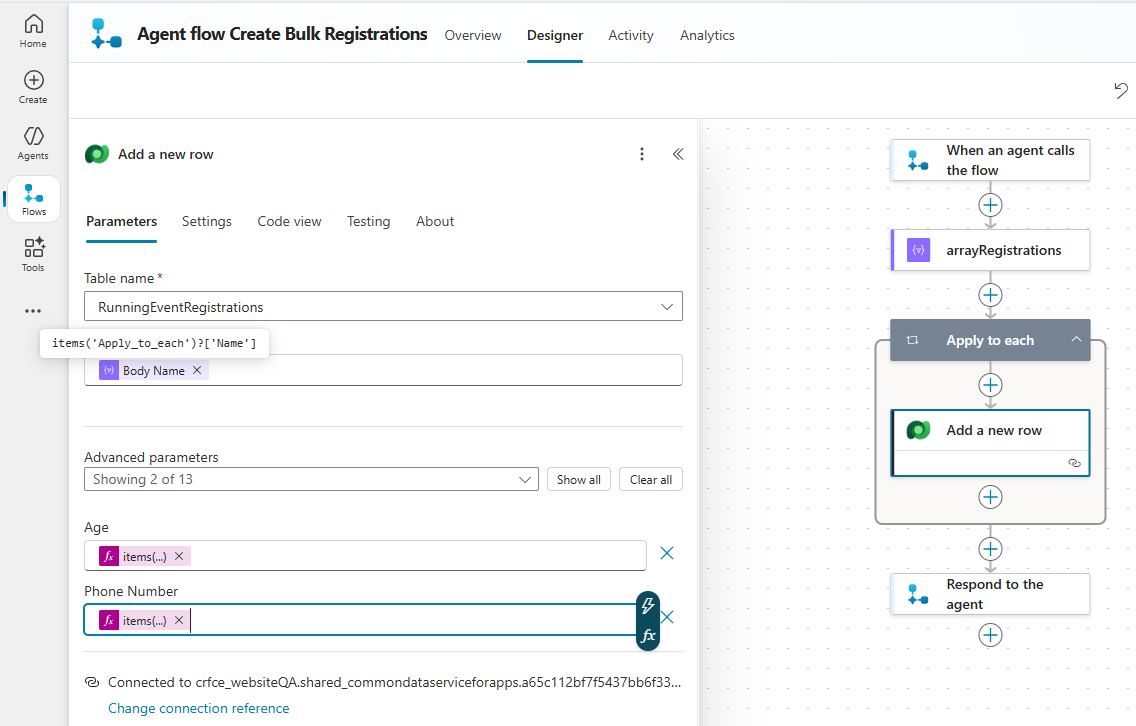
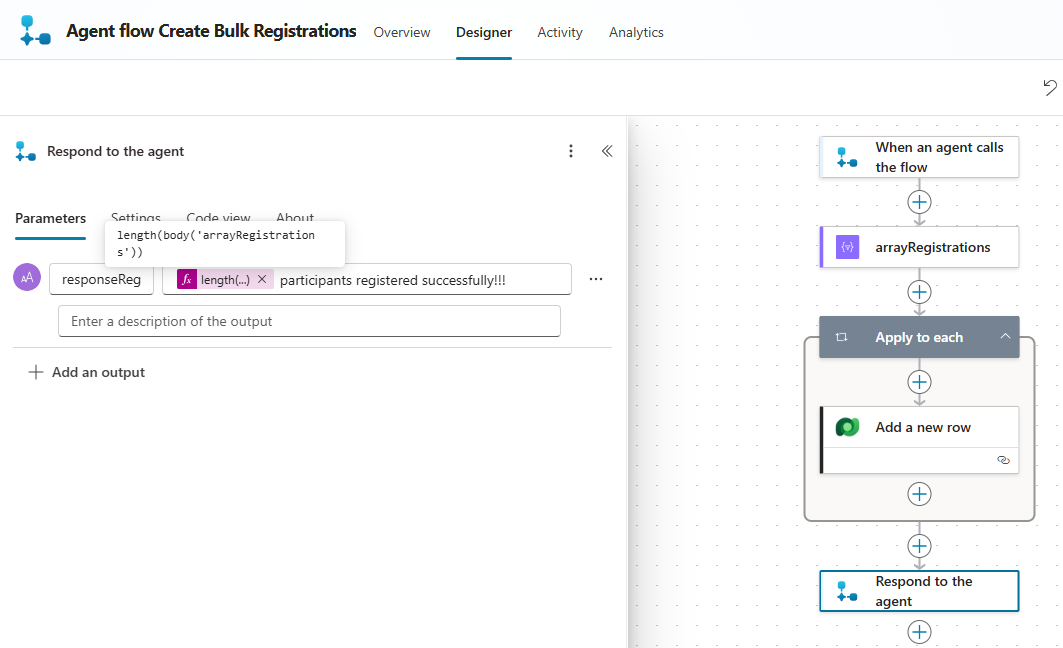
- Finally, configure the Respond to the agent action to send a message back to the Topic—this helps confirm that the flow has finished processing.
- You can also test the flow at this stage to make sure the records are being created correctly in Dataverse.

- Once everything looks good, save and publish the Agent Flow.
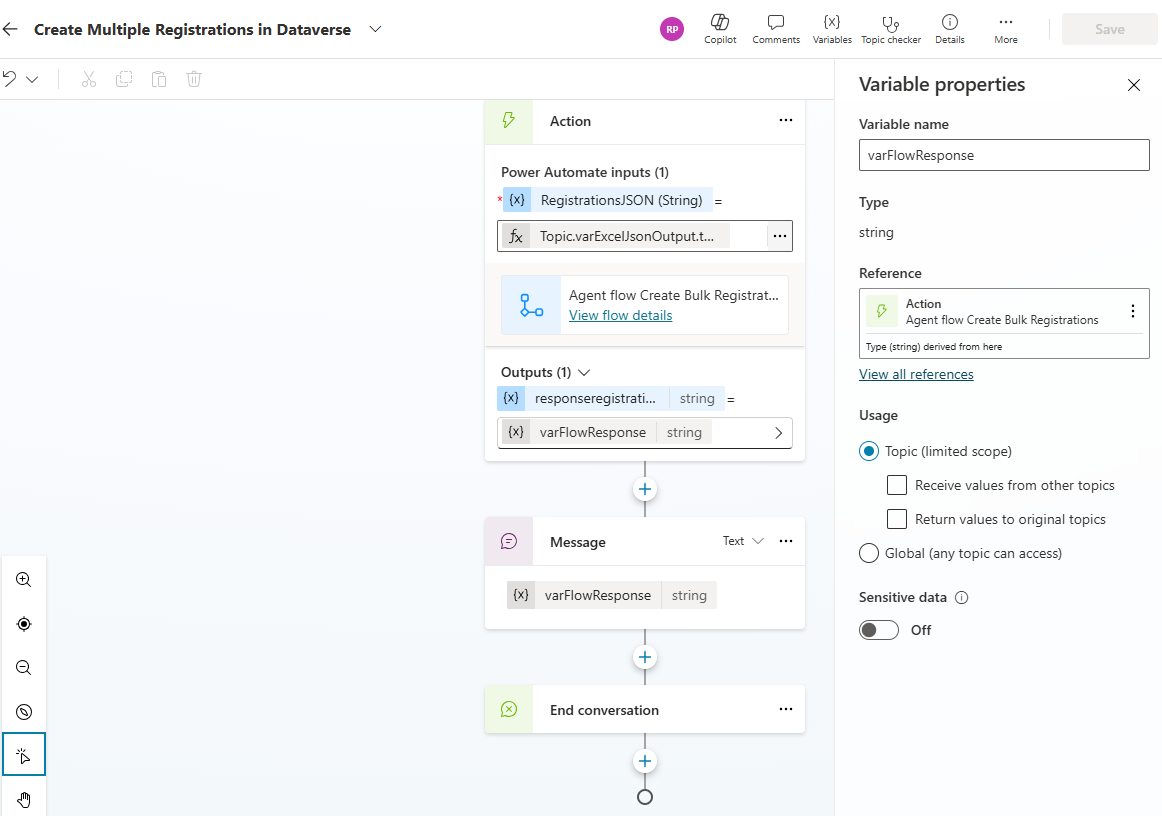
- Now return to the Topic. In the Agent Flow action you added earlier, pass
Topic.varExcelJsonOutput.textas the input parameter so the flow receives the JSON array generated by the Prompt.
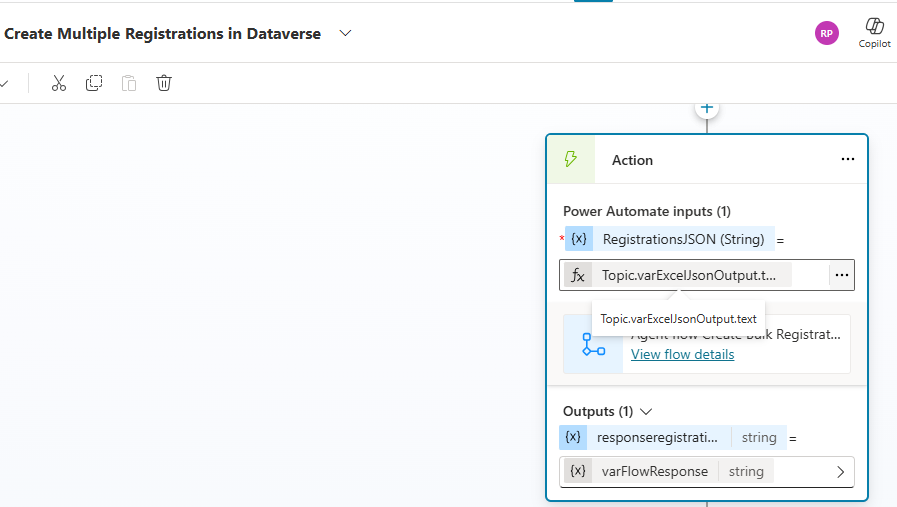
- After the Agent Flow action in the Topic, add a Message node to display the response returned from the flow. Finally, add an End conversation action to complete the Topic.
Summary of What We Built:
We have now completed the Topic configuration with the following capabilities:
- Read the Excel file and convert it into a JSON array using an AI Prompt with Code Interpreter enabled
- Parse the JSON array and create multiple records in the Dataverse table using an Agent Flow
It’s time to test the Agent and see the full bulk registration flow in action.
Test the Agent:
- start by asking the agent: I want to bulk register
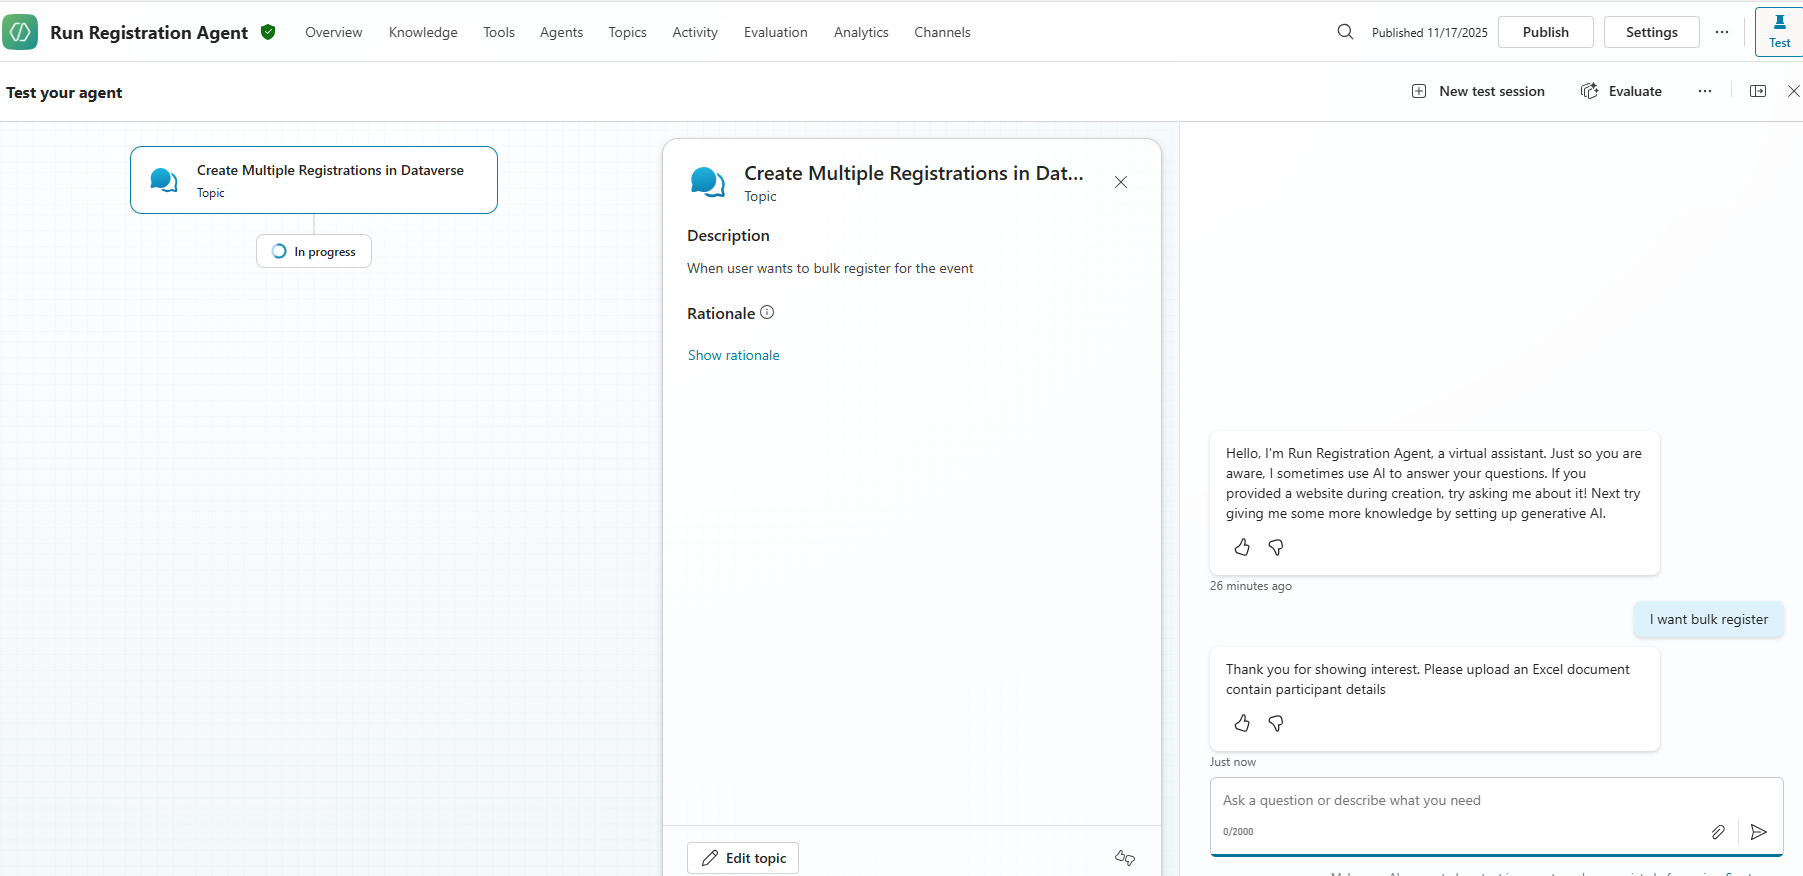
- The agent will prompt you to upload an Excel file.
- Upload the file you created earlier. Agent reads the excel file and move to next action to create the records in Dataverse.
- Finally agent responds that participants registered successfully as shown below.

With that, we have successfully created and tested the bulk registration Agent.
Intermittent Issue with ‘Code Interpreter’:
While testing, I ran into an occasional error: ‘list’ object has o attribute ‘items’ error with Code Interpreter.
This issue appeared inconsistently and here are a few steps that resolved it:
- Make sure the Excel file is closed before uploading it
- Save the Topic and refresh the Agent.
- Reopen the Topic and test again

🙂


Leave a comment