In this article, I’ll walk you through the steps to create, build, and run a C# console application using Visual Studio Code (VS Code).
Before we begin, ensure the following prerequisites are installed:
Prerequisites:
- Install VSCode from here
- Open Extensions pane and search for, and install the following:
- C#
- C# Dev Kit

- After installing the extensions, restart VS Code for the changes to take effect.
Now that we have prerequisites covered lets proceed with project creation.
Create a Console project:
- From the Explorer, click on Create .NET Project

- In the Project Templates list, choose Console App

- Select a folder where you want to create the project.

- Provide a Name for the new project and press Enter

- Choose Solution File Format as .sln
- Click Create project

- Console project opens up as below in the Explorer.

- Here is the important step. Because we installed C# Dev Kit extension, VSCode provides us the SOLUTION EXPLORER view.
- Switch to SOLUTION EXPLORER view giving you a familiar Visual Studio-like experience inside VS Code.

Debug and Run:
- Open the Program.cs file and add a breakpoint as shown below.

- Click on Run and Debug tab

- click on Run and Debug button.

- Choose C# as debugger under Select debugger

- Next choose the Project
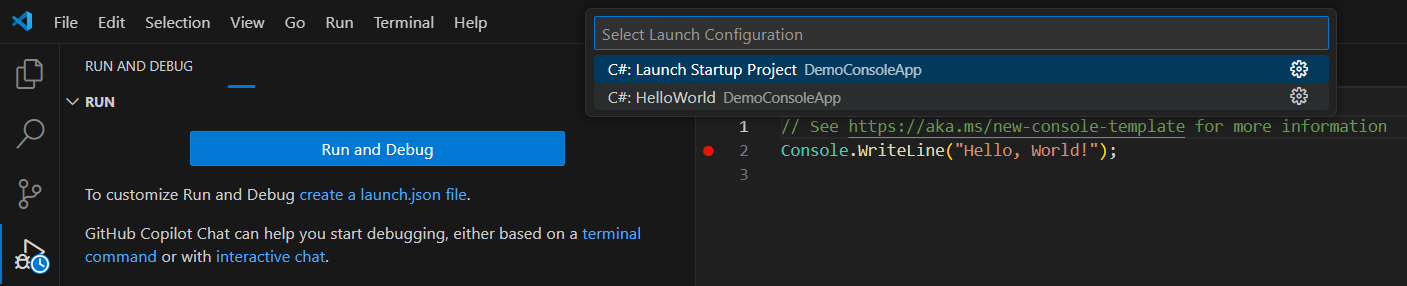
- Control hits the breakpoint

- Alternately, you can trigger dotnet run command from console to run the project without Debugging.

🙂


Leave a reply to MCP using C# SDK: Create Your First MCP Server in VS Code | Rajeev Pentyala – Microsoft Power Platform Cancel reply