In this article, I will explain a step-by-step process to build an ASP.NET Core Web API, deploy it as a Custom Connector in Power Platform, and demonstrate how to debug the code using Visual Studio’s Dev tunnel option.
Following are the high-level steps we will be covering in this post:
- Create an ASP.NET Core web API project
- Create a custom connector for your web API using the dev tunnel URL
- Create a Canvas App using the Custom Connector and debug
- Create a Power Automate flow using the Custom Connector and debug
Lets first start with Basics of Custom Connector.
What is a Custom Connector:
- A custom connector is a wrapper around a REST API (Logic Apps also supports SOAP APIs) that allows Logic Apps, Power Automate, or Power Apps to communicate with that REST or SOAP API.
- ‘Custom Connector’ can be created many ways. To create a custom connector, you must describe the API you want to connect to so that the connector understands the API’s operations and data structures.
- Refer this link for more details.
Now that you know the basics of the Custom Connector, let’s get started with our first step.
Create a web API with ASP.NET Core:
I am going to build a simple calculation API with a Post action.
- Open a Visual Studio 2022 and create a new project of type ‘ASP.NET Core Web API’.

- Provide a ‘Project name’ and click ‘Next’.

- Select the properties as below and click ‘Create’.

- A new project opens with a default “WeatherForecastController.cs” controller

- The ‘WeatherForecastController.cs’ controller is a default controller that gets added with every new Web API project. Since we will be building our own custom controller, let’s delete the ‘WeatherForecastController.cs’ controller and create a new ‘Controller’ by selecting Add -> New Item.

- Select the template as ‘API Controller – Empty’ and provide the name as ‘CalculatorController.cs’ and click ‘Add’.

- In the ‘CalculatorController.cs’ file, add the following ‘Post’ action.
using Microsoft.AspNetCore.Http;
using Microsoft.AspNetCore.Mvc;

namespace CalculatorWebApplication.Controllers
{
    [Route("api/[controller]")]
    [ApiController]
    public class CalculatorController : ControllerBase
    {
        [HttpPost("GetSum")]
        public int TransformDocument([FromBody] SumRequest sumRequest)
        {
            return sumRequest.Value1 + sumRequest.Value2;
        }
    }

    public class SumRequest
    {
        public int Value1 { get; set; }
        public int Value2 { get; set; }
    }
}

- Press F5 to run the application, and you should get the Swagger landing page as shown below.
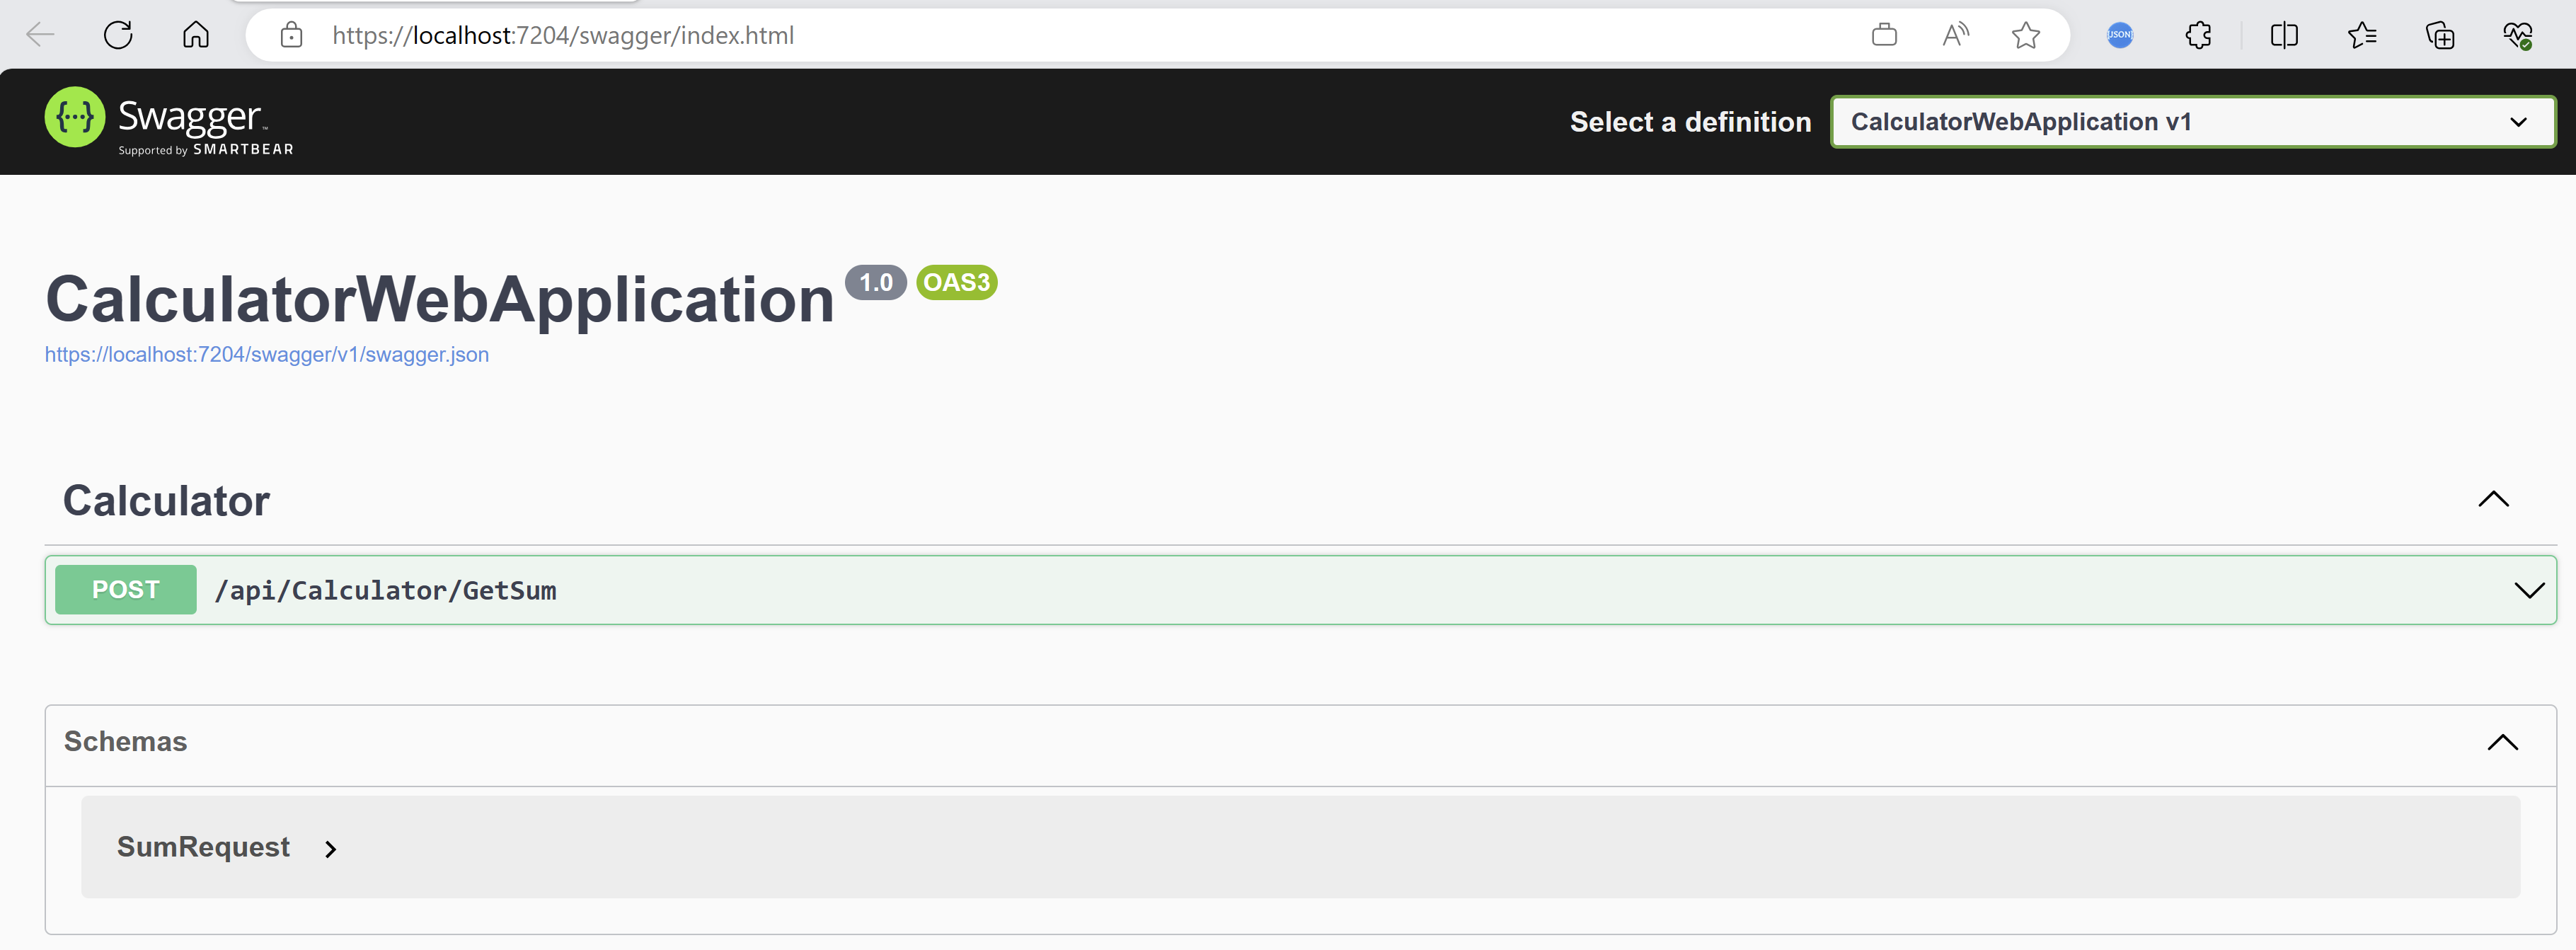
- Note that the application is running under ‘localhost’. This will be changed once you map it to a dev tunnel, which I will cover in the next steps.
- In case you ran in to “‘Your connection isn’t private’ warning” error while running the project, refer this post to fix the same.
Now that the Web API project is running, as the next step, we will be pushing the Web API as a ‘Custom Connector’ into the Power Platform.
Publish the Web API as Custom Connector
- Double click on ‘Connected Services’ and click on ‘Add a service dependency’.

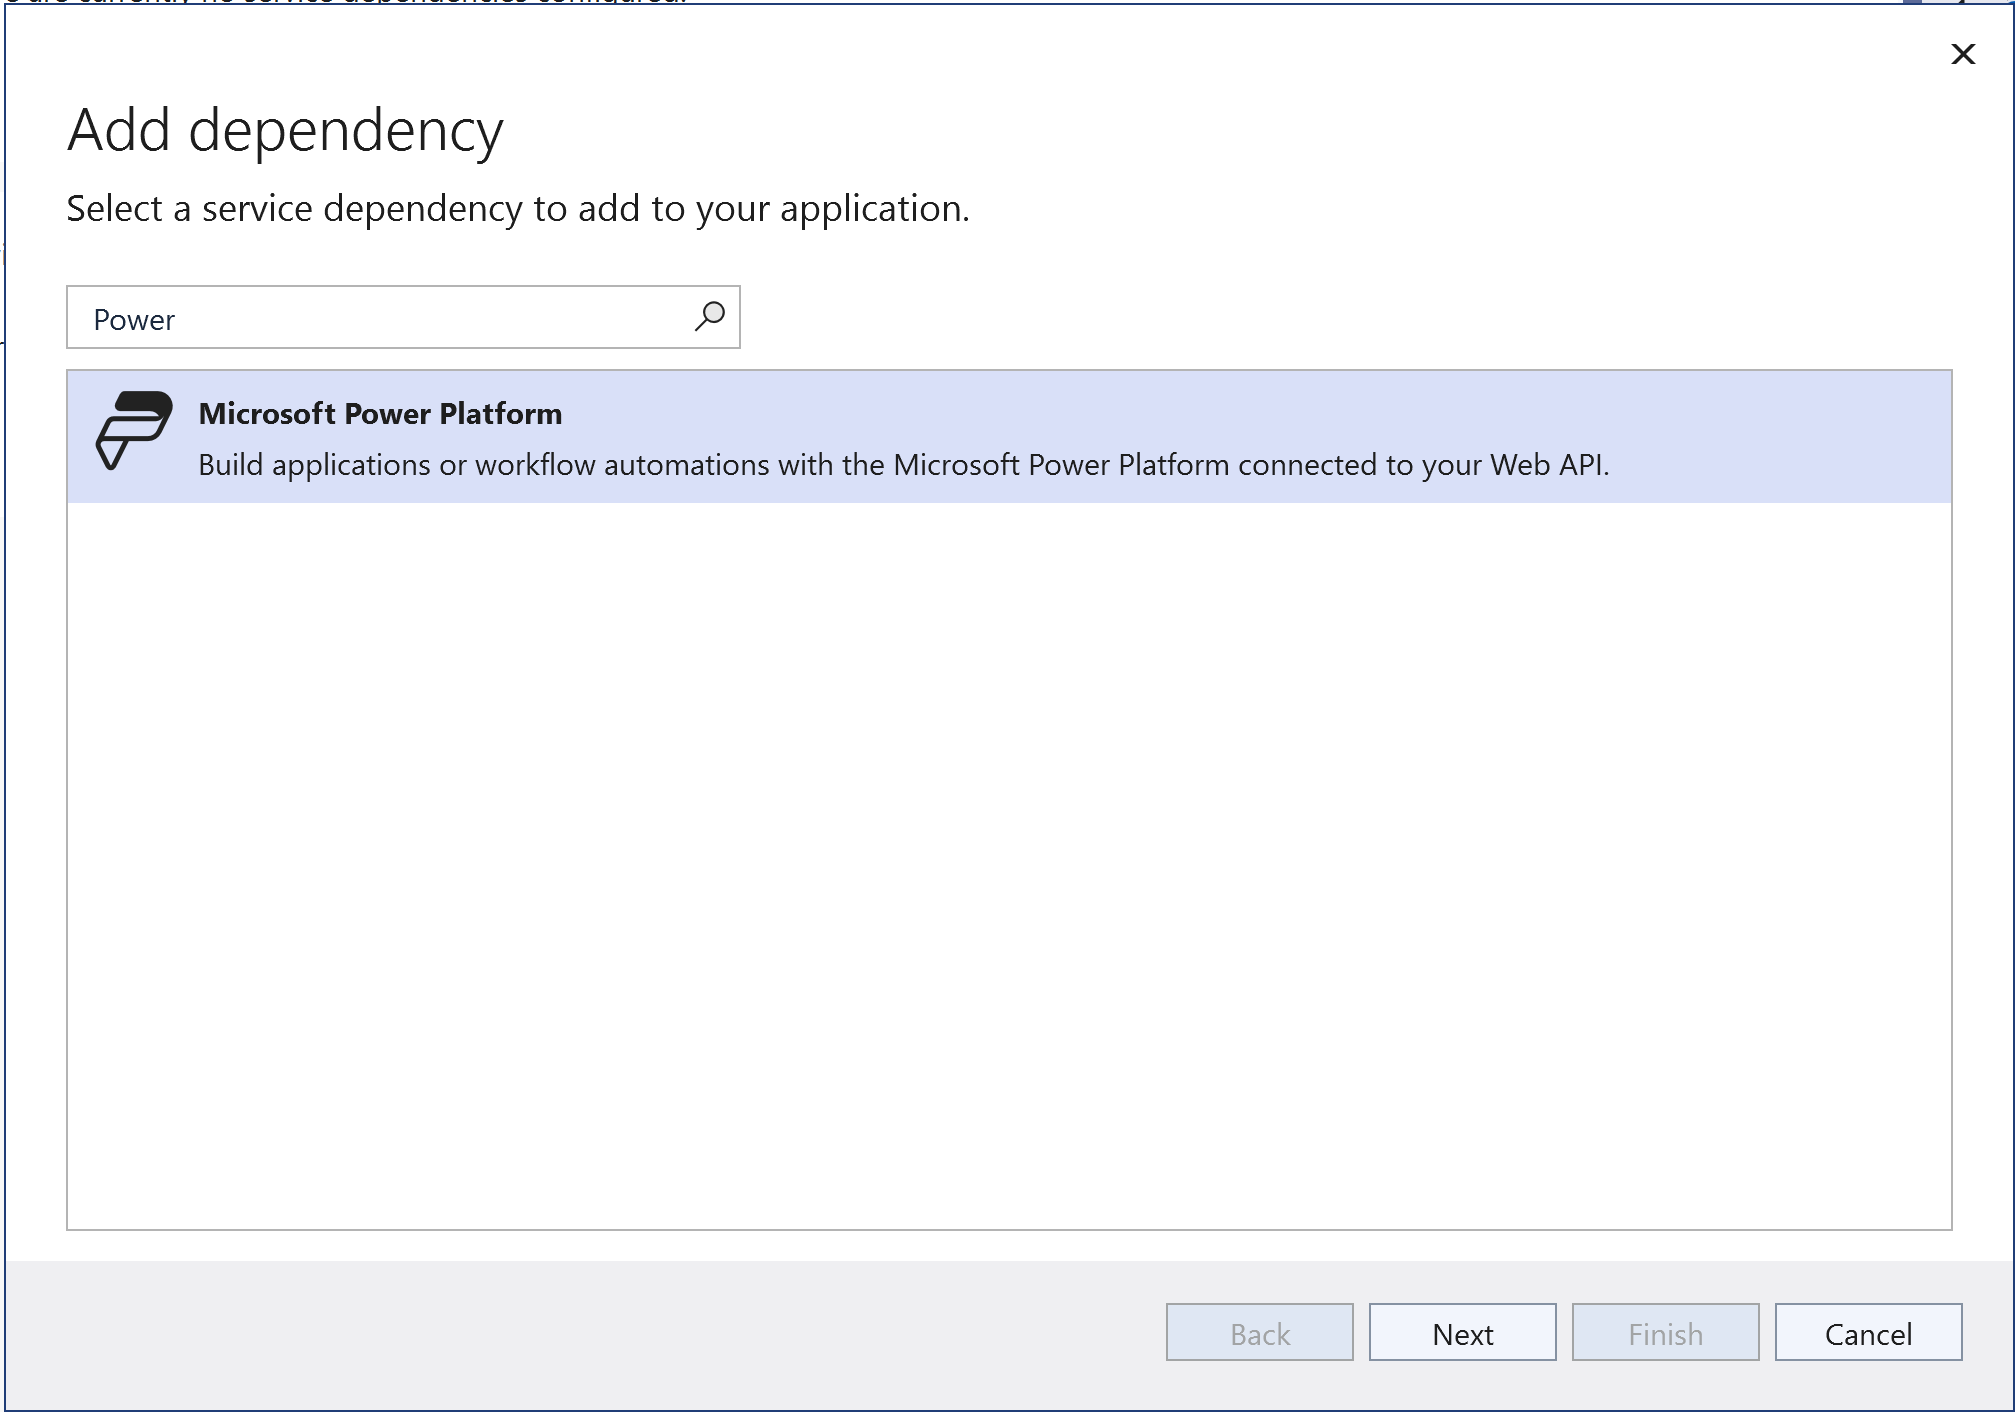
- Select the ‘Microsoft Power Platform’ from the list and click ‘Next’.
- Using the top right corner dropdown, connect to your Microsoft 365 tenant and select your ‘Power Platform’ environment.
- Click on + to provide the name of your new Custom Connector.

- I’ve provided my custom connector name as ‘Calculator_Connector‘.

- Next we need to provide a ‘public dev tunnel’ which enables us to debug.
- Click on + which will open up a tunnel configuration page.
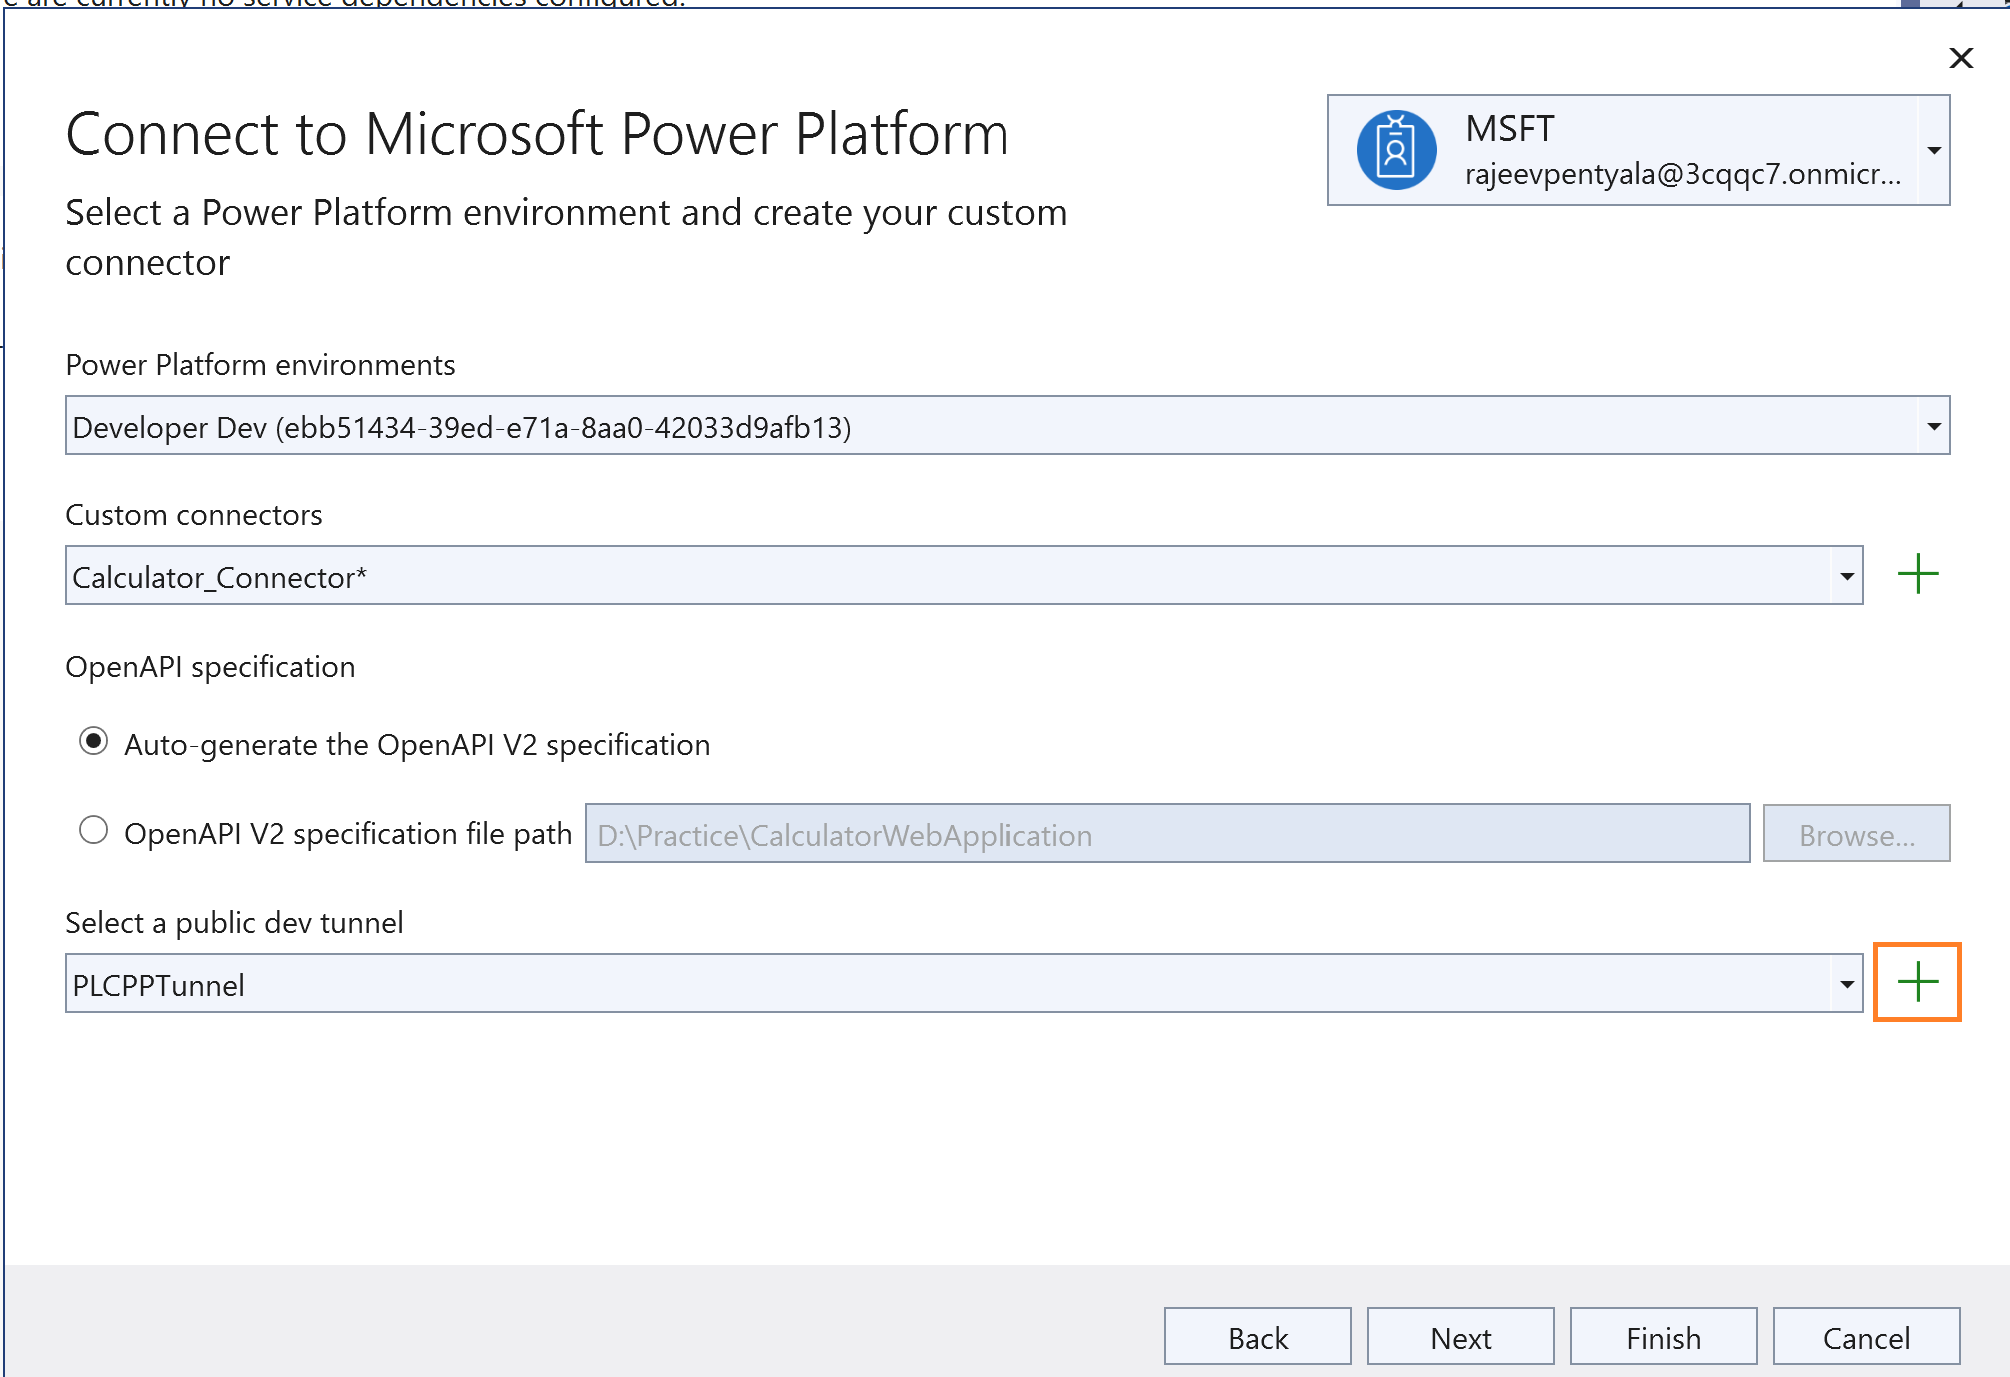
- Provide a ‘Name’ of the tunnel and select ‘Tunnel Type’ as ‘Persistent’ and ‘Access’ as ‘Public’. Click ‘Ok’.

- Once you have configured the tunnel, your ‘Connect to Microsoft Power Platform’ pane should look as below. Click ‘Next.’

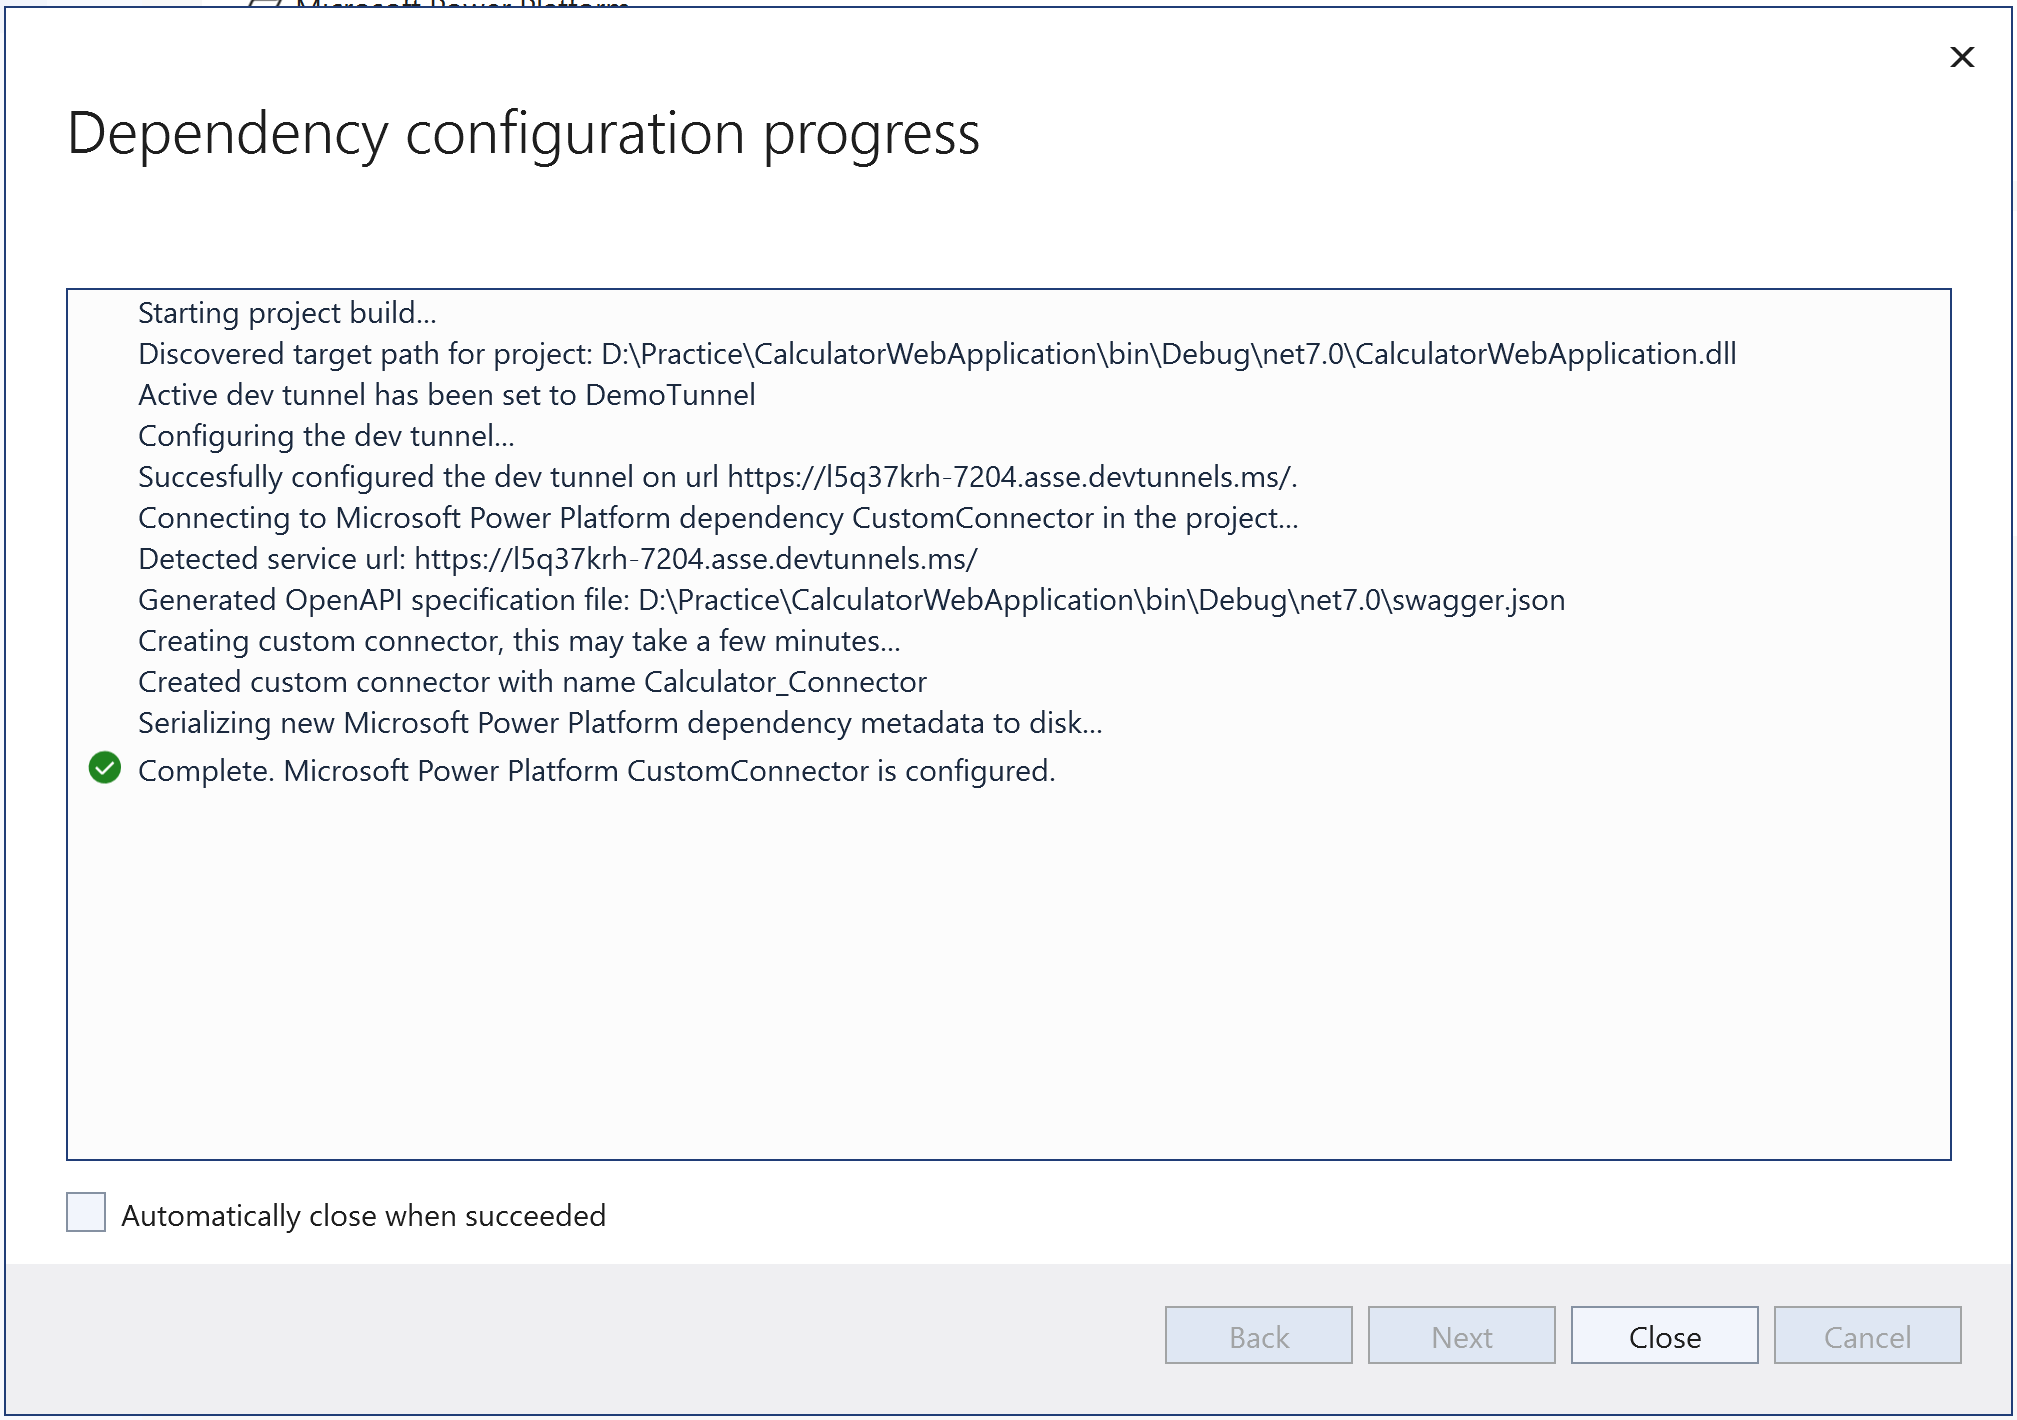
- In the next screen, you will see the summary of changes, click on the ‘Finish’.

- You should see the configuration pane as below. Give it few seconds to complete the configuration.
- Now, run the ‘Web API Project’ again from Visual Studio, and you will get a popup as below, which denotes that we connected to a ‘Dev tunnel’.
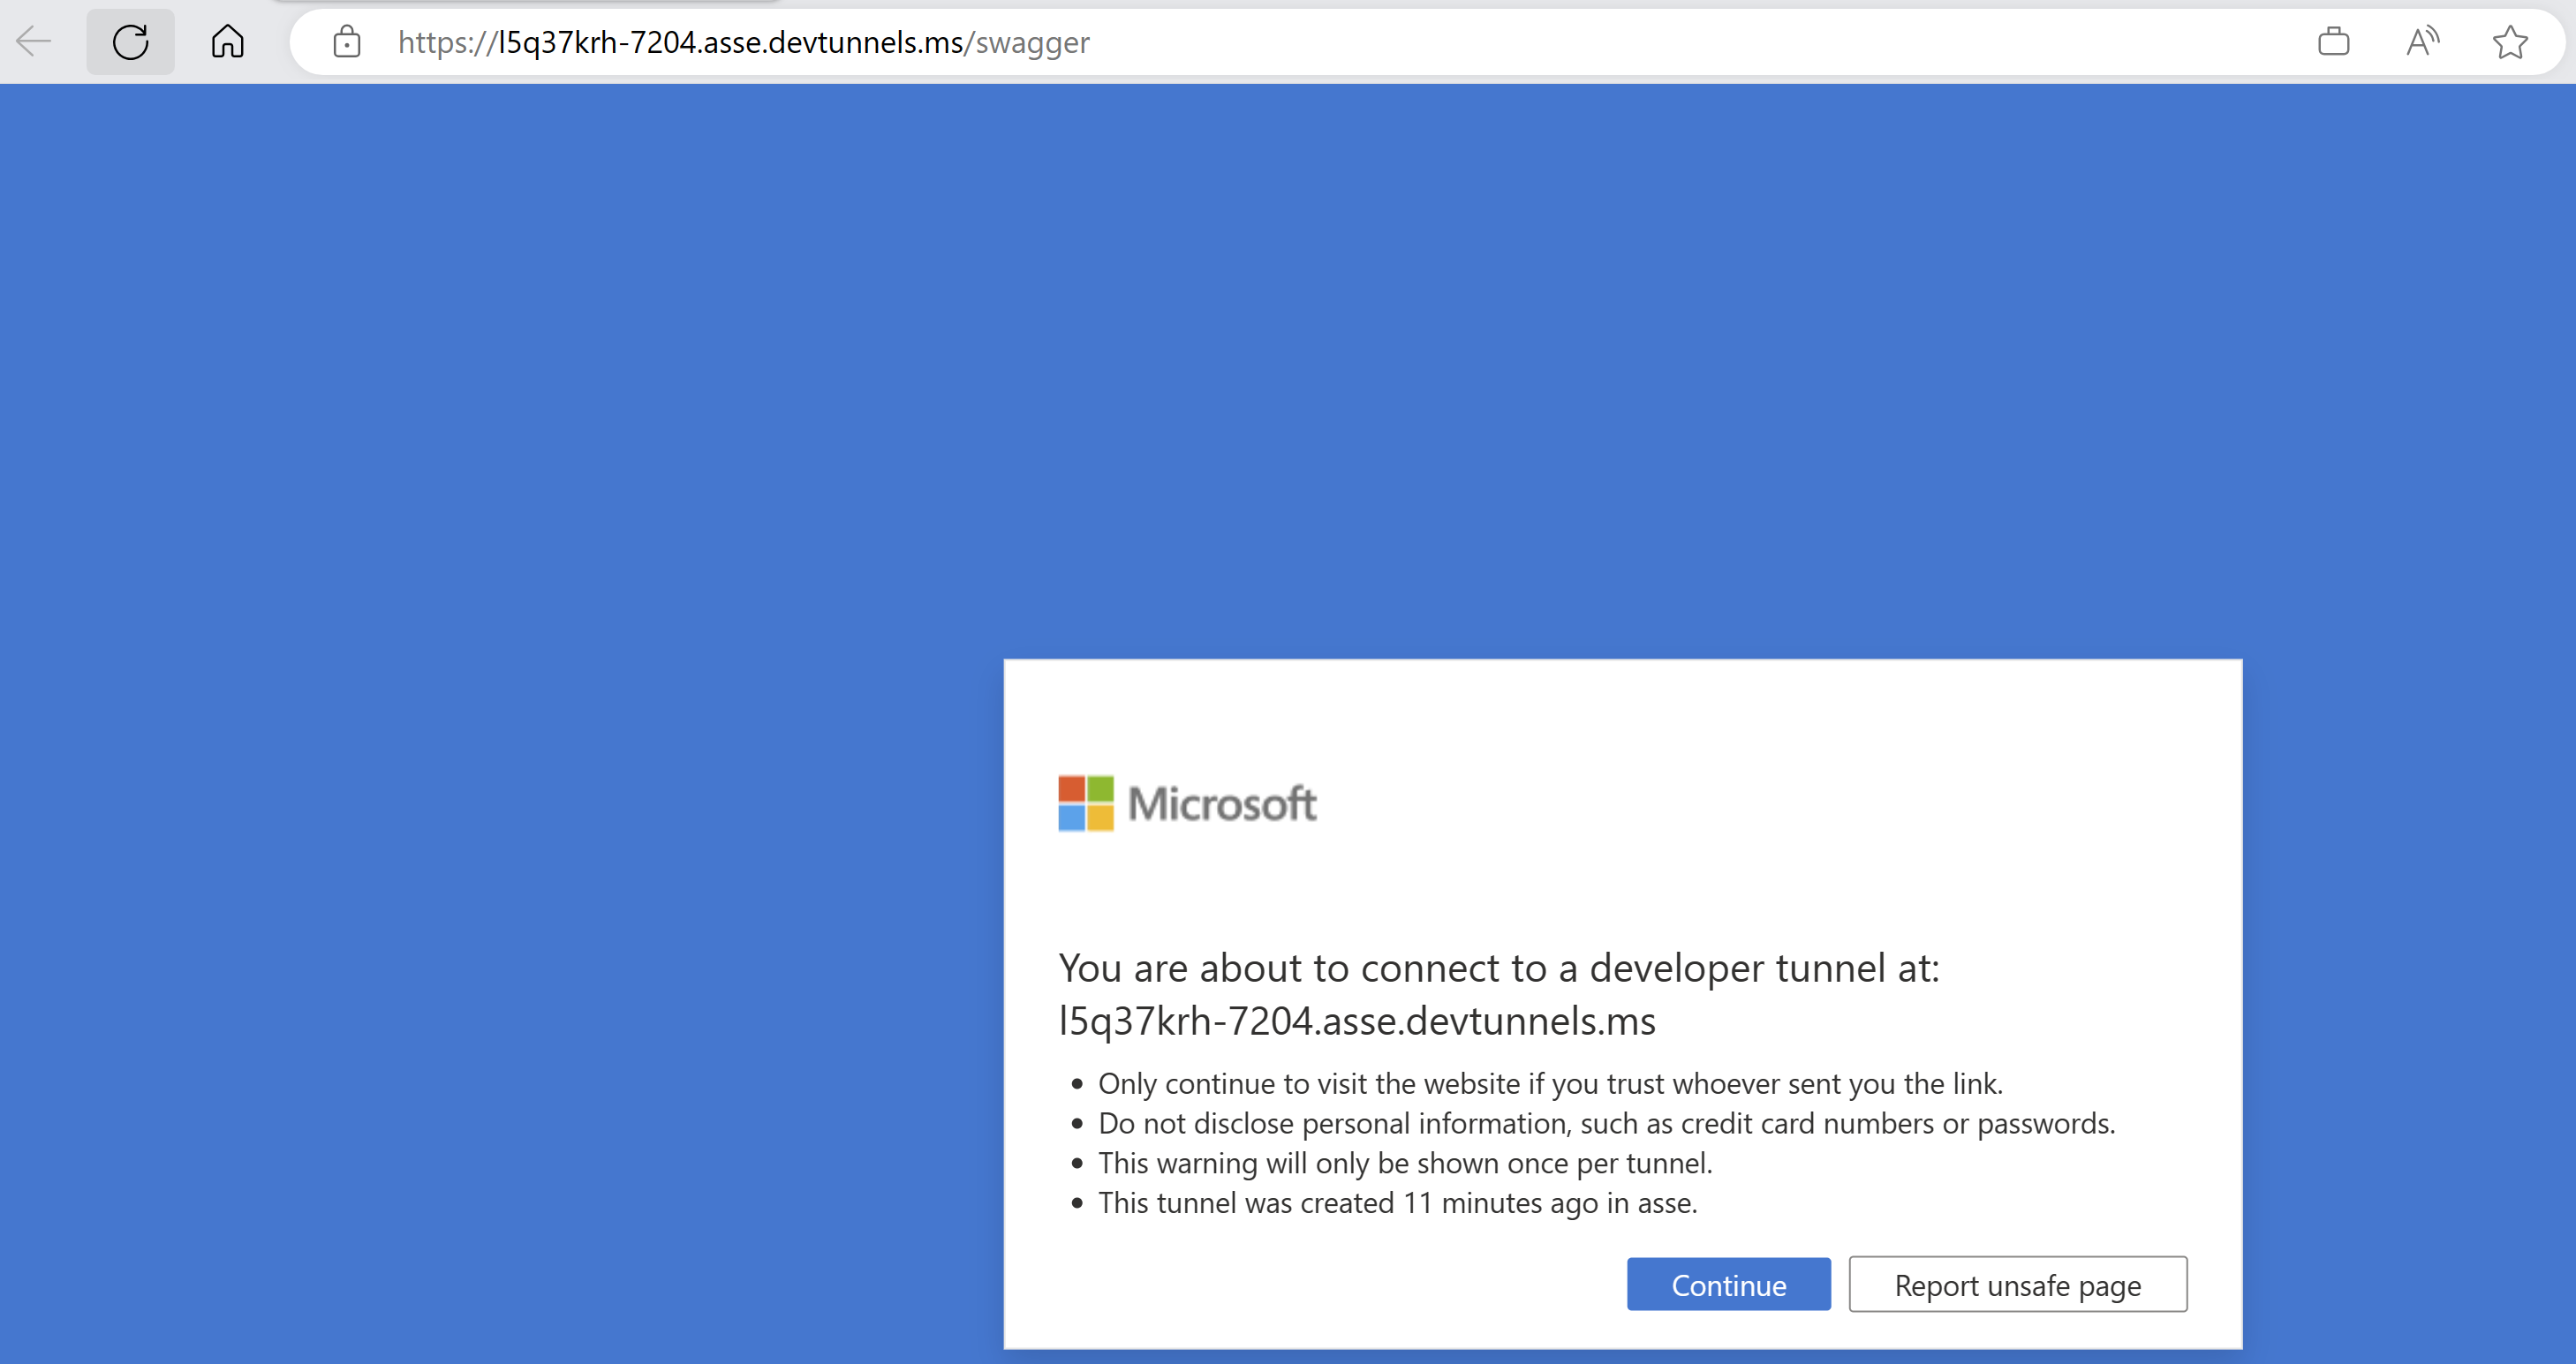
- Click ‘Continue’ and you should get the Swagger page as below. Notice that the ‘localhost’ replaced by the dev tunnel host.

- Note: Make sure you keep running this project on Visual Studio which allows us to debug in the next steps.
- Connect to the Power Platform environment from maker portal and you should see the ‘Calculator_Connector‘ under ‘Custom connectors’.

- Test the ‘Calculator_Connector‘ by going to the ‘Test’ tab of the Custom Connector and make sure it’s working (i.e., Status 200).

We now have the Web API registered as the ‘Calculator_Connector‘ custom connector, lets see how to connect to the ‘Calculator_Connector‘ and debug in the next steps.
Debug the Calculator_Connector connector using a Canvas App:
- Create a new Canvas App.

- Create a simple UI by adding controls to pass ‘Value 1’ and ‘Value 2’ to the Calculator_Connector connector and capture the response.

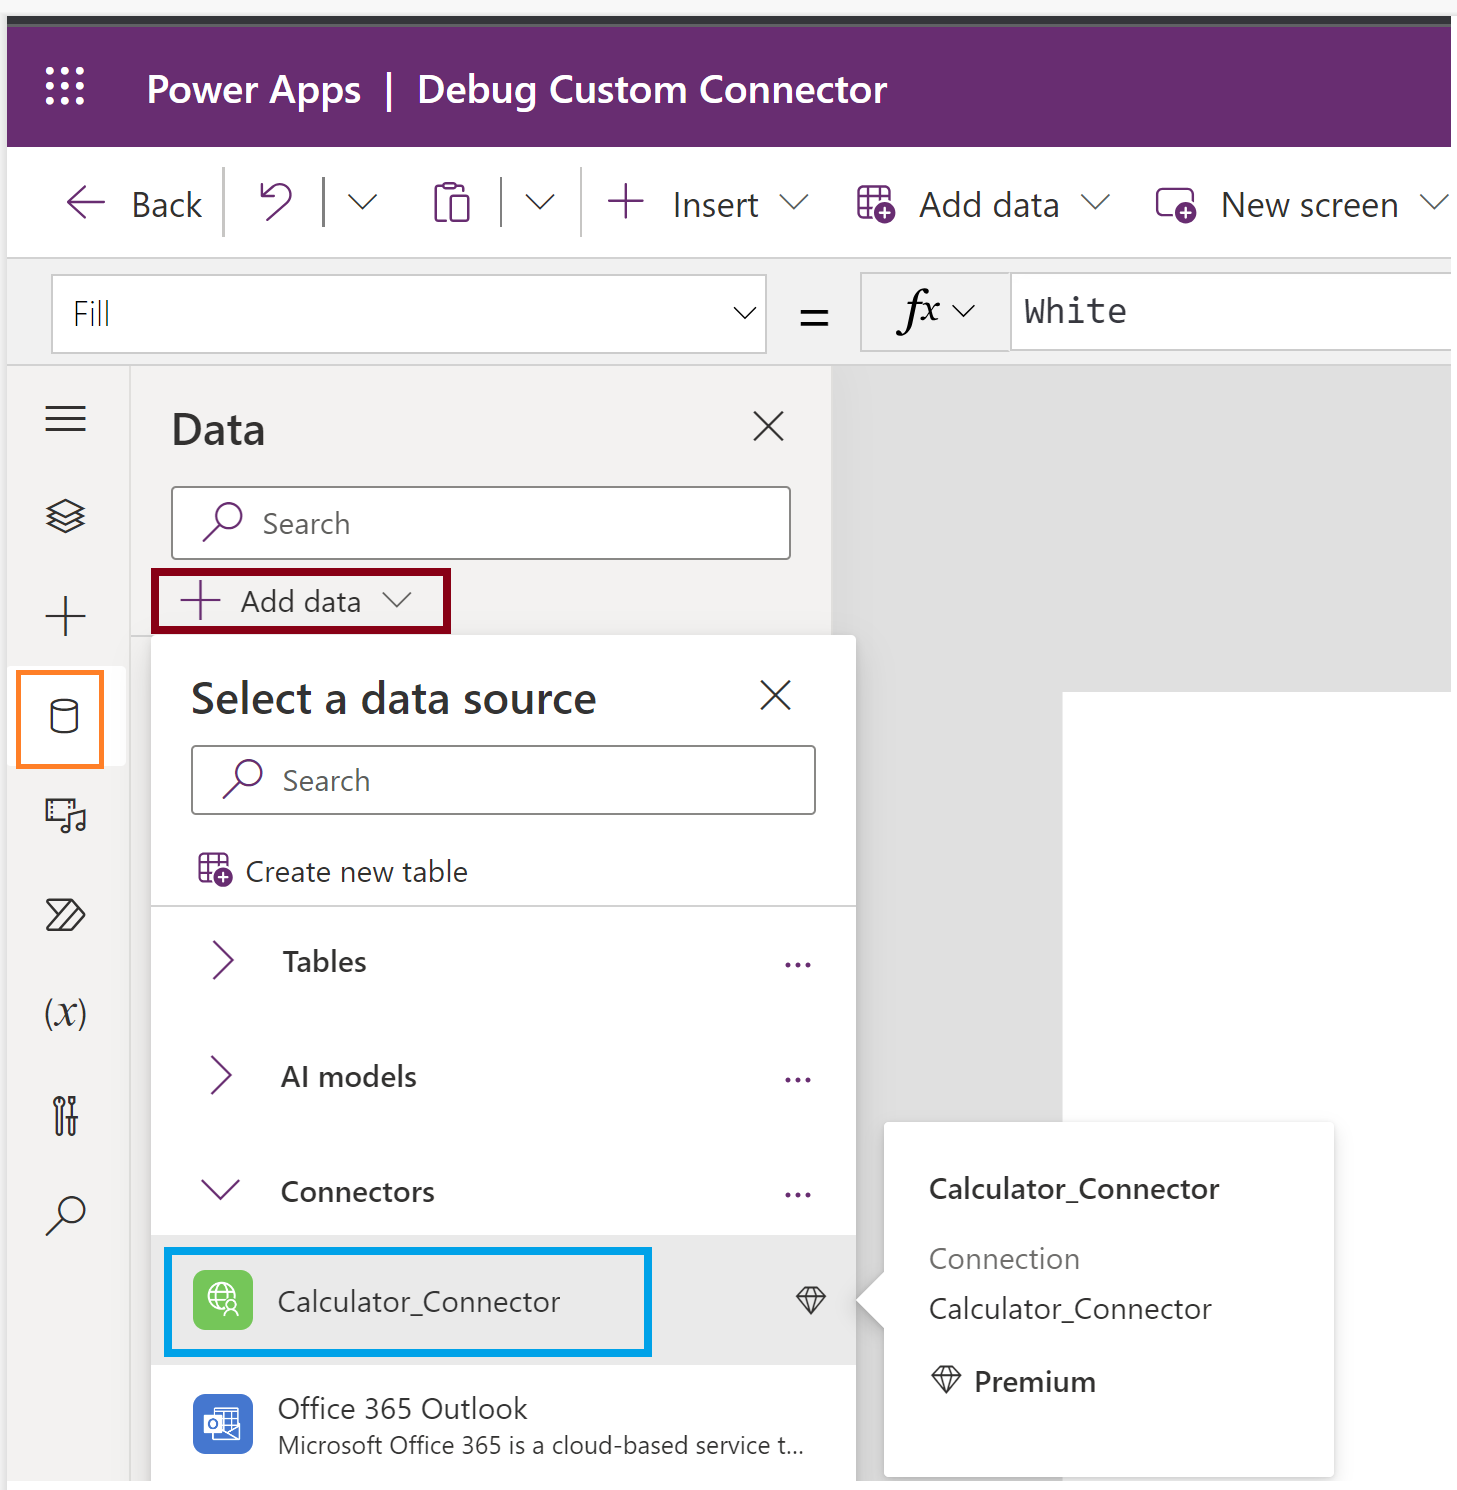
- Add the ‘Calculator_Connector‘ custom connector to the App by using ‘Data’ tab as shown below.
- Now, call ‘SumRequest’ API of the the Calculator_Connector connector, on the ‘onselect’ event of the button using the following ‘PowerFx’ formula. In this formula, we are capturing the API response in to ‘apiResponse‘ variable.
UpdateContext(
    {
        apiResponse: Calculator_Connector.SumRequest(
            {
                value1: txtValue1.Text,
                value2: txtValue2.Text
            }
        )
    }
)
- Set the apiResponse as label’s ‘Text’ property.

- Once you play the App, clicking on ‘Trigger API’ will hit the breakpoints in Web API project. So, make sure your Web API project is running in Visual Studio and have a break point set.

- We are all set to debug. Go ahead and play the canvas App and click the ‘Trigger API’ button, the breakpoint in Visual studio gets hit which allows you to debug.
Debug the Calculator_Connector connector using a flow
Now let’s see how to to debug the Custom Connector Web API using Power Automate Flow.
- Create a new ‘Instant’ flow.

- Add a new control and choose the Calculator_Connector connector.

- Select the ‘Sum Request’ API.

- In the ‘Sum Request,’ provide ‘value 1’ and ‘value 2,’ then save and test the flow.
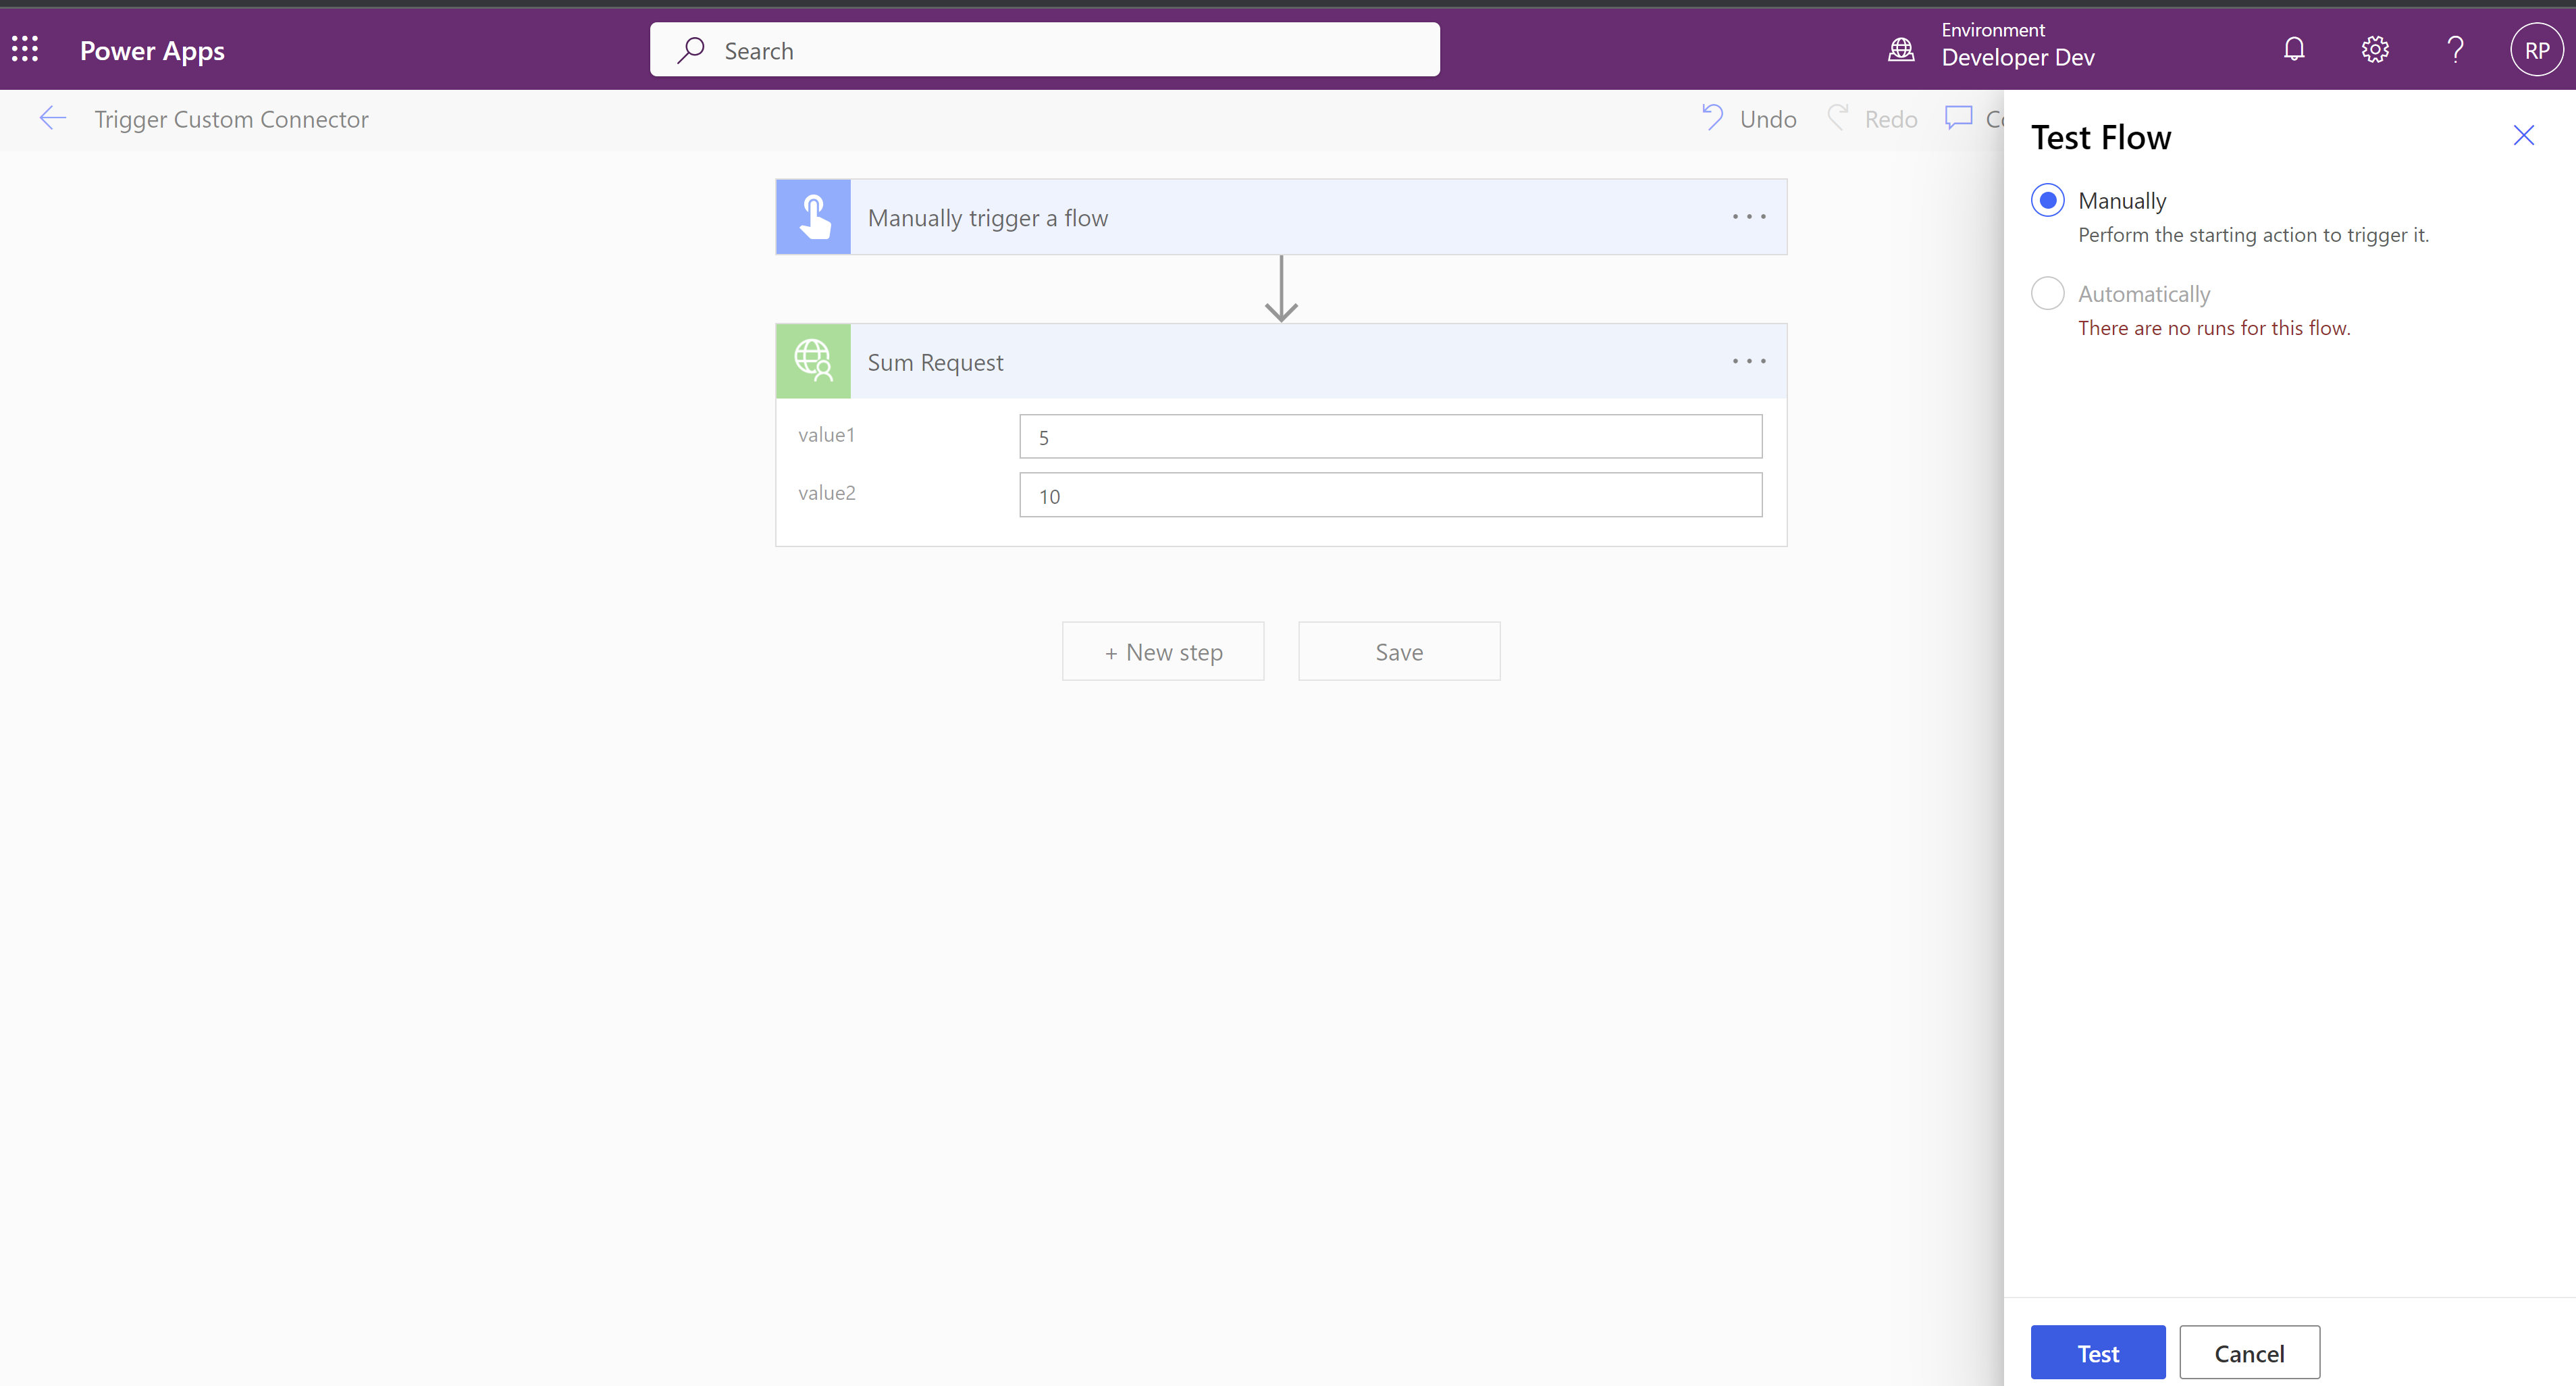
- Clicking on the ‘Test’ button will run the flow, and the breakpoint in the Visual Studio project will get hit.
That’s all for this blog post. I hope you learned how to debug the Web API registered as a ‘Custom Connector’ using Visual Studio Dev Tunnels.
Please be mindful that the above approaches are meant for development purposes only. If the App is not running in Visual Studio, your API won’t be accessible.
The Web API needs to be deployed in cloud, for example as a Azure App Service to be able to use in Test and PROD environments.
In the future posts I will explain how to deploy the Web API project in Azure as App service and configure the Custom Connector using the App Service end point.
🙂


![[Step by Step] Beginner : Create a PCF control and add it to a custom page](https://rajeevpentyala.com/wp-content/uploads/2024/12/image-49.png)

Leave a comment