In this series, I am going to touch base Bootstrap fundamentals and controls. Lets see how to get started with Bootstrap.
What is Bootstrap?
- Bootstrap is is the most popular CSS (Cascading Style Sheet) Framework for developing responsive and mobile-first websites.
- Bootstrap framework provides helper css and js files, with which can make your website/web application vibrant and responsive with no additional effort.

What is ‘Responsive’ UI:
- Responsive Web Design is about using HTML and CSS to automatically resize, hide, shrink, or enlarge, a website, to make it look good on all devices (desktops, tablets, and phones).
- With Bootstrap framework you can make you web pages responsive and fit for all devices.
Below are the steps to use Bootstrap in a sample HTML page
Download the Bootstrap framework:
- Download the Bootstrap components (i.e., CSS and JS files) from here
- Note: Instead of downloading the files locally, you can also refer CDN files. Refer this link

- In this article I am downloading the components locally and use it in HTML file.
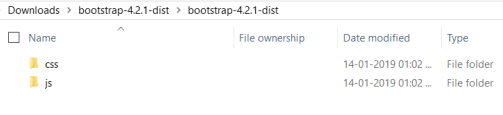
- Once you download and unzip, you would notice 2 folders css and js
Get start with a sample HTML page:
Once you download the Bootstrap components below are the steps to use Bootstrap in HTML file.
I am using Visual Studio as my code editor, you can also use the editors you are comfortable with.
- Create a new “Asp.Net Empty Website”
- Create a new folder “Bootstrap” and place the css and js folders of Bootstrap downloaded in prior section.

- Copy the HTML content from Starter Template of Bootstrap and paste it in your HTML file.

- You would notice the Bootstrap css and js files CDN’s references.
- Note: CDN references will not work if your machine not connected to Internet.
- Replace CDN references with local file references, since we already downloaded the Bootstrap files locally and added to Visual Studio.

- With out making any further changes, run the HTML page and you would notice the output as below.

- You would not find any difference as the HTML page rendered normally, to make the HTML page with Bootstrap styling make sure you follow next step.
- The key point here is, Bootstrap styles will take affect only if you wrap your HTML tags inside a <div> with class name “container”
- ‘container’ is the Bootstrap css class name.

- Lets move <h1> tag inside <div class=”container”> and run the HTML page, which renders as below with more vibrant.

Notes:
- Bootstrap requires jQuery, hence jQuery file CDN reference comes with Bootstrap ‘Starter Template’
- You would also get “popper.min.js” in the Bootstrap ‘Starter Template’, which is useful to show pop over notifications.
In the followup articles, we will see the Bootstrap styling of different controls.
🙂


Leave a comment