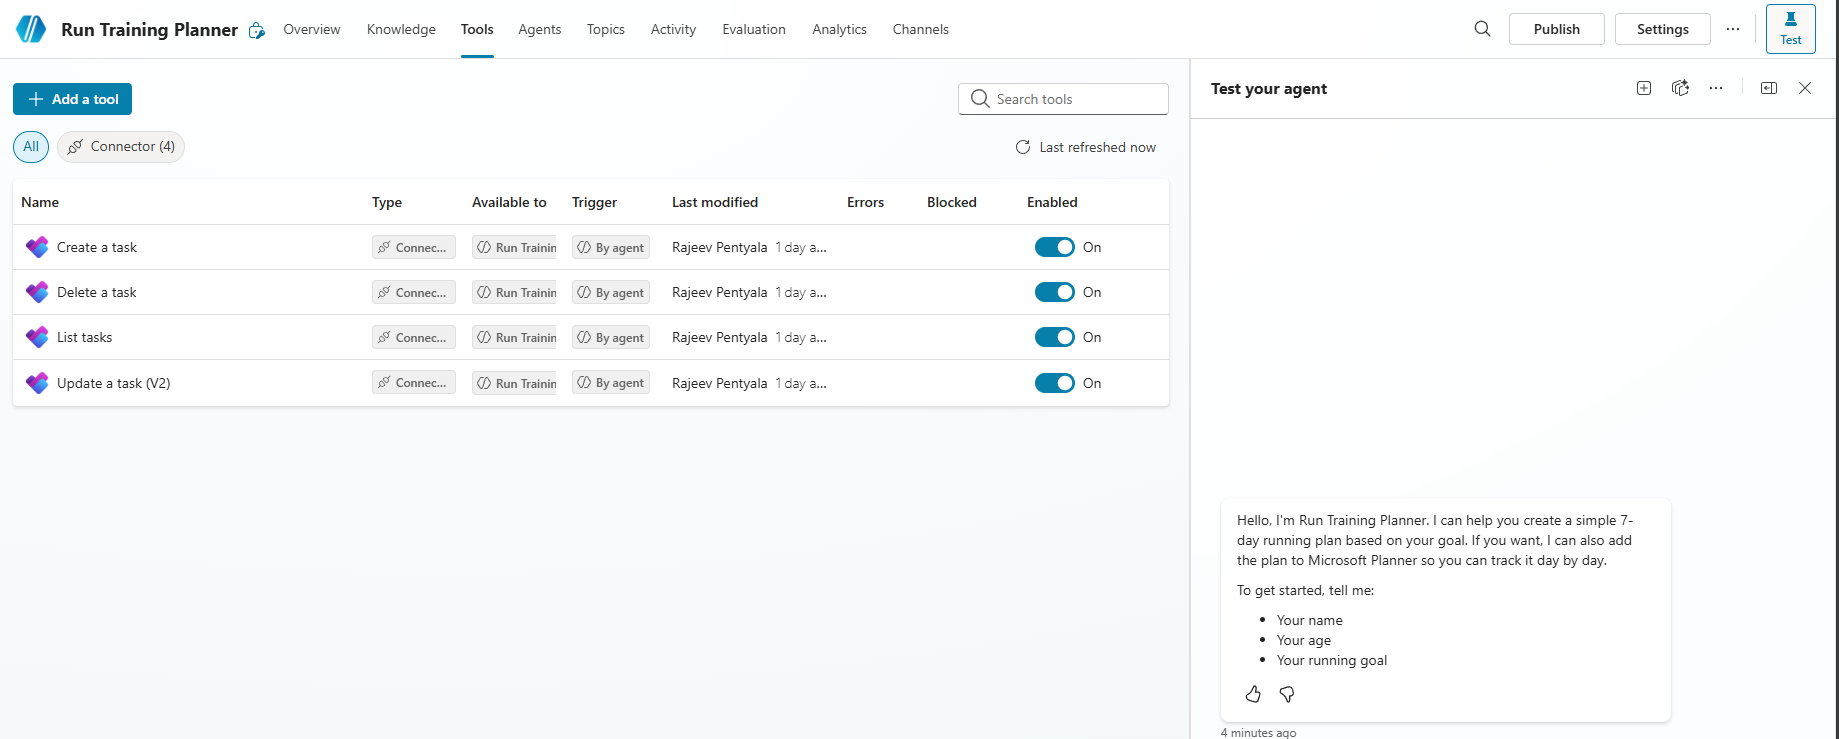
In my previous article Build an Agent Using Microsoft Planner, I built an agent that connects to Microsoft Planner and create tasks.
To achieve that functionality, I configured the required following Tools directly inside the agent :
Now, let’s consider a new requirement.
Suppose you need to build another agent that also needs to interact with Microsoft Planner. Instead of recreating the same Planner tools again, Component Collections allow us to reuse those components across agents.
What are Component Collections:
- Component collections enable makers to create and share reusable components across agents.
- Share collections with teammates while controlling edit access, enabling safe collaboration.
- Restrict a collection so it can be used only by its intended agent (the primary agent)
Let’s see how to configure Component Collections and reuse components across agents.
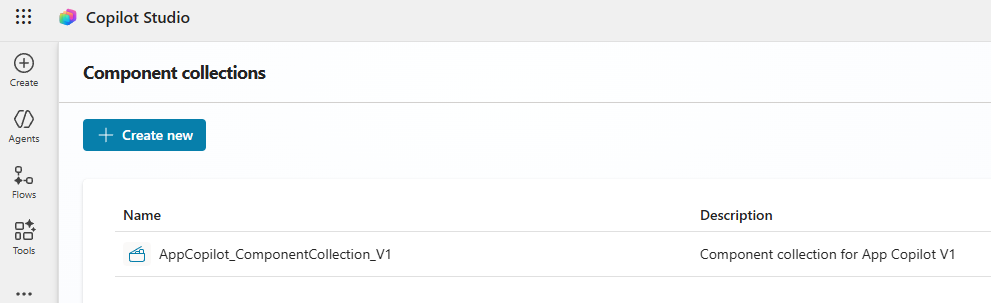
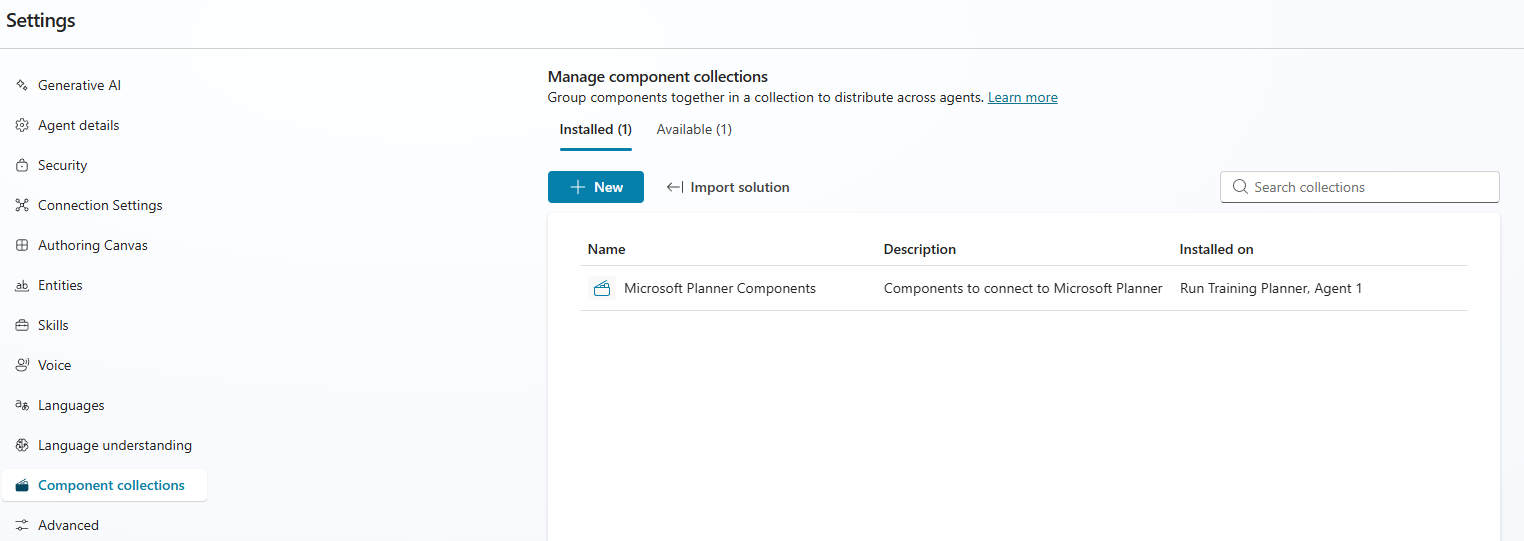
Configure Component Collections:
- From the Copilot Studio sidebar, select the three dots (…), then select Component collections.

- Select Create new
- Enter a name and a description for your component collection. You can either create a new solution, or, select an existing solution.
- Select Finish.

At this point, a blank Component Collection is created.
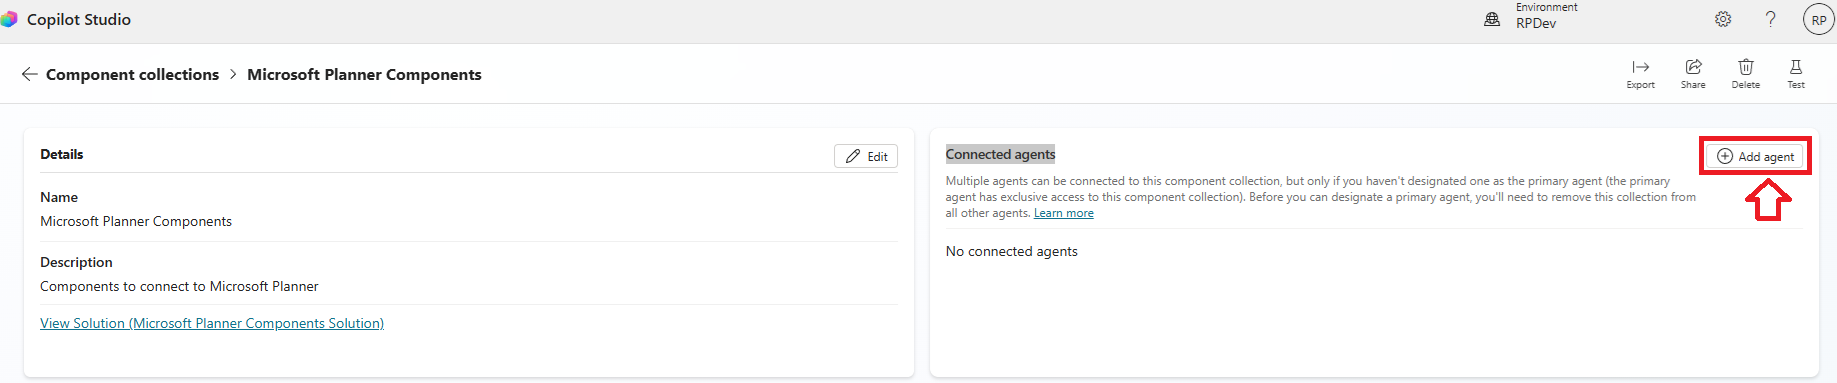
Add Agent and components to the collection:
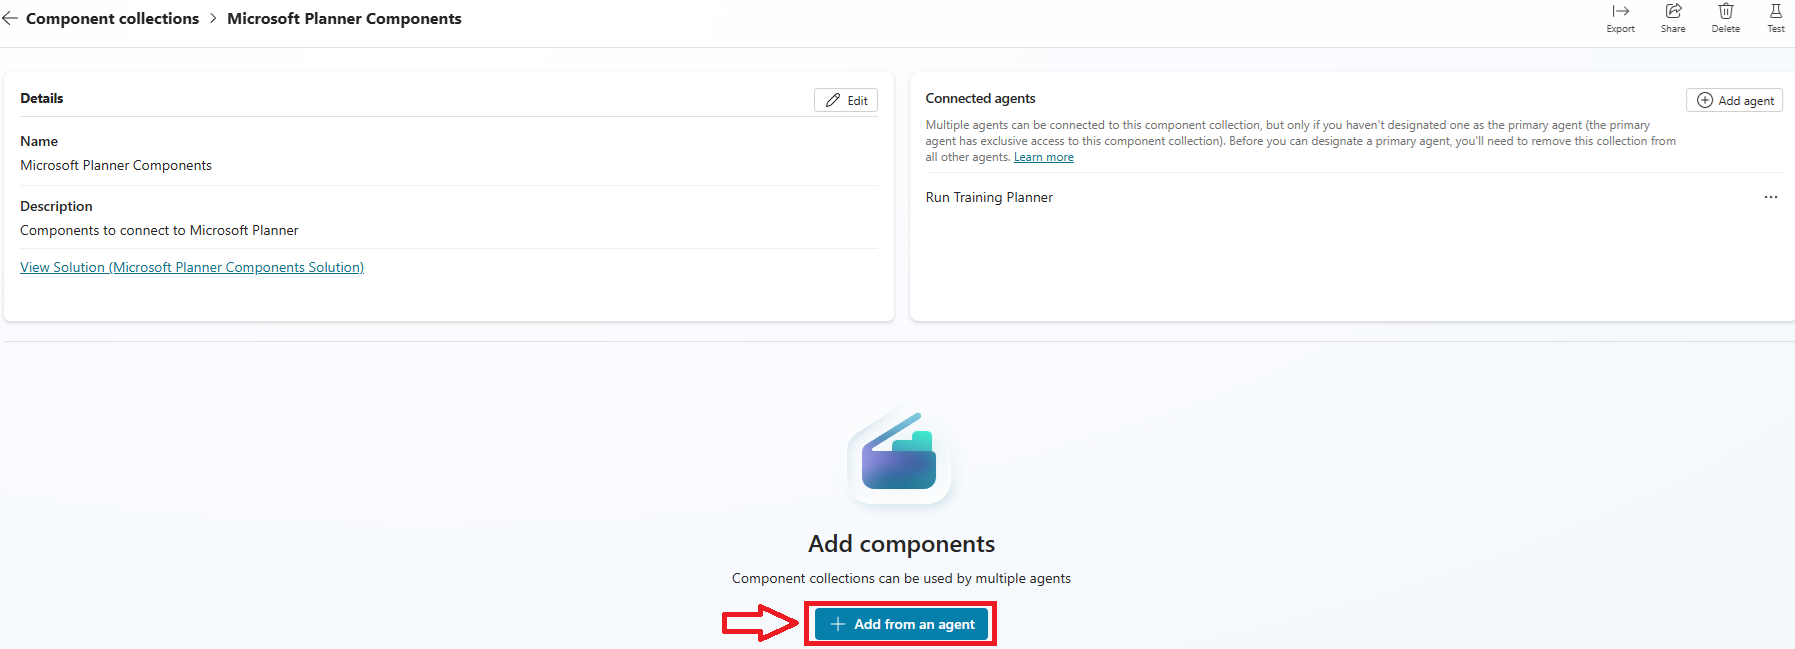
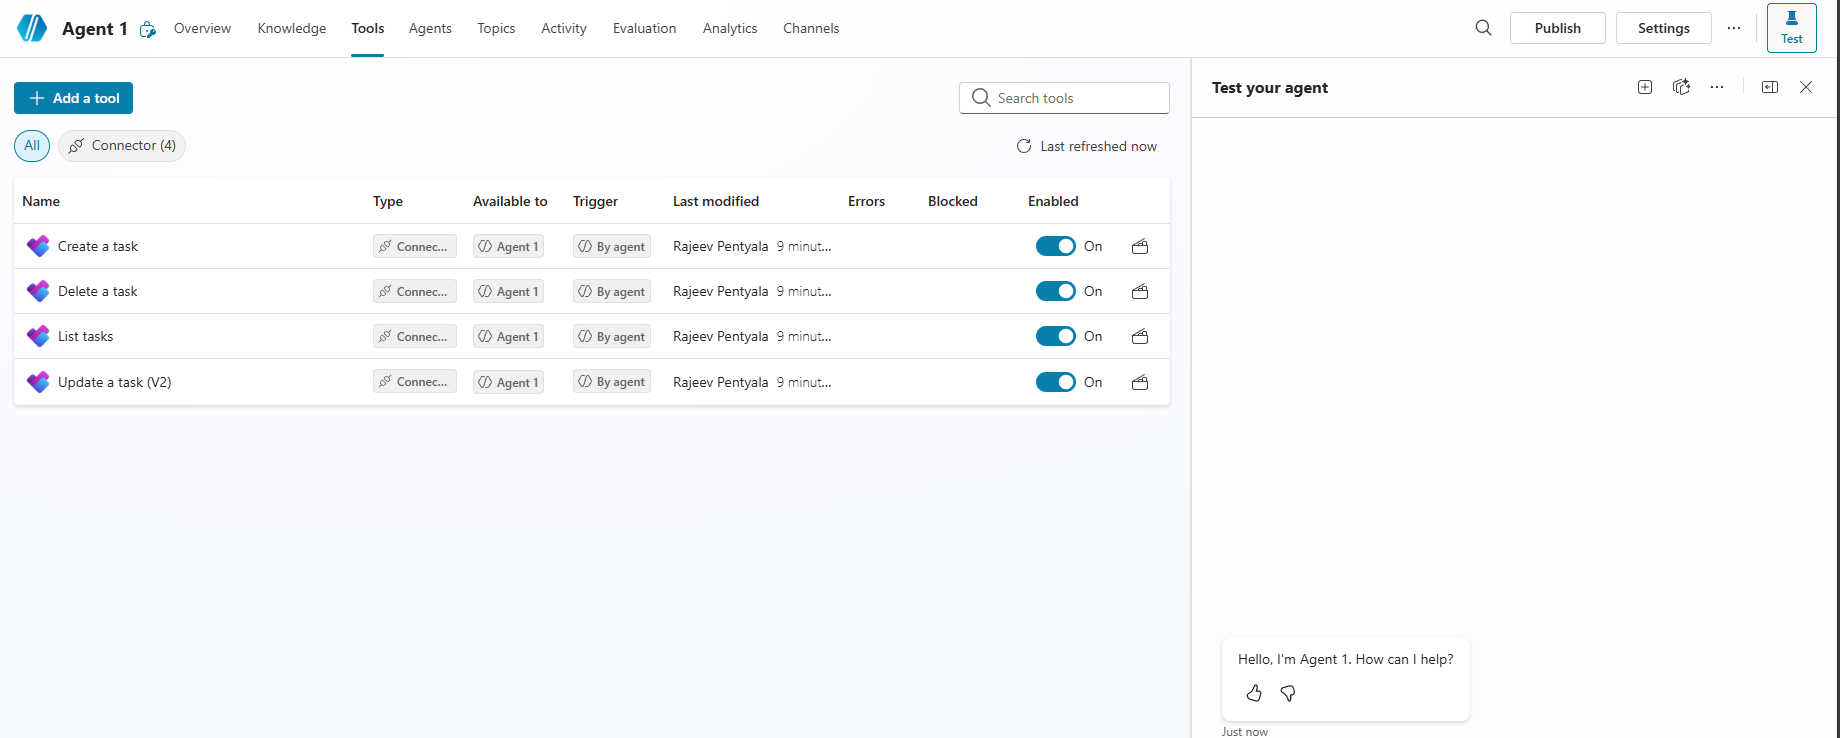
Our goal is to reuse the Planner tools from the existing Run Training Planner agent. Follow these steps:
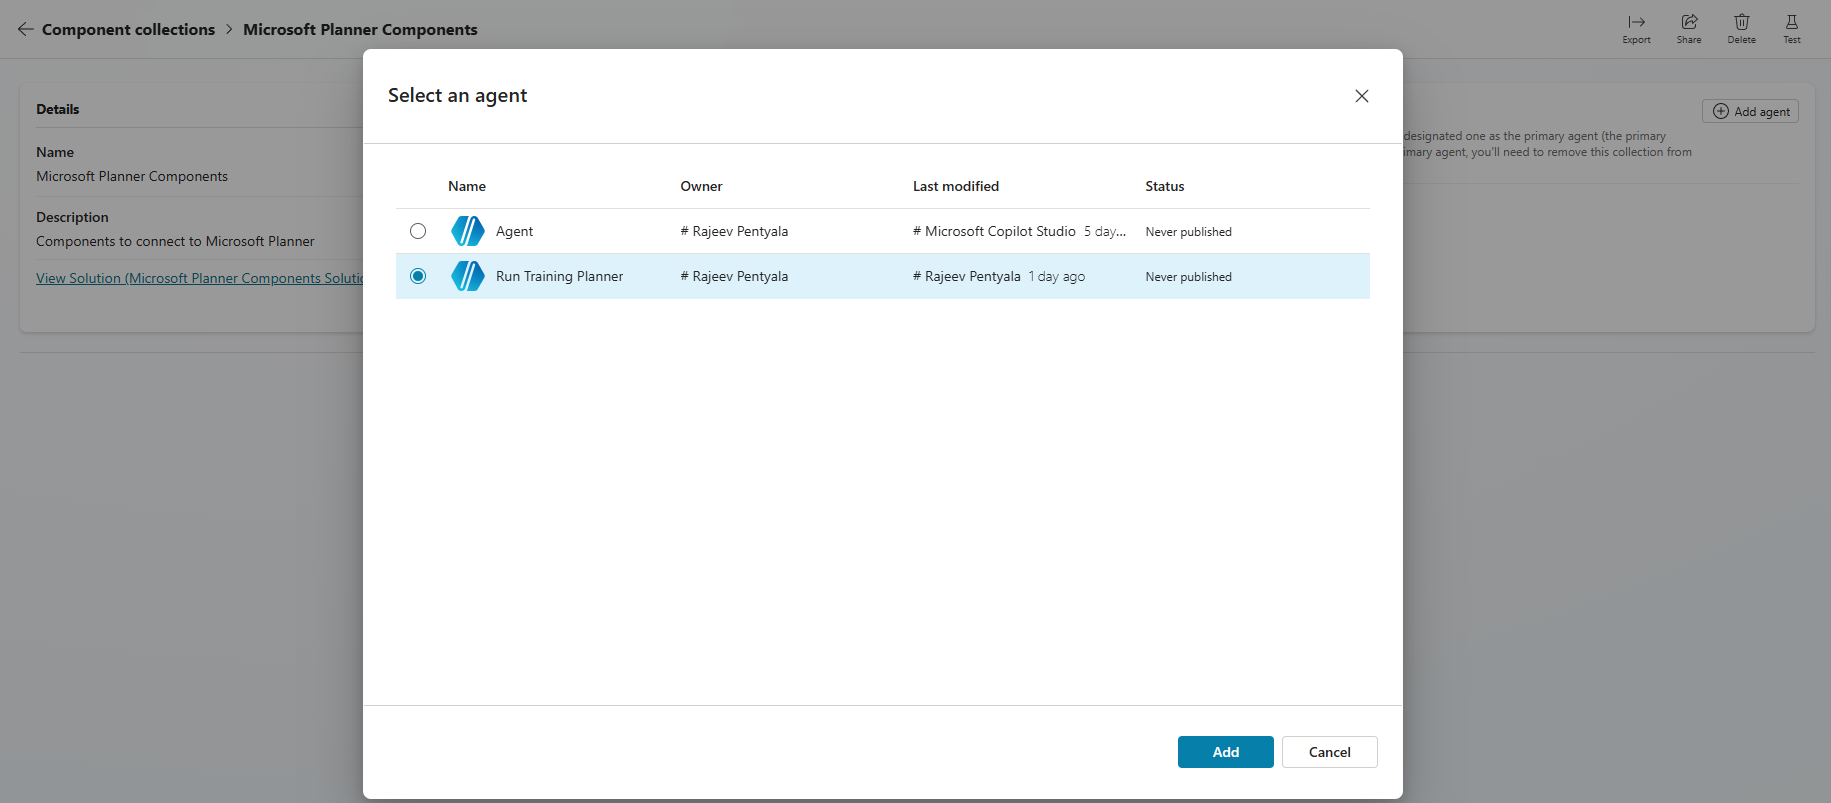
- In the Connected agents section, select Add agent.
- Select the agent you want to connect, and then Add.
- To add the tools from the Run Training Planner agent to this collection, select Add form an agent
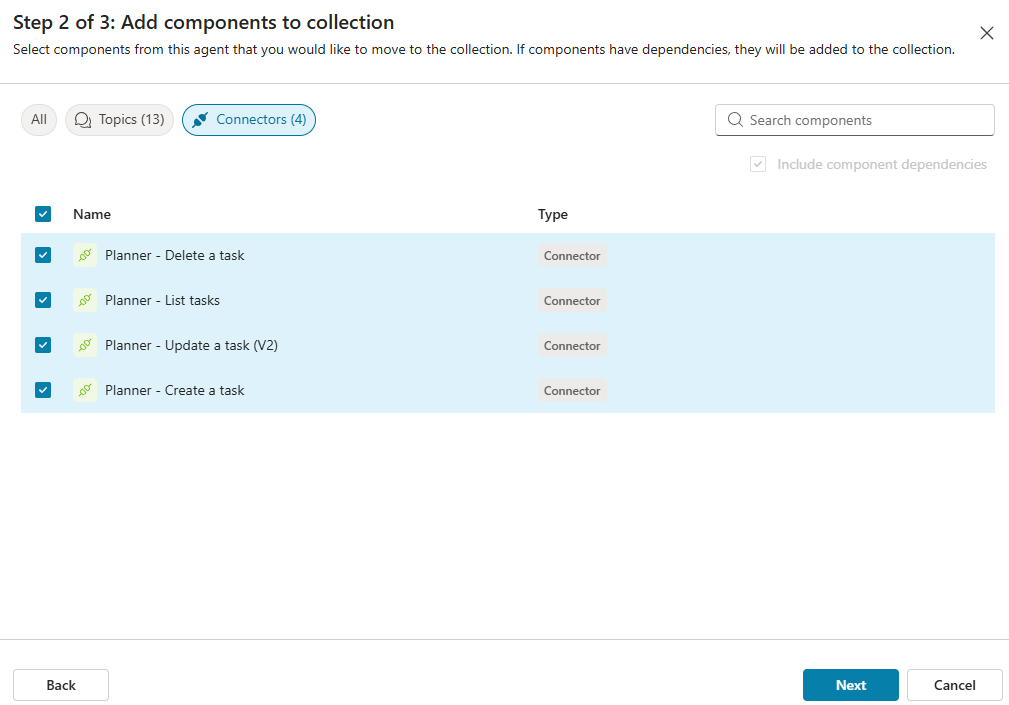
- Under Step 2 of 3: Add components to collection select all the required Planner tools and click Next..
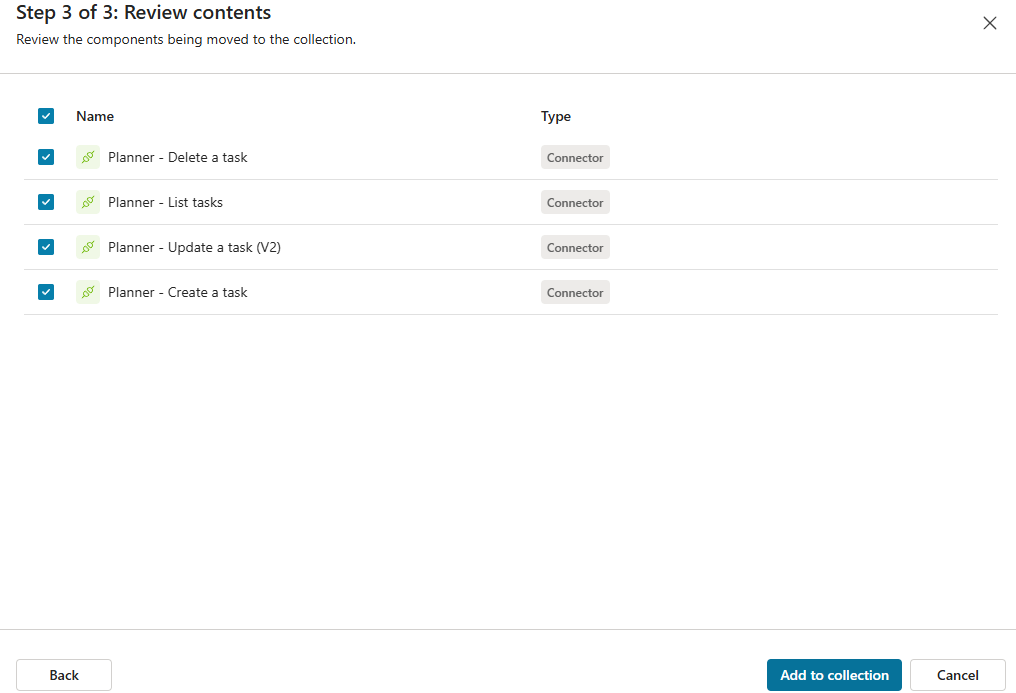
- Review the selected components and click Add to collection.
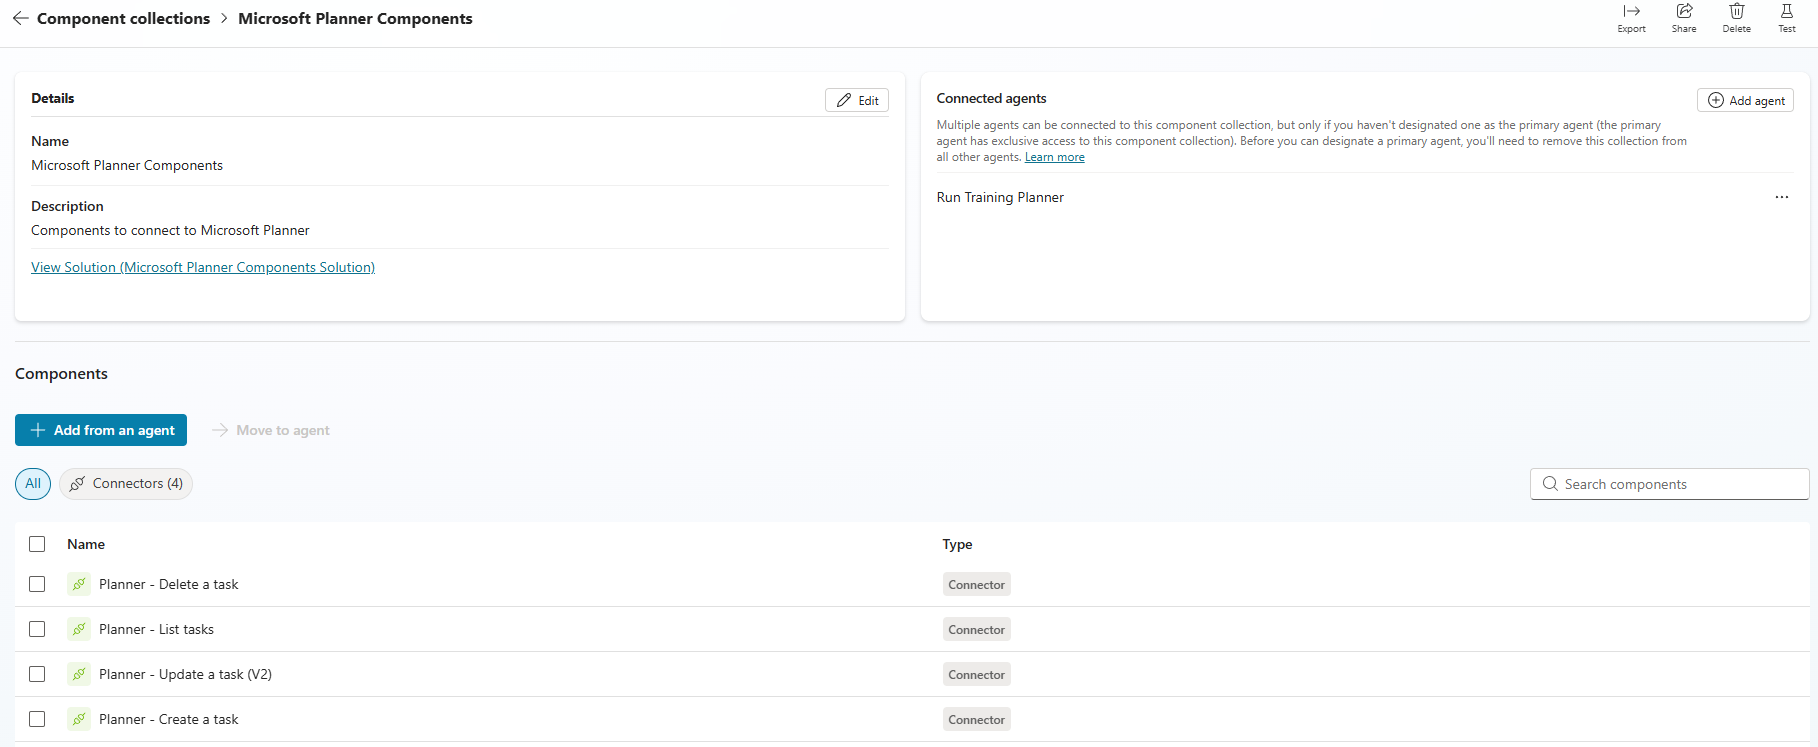
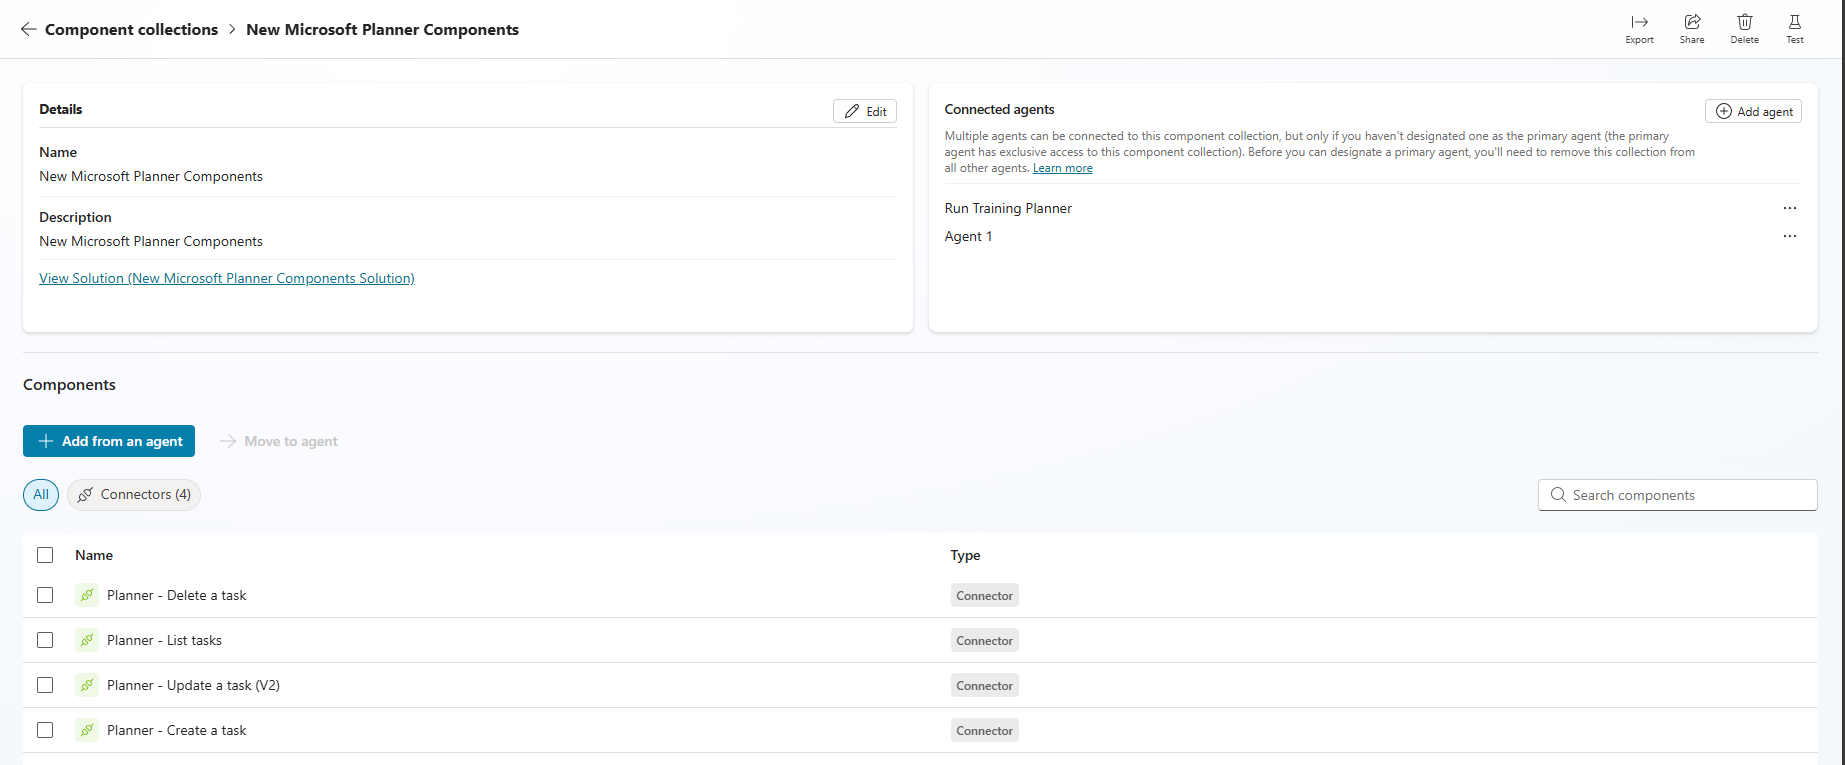
- You’ll now see the Planner tools listed inside the Component Collection.
At this point, the Component Collection is fully configured. Next, let’s see how to reuse it in another agent.
Reuse components in another Agent:
- Create a new Agent
- Go to the Settings page and select Component collections. Select Available tab.
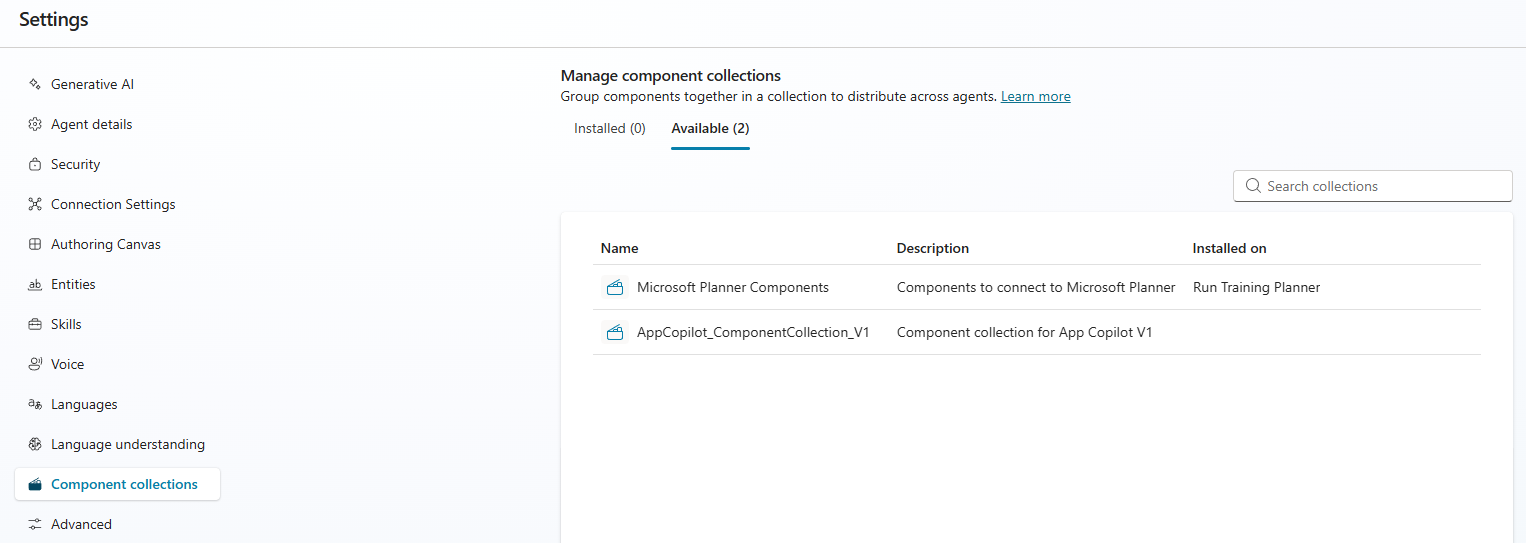
- You will see the Microsoft Planner Components collection that we created earlier.
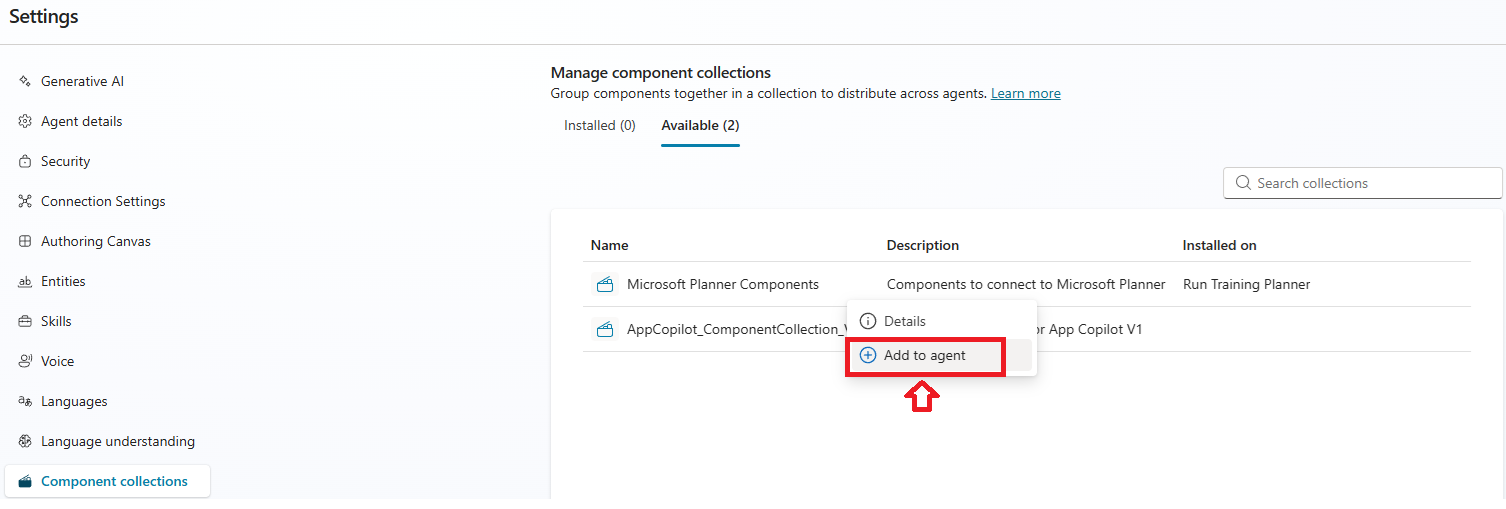
- Select the Add to agent
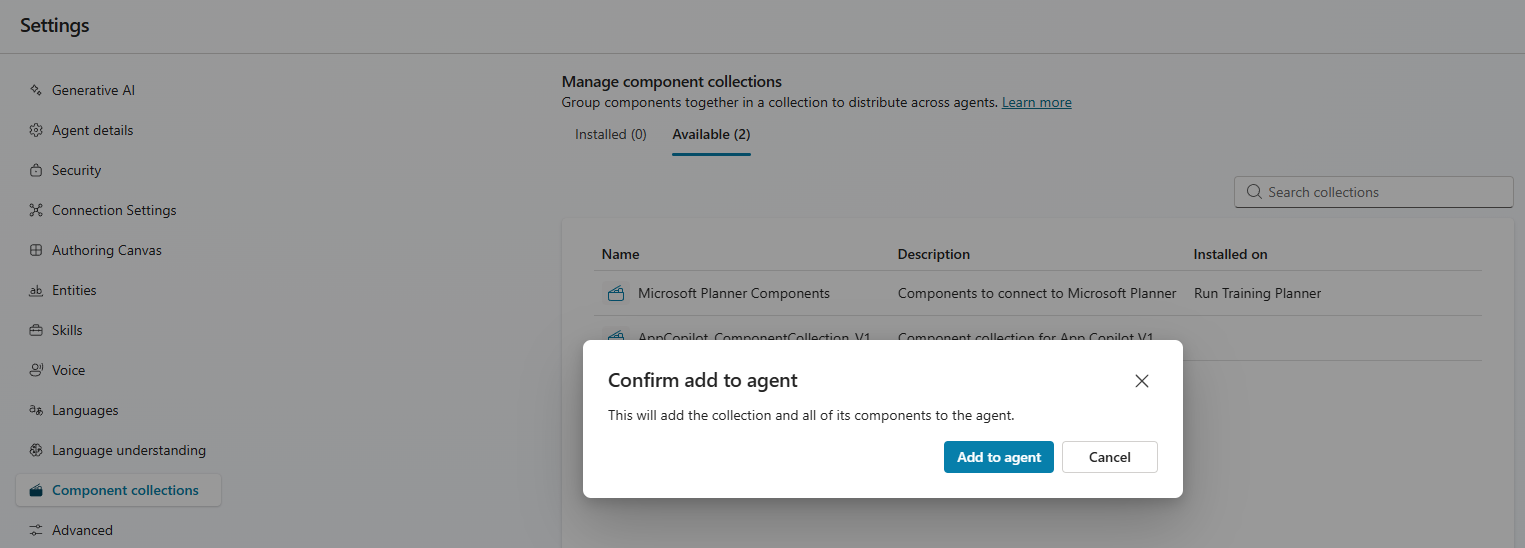
- Confirm to add to agent
- Once added, the collection appears under the Installed tab.
- Now go to the Tools section of the new agent — you’ll see all the Planner tools from the Microsoft Planner Components collection available for use.
At this point, we’ve successfully reused Planner tools across agents without recreating them.
Restrict Component Collection usage:
Now let’s look at the opposite scenario — when you don’t want component collection to be reused across other agents.
Component Collections allow you to restrict a collection so it can be used only by its primary agent.
Let’s see this in action.
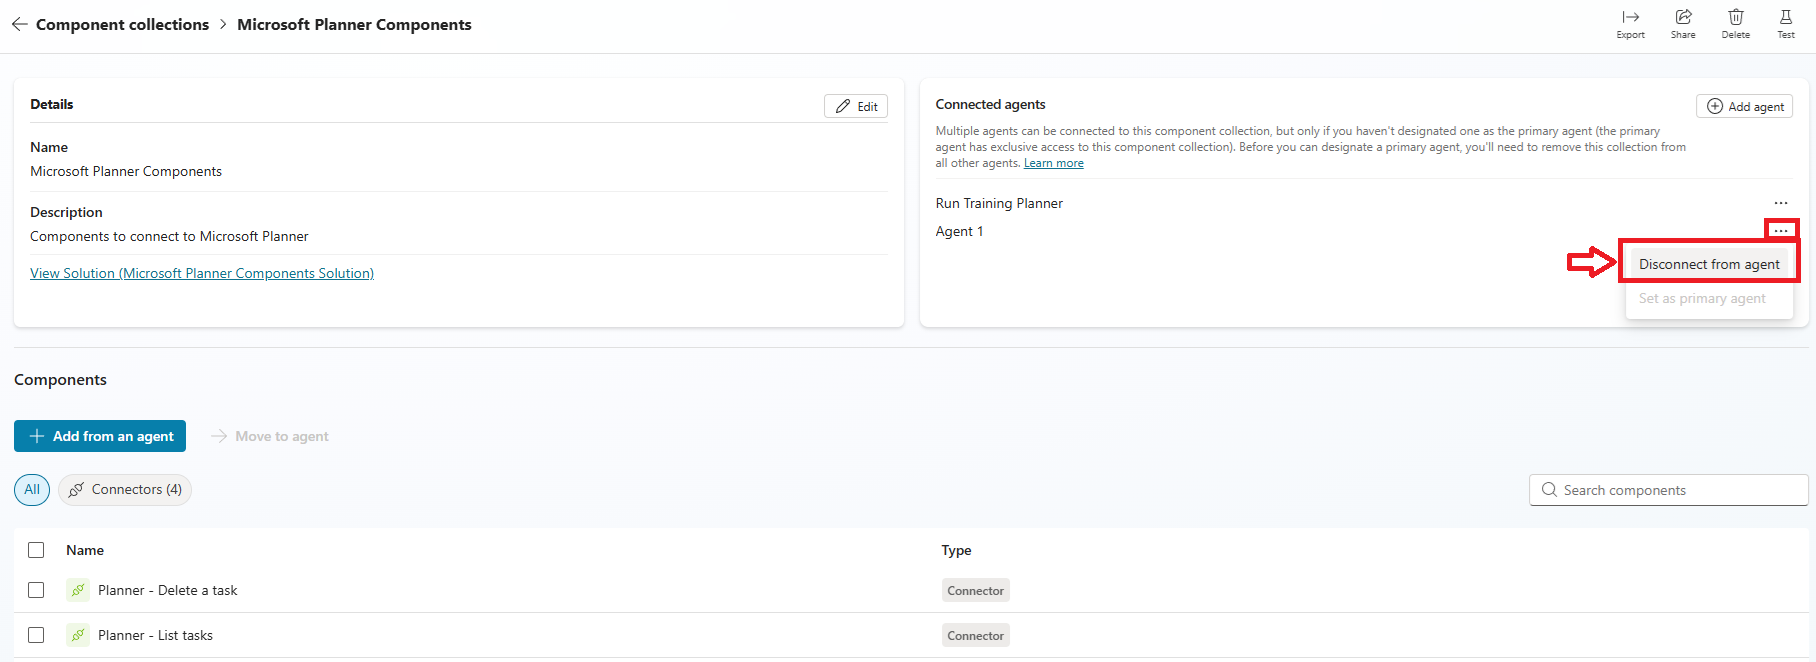
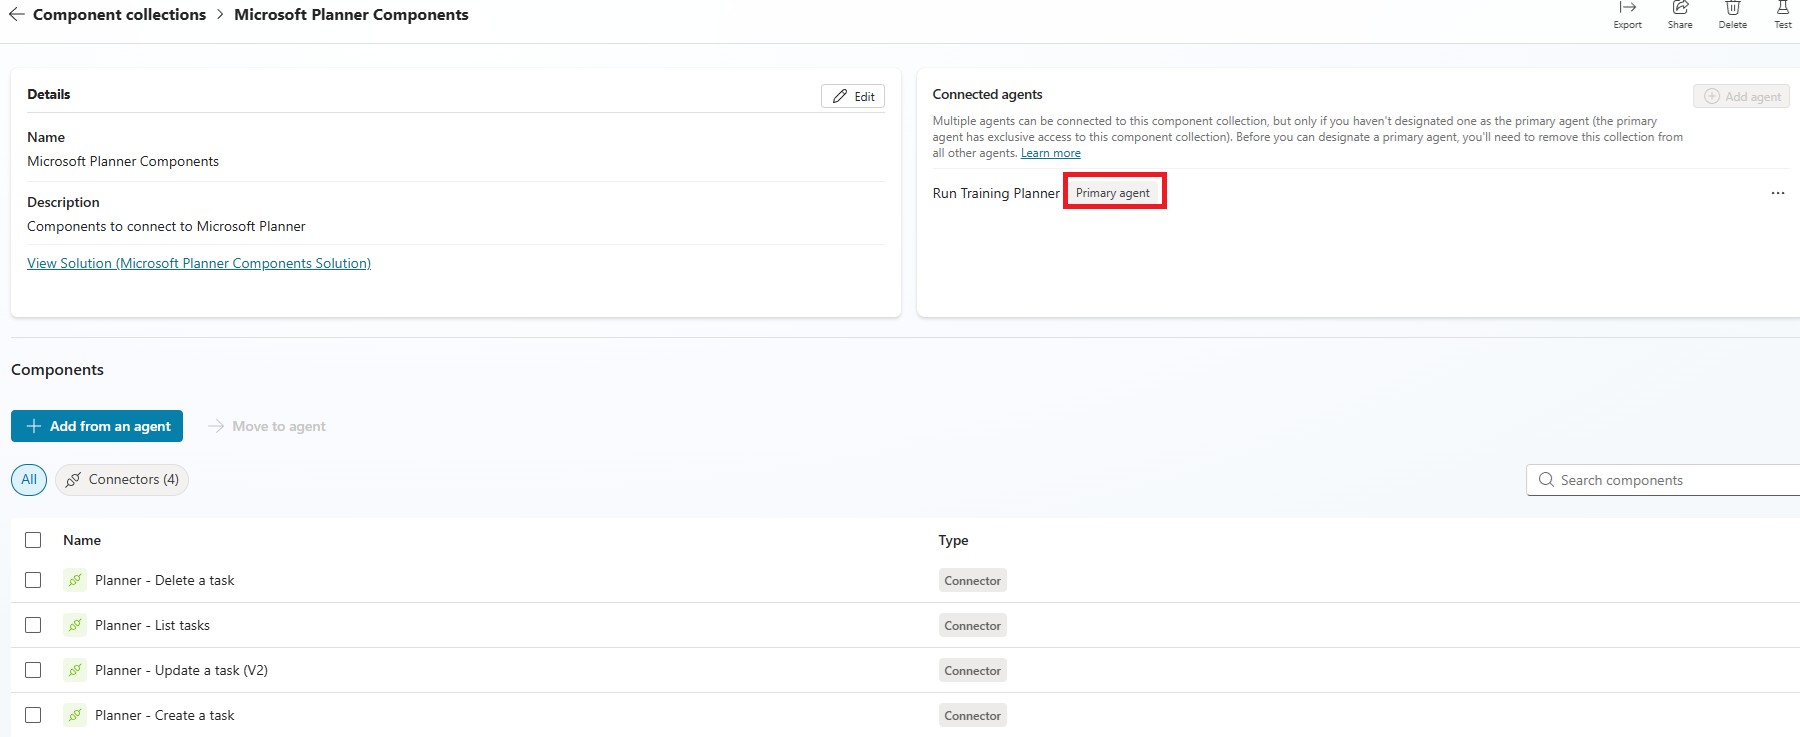
- Open the Microsoft Planner Components collection.
- Under Connected agents, you’ll see Agent 1 (the new agent), because the collection is currently installed there.
- To restrict usage, first remove the collection from other agents:
- Select Agent 1
- Click on Disconnect from agent as shown below.
- Now select Run Training Planner and click Set as primary agent.
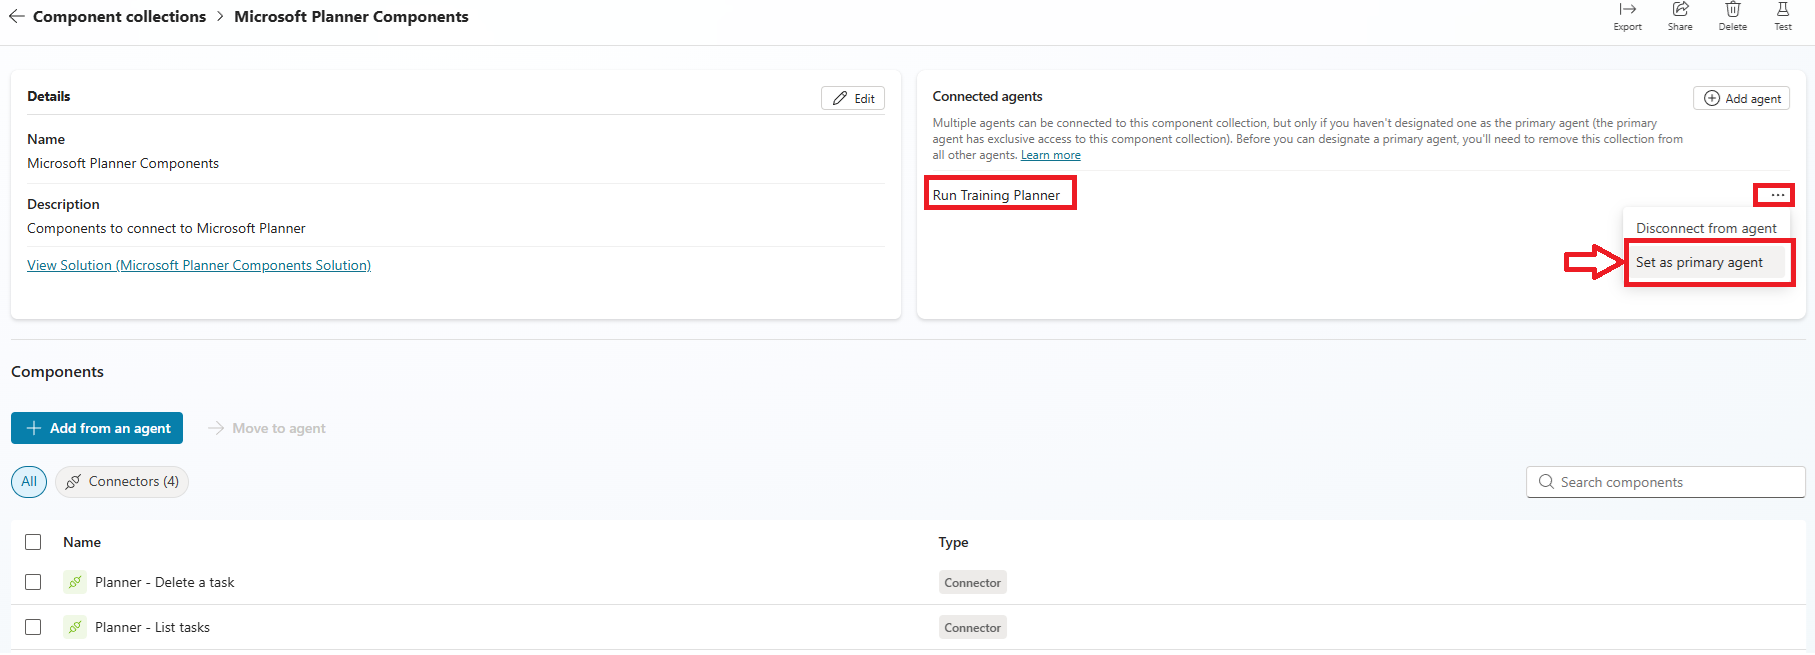
- The Run Training Planner agent is now marked as the primary agent for this collection.
We have made the Run Training Planner agent as Primary of the Microsoft Planner Components Collection. Now we can’t install the collection in other agents.
Let’s see this in action.
Test the restriction:
- Open the Agent 1
- Go to the Settings page and select Component collections. Select Available tab.
- You’ll notice that the Microsoft Planner Components collection no longer appears in the Available list.
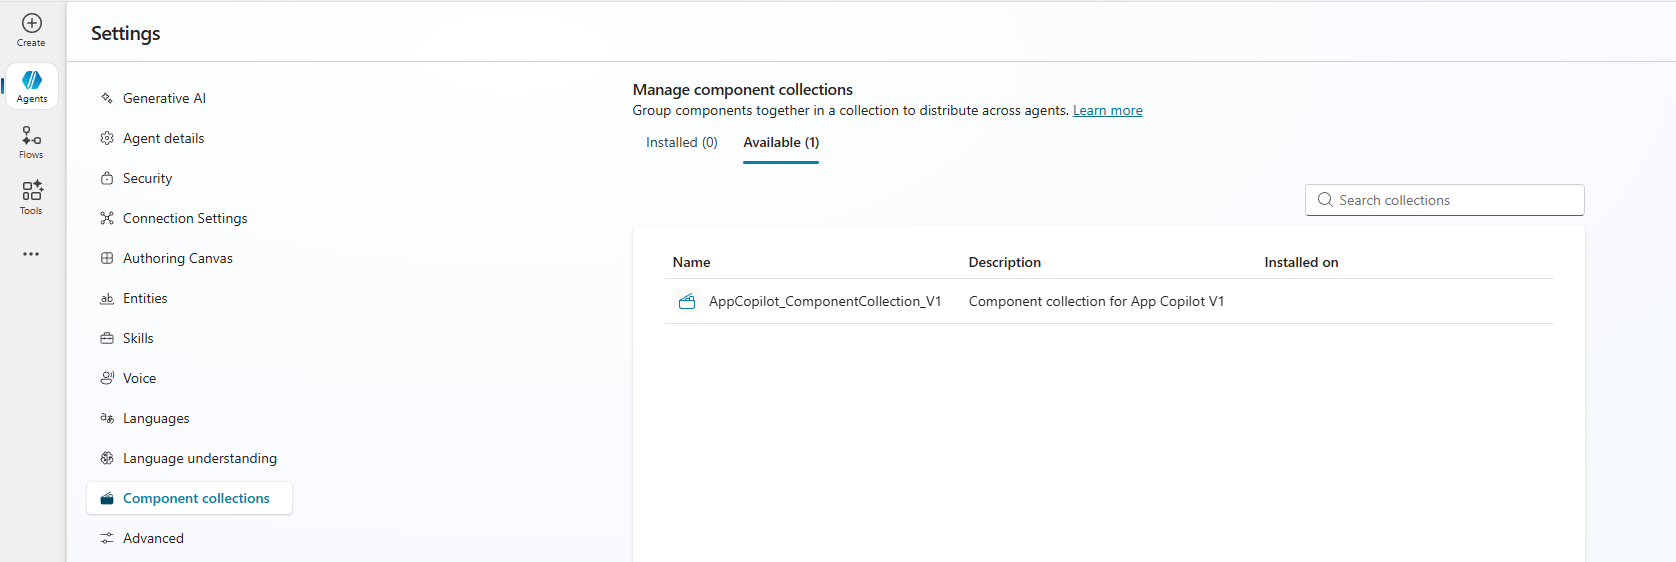
- This confirms that the collection is now restricted to its primary agent.
Important Note:
- By setting agent as Primary in the Microsoft Planner Components Collection, we are restricting the collection to be reused in other Agents.
Reuse is still possible (even after restriction):
Even if you set Run Training Planner as the primary agent, you can still reuse the same Planner tools in other agents.
- Create a new Component Collection
- Add the Planner tools from Run Training Planner
- Do not set a primary agent for that new collection
- Install that collection in other agents as needed
In other words, setting a primary agent restricts reuse only for that specific collection. You can always create another collection to share the same components across multiple agents.
Import and export collections:
So far we have learnt how to reuse the components across agents with in the environment.
You can also Export collections so you can import them into other environments.
Export Collection:
- Open the collection you want to export.
- On the top menu bar, select Export.

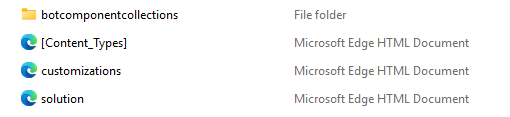
- When the export is ready, you can download the collection as a .zip file.

- The extracted .zip contain similar structure.
Import Collection:
To import a collection:
- In Copilot Studio, ensure the environment where you want to import your collection is selected.
- Open the agent you want to connect to the collection, and then select Settings on the top bar.
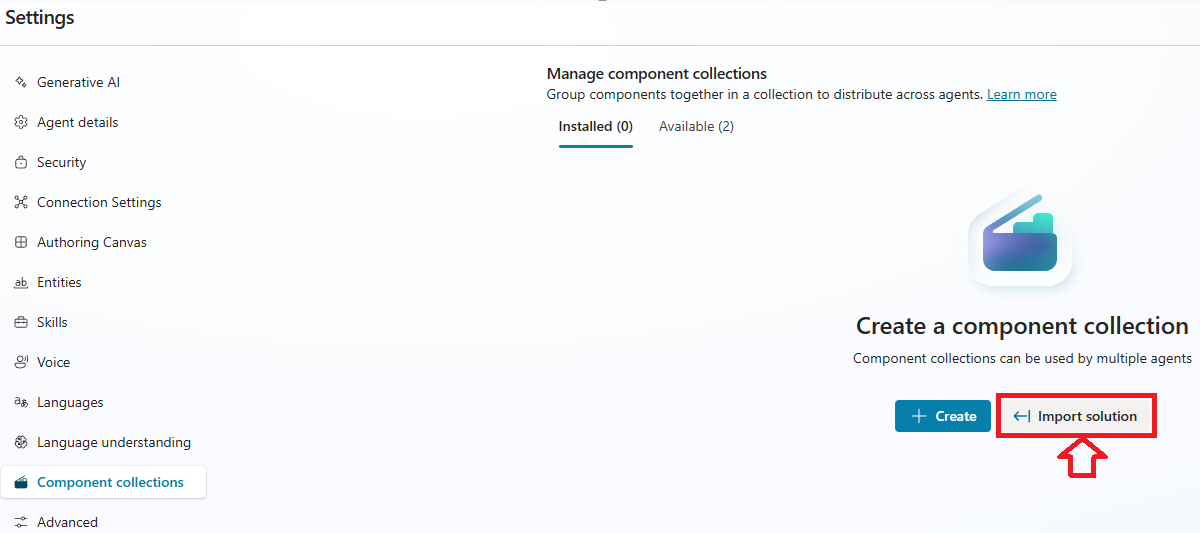
- Select Component collections on the side menu, and then select Import solution.
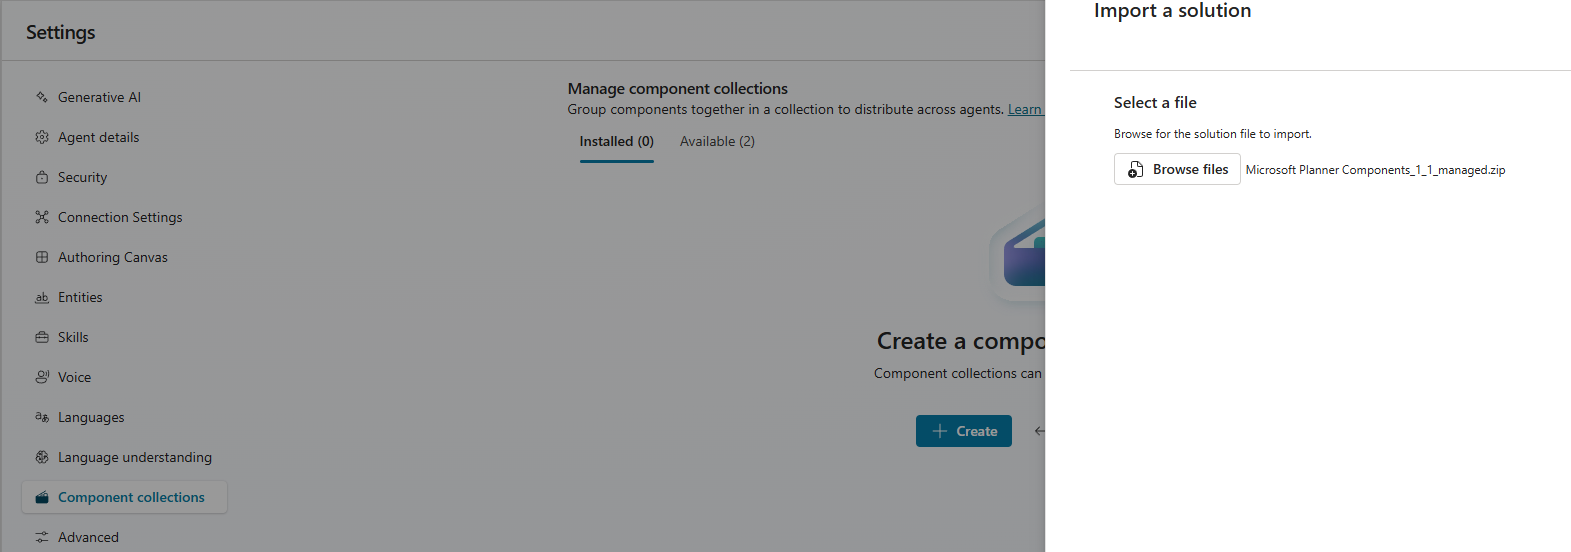
- Select Browse files and then choose the exported collection.
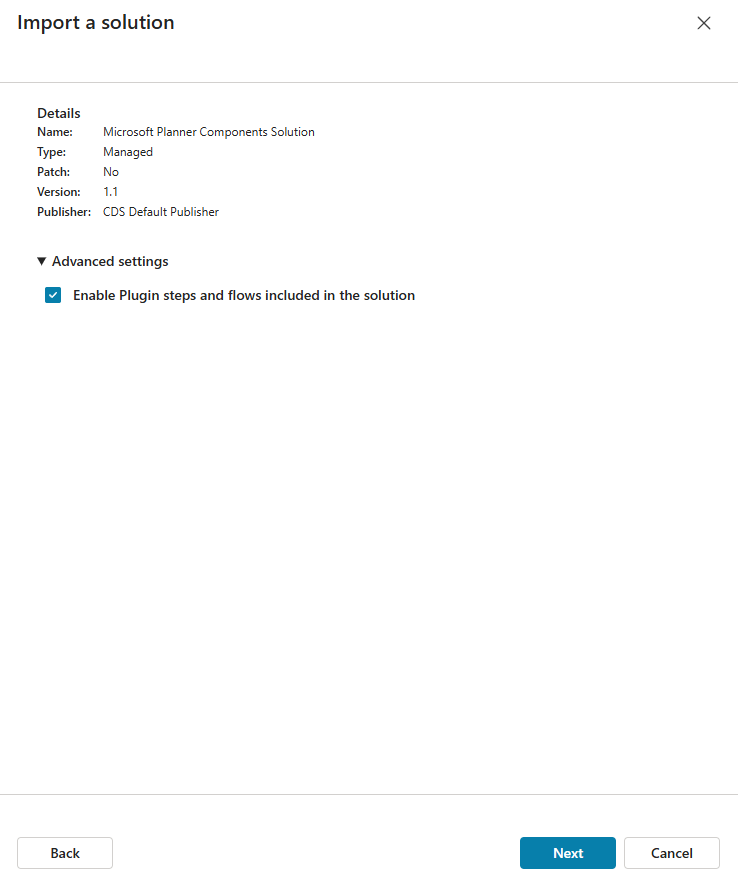
- Select Next. The import panel closes, and a message shows the collection was imported successfully.
Share collections with teammates:
- You can control and limit how agents are shared in your tenant by applying the Editor and Viewer permission assignments to individuals.
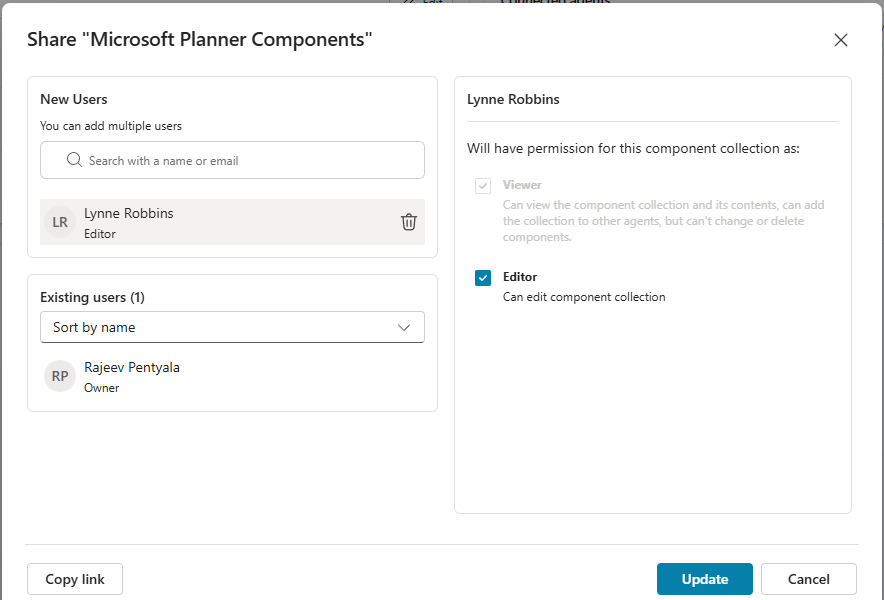
- Open the Component Collection and select the Share

- In the sharing panel, enter the names or email addresses of other people you want to share the component collection with. For each user, specify the permission roles (Viewer or Editor).
- By default the added user gets Viewer permission. Grant or Editor permission to let the user edit the Component Collection.
Hope you understood how Component Collections enable both reuse and restriction of agent components, giving you flexibility to share tools across agents or limit them to a single primary agent when required.
🙂


![[Step by Step] Beginner : Create a PCF control and add it to a custom page](https://rajeevpentyala.com/wp-content/uploads/2024/12/image-49.png)

Leave a comment