If you are a beginner, I recommend starting with the basics of Pipelines. In my earlier article, Configure and run ‘Pipelines in Power Platform’ , I explained how a maker can deploy a solution from DEV to TEST.
In this article, we’ll explore Delegated deployments using a Service Principal. With this approach, the pipeline stage runs under the identity of a delegate (the Service Principal) instead of the requesting maker.
Why we need Delegated Deployments?
When working with Power Platform pipelines, makers often don’t have elevated access to target environments. This is where Delegated Deployment becomes useful—it allows deployments to run securely using a Service Principal instead of the maker’s own account.
Now that you understand why Delegated Deployments are important, let’s start with the prerequisites.
Prerequisites:
Create a Service Principal in Entra ID:
The first step is to create a Service Principal in Microsoft Entra ID. You can do this using the pac admin create-service-principal command:
- From the console, run the command and pass the host environment’s ID in the
--environmentparameter.
pac admin create-service-principal --environment bd4e2fff-733f-ec15-b429-ee10b2f64800 --name spapipelines
- Once the command executes successfully, copy the details like Application ID, Client Secret and Tenant Id

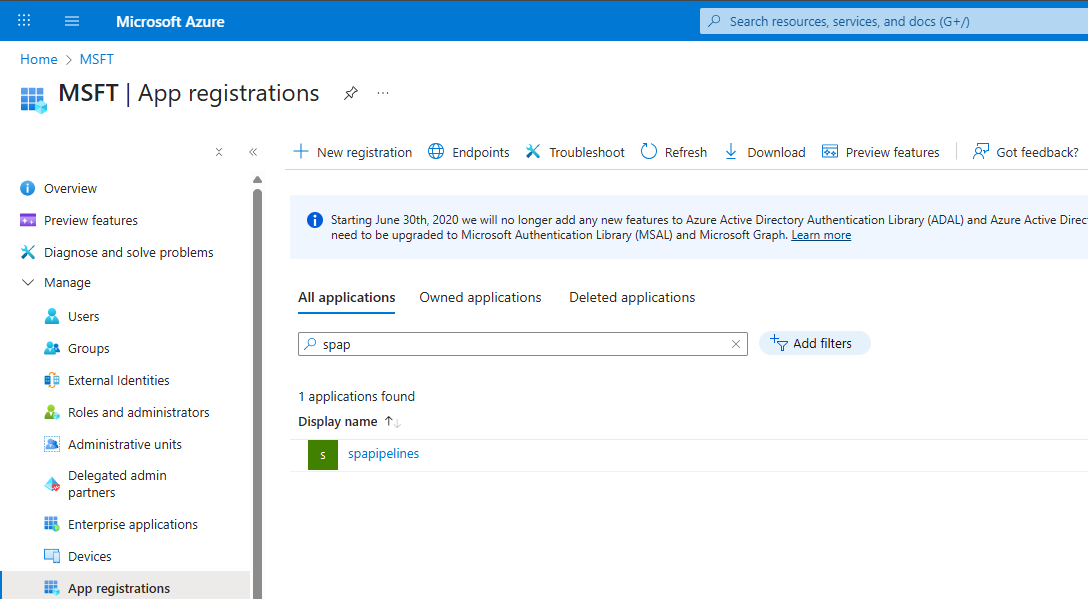
- Next, go to the Microsoft Entra > App registrations and you will see the newly created Service Principal under the App registrations
Once the Service Principal got created, make sure to add yourself as an owner of the Service Principal.
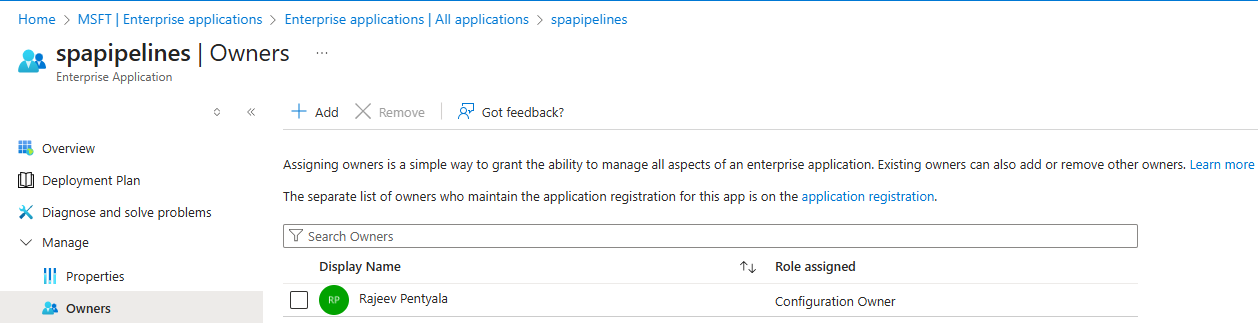
Add yourself as the owner of service principal:
You must be an owner of the enterprise application (service principal) in Entra ID. Follow these steps to add yourself as an owner:
- Go to Enterprise applications in Microsoft Entra ID and select the Service Principal you created.

- Open the Owners tab and add yourself as an owner.
With these two steps, the Service Principal is created and the necessary permissions are configured on the Entra side.
Next, we need to assign the required Dataverse Security Roles to the Service Principal.
Assign Datavesre Security Roles to Service Principal:
We need to give the Service Principal the right permissions in Dataverse.
- Go to the Power Platform admin center
- Open the Host Environment.

- Click on S2S apps and assign the Deployment Pipeline Administrator security role.
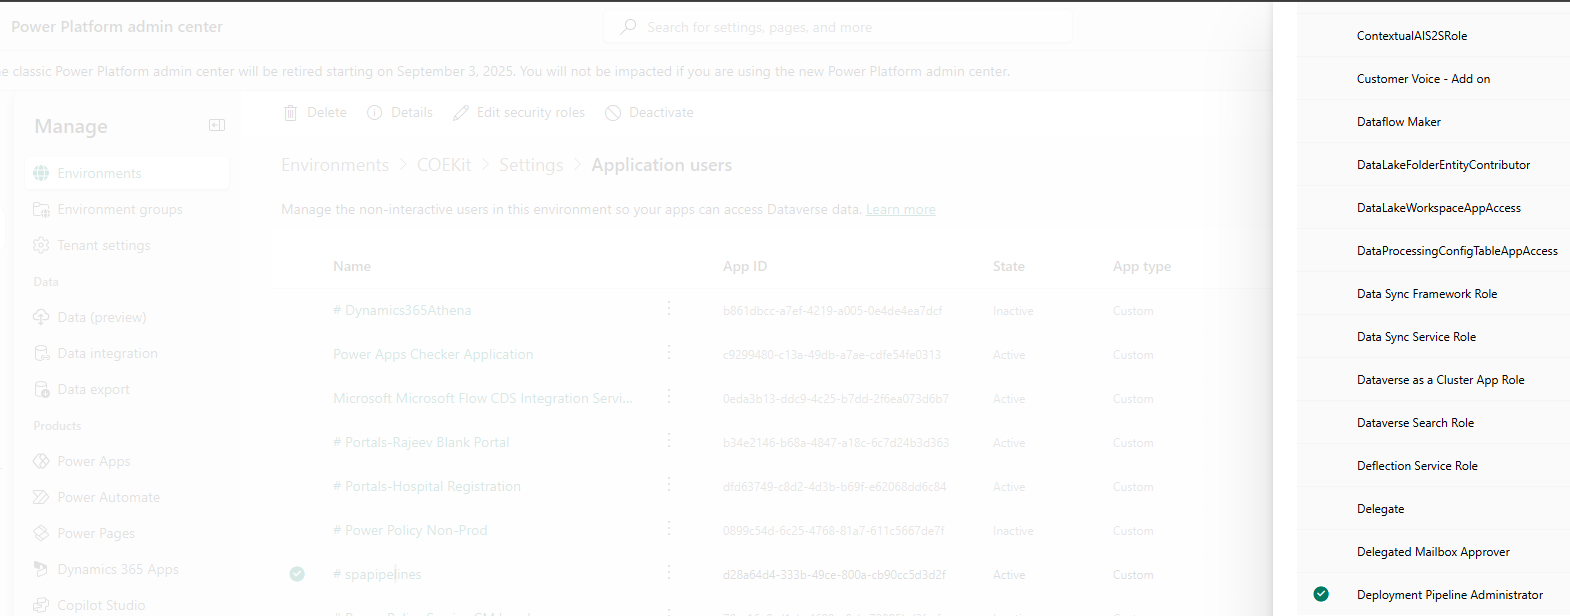
- Open each target environments and assign the System Administrator security role. Lower permission security roles can’t deploy plug-ins and other code components so full System Administrator access is required.
- In my setup,
- I granted the System Administrator security role to spapipelines in my DEV environment.

- Granted the System Administrator security role to spapipelines on my TEST environment.

With the Service Principal created and the required security roles assigned, the next step is to set up an approval mechanism so that delegated deployments can proceed without getting stuck in a pending state.
Create a Approval cloud flow within the pipelines host environment:
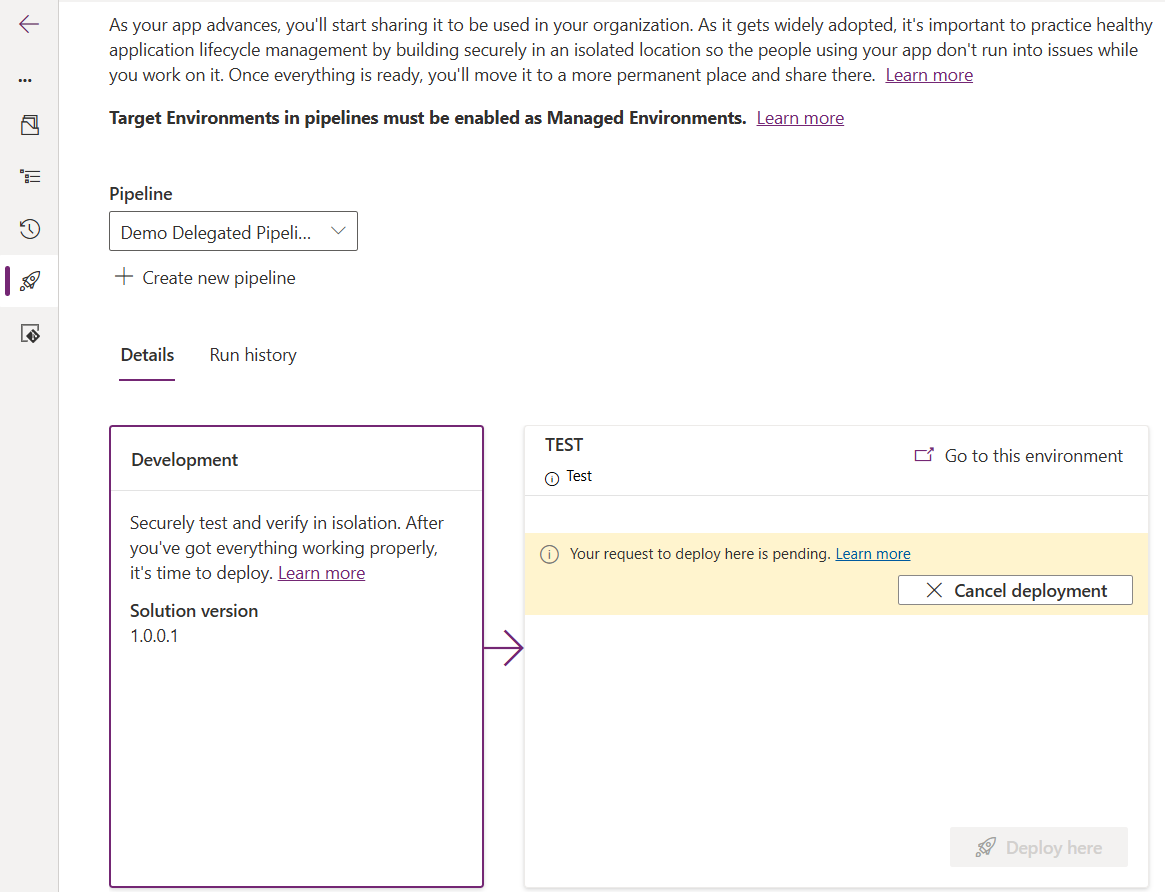
This is a crucial step. All delegated deployments remain in a Pending state until they are approved. Ensure you configure a Power Automate approval flow or other automation, to process approvals.
Following is an example of a deployment stuck at Pending state without the approval logic.
Here’s the good news: you don’t need to build this flow from scratch. Microsoft provides a sample unmanaged solution that you can download, import into your pipelines host environment, and then customize for your needs.
Steps to Import and Configure the Sample Solution
- Open the Host environment and import the solution.
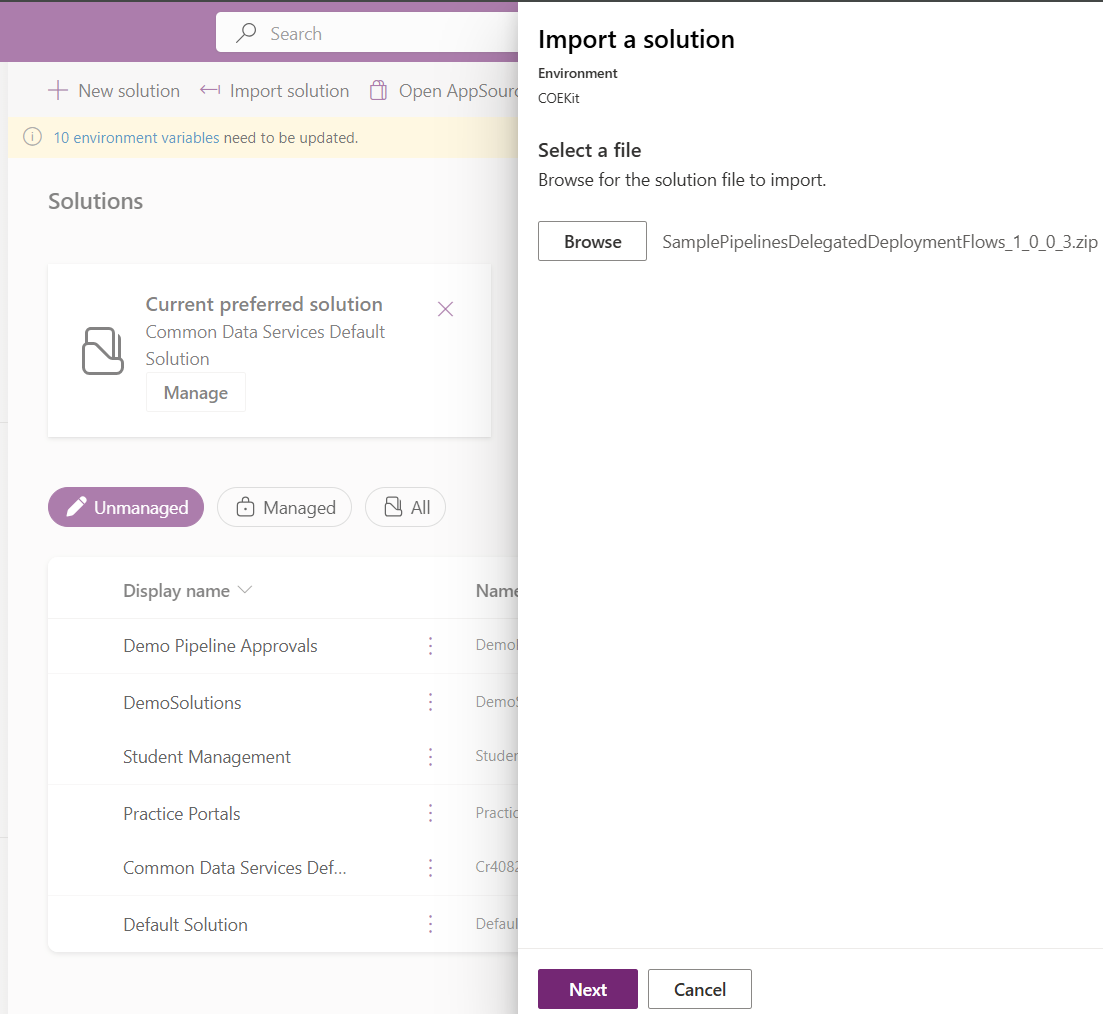
- Configure the Connections

- Important : Create a Dataverse connection of type Service Principal pointing to the Service Principal you created earlier. Map this connection to the Dataverse Service Principal Connection connection reference thats part of the sample solution.

- Provide the email of the group or individual user who approve the deployments.

- After the solution import, open the SPN Delegated Deployment Approvals flow in Edit mode.

- By default, this flow configured to auto approves the deployments if the stage is non-prod. You can customize as per your requirement. For example, I modified the flow to auto-approve deployments only if the stage name is TEST.
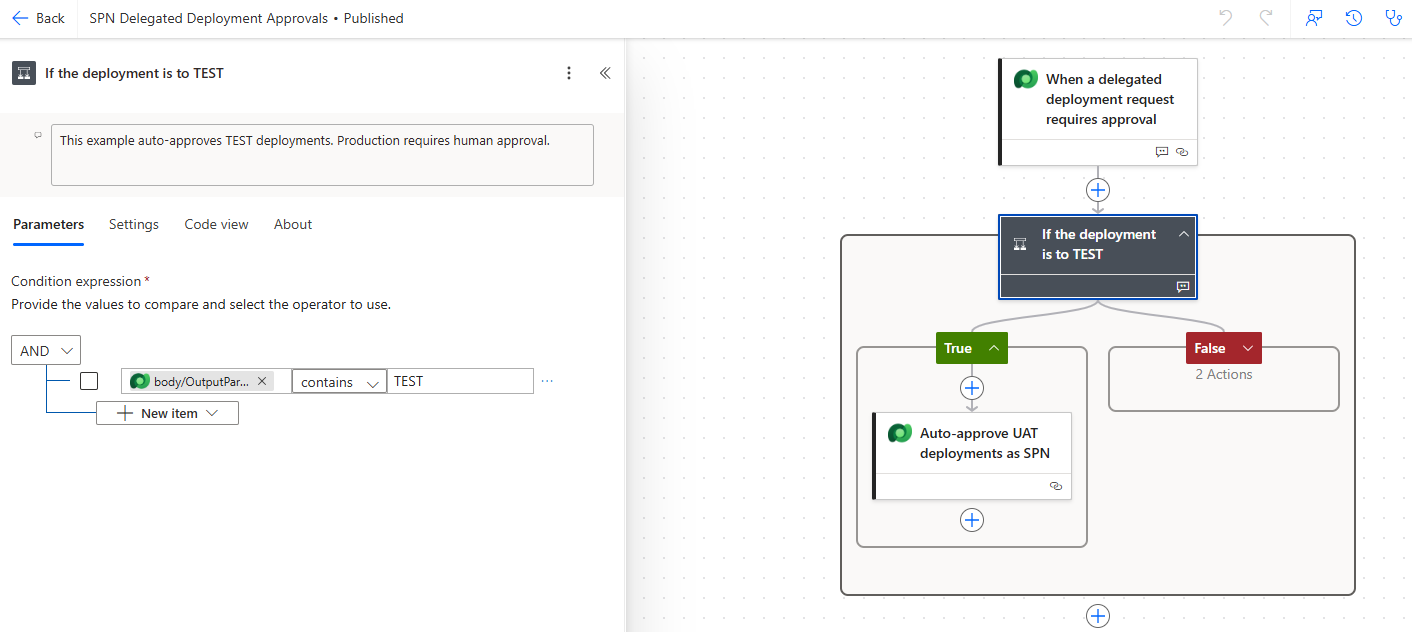
- Save and Publish the flow.
Summary of Prerequisites:
Now we have completed the prerequisites. In summary, we have:
- Created a new Service Principal.
- Added the approver as an Owner of the Service Principal.
- Added the Service Principal as Application User in all the Dataverse environments and granted necessary security roles.
- Configured the Deployment Approval Pipeline by downloading and customizing the sample solution.
With these steps complete, let’s proceed to the pipeline configuration.
Configure delegated deployment on a pipeline stage:
- From your HOST environment, open the Deployment Pipeline Configuration model-driven app.
- Under Pipelines, create a new pipeline.

- Under Deployment Stages (Deployment Pipeline), click on New Deployment Stage.
- Select the Target Deployment Environment ID as Test environment.

- Next, select the Is Delegated Deployment as Yes
- Choose (check) Is Delegated Deployment
- Select Delegated Deployment Type as Service Principal
- Enter the SPN Client Id
- Select Save

- Post configuration the Deployment Pipeline looks as below.

Now that the pipeline is configured successfully, it’s time to test it.
Test the Deployment Pipeline:
- Navigate to your DEV environment from the Maker Portal.
- Open the solution which you would want to deploy to TEST.
- Select Pipelines
- Choose the Pipeline and click on Deploy here.

- In the Deploying Solution pane, click Next

- Configure Environment Variables if you have them in the solution. Click Next
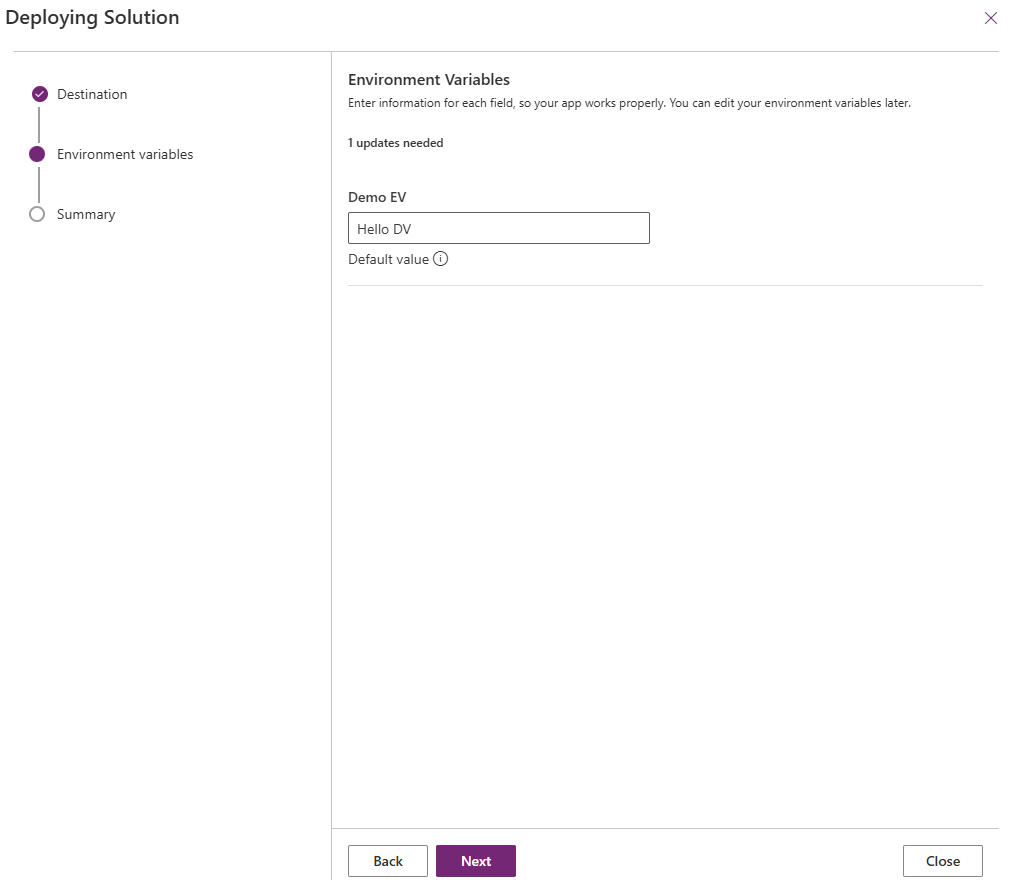
- Click Deploy

- The solution first gets exported from DEV and imports to TEST.

- Once the deployment pipeline run is complete, go to the TEST environment and verify that the solution has been imported.
- You’ll notice that the solution owner is the Service Principal, since the deployment was executed under its identity.

- You can also review the run history of SPN Delegated Deployment Approvals flow.

- In my case, since the stage name was TEST, the flow automatically approved the deployment by calling the Dataverse
UpdateApprovalStatusunbound action

Refer this documentation for more details: Deploy pipelines as a service principal.
Hope you learnt the importance of delegated deployments with a Service Principal. This approach allows secure and automated deployments without giving makers elevated access in target environments.
🙂


Leave a comment