Let’s say you are storing sensitive information such as credit card numbers, SSNs, or users’ email addresses, and you want to protect this information during customer interactions to prevent data leaks. Masking Rules help by replacing sensitive data with masked strings.
Masking Rules use regular expressions to identify specific patterns, for example a credit card number, social security number, and email address.
Scenario:
- I have a custom table ‘Customer’ with columns Email and SSN.

- I will implement masking rule on the SSN column.
Lets get started with configuring the masking rule.
Configuring Masking Rules:
To create a Masking Rule follow these steps:
- Open an existing or Create a new solution.
- Go to Security > Secured masking rule

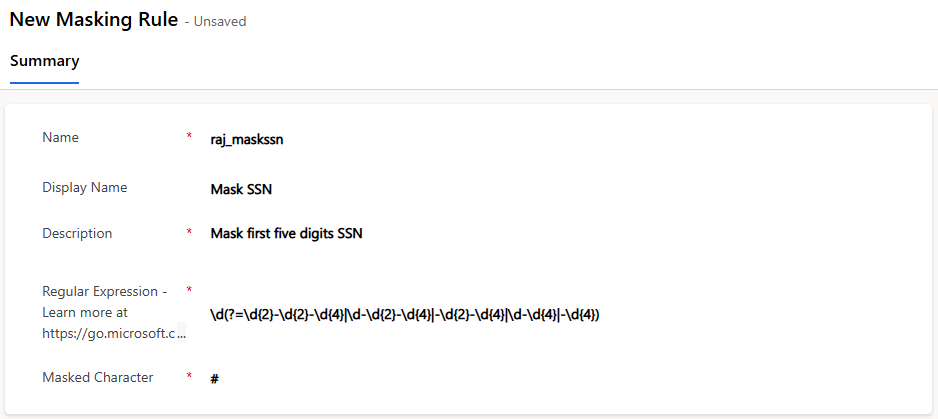
- In the New Masking Rule form enter following details:
- Name : Enter in this format:
prefix_name - Display Name and Description : Provide meaningful names
- Regular Expression : Regular expressions to identify the patterns. Use copilot to generate the regular expressions. For example, to mask the first five digits of a SSN, use:
\d(?=\d{2}-\d{2}-\d{4}|\d-\d{2}-\d{4}|-\d{2}-\d{4}|\d-\d{4}|-\d{4}) - Masked Character : Masked character symbol
- Name : Enter in this format:
- Save the masking rule.
- You can also test the configuring rule as shown below.

Now that we have configured the masking rule. Lets add the rule to our Customer table column.
Add a masking rule to a column:
To configure SSN masking rule on my Customer table’s SSN column:
- Open the SSN column
- Expand Advanced options.
- Check Enable column security if the box isn’t checked.
- Select the Masking rule dropdown.
- Select the Masked SSN masking rule which we created in previous section.

- Save
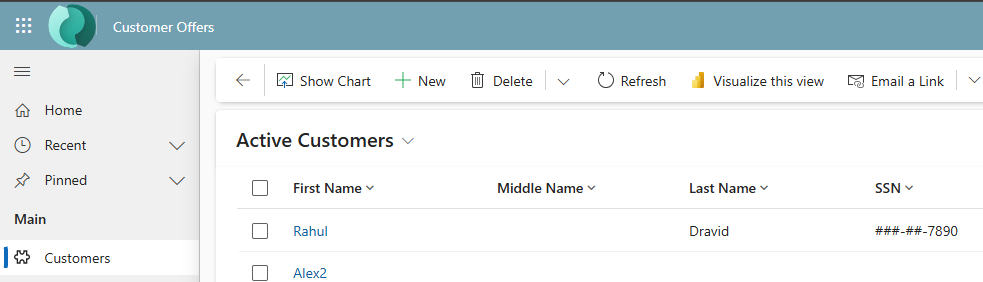
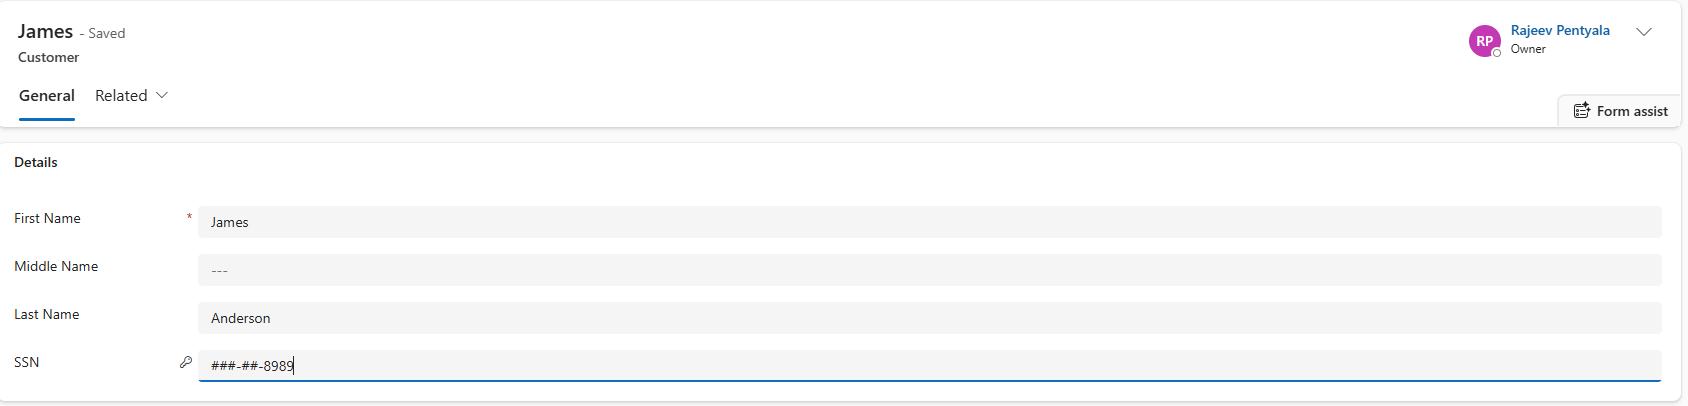
Test the masking rule:
- Create a new Customer record with SSN.

- Save. Once the record is saved the SSN will be masked as shown below.

- The SSN value will be masked even on the grid.
We’ve completed the masking rule configuration and applied it to a column.
By default, users will only see the masked value of a field. Now, let’s look at how to grant permission to read the actual value of a masked field.
Grant permissions to a secured column with a masking rule:
- Sign in to the Power Platform admin center.
- Select the environment.

- Select Settings > Users + permissions > Column security profiles.
- Select an existing profile, or select New Profile, enter a name, enter a description, and then select Save.

- Once saved, open the SSN Masked Profile record
- Select our masked column, which is raj_ssn
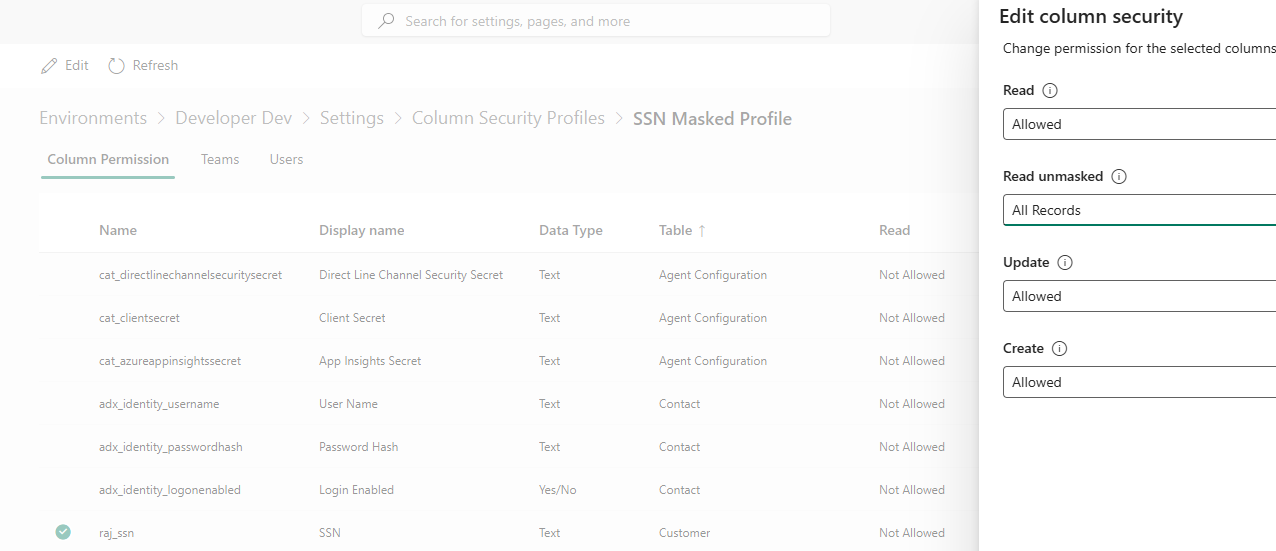
- Choose the options. Refer this table for details:

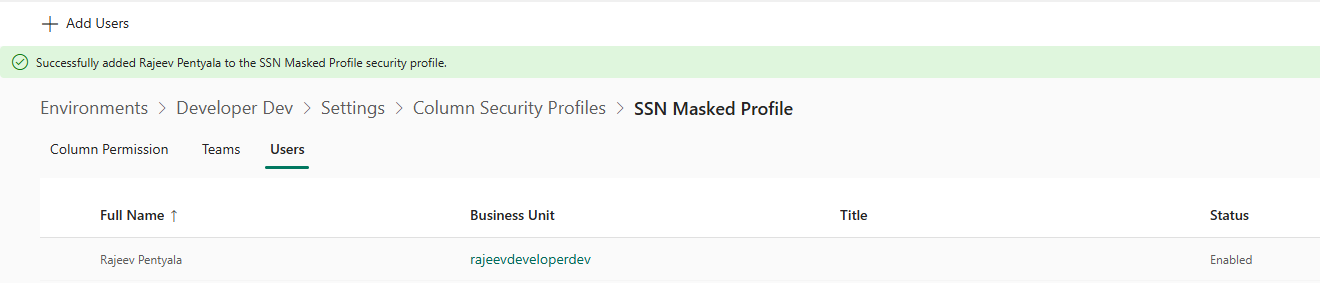
- Add the Users or Teams group to the Column Security Profile.

- Once added the screen looks as below.
We have completed the Column Security Profile configuration. Lets see how the permitted users can access the masked column.
Reading unmasked values on the form:
Users who were granted permission to read unmasked fields will see a button to read the unmasked values on the form.
Note : For some reason the “Read” icon was not showing up for me.
- I checked the form and don’t see the Read icon.
- Even the Web API returning me only the masked values.

As per the documentation
- The Read icon is currently visible only to users with the System Administrator security role with Read Unmasked permissions. We’re working on enabling visibility for non-administrator users in an upcoming update.
- Masked values are displayed on the Detail area of a Main form.
I’m already a System Administrator. I even tried creating a new tab named Detail, but had no luck.
I’m not sure if this is a bug, as the feature is still in preview. I’ll update this blog post once I’m able to resolve it.
🙂


Leave a comment