Did you know that, You can call Custom Connectors as connector actions in your copilot, from the Call an action node in conversational topics, and through cloud flows as actions or within topics.
In this article, I’ll cover the following concepts:
- Choose a REST API and create a Custom Connector
- Create a Copilot
- Call the Custom Connector as connector actions in copilot
Lets get started.
Choose a REST API and create a Custom Connector:
- As we know that, A custom connector is a wrapper around a REST API that allows Logic Apps, Power Automate, or Power Apps to communicate with that REST or SOAP API.
- In this blog post, I will be creating a new Custom Connector using the Random Joke REST API
- JokeAPI is a REST API that serves uniformly and well formatted jokes. It can be used without any API token, membership, registration or payment.
We’re now ready with our Jokes API. The next step is to create a Custom Connector, which acts as a ‘wrapper’ around the API.
Create Custom Connector:
- Sign in to Power Apps or Power Automate.
- On the left pane, select Data > Custom connectors.
- Select New custom connector > Create from blank.
- Enter a name for the custom connector, and then select Continue.
- In the Host provide v2.jokeapi.dev

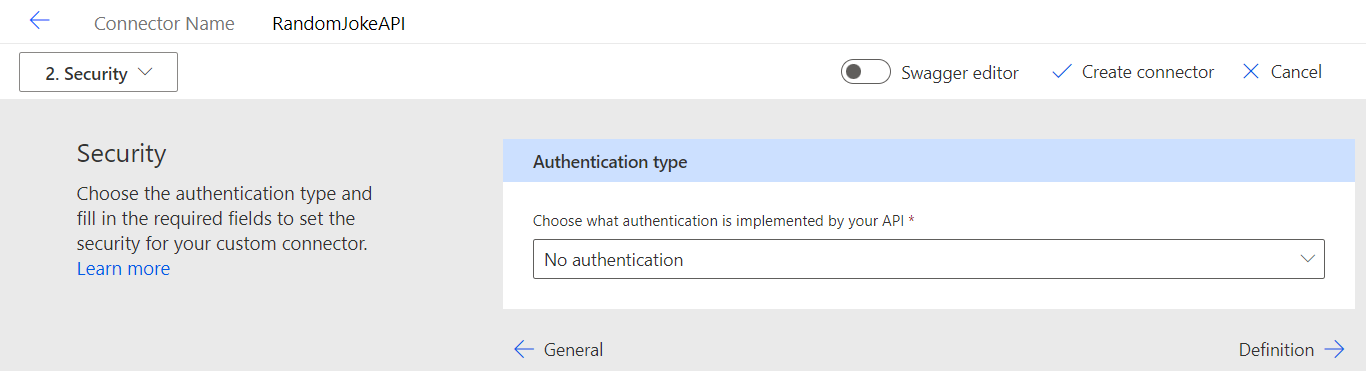
- Go to Security tab and choose Authentication Type as No authentication
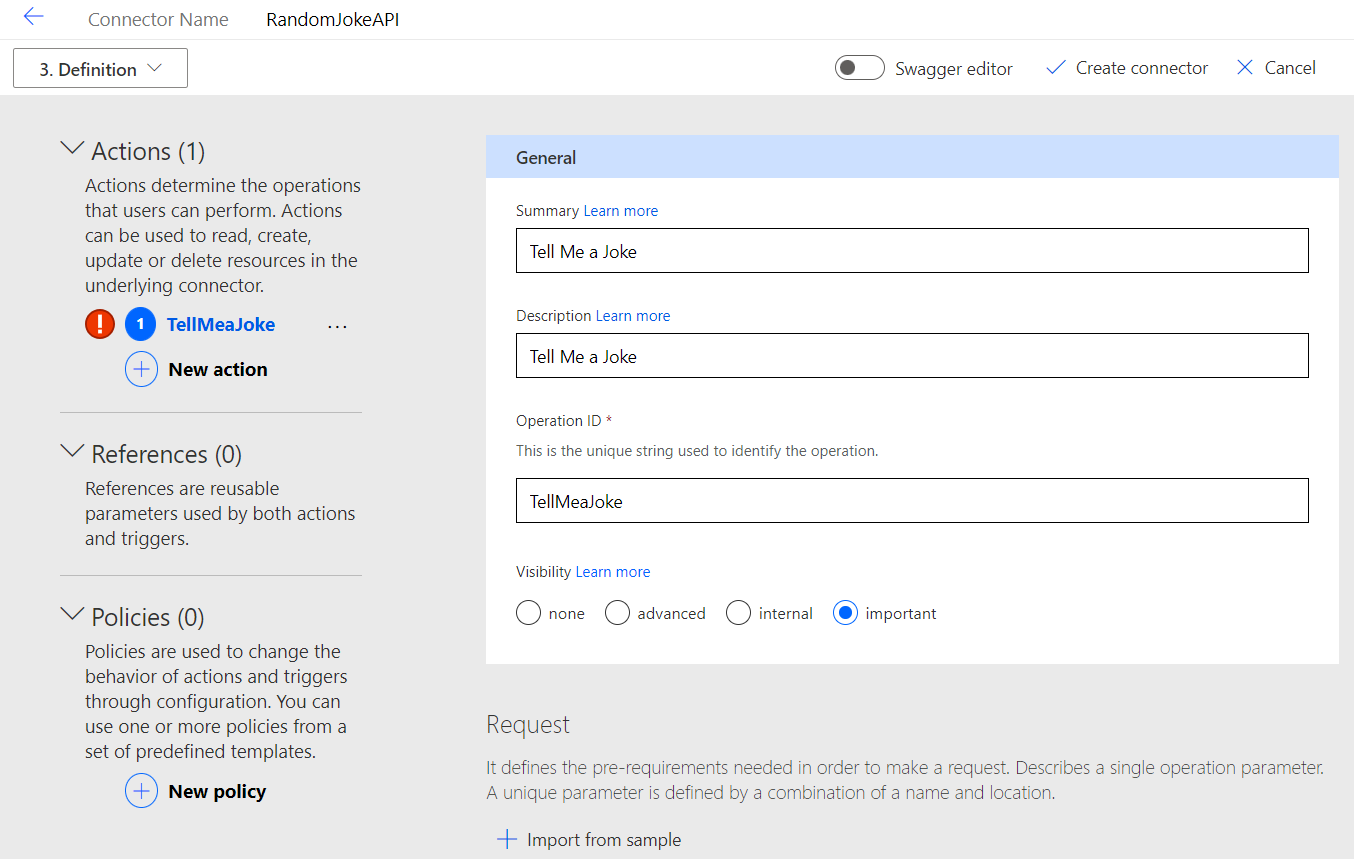
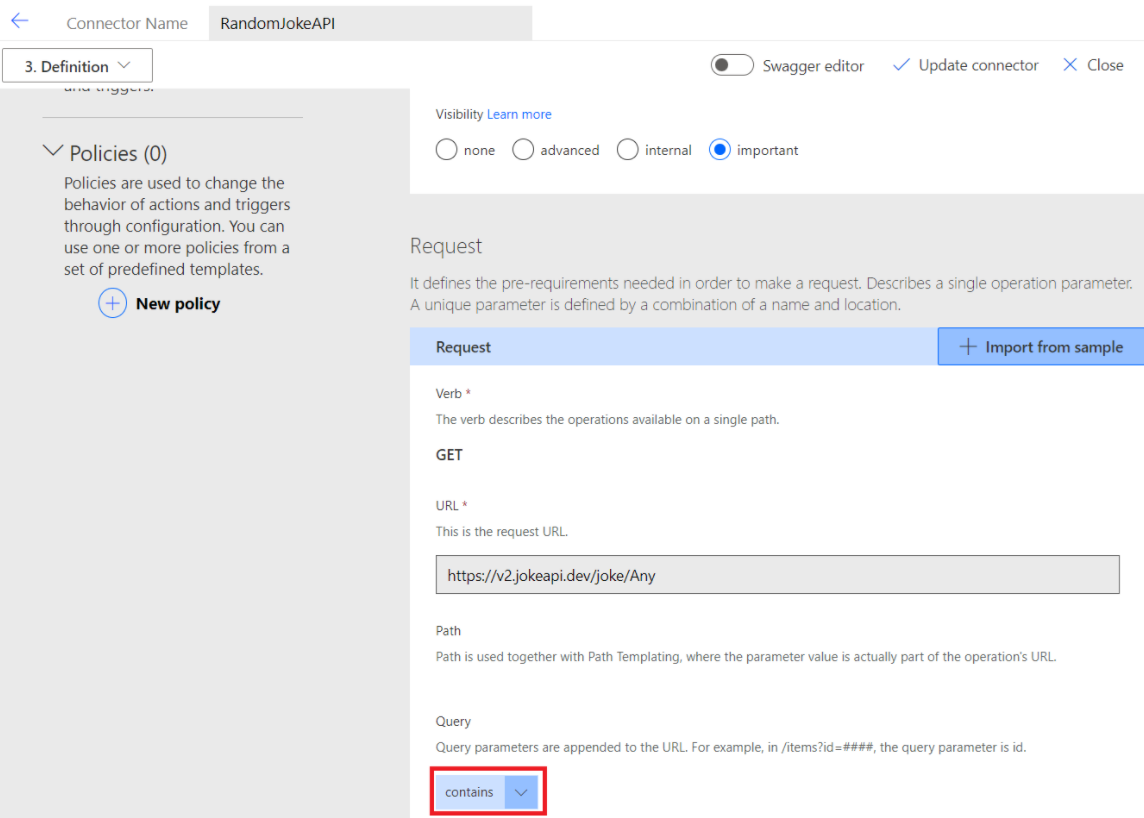
- Next go to Definition tab and create a new Action as shown below.
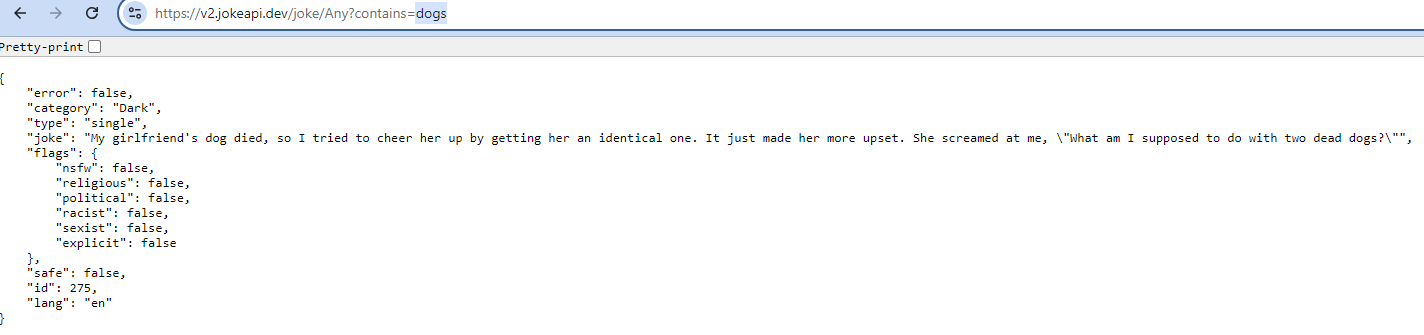
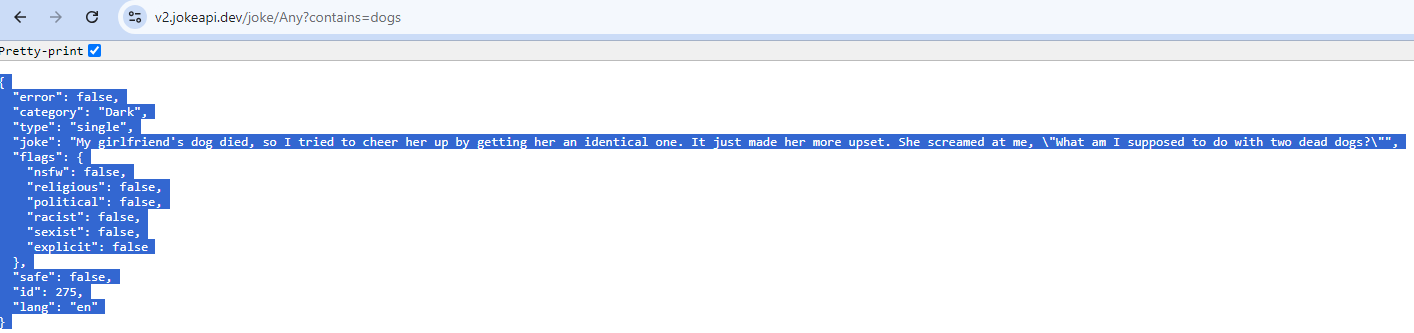
- As we saw in the previous step (Refer screen below), to get a joke using the Jokes API, we need to pass the
containsas request parameters.

- Since this Custom Connector we are creating is a wrapper on top of the Jokes API, we need to define the request parameters in our Action.
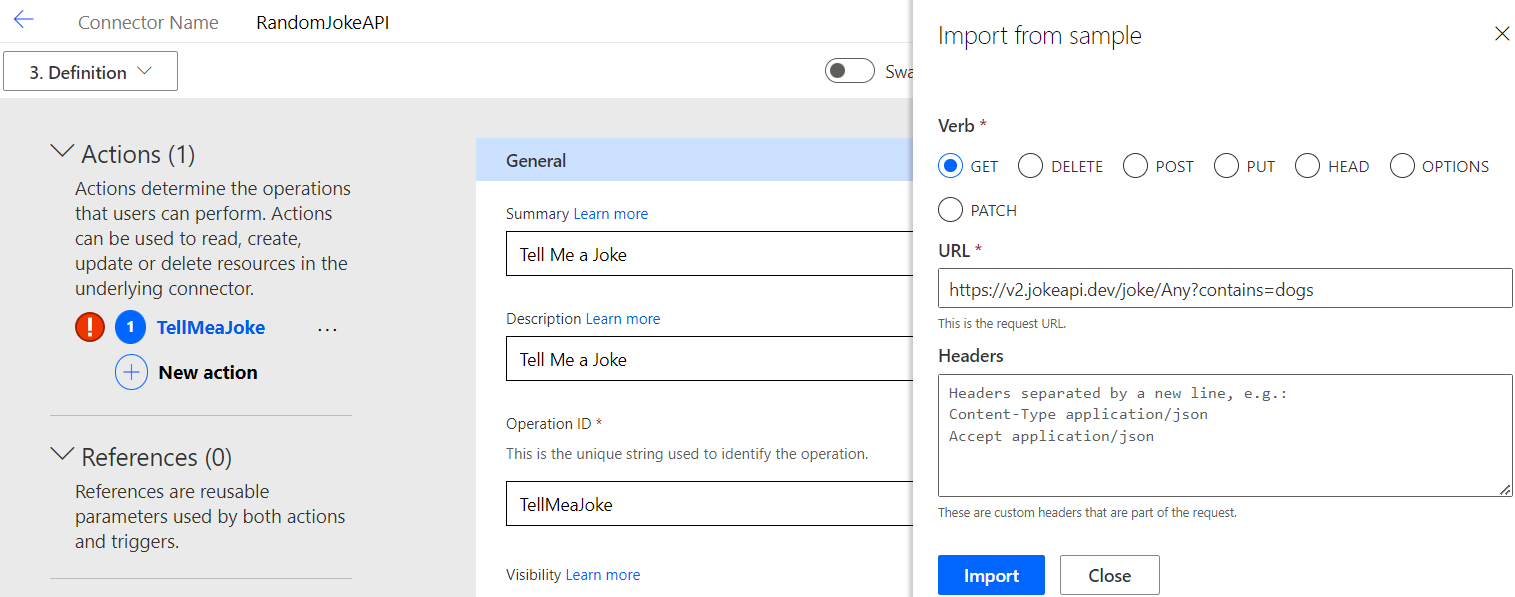
- Click on Request > Import from sample

- In the Import from sample pane, select Verb > GET and in the URL and paste the Jokes api URL that we tested in the previous steps into the URL field. Then, click Import.
- You will see a parameter contains under the Query section as shown below.

- Next we need to let our Custom Connector know about the Jokes API’s Response structure.
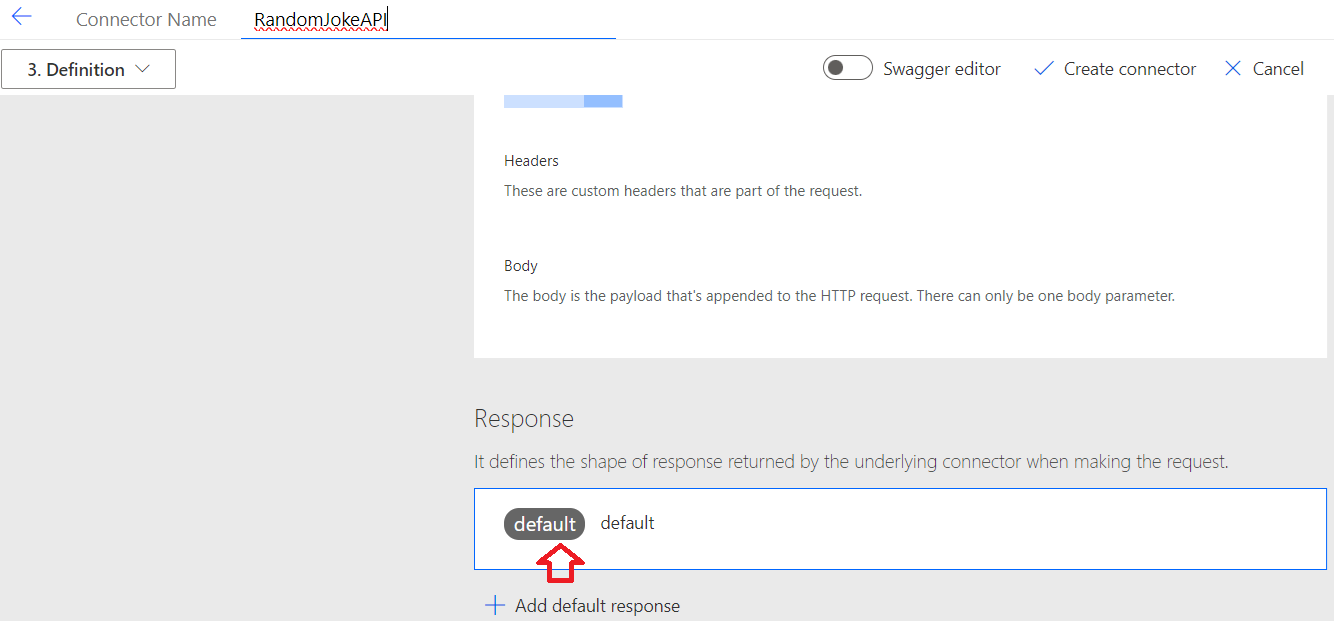
- Click on + Add default response
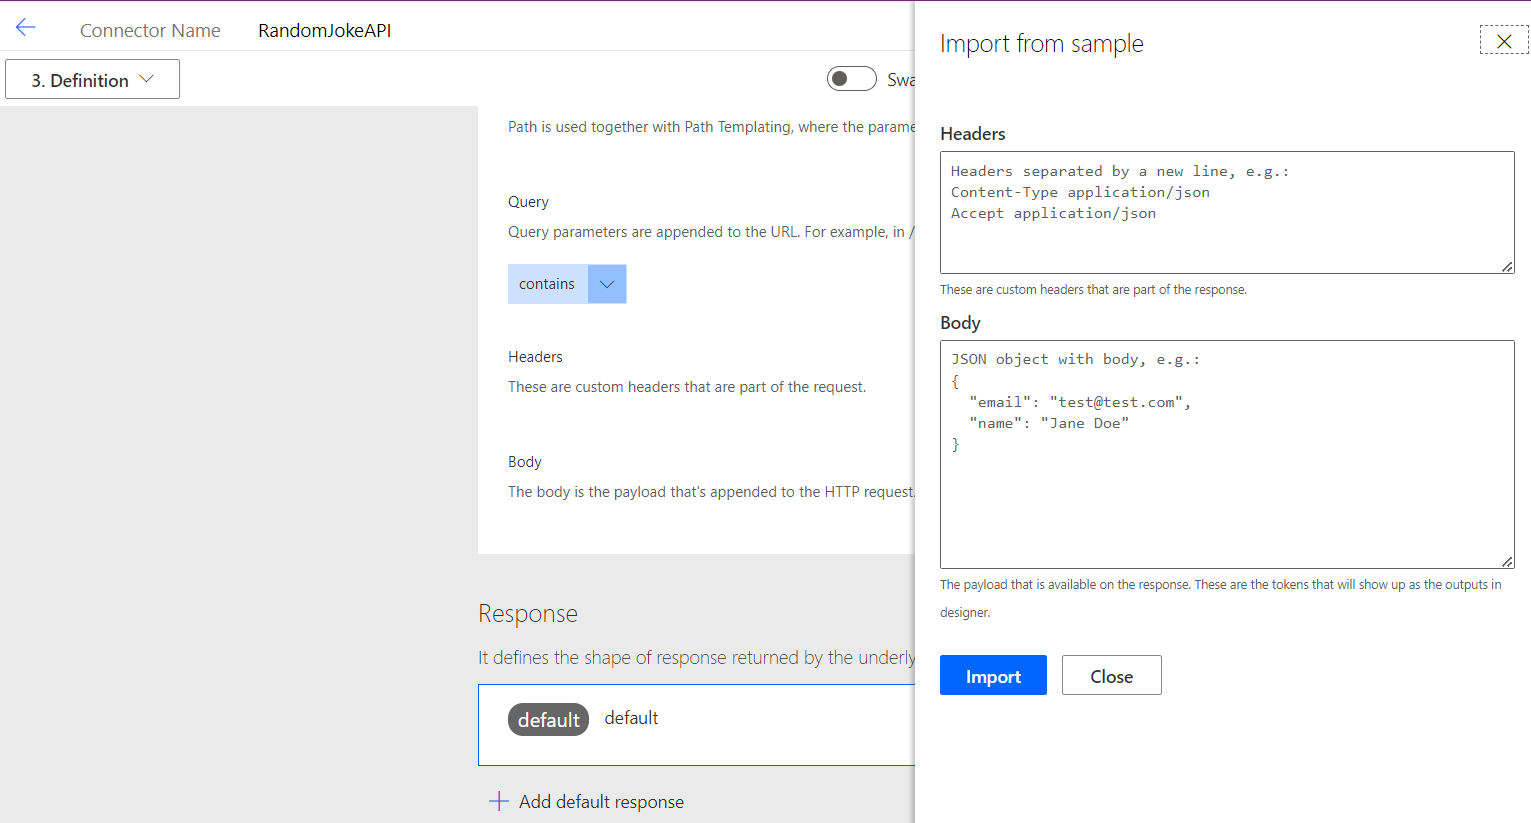
- Now, return to the browser tab where we tested the Jokes API and copy the entire response.
- Paste the response json under Body and click on Import

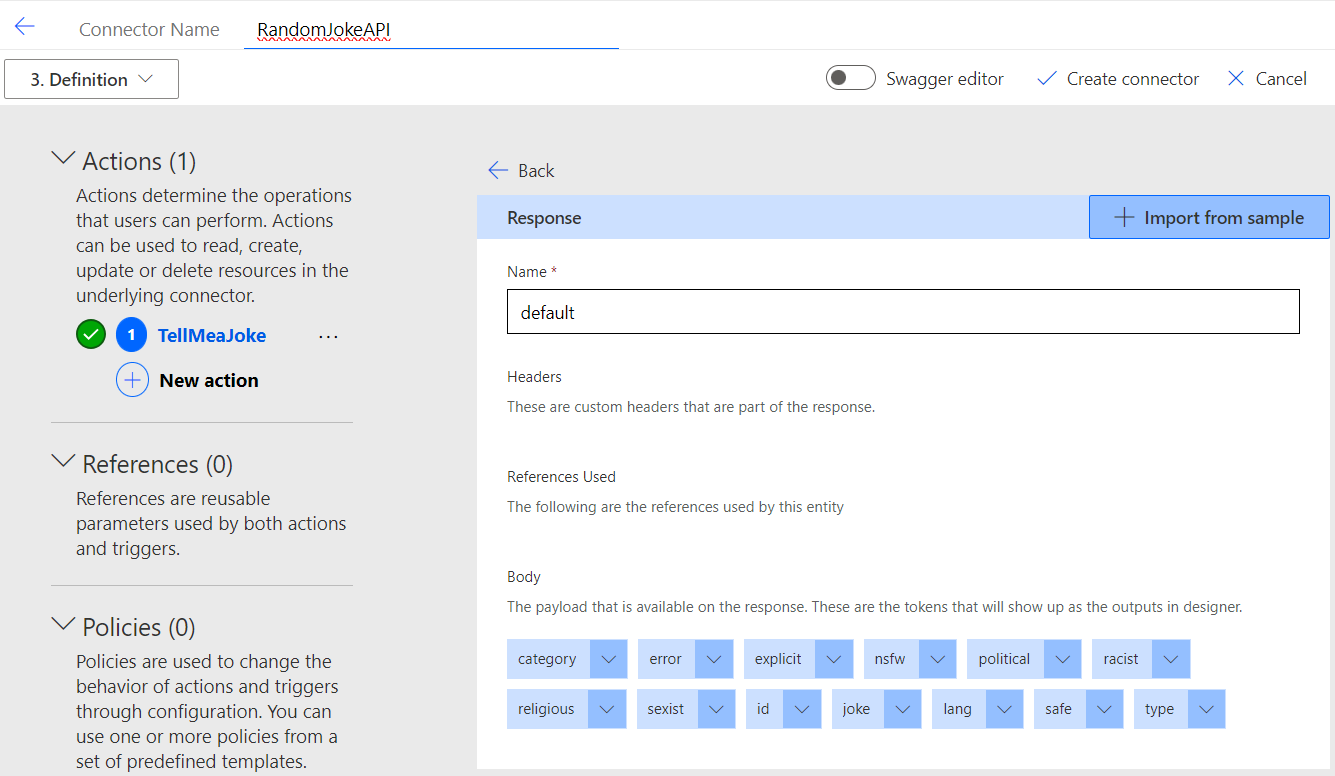
- To see what was generated by importing the response, click on default. This step is optional.
- You will see the response parameters from the Jokes API listed under the Body.
- Click on Create connector to save the Custom Connector.
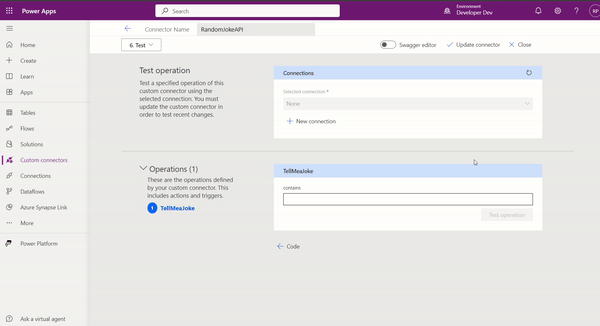
Test the API:
We’ve finished configuring the Custom Connector. Now, go to the Test tab to run a test. First, you’ll need to create a connection.
With that, we’ve completed the configuration of the RandomJokesAPI Custom Connector. Now, let’s use it in our Copilot.
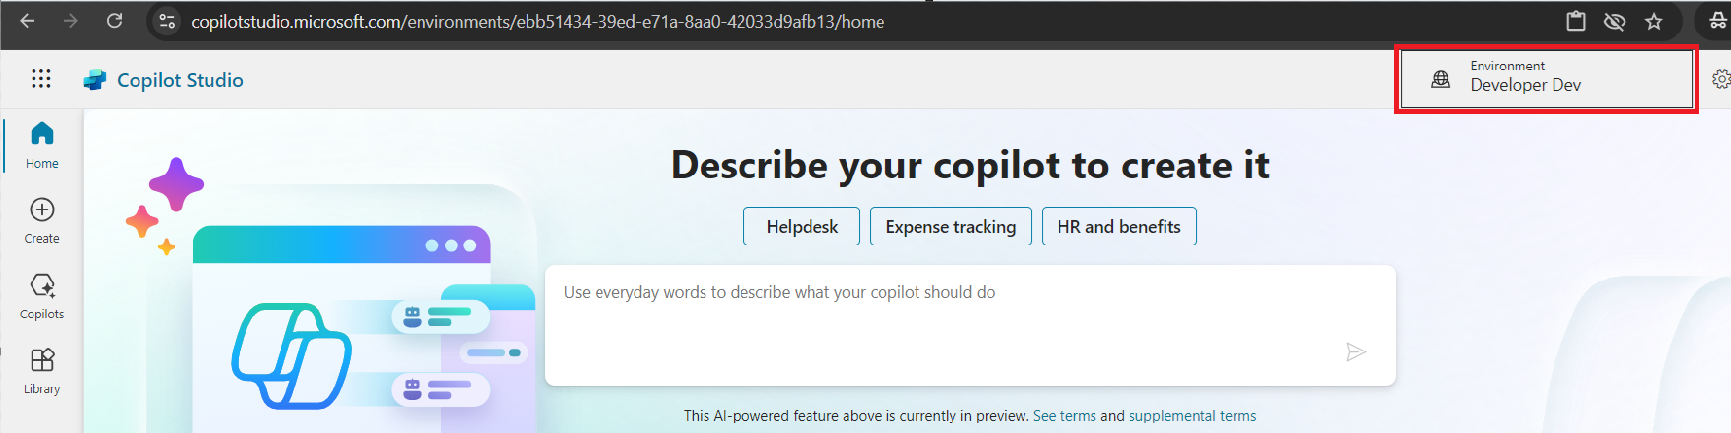
Copilot studio signup:
If you don’t have a Copilot Studio subscription already, sign up to trial using this link
Create a Copilot and use the RandomJokesAPI Custom Connector:
- Login to the Copilot Studio.
- Make sure you select the same environment, where you have created the Custom Connector.
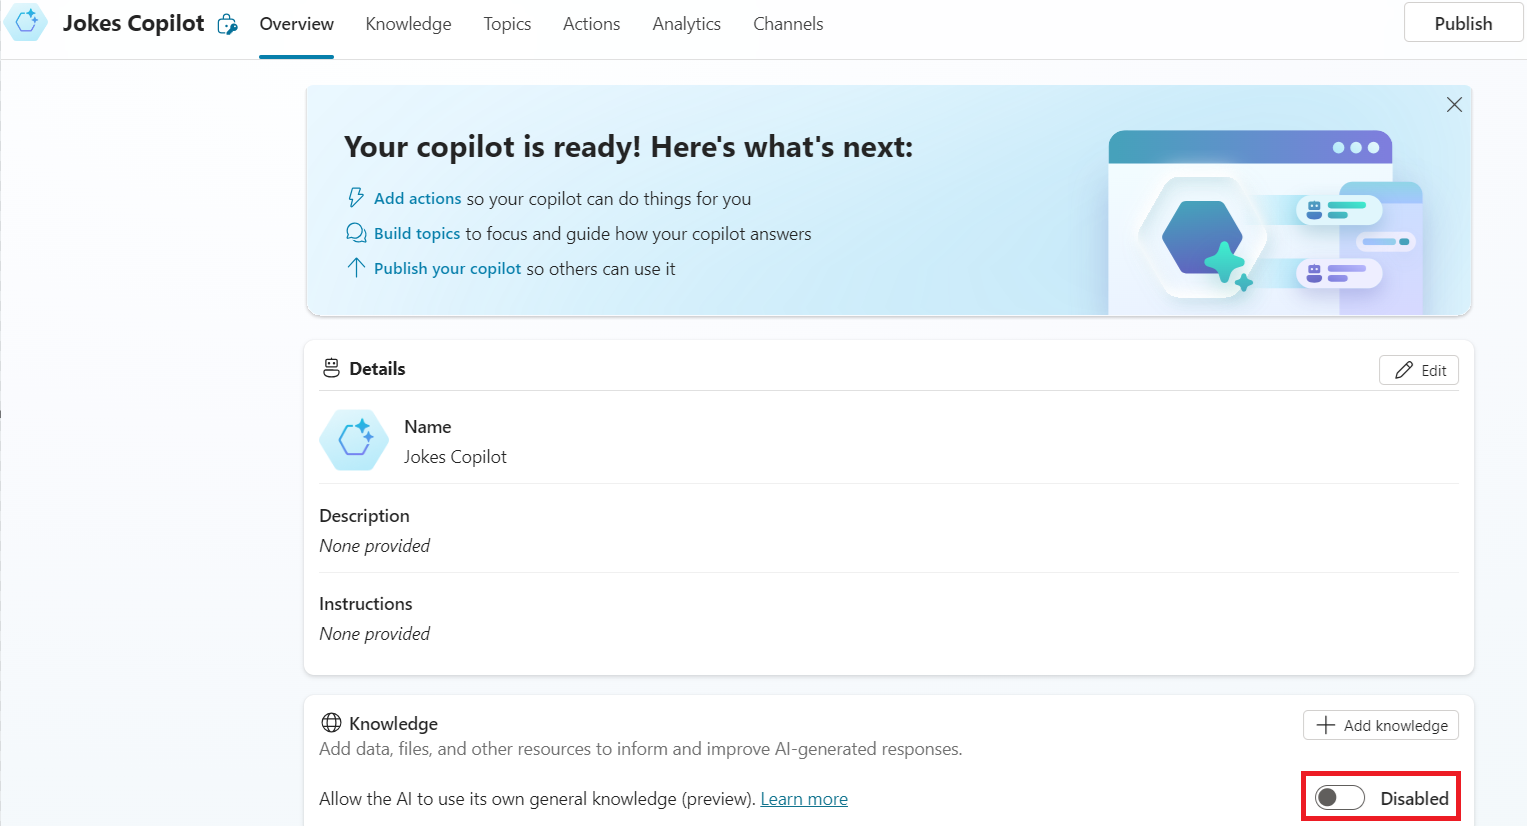
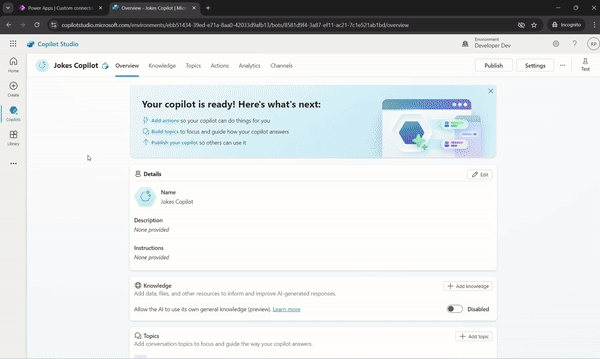
- Under Copilots tab click on + New copilot
- Provide a Name and click on Create

- You can disable the Knowledge feature, as we want our Copilot responses to rely solely on the Custom Connector (i.e., RandomJokesAPI)
Define an Action:
Actions are used by the copilot to respond to users automatically. We need to add our RandomJokesAPI Custom Connector as an Action to the Copilot.
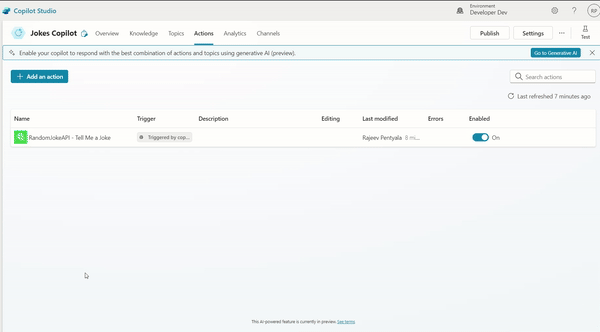
- Select Actions to view actions for the copilot.
- Select + Add an action.
- In the Choose an action (preview) wizard, search for an action you want to use and select it.
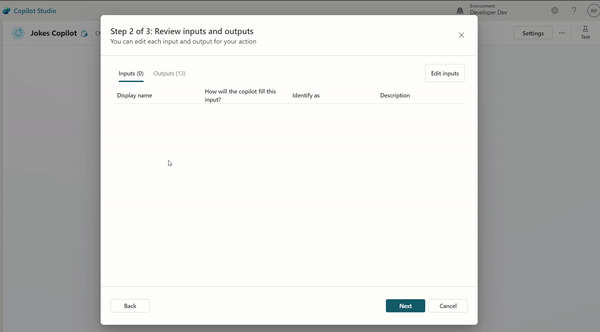
- In the Step 2 of 3: Review inputs and outputs we need to add the input parameter manually. If you remember, our TellMeaJoke action requires contains as an input parameter. For some reason, the input parameter is not being rendered by default.
- Go ahead and configure the inputs
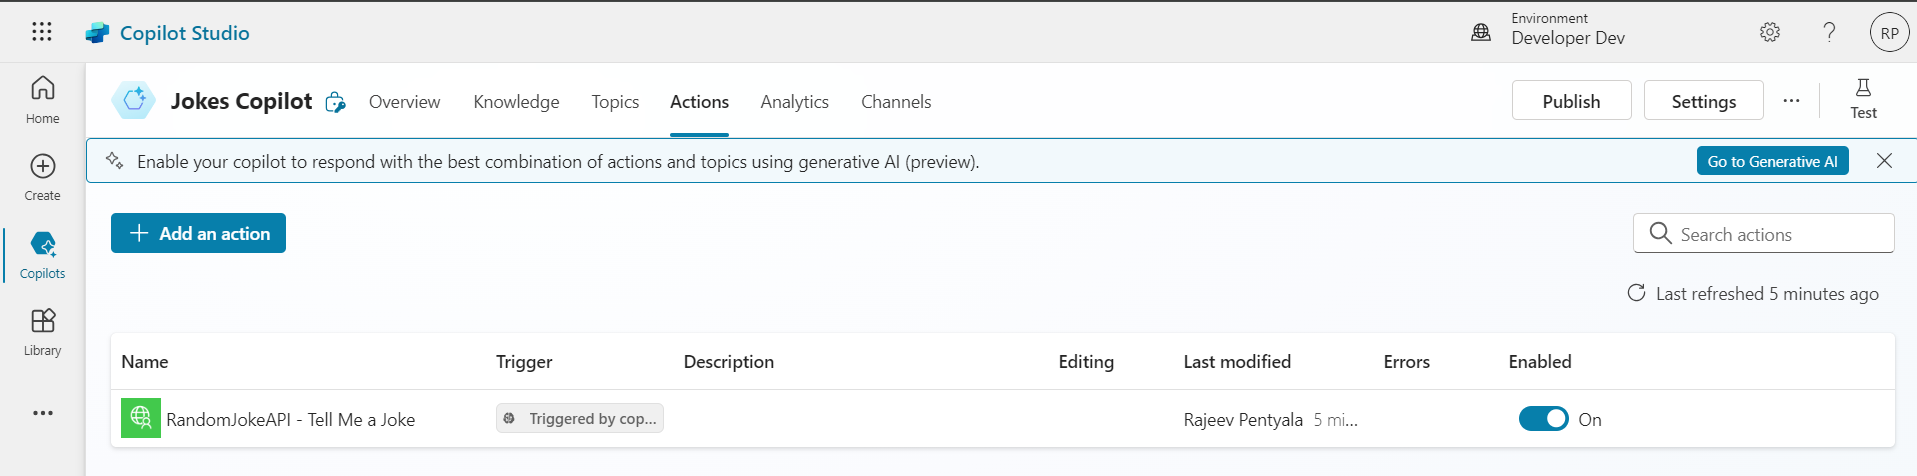
- Once you add the Custom Connector as an Action, it looks as below. The name of my Action is Tell Me a Joke.
Add Topic:
Topics are the core building blocks of a copilot. Topics can be seen as the copilot competencies: they define how a conversation dialog plays out.
- On the top menu bar, select Topics.
- Select Add a topic, and select From blank.
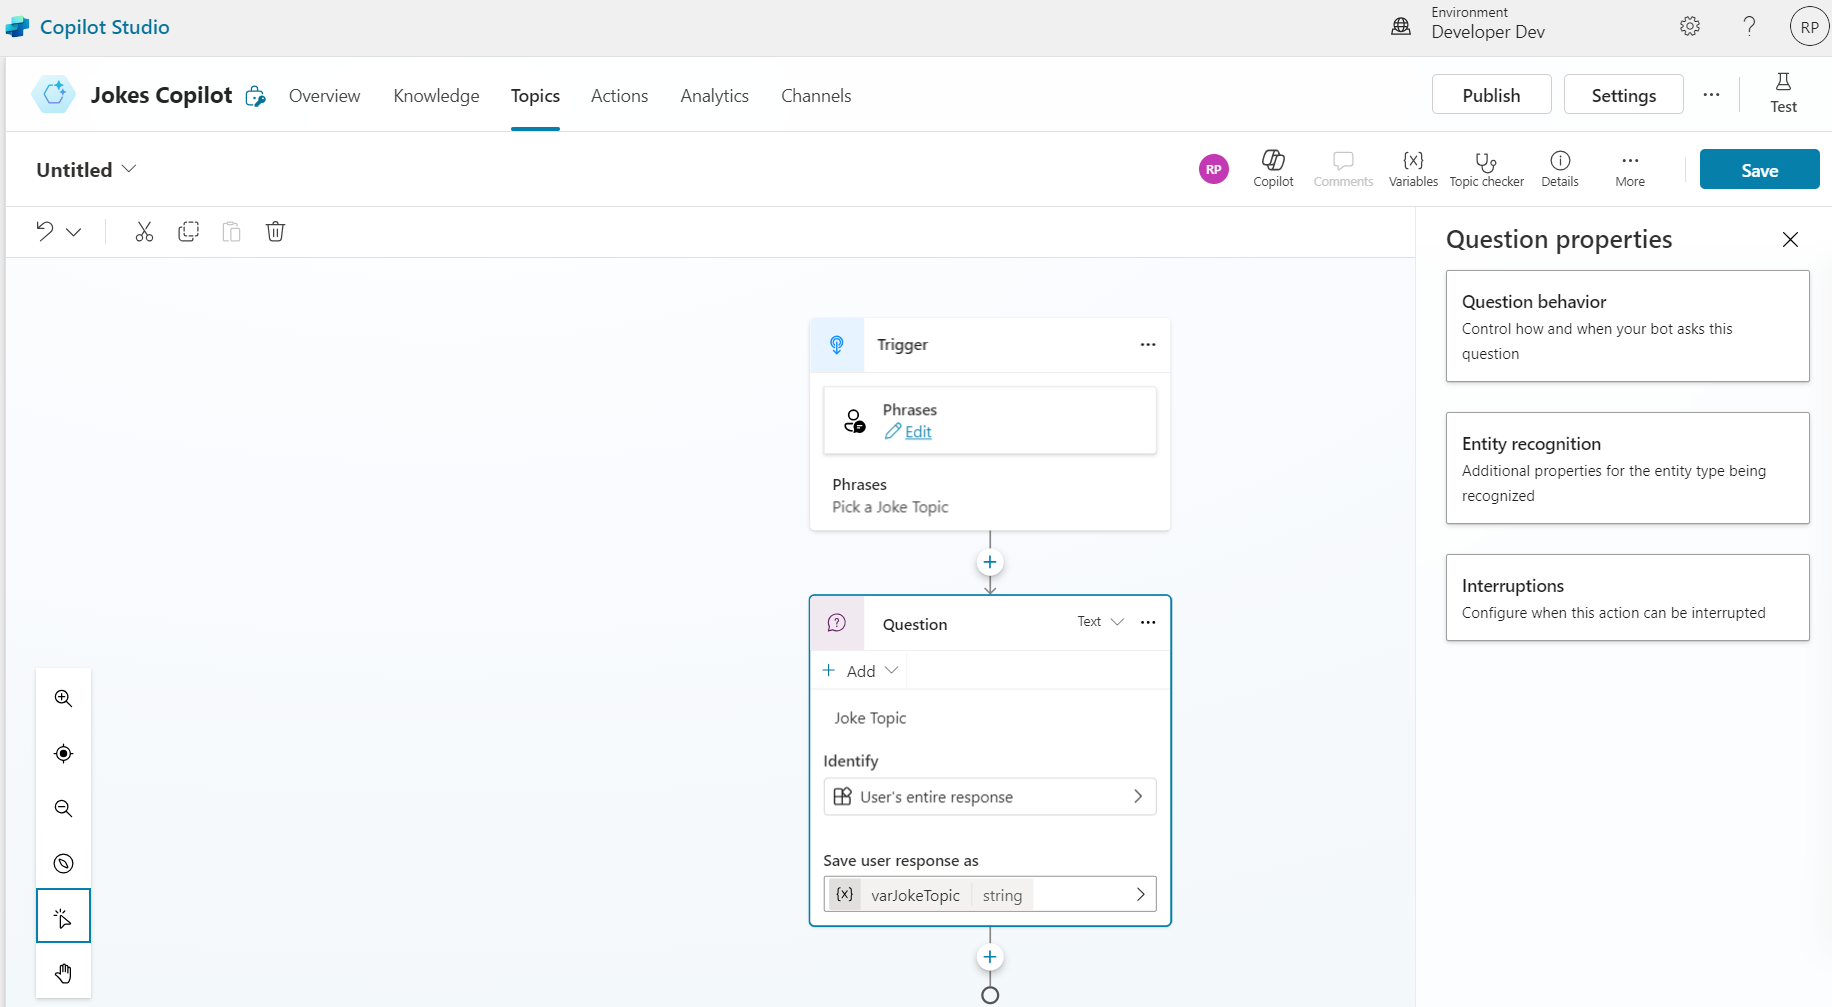
- Under Add phrases, enter a trigger phrase for your topic. I’ve add Pick a Joke Topic as a Phrase.
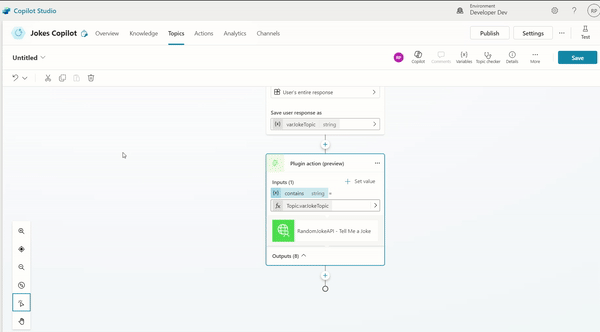
- Then I’ve added a Question to the Topic to capture the the ‘Joke Topic’ response from the User.
- A Question node prompts a user for information and stores their response in a variable.
- I’ve defined the Variable name as varJokeTopic
- Post the above step, your Topic should look as below:
Call an action:
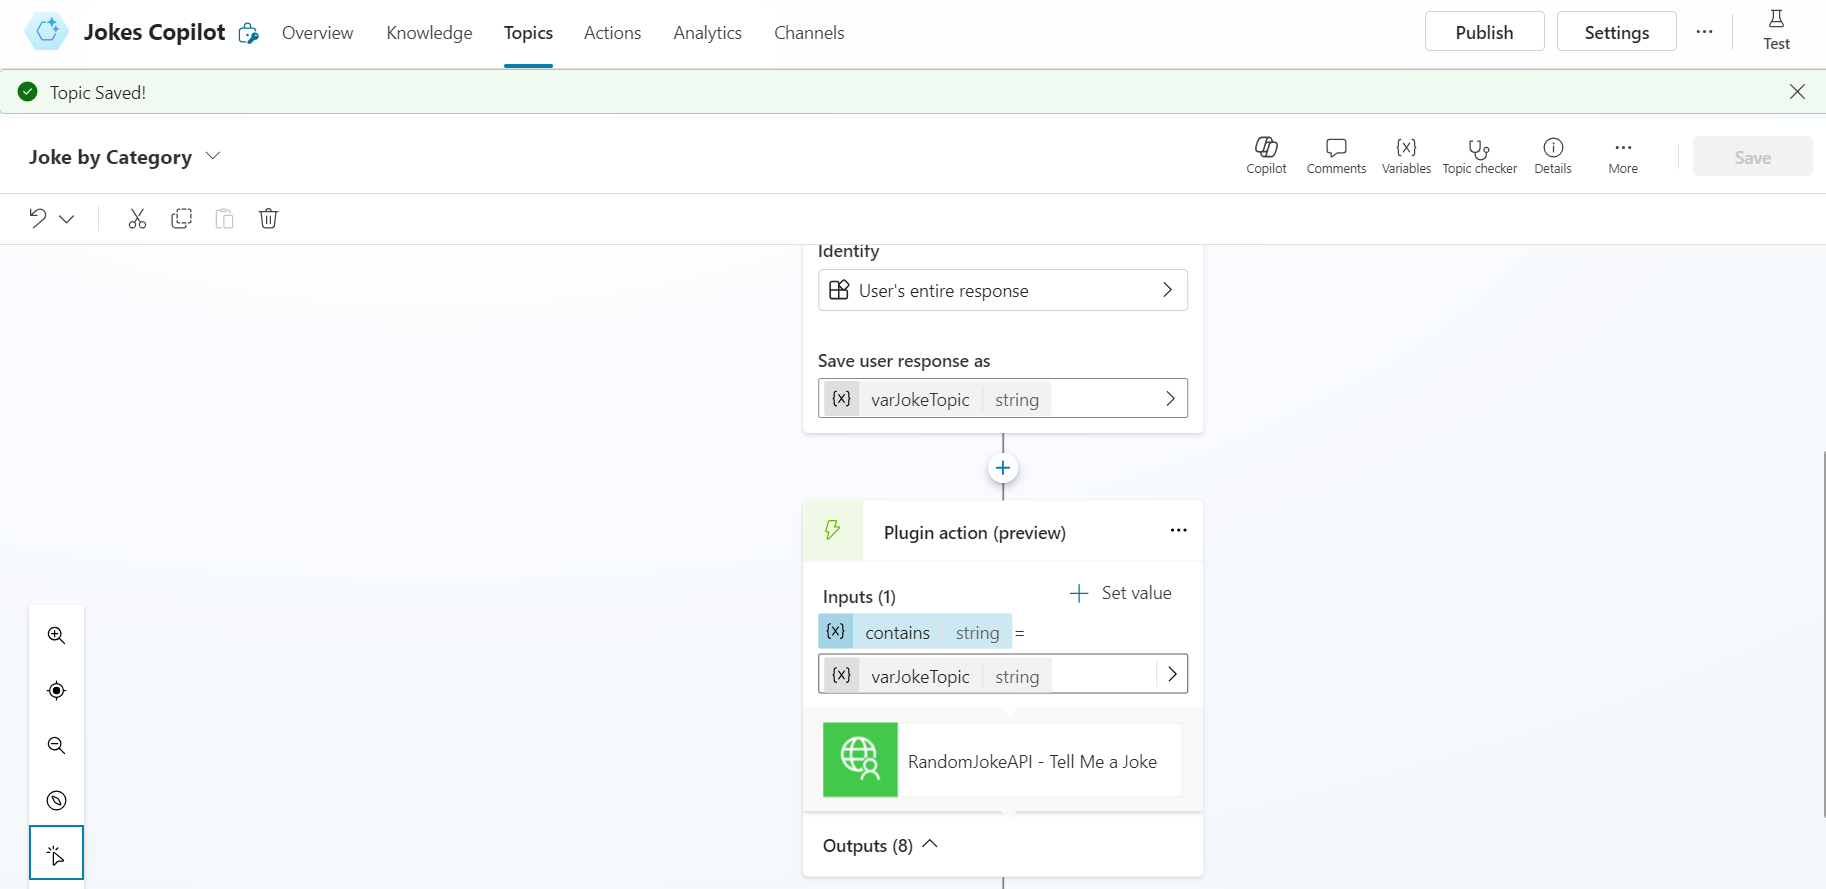
So far in the Topic, we have defined a question and captured the users response in varJokeTopic. Next, we need to leverage the RandomJokeAPI Custom Connector to fetch the Joke based on the User’s input in varJokeTopic.
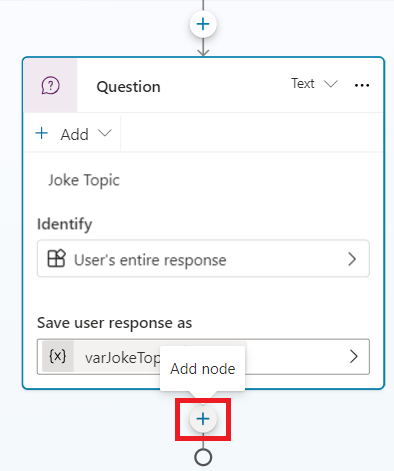
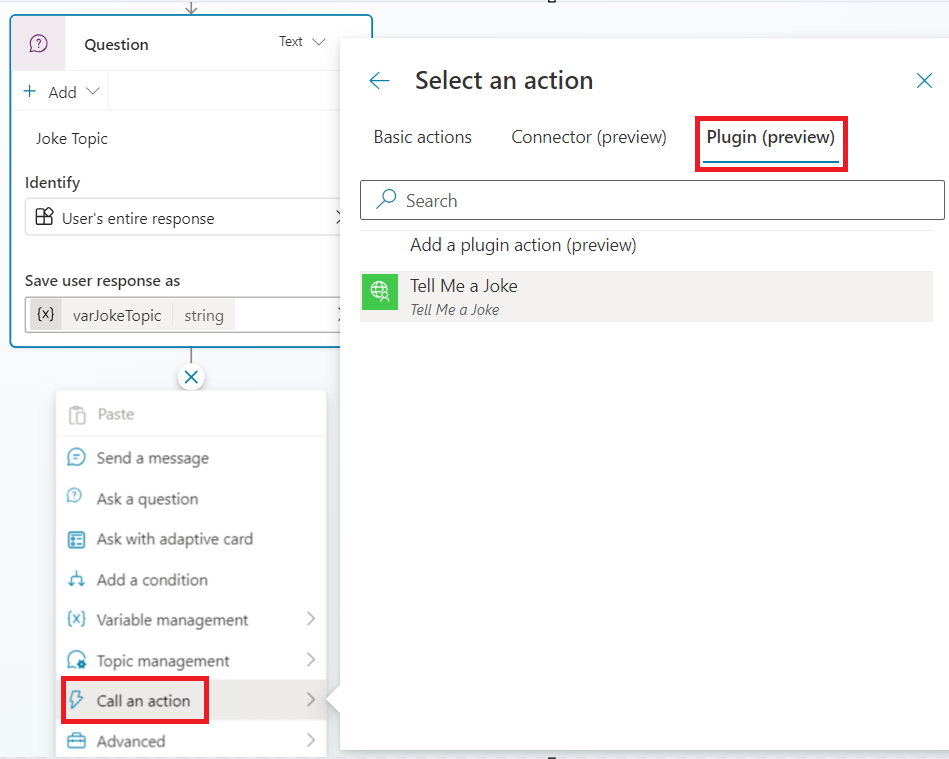
- Click on + Add node
- Choose Call an action > Plugin (preview) > Tell Me a Joke
- Tell Me a Joke is nothing but the Copilot Action we defined in the above steps.
- Click on + Set value and choose contains
- contains is the Request parameter name we defined in our RandomJokeAPI Custom Connector.
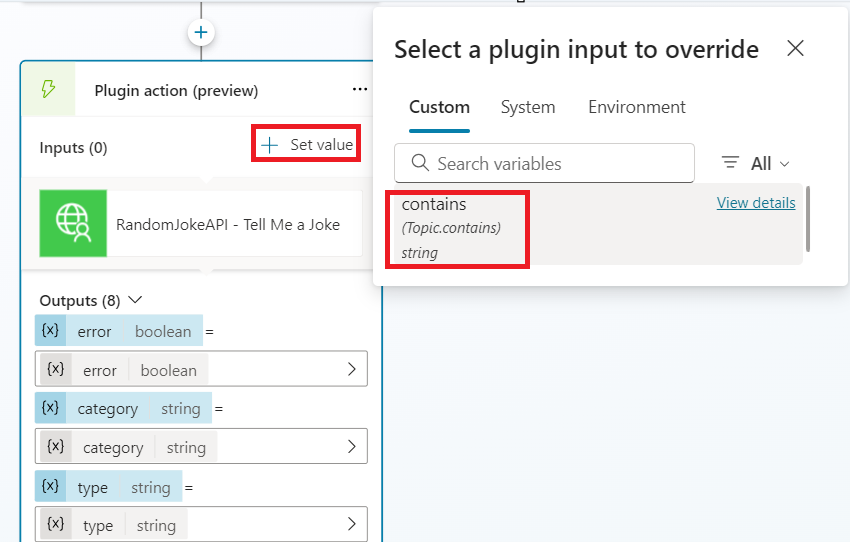
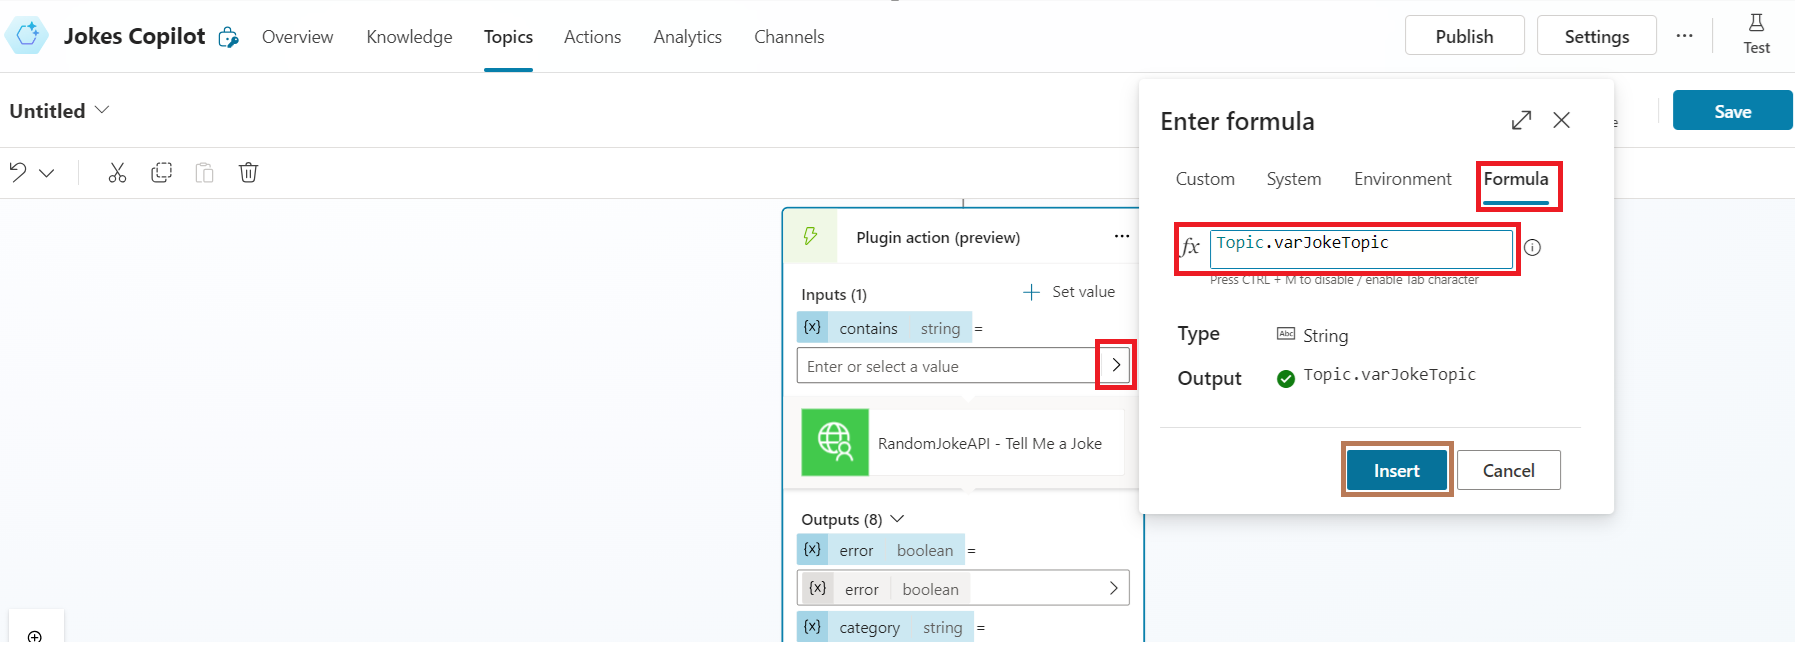
- Next map the contains with the User’s provided ‘Joke Topic’ (i.e., varJokeTopic). Click on Insert.
- Use Power Fx formula Topic.varJokeTopic
- Plugin action looks below.
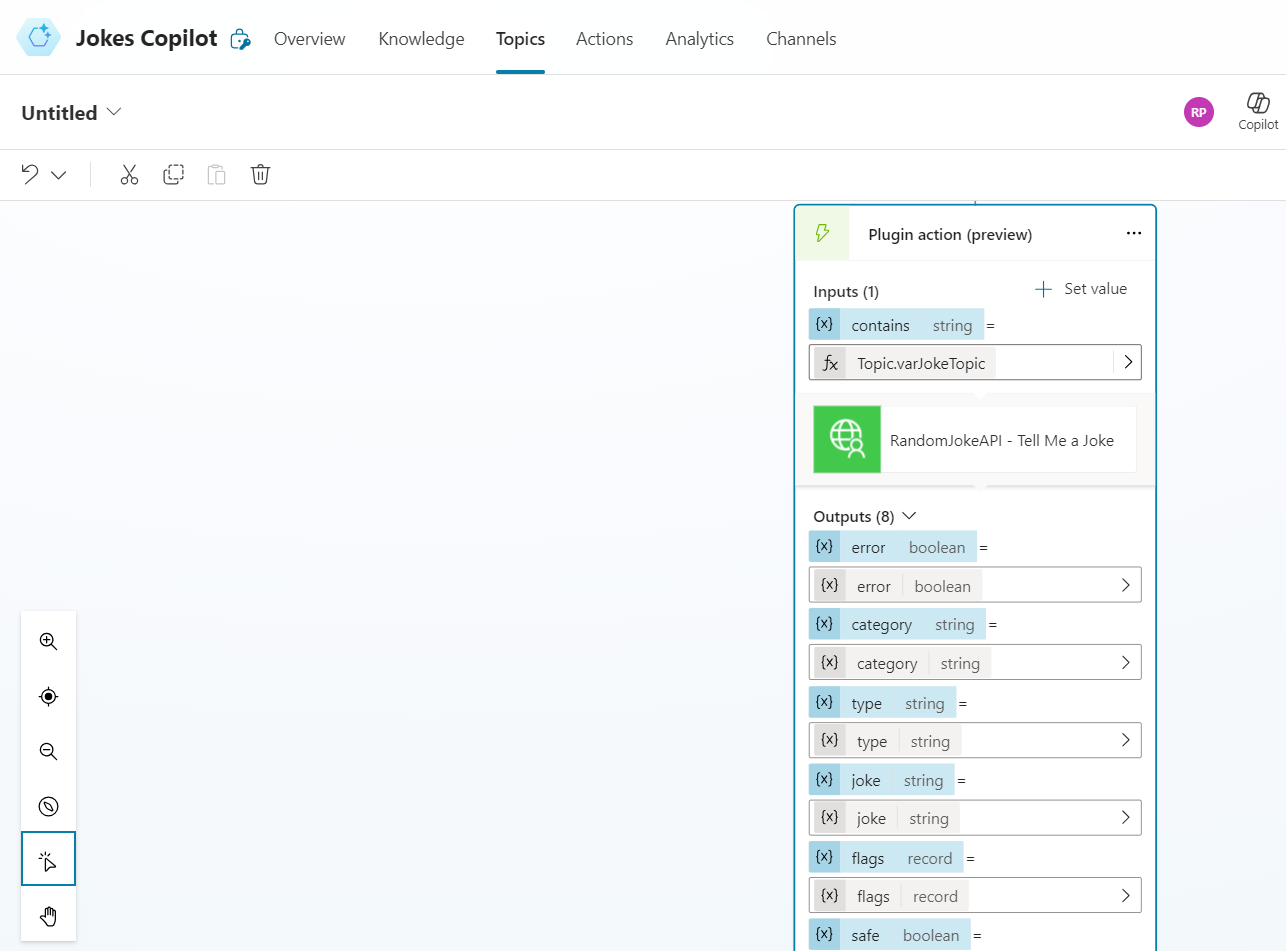
- To summarize, Plugin action is nothing but the RandomJokeAPI Custom Connector. What you see under Outputs is the RandomJokeAPI Custom Connector’s response.
- The response will be stored in joke output property.
Results:
Finally we need to display the response returned by the Plugin action (i.e., joke property)
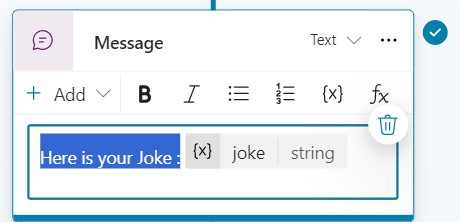
- Add a new Send Message to the Topic
- Use Power Fx to read the joke output property as Topic.joke
- If you want you can also add some text before the generated joke as shown below:
- Save the Topic. I named the Topic as Joke by Category
Test the Copilot:
Its time to test the Copilot.
- Click on the Test
- Provide the ‘Joke Topic’
- You might need to connect to the Custom Connector before getting the Response.

That’s all. We have learned
- How to create a Custom Connector from scratch
- Create a Copilot
- Configure the Custom Connector as connector actions
- Create Copilot Topics.
- Read the Response and show them as Message.
Thanks to Damien Bird for this wonderful video on APIs.
🙂


Leave a comment