In this article, let’s learn how to configure the Azure Active Directory B2C identity provider in a Power Pages Website.
What is an Azure Active Directory B2C
- Azure Active Directory B2C provides business-to-customer identity as a service
- Azure AD B2C is built on the same technology as Microsoft Entra ID but for a different purpose and is a separate service.
- It allows businesses to build customer facing applications, and then allow anyone to sign up and sign in to those applications with no restrictions on user account.
The following are the high-level steps required to complete the Azure AD B2C identity setup in a Power Pages website.
- Set up Azure AD B2C in Power Pages
- Create an Azure Active Directory B2C tenant
- Create an app registration
- Create user flows
- Enter site and password settings in Power Pages
Before you start, ensure that you have already created a Power Pages Website.
Set up Azure AD B2C in Power Pages:
- In your Power Pages site, select Security > Identity providers.
- To the right of Azure Active Directory B2C, select Configure.
- Leave the provider name as it is or change it if you like.
- The provider name is the text on the button that users see when they select their identity provider on the sign-in page.
- Select Next.
- Under Reply URL, select Copy.
- Store this Reply URL in a notepad. We will need in next steps.
- Don’t close your Power Pages browser tab. You’ll return to it soon.
As mentioned, we will return to the Power Pages Configure Identity Provider pane once we complete the Azure side of things.
Create an Azure Active Directory B2C tenant:
- Sign in to the Azure portal
- Click on Create a resource and search for Azure Active Directory B2C
- Click on Create
- In the Create new B2C Tenant or Link to existing Tenant screen, select Create a new Azure B2C Tenant.
- Provide Organization name and Initial domain name
- Choose a Resource Group
- Click on Review + create
- In sometime the new Azure AD B2C Tenant will be ready and looks as below.

Now that the Azure AD B2C Tenant is ready, let’s create an App Registration. This is required because, before Power Pages can interact with Azure AD B2C, they must be registered in this tenant.
Create an app registration:
- In the newly created Azure AD B2C Tenant
- Under Manage, select App registrations.
- Select New registration.
- Enter a Name.
- Under Redirect URI, select Web as the platform, and then enter the Reply URL of the Power Pages site we copied earlier.
- Select Register.
- In the left side panel, under Manage, select Authentication.
- Under Implicit grant, select Access tokens (used for implicit flows) and ID tokens (used for implicit and hybrid flows)
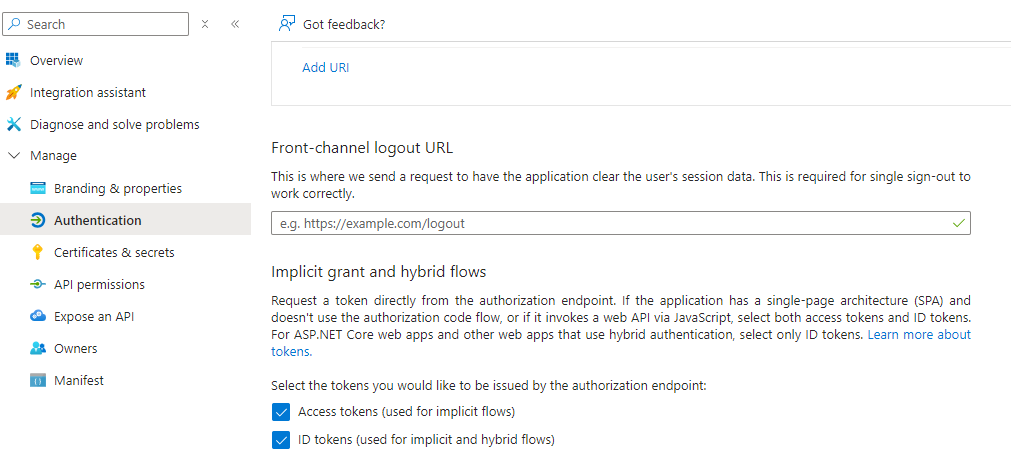
- Select Save.
- Copy the Application (client) ID to a notepad, we need it in the next steps.

The next step is to create User Flows. These are essentially the actions you want to include in the user registration process, such as Sign In, Sign Up, and Password Reset. All these actions can be enabled in Azure AD B2C by configuring user flows. Below is an example of already configured user flows in the B2C login experience.

Now lets configure User flows.
Create User flows:
A user flow lets you determine how users interact with your application when they do things like sign-in, sign-up, edit a profile, or reset a password.
Create a sign-up and sign-in user flow:
The sign-up and sign-in user flow handles both experiences with a single configuration. To create a sign-up and sign-in user flow:
- Select the Azure AD B2C link.
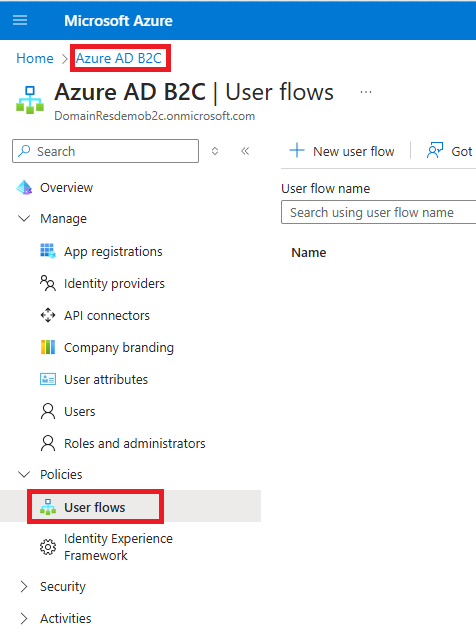
- Under Policies, select User flows, and then select New user flow.
- On the Create a user flow page, select the Sign up and sign in user flow.
- Select Create
- Enter a Name for the user flow.
- For Identity providers, select Email signup.
- For User attributes and token claims, choose attributes Display Name, and Email. Select OK.
- Click on Create to complete the user flow creation.
Now that the sign-up and sign-in user flow completed, lets create the password reset user flow.
Create a ‘Password reset’ user flow:
Now create a new Password reset user flow like how we did above.
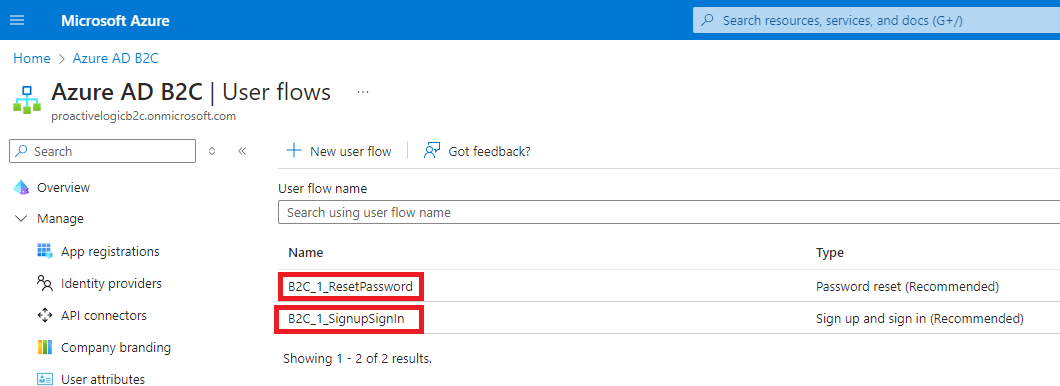
Once created, you should see two User Flows as below. Save the ‘Name’ of the both User Flows (i.e., B2C_1_SignUpSignIn and B2C_1_ResetPassword) which we use in next steps.
Change the ‘Issuer (iss) claim’ property of User Flows:
For each User Flow, Its required to set the Issuer (iss) claim URL includes tfp by following the steps below:
- Click on the B2C_1_SignUpSignIn User flow.
- Click on Properties
- Under Token compatibility settings > Issuer (iss) claim, select the URL contains the tfp.
- Repeat the same for B2C_1_ResetPassword User flow.
Get the issuer URL from the user flows:
- Open the B2C_1_SignUpSignIn user flow
- Select Run user flow.
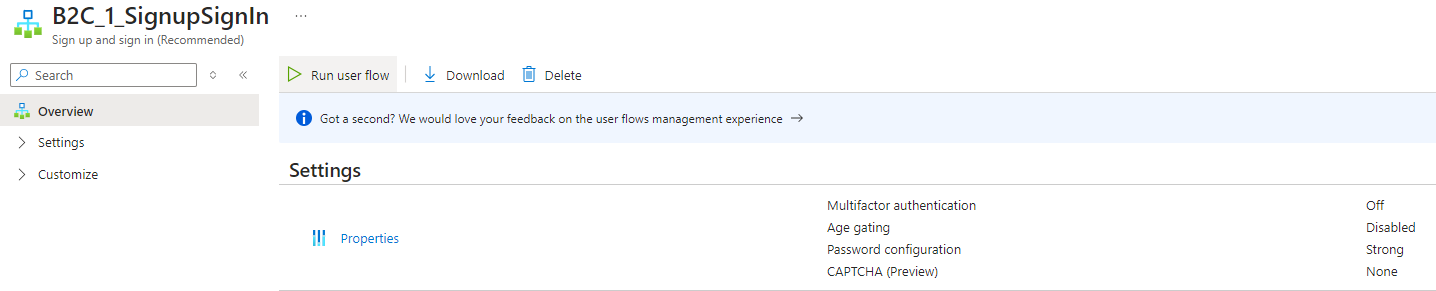
- Open the OpenID Connect configuration URL in a new browser tab by clicking on the link highlighted below.

- Copy the Issuer URL as shown below. Don’t include the quotation marks.

- This is my copied B2C_1_SignUpSignIn Issuer URL https://domainresdemob2c.b2clogin.com/tfp/a1xxxx-ca21-460e-ac6d-693d3xxxx/b2c_1_signupsignin/v2.0/
- Open the B2C_1_ResetPassword user flow, and repeat steps.
- This is my copied B2C_1_ResetPassword Issuer URL : https://domainresdemob2c.b2clogin.com/tfp/a11xxxx-ca21-460e-ac6d-693xxxde7/b2c_1_resetpassword/v2.0/
- Store both User Flows URLs in a notepad which we need in next steps.
We are done with Azure B2C Tenant and App Registrations. Lets go back to Power Pages Website and complete the configuration.
Complete the ‘Identity Provider’ configuration in Power Pages:
- Return to the Power Pages Configure identity provider page you left earlier.
- Under Configure site settings, enter the following values:
- Authority: Paste the issuer B2C_1_SignUpSignIn Issuer URL.
- Client ID: Paste the Application (client) ID of the Azure AD B2C application.
- Under Password reset settings, enter the following values:
- Default policy ID: Sign up and sign in user flow name (i.e., B2C_1_SignUpSignIn)
- Password reset policy ID: ‘Password reset user flow’ ‘Name’. (i.e., B2C_1_ResetPassword)
- Valid issuers: Enter a comma-delimited of the sign-up, sign-in, and password reset user flows.
- (i.e., B2C_1_SignUpSignIn Issuer URL,B2C_1_ResetPassword Issuer URL). Which is https://domainresdemob2c.b2clogin.com/tfp/a1xxxx-ca21-460e-ac6d-693d3xxxx/b2c_1_signupsignin/v2.0/,https://domainresdemob2c.b2clogin.com/tfp/a11xxxx-ca21-460e-ac6d-693xxxde7/b2c_1_resetpassword/v2.0/
- Click on Confirm
- Then click on Close
- You should see Azure AD B2C as Enabled under Identity providers

We have completed both the Azure B2C and Power Pages configurations. Restart the website and test the setup.
Restart Site:
- Go to Set up > Site details
- Click on Open admin center
- Under Site Actions, click on Restart site
Restarting the website will make it unavailable for a short time. Once the website is back up, we can test the B2C setup.
Test the Azure B2C Identity:
- Click on the website url.
- Click on Sign In
- You will notice Azure AD B2C option under External SignIn

- Click the Azure AD B2C button, and you will be redirected to the Azure B2C Sign in window with Sign in and Sign up and Forgot Password User Flows.
- If you try to Sign in without an account, it will prompt you to Sign Up.
- You can Sign Up by completing the verification process.
- After signing up, you can sign back in. Upon your first sign-in, you will be redirected to the profile.
That’s it! I hope you now understand how to configure the Azure AD B2C provider.
Refer this Power Pages | Azure AD B2C | Claims mapping to learn how to map additional fields during the Portal registration step.
🙂


Leave a comment