In this article, I will explain how to use Tabs or tab list modern control by building a simple Canvas App. Before we begin, let’s first understand what Modern controls are in canvas apps.
Modern controls in Canvas Apps:
- Modern controls in canvas apps are a new set of controls that are based on the Microsoft Fluent 2 design system.
- Modern controls are designed with a focus on accessibility, usability, and performance that makes them visually appealing, highly functional, and intuitive to use.
Enable modern controls and themes for your app:
At the time of writing this article, Modern controls is a preview feature. To use the modern controls, enable the feature by:
- From the Canvas App studio, on the command bar, select Settings > Upcoming features.
- From the Preview tab, set the toggle for Modern controls and themes to On

Now that we understand and have enabled the feature, lets proceed with using Tabs or tab list modern control. A Tab is a navigation control which can help users switch between different context within the app.
Create an App with Tabs:
- Create a new Canvas App and add two simple screens as shown below.

- Now, let’s add a ‘Tab list’ control to the form.

- Once you add the ‘Tab list’, notice that it expects a collection as Items property.

- Lets prepare a collection with our screen details as below.
- ‘collTabs‘ collection node has 2 properties;
- Name : Tab name.
- Screen : Which screen to navigate on tab click.
- ‘collTabs‘ collection node has 2 properties;
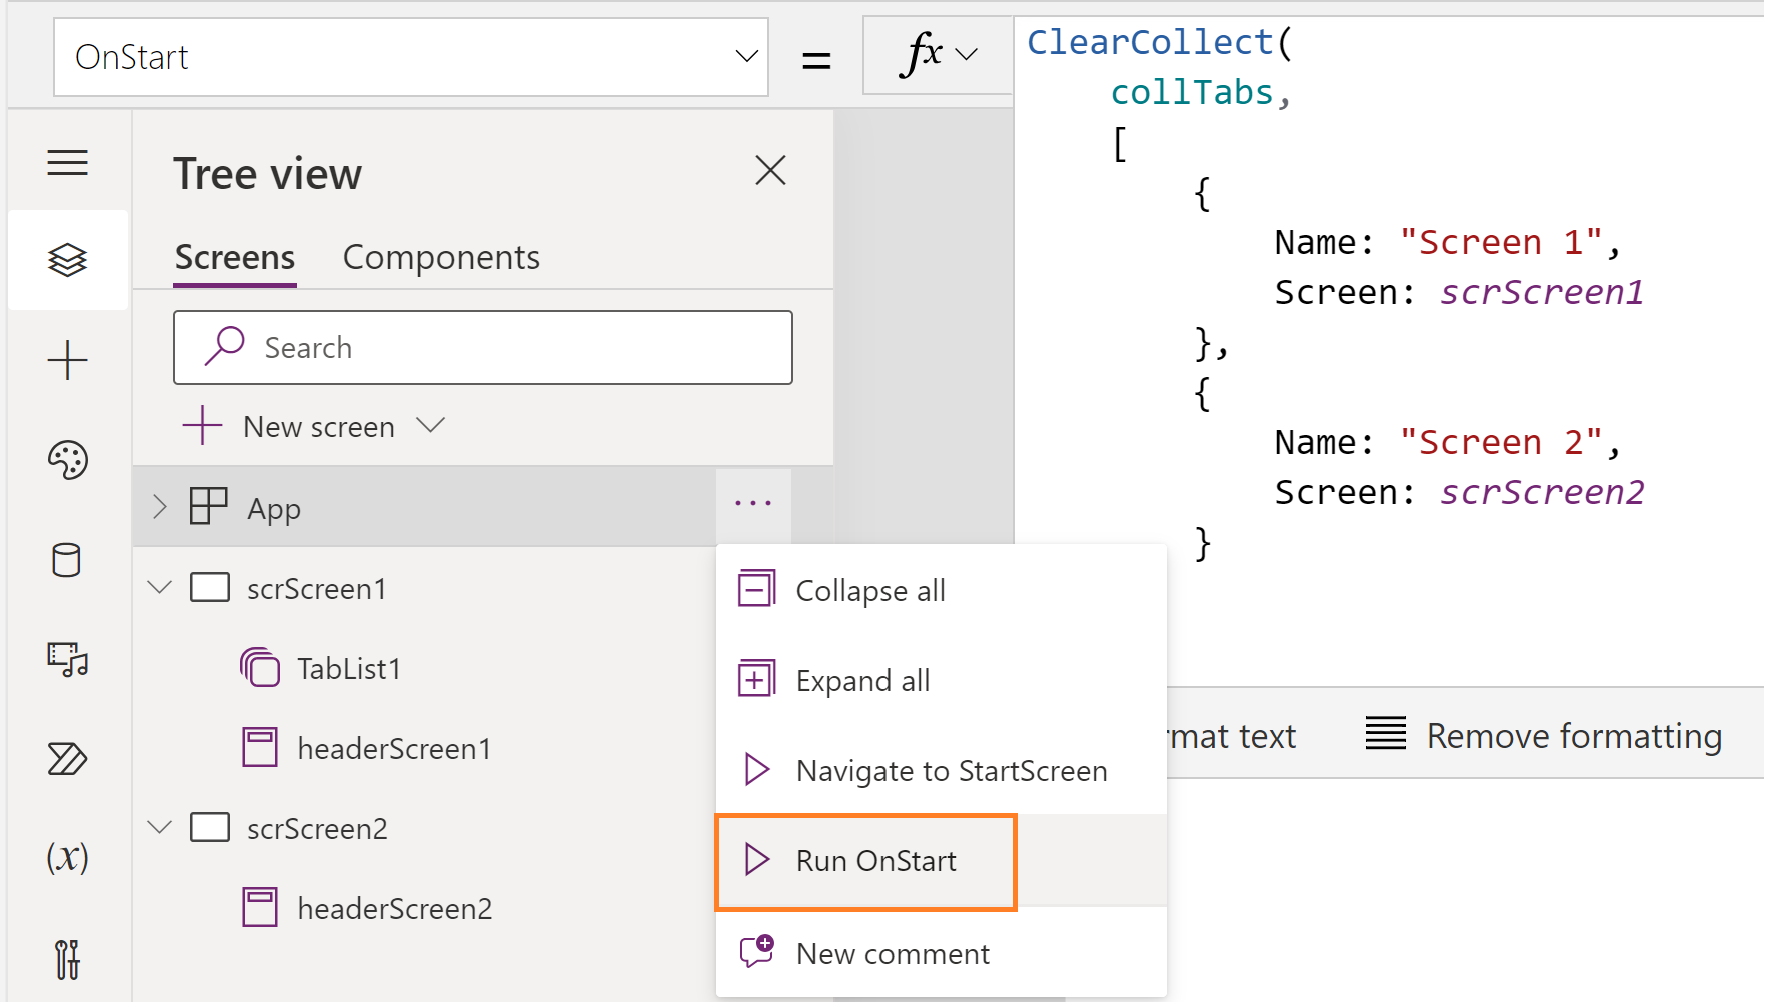
ClearCollect(
    collTabs,
    [
        {
            Name: "Screen 1",
            Screen: scrScreen1
        },
        {
            Name: "Screen 2",
            Screen: scrScreen2
        }
    ]
);- Add the above ‘collTabs‘ collection to the App’s OnStart event as shown below.

- Trigger the App’s ‘Run OnStart’ to execute the collection initialization code we pasted.
- Now go back to the ‘Tab list’ control and set the ‘Items’ property as ‘collTabs‘.

- Initially, you see numbers as tabs. To change this, click on ‘Fields -> Edit -> Add field’, select the Name and click on ‘Add’.

- Now, you would see the tab names changed to the ‘Name’ we defined in the ‘collTabs‘ collection.

- Next, to implement the navigation logic, select the ‘Tab list’ control, and in the ‘OnSelect’ event, add the formula:
Navigate(Self.Selected.Screen);
- We also need to set the ‘DefaultSelectedItems‘ property of ‘Tab list’ which is the default value of a control before the user specifies a different value.
LookUp(
    collTabs,
    Screen = App.ActiveScreen
)
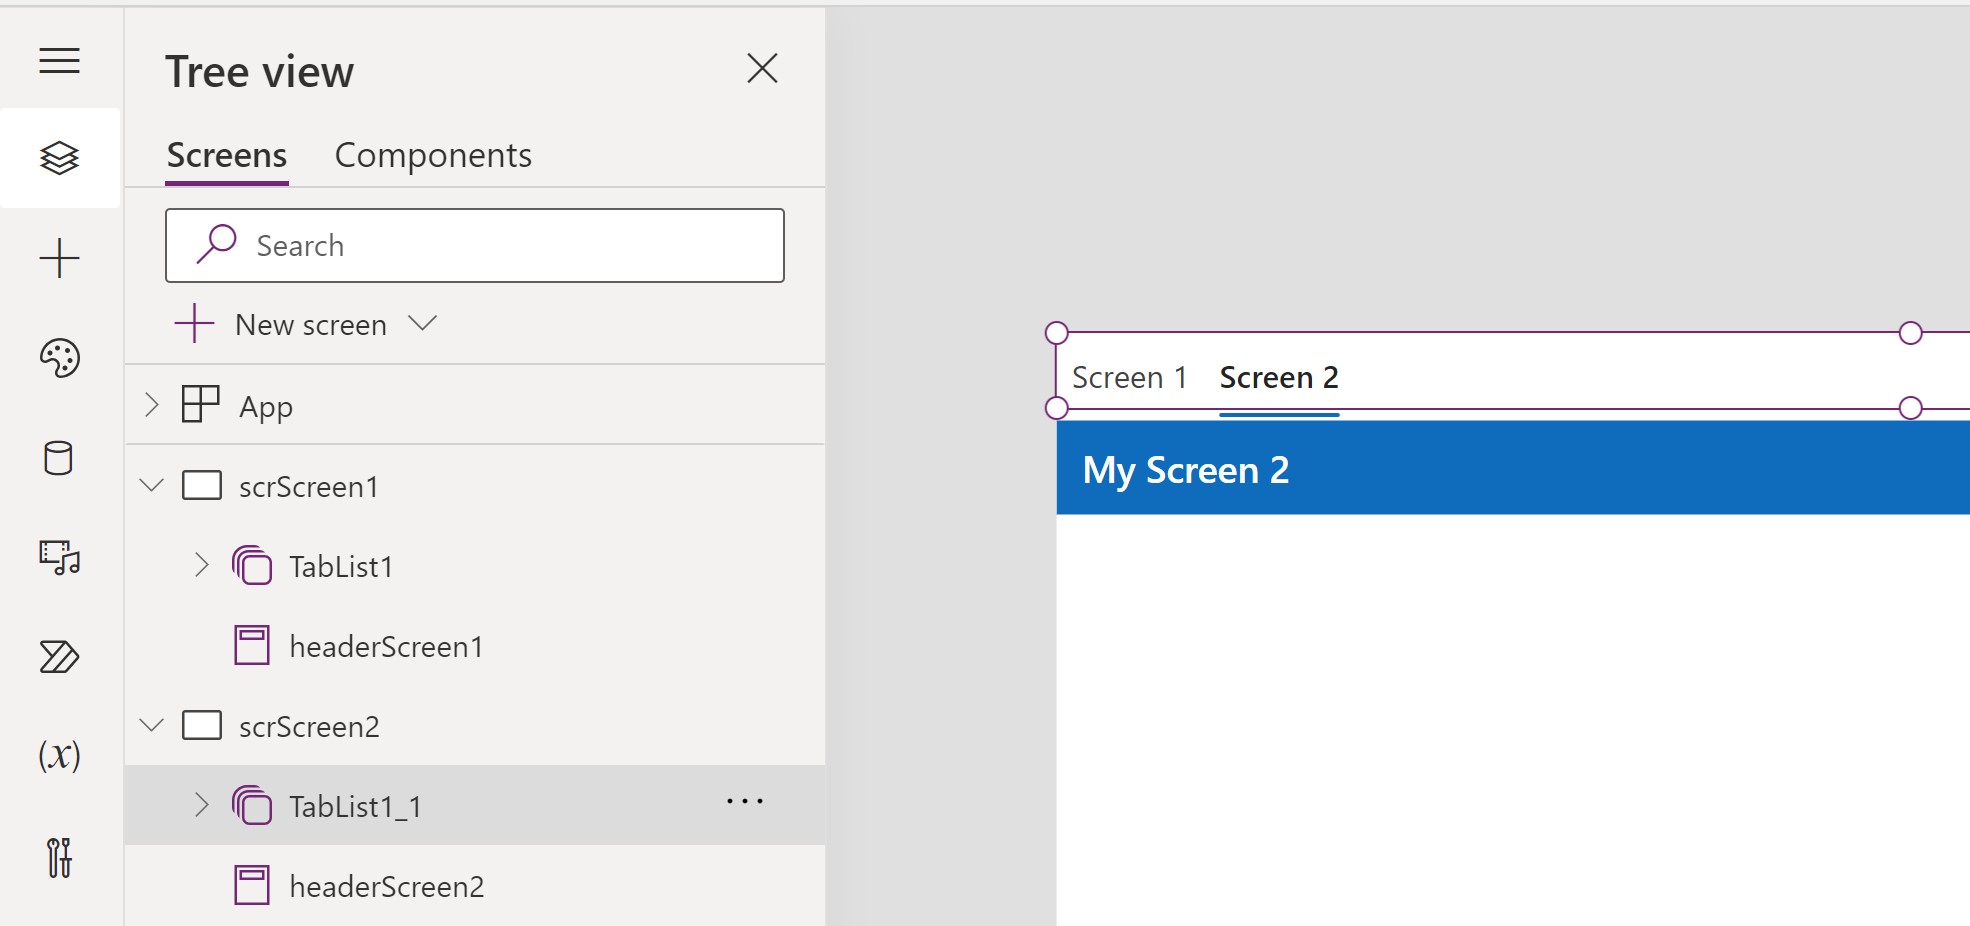
- We are almost done with the configuration. Copy the ‘Tab list’ control and paste it on all other screens.
- Use ‘Copy’ option of the ‘TabList1’ from ‘scrScreen1’ as shown below and paste (Ctrl + V) in the ‘scrScreen2’.

- ‘scrScreen2’ looks as below once you copy and paste the ‘TabList1’.
- That’s it! Go ahead and play the app, and you should see the tabs working.

- We can also change the ‘Alignment’ to ‘Vertical’ as shown below.

🙂


Leave a comment