Archive
D 365 – Set Recommendation on a field using JScript/Business Rule
In this article I am going to detail the steps to set a notification (i.e., Recommendation/Error) to a particular control on the form.
Notifications can be of 2 types; Error or Recommendation.
- If an ‘Error’ notification set, a red “X” icon appears next to the control. Setting an error notification on a control blocks saving the form.
- If a ‘Recommendation’ notification set, an “i” icon appears next to the control. A recommendation notification does not block saving the form.
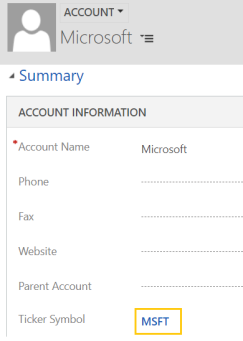
To explain this better, I am taking below scenario
- If ‘Account Name’ is ‘Microsoft’ recommend to set ‘Ticker Symbol’ to ‘MSFT’

- From the recommendation, if I click on ‘Apply’, set ‘Ticker Symbol’ to ‘MSFT’
Setting Recommendation using ‘Business Rule’:
Create a new ‘Business Rule’ with below components

- Add a “Condition” flow with condition (If ‘Account Name’ = ‘Microsoft’ AND ‘Ticker Symbol’ <> MSFT)
- If condition met, add ‘Recommendation’ action
- Under ‘Recommendation’ action, add sub Action, set ‘Ticker Symbol’ field to ‘MSFT’

Setting Recommendation from JScript:
Register this function on form ‘onload’ and ‘onchange’ of ‘Account Name’ field.
function setRecommendationOnAccountName() {
var ctrlAccountName = Xrm.Page.getControl(‘name’);
var accountName = Xrm.Page.data.entity.attributes.get(‘name’);
var tickerSymbol = Xrm.Page.data.entity.attributes.get(‘tickersymbol’);// Check condition (If ‘Account Name’ = ‘Microsoft’ AND ‘Ticker Symbol’ <> MSFT)
if (accountName.getValue(‘Microsoft’) && tickerSymbol.getValue() != ‘MSFT’) {
var actionCollection = {
message: ‘Set the Ticker Symbol to MSFT?’,
actions: null
};// Add sub Action, set ‘Ticker Symbol’ field to ‘MSFT’ and clear Recommendation
actionCollection.actions = [function () {
tickerSymbol.setValue(‘MSFT’);
ctrlAccountName.clearNotification(‘notify_account_name’);
}];// Set the Notification to ‘Account Name’ control
ctrlAccountName.addNotification({
messages: [‘Set Ticker Symbol’],
notificationLevel: ‘RECOMMENDATION’,
uniqueId: ‘notify_account_name’,
actions: [actionCollection]
});
}
}
Notes:
- notificationLevel : Valid values are either ERROR or RECOMMENDATION. If nothing specified in object definition, it is set to ERROR by default.
🙂
Dynamics 365 – Capture events from Editable subgrid and set main form fields
To answer one of the queries posted on my blog, in this article I am going to detail, capturing the events from Editable sub grid and Get/Set the form fields.
To simplify the explanation, I am taking below use case
- On Account from configure ‘Contacts’ editable sub grid
- On change of ‘Business Phone’ from ‘Contact’ sub grid
-
- Read the new ‘Business Phone’ value

-
- Set the ‘Telephone’ field on Account form with the Contacts ‘Business Phone’

below are the execution steps
Add ‘Editable Grid’ on Account Form:
- Add a ‘Contact’ sub grid on the Account form (You can leverage OOB Contacts grid as well)
- To convert read only grid to Editable grid, Double click on ‘Sub grid’ and go to ‘Controls’ -> Add Control
- Choose ‘Editable Grid’ option from the list

- Select ‘Web’ checkbox
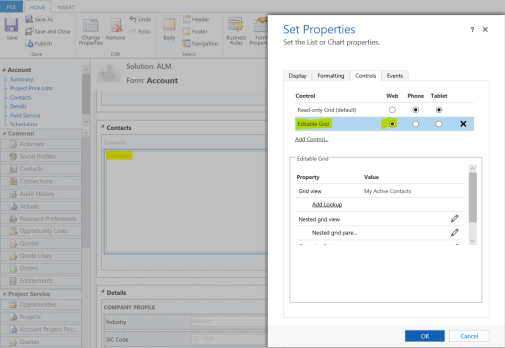
- Click ‘OK’
Register ‘onchange’ event on sub grid field:
- Double click on ‘Sub grid’ and go to ‘Events’
- Select the Field as ‘Business Phone’ and the Event as ‘OnChange’

- Add click ‘+Add’ to add your Jscript function name
-
- Function : businessPhoneOnChange
- Make sure you select the ‘Pass execution context as first parameter’ checkbox

- Save and Publish the form
JScript function:
function businessPhoneOnChange(execContext) {
try {
var formContext = execContext.getFormContext();// Read the changed Business Phone’ value from sub grid
var entityObject = formContext.getData().getEntity();
var contactBusinessPhone = entityObject.attributes.getByName(“telephone1”).getValue();
// showAlert(“Business Phone – ” + contactBusinessPhone);// Set the ‘Phone’ field on ‘Account’ form
parent.Xrm.Page.getAttribute(“telephone1”).setValue(contactBusinessPhone);
} catch (e) {
showAlert(“Error in businessPhoneOnChange – ” + e.description);
}
}function showAlert(message) {
var alertStrings = { confirmButtonLabel: “Yes”, text: message };
var alertOptions = { height: 120, width: 400 };
Xrm.Navigation.openAlertDialog(alertStrings, alertOptions).then(
function success(result) {
console.log(“Alert dialog closed”);
},
function (error) {
concole.log(error.message);
}
);
}
🙂
